A barbecue smoker cooks meat low and slow in wood smoke, turning tough cuts such as brisket, pork shoulder and ribs into tender, flavorful meals. Smokers fall into a few families: charcoal bullets, electric cabinets, pellet grills and offset or vertical units, each with its own balance of effort and control.
The six smokers below cover those styles from established brands, so you can pick the one that fits your patience and budget. We have not used these products ourselves, so confirm capacity, dimensions and what is included on the current listing before you buy. Electric and pellet models also need a power outlet nearby.
As an Amazon Associate we earn from qualifying purchases. Links below are affiliate links, and they do not change the product information we give.
What to Look For
| Feature | Why it matters |
|---|---|
| Fuel type | Charcoal, electric, pellet and wood all change flavor and effort |
| Capacity | Racks and chamber size decide how much meat fits |
| Temperature control | Digital controls hold heat with less tending |
| Build | Thicker steel and tight seals reduce heat and smoke loss |
| Cleanup | Removable water pans and ash trays save time |
In this guide
Specs at a Glance
| Smoker | Fuel | Type | Notes |
|---|---|---|---|
| Weber Smokey Mountain Cooker 18-inch | Charcoal | Bullet | Built-in water pan |
| Masterbuilt Digital Electric Smoker | Electric | Cabinet | Digital panel; check the size shown |
| Traeger Pro Series 575 | Wood pellets | Pellet grill | Needs an outlet |
| Camp Chef SmokePro DLX | Wood pellets | Pellet grill | Check hopper details on the listing |
| Dyna-Glo Vertical Offset Charcoal Smoker | Charcoal and wood | Vertical offset | Firebox on the side |
| Char-Broil Deluxe Digital Electric Smoker | Electric | Cabinet | Glass door on some versions |
The 6 Best Barbecue Smokers
Top pickBest for charcoal fans learning to smoke
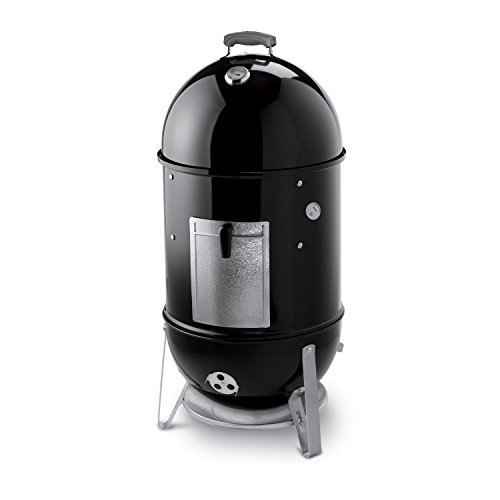
1. Weber Smokey Mountain Cooker 18-Inch
A charcoal bullet smoker with a lower coal chamber, a water pan and two cooking grates. It has a long record among hobby cooks for steady low heat once the vents are set. Larger and smaller sizes exist, so check the listing.
Suits: charcoal fans learning to smoke. Strengths: a proven design with good vent control. Weaknesses: you tend the fire. Skip it if you want a set-and-forget cooker.

Best for beginners and apartment patios
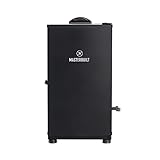
2. Masterbuilt Digital Electric Smoker
An electric cabinet smoker with a digital panel and wood chip tray. You set the temperature and time and the unit does the rest. Masterbuilt sells several sizes, so confirm the capacity and model on the current listing.
Suits: beginners and apartment patios. Strengths: easy operation. Weaknesses: a milder smoke flavor. Skip it if you want a heavy bark.
Best for cooks who want flavor with less work
3. Traeger Pro Series 575
A wood pellet grill that feeds pellets to a fire pot and holds a set temperature with an electronic controller. It smokes, grills and bakes. Check the listing for hopper and app features, which vary by version.
Suits: cooks who want flavor with less work. Strengths: versatile cooking. Weaknesses: needs power and pellets. Skip it if you cook far from an outlet.
View Traeger Pro Series 575 on Amazon
Best for pellet smoking at a steady pace
4. Camp Chef SmokePro DLX
A pellet smoker from an outdoor-cooking brand with a digital controller and a hopper. It is aimed at those who want a pellet cooker with a lower profile than the biggest names. Check the listing for the current features.
Suits: pellet smoking at a steady pace. Strengths: a set temperature and pellet feed. Weaknesses: models change over time. Skip it if you prefer charcoal flavor.
View Camp Chef SmokePro DLX on Amazon
Best for larger batches in a small space
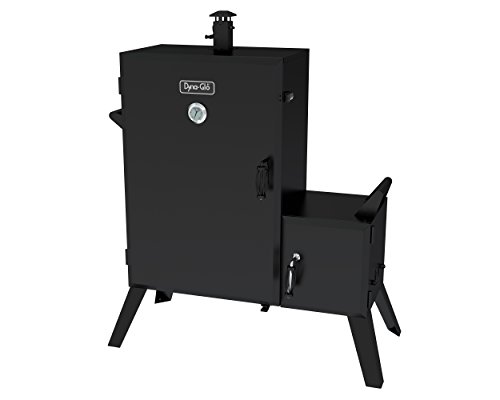
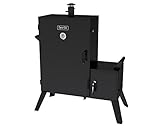
5. Dyna-Glo Vertical Offset Charcoal Smoker
A tall smoker with a side firebox and several racks stacked in a vertical chamber. It gives a lot of cooking room in a small footprint. Check the listing for the exact model, rack count and dimensions.
Suits: larger batches in a small space. Strengths: stacked racks. Weaknesses: some tuning to seal leaks. Skip it if you want a plug-in cooker.
Best for easy smoking
6. Char-Broil Deluxe Digital Electric Smoker
An electric cabinet smoker with a digital controller and a wood chip box. It is similar in idea to other electrics but from a different brand, so compare racks, door design and size on the listing.
Suits: easy smoking. Strengths: digital control. Weaknesses: lighter smoke than charcoal. Skip it if you want a charcoal taste.
View Char-Broil Deluxe Digital Electric Smoker on Amazon
Care and Setup
- Season a new smoker by running it empty at low heat, as the maker advises.
- Empty ash and grease after each cook once the unit has cooled.
- Use a probe thermometer for both the chamber and the meat.
- Keep wood chips or pellets dry in a sealed container.
- Cover the smoker between uses.
Mistakes to Avoid
- Opening the lid or door too often.
- Smoking with wet, smoldering wood that gives bitter smoke.
- Judging doneness by time instead of meat temperature.
- Skipping rest time after the cook.
- Placing an electric unit where rain can reach the controls.
Charcoal, Electric, Pellet and Offset: How the Types Differ in Use
The fuel type decides most of what a smoker is like to live with, so settle that first. A charcoal bullet gives strong smoke flavor and teaches fire control, but you adjust vents and add fuel during long cooks. An electric cabinet is the least demanding: you set the temperature, add wood chips and leave it, but the smoke is typically milder. A pellet cooker also holds a set temperature with an electronic controller, and the pellets add wood flavor. It can smoke, grill and bake, which suits cooks who want one cooker for several jobs.
A vertical offset cooker with a side firebox sits between those. It offers a lot of rack space in a small footprint and a traditional wood and charcoal flavor, but it can need tuning for leaks and some practice to manage the fire.
- Charcoal: best for flavor and learning; needs attention.
- Electric: best for ease and small patios; needs an outlet and gives lighter smoke.
- Pellet: best for steady heat with less effort; needs power and a supply of pellets.
- Vertical offset: best for larger batches; takes more skill.
Be honest about how much time you want to spend at the cooker. A smoker you avoid using is a poor purchase, however good the flavor potential.
Sizing, Capacity and Rack Space
Capacity is described differently from one listing to the next, so look past the headline number. Rack count matters less than the usable area on each rack and the vertical gap between them. A brisket or pork shoulder needs height as well as width, and a whole packer brisket may not fit on a small round grate without trimming or cutting it in half.
Think about the largest cook you expect to do, not the typical one. If you only smoke for a household of two or three, a compact unit will do. If you host gatherings, look at the total cooking area and whether racks can be removed to fit taller items such as a turkey or several racks of ribs. Stacked racks are efficient but hot spots and uneven airflow can mean rotating food during the cook.
Do not forget the footprint of the unit itself. Check the width, depth and height, plus the extra space needed for a side firebox, a hopper, an open door or a shelf. Also leave a safe distance from walls, railings and fences, which the manual should state.
- Measure your meat: compare the size of a typical cut with the rack dimensions.
- Check the weight: a heavy steel unit is harder to move.
- Look at the door or lid: a wide opening makes loading easier.
Heat Retention, Seals and Build Quality
A smoker’s job is to hold low, steady heat for hours, and the shell is what makes that possible. Thicker steel holds heat better and resists warping, while thin metal loses heat quickly in wind or cold weather and may need more fuel. Tight door seals, snug lids and well-fitted joints keep the smoke inside the chamber and make temperatures easier to manage.
Look for details that signal care in construction: a firebox that fits the chamber without large gaps, a gasket or tight-closing door, solid latches, sturdy legs and handles that stay cool. On offset and vertical designs, small leaks around the door and joints are common, and many owners seal them with heat-safe gasket material, but check the manual before modifying anything.
Thermometers built into the lid are often inaccurate or sit far from the meat. A separate probe thermometer, placed at grate level, gives a truer reading. Wind and cold air also matter: a smoker in an exposed spot will burn more fuel to keep its temperature, so choose a sheltered location, away from anything flammable.
- Check the finish: porcelain or high-heat paint resists rust, but all outdoor metal needs a cover.
- Test fit: doors should close evenly.
- Read the warranty terms on the listing and what they cover.
Your First Smoke: Setup, Wood and Learning Curve
Plan your first cook as practice rather than a showpiece. Follow the manual to season the smoker, which usually means running it empty at moderate heat to burn off manufacturing residue. Then choose a forgiving cut, such as pork shoulder, chicken thighs or ribs, which tolerate small temperature swings better than a lean piece.
Wood choice affects flavor. Milder woods such as fruit woods suit poultry and pork, while stronger woods suit beef. Use dry, seasoned wood or the pellets and chips recommended for your model. Wood that is damp or smoldering produces thick, bitter smoke; thin, nearly clear smoke is what you want. Soaking chips is often debated, so follow the instructions for your model and do not exceed the recommended amount.
Use two thermometers: one for the chamber and one in the meat. Cook to internal temperature, not the clock, and expect a stall where the meat temperature stops rising for a while. Resist the urge to open the lid, since each opening lets heat and smoke escape. Rest the meat afterward, wrapped loosely, so the juices settle.
- Keep notes: record vent settings, fuel and times so the next cook improves.
- Start early: allow extra time for delays.
Safety, Fuel Storage and Long-Term Upkeep
Smokers run hot and produce carbon monoxide, so use them outdoors only, in the open, and never inside a garage, tent or enclosed porch. Keep them on a stable, level, non-flammable surface and away from walls, overhanging branches and children or pets. Keep a fire extinguisher or a bucket of sand nearby when cooking with charcoal or wood, and follow the manual on ash disposal, since coals can stay hot for a long time.
Fuel storage is part of reliability. Charcoal, wood chunks and pellets absorb moisture and perform poorly when damp, so keep them in sealed containers in a dry place. Pellets in particular can swell and jam an auger if wet.
Clean grease and ash regularly. Built-up grease is both a fire risk and a source of off flavors. After the unit cools, empty the ash pan, scrape the grates and wipe out drip trays. Clean the inside of an electric or pellet cooker only as the manual describes, and keep electrical parts dry.
- Cover it: a fitted cover guards against rain and sun.
- Check seals and fasteners each season.
- Replace grates, gaskets and thermometers when they corrode or fail.
Heavy rust-through on the body, a damaged controller or burned-out heating element are signs it may be time for a new smoker.
Pre-Purchase Checklist for a Backyard Smoker
A smoker is a bigger commitment than most kitchen tools, so a short list helps you avoid regrets. Work through these points before you pick a model.
- How many people do you usually feed, and how often do you host larger groups?
- How much time are you willing to spend tending a fire or watching a thermometer?
- Is there a power outlet nearby, or will you rely on charcoal, wood or pellets?
- Where will it live when not in use, and can you cover it?
- Does your household or neighborhood have any rules about open flame or smoke?
- Do you want one machine for everything, or a dedicated tool for long cooks?
Answering honestly saves you from buying a unit that suits an ambitious weekend cook but sits idle on a busy weeknight. It also helps you decide whether convenience or direct control matters more to you.
Comparing Two Paths: Set-and-Forget or Learn the Fire
Most smokers fall on one side of a simple divide. Some let you set a temperature and walk away, while others reward you for learning airflow and fuel. Neither approach is better in general, and the right choice depends on what you enjoy.
| Feature | Controlled style (electric or pellet) | Fire-managed style (charcoal or offset) |
|---|---|---|
| Attention needed | Low, with a dial or controller | Higher, with vents and fuel to adjust |
| Learning curve | Gentle | Steeper but rewarding |
| Power needs | Outlet usually required | None for pure charcoal models |
| Flavor character | Milder smoke | Often stronger smoke |
| Weather sensitivity | Moderate | Wind and cold affect heat |
Read the table as a first pass, not a verdict. Plenty of cooks own one of each and choose by occasion.
Reading a Smoker Listing Like a Careful Buyer
Smoker listings are packed with numbers, and not all of them mean the same thing. Cooking area is usually quoted in square inches, but that figure may count every rack added together, including narrow upper shelves that hold little. Look at the number of racks and the spacing between them to judge whether a large brisket or a full rack of ribs will fit.
Wattage, hopper size and tank capacity describe fuel and power rather than food space, so keep them separate in your mind. Weight is a hint about steel thickness, and heavier units often hold heat better, though listings rarely say so directly. Check whether items such as a thermometer, a cover or wheels are included, since they can add real cost if bought later. When a detail is missing, the maker’s manual or product page is the place to confirm it before you order.
Cleanup, Ash and Grease Between Cooks
A smoker that is cleaned after each use lasts far longer than one left to sit. Let the unit cool completely, then remove ash, spent fuel and any drip pan contents. Fat that sits in a pan can harden, so empty it while it is still manageable and wipe the pan with soap and warm water.
Scrape the racks with a grill brush or scraper and wash them as the manual allows. Leave the interior walls alone apart from loose flakes, because a thin dark layer of smoke residue is normal on many models. Dispose of ash only once you are sure it is cold, using a metal container as your local guidance advises. For electric parts, wipe with a damp cloth only and follow the maker’s instructions rather than spraying water near controls.
When to Check the Manual or Call a Professional
Most smoker care is simple, but a few situations call for outside help. If a gas line, regulator or igniter on a combination unit seems faulty, stop using it and consult the maker or a licensed technician. The same goes for electric faults such as a damaged cord or a heating element that behaves strangely.
For assembly, follow the printed steps in order, since skipping a bolt can leave a firebox wobbly. If a part arrives bent or missing, contact the seller rather than forcing it into place. Local rules on open fires and smoke vary, so check with your town or housing association if you are unsure.
Putting the Decision Into Practice: A barbecue smoker
The advice earlier in this guide comes together when you apply it to your own space, habits and household. Start by writing down what your backyard cooking space demands on an ordinary week, not on the best day or the worst one. Most disappointing purchases happen because the decision was made against an imagined routine: the room as it looks in a photo, the household as it behaves when guests are coming, or the cook as they plan to be rather than the one who shows up on a tired weekday evening. A short, honest note about how the space is really used will do more for the outcome than any amount of browsing, because it turns a long list of possibilities into a short list that genuinely fits.
Work through the main criteria one at a time and give each a plain verdict. First, consider the fuel and fire management style you are willing to tend. Then weigh capacity relative to the cuts and quantities you plan to smoke, because the two often pull in opposite directions and the right balance depends on your household. Next, look honestly at how steadily the smoker holds a low temperature over hours; this is the point where many people compromise without noticing, and the compromise only shows up weeks later. After that, check the footprint and where smoke will drift relative to neighbours, and finally cleaning, ash handling and storing the smoker between cooks. When two options still look equal after all five checks, choose the one that is easier to live with on an ordinary day, since that is the day you will meet it most often.
It also helps to separate needs from preferences before you commit. A need is anything that would make the wrong choice fail outright: it does not fit, it cannot be cleaned the way your home requires, it does not suit the people who use it every day, or it fights the layout of the room. A preference is everything else, and preferences can flex when a strong option is weak in one small area. Writing the two lists side by side stops a minor preference from quietly overruling a real need, and it gives you a calm way to compare the picks in this guide without starting the whole search again each time you revisit the decision.
Matching the Choice to Real Households
Consider a beginner planning a first long smoke on a weekend. In that situation the priorities reorder themselves: the feature that looked like a nice extra in the abstract becomes the thing that decides whether the choice works at all, while a headline feature may matter far less than expected. Walk the scenario through step by step in your mind, from the first moment of use to putting things away afterwards, and notice where friction would appear. If a candidate handles the awkward moment in the middle of that routine gracefully, it is probably the right shape of answer for you, even if another option looks stronger on paper.
Consider a backyard cook feeding a crowd for a celebration. In that situation the priorities reorder themselves: the feature that looked like a nice extra in the abstract becomes the thing that decides whether the choice works at all, while a headline feature may matter far less than expected. Walk the scenario through step by step in your mind, from the first moment of use to putting things away afterwards, and notice where friction would appear. If a candidate handles the awkward moment in the middle of that routine gracefully, it is probably the right shape of answer for you, even if another option looks stronger on paper.
Consider a small patio where smoke and space both need managing. In that situation the priorities reorder themselves: the feature that looked like a nice extra in the abstract becomes the thing that decides whether the choice works at all, while a headline feature may matter far less than expected. Walk the scenario through step by step in your mind, from the first moment of use to putting things away afterwards, and notice where friction would appear. If a candidate handles the awkward moment in the middle of that routine gracefully, it is probably the right shape of answer for you, even if another option looks stronger on paper.
Households also change. Children grow, routines shift, a room gets rearranged, a new hobby arrives, or an older relative comes to stay. A good choice in this category leaves a little room for that change: it can be moved, adjusted, combined with what you already own, or handed a slightly different job without being replaced. When you compare the options above, give quiet credit to that kind of flexibility. It rarely shouts from a product page, but over years of ownership it is often the difference between something that keeps earning its place and something that is worked around, resented and eventually replaced long before it has worn out.
A Step by Step Routine From Day One
Begin before the new arrival is even in use. Clear and prepare the space, and deal with the small jobs that are easy now and annoying later: cleaning the surface it will sit on or hang in, checking the fixings, light, ventilation or access around it, and reading any care guidance that came with it while you are still unhurried. Take a quick photo of the space as prepared, and keep any labels, spare parts or instructions in one labelled place. These small acts take minutes, yet they are the ones people most often wish they had done once the item is in daily service and everything has become harder to reach.
During the first week of use, pay deliberate attention rather than letting habit form by accident. Notice how the choice behaves at the busiest moment of the day, not the quietest. Notice who struggles with it, what gets left undone, and what small adjustment would remove the friction: a different position, a changed order of steps, a supporting accessory you already own, or simply a better place to keep the things that go with it. Small corrections made in the first week tend to stick, and they turn a reasonable purchase into one that feels made for the household rather than merely tolerated by it.
After that settling in period, settle into a simple rhythm of use. Keep the everyday steps light and repeatable, because a routine that depends on effort or special equipment will quietly stop happening. Pair the task with something that already happens, such as a weekly clean, a laundry day or a regular tidy of the room, so it is carried by an existing habit. And keep the standard realistic: the goal is a home that works comfortably and looks cared for, not a showroom that nobody is allowed to disturb. A routine you actually keep beats a perfect routine abandoned by the second month.
Care, Cleaning and Storage That Protect Your Purchase
Long life in this category comes mostly from seasoning, ash removal, grate care and covered storage, done little and often rather than in rare rescue missions. Dirt, moisture, heat and friction do their damage slowly and quietly, so the habits that matter are the small ones: dealing with marks promptly, letting things dry fully before they are put away, keeping the item out of harsh conditions it was never meant for, and checking the parts that move, rub or carry weight before wear turns into damage. None of this needs special products in most homes; it needs attention at the moment when the fix is still small.
Storage deserves the same thought as use. Keep the item and anything that goes with it clean, dry and easy to reach, in a place where it will not be crushed, snagged, faded or forgotten. If it is stored seasonally, check it when it comes out rather than when you next need it urgently, so there is time to clean, repair or replace it calmly. If it lives in daily use, give it a defined home so it is not constantly moved, stacked or balanced somewhere unsuitable. Things that are easy to put away properly tend to be put away properly, and that single fact protects them more than any special treatment.
When something does go wrong, work from the gentlest response upward. Identify what you are actually dealing with before reaching for a product or a tool, test any new approach in a hidden spot, and change one thing at a time so you can tell what helped. Stop and reassess if the problem spreads, the material reacts badly, or the fix would risk more than the fault costs. Many items in this category are replaced over problems that a patient, staged approach would have solved, and many others are damaged by a hurried fix that was stronger than the situation ever required.
Comparing the Picks in This Guide
The picks gathered in this guide, including Weber Smokey Mountain Cooker, Masterbuilt Digital Electric Smoker, Traeger Pro Series, Camp Chef SmokePro DLX, Dyna-Glo Vertical Offset Charcoal Smoker and Char-Broil Deluxe Digital Electric Smoker, were chosen to cover the main shapes this decision takes rather than to repeat the same answer several times. Read them against your own criteria list rather than against each other in the abstract. The right question is not which pick is strongest overall, but which one’s strengths land on the criteria you marked as needs, and which one’s weaknesses fall only on preferences you can flex. A pick that looks second best in a general comparison is often the best answer for a particular room, household or routine.
Pay particular attention to how each pick handles the middle of the task rather than the beginning or the end. Most options perform well in the moment they are designed to show off; the differences appear in the unglamorous middle: the repeated adjustment, the awkward reach, the cleaning afterwards, the storage between uses. The discussion of each pick above gives you the material to judge that middle honestly. If a pick’s limitation sits exactly in the part of the routine you perform most often, treat that as a serious mark against it, however strong the rest of its case may be.
Finally, decide with a simple rule for breaking ties. If two picks both meet your needs, prefer the one that is easier to care for, easier to store, and easier to adapt when the household changes, in that order. Those qualities compound quietly over years of ownership, while a small edge in a headline feature is usually forgotten within weeks. And once you have decided, stop comparing: continued browsing after a sound decision tends to manufacture doubt rather than improve the outcome, and the energy is better spent on the setup and habits that will make the choice succeed.
Mistakes That Quietly Undermine a Good Choice
The most common mistake in this category is deciding from a single moment: a photograph, a display, a recommendation meant for a different household, or one bad experience with a previous item. Each of those shows you something real, but none of them shows you your own room, your own routine and your own constraints together. The second most common mistake is measuring or judging carelessly at the start and then trying to compensate later with accessories, workarounds and patience. Time spent checking the fuel and fire management style you are willing to tend properly, before anything is ordered or begun, is almost never wasted.
Another quiet mistake is solving only the visible part of the problem. A choice can look right and still fail because the supporting details were ignored: the surface beneath it, the light or ventilation around it, the storage it needs, or the people who will use it differently from you. When you plan, plan the whole small system, not just the headline item. Equally, avoid overcorrecting from your last experience. The failure of a previous purchase tells you what to check this time; it does not automatically mean the opposite extreme is right for you now.
If the outcome still disappoints after a fair settling in period, diagnose before you replace. Work out whether the problem is the item itself, its position, the routine around it, or an expectation it was never going to meet. Position and routine problems are cheap to fix and surprisingly common; expectation problems are solved by adjusting how the item is used rather than by buying again. Only when the item itself fails a genuine need on your original list is replacement the honest answer, and by then your list will make the next decision faster and far more certain than the first.
How the Choice Holds Up Through the Year
Seasons test choices in this category in ways a single shopping day cannot. Light changes, rooms grow warmer or colder, windows open, guests arrive, and the household’s busiest weeks rarely resemble its quietest ones. A choice that was made with cleaning, ash handling and storing the smoker between cooks honestly in mind tends to absorb those swings without complaint, while one bought for a single season often becomes the thing that is worked around for the other three. As the year turns, watch for the moments when the choice is under strain and note whether the strain comes from the season itself or from a weakness that was there all along. Seasonal strain passes; a real weakness deserves a plan.
It is worth doing one short review each season, taking no longer than a few minutes. Look at how the item has worn, whether the routine around it still happens, and whether the space has changed around it: furniture moved, a new appliance nearby, different people using it, or new habits in the household. Catching a small drift early, whether that means a cleaning habit that slipped, a position that no longer suits the room, or wear that needs attention, keeps the choice performing as it did at the start and postpones replacement far more effectively than any single deep effort once a year.
A Final Walkthrough Before You Commit
Before you finalise anything, walk the whole decision once more in order. Stand in your backyard cooking space and look at the space with fresh eyes. Confirm the measurements or preparations one last time, because a surprising share of disappointments trace back to a figure written down in a hurry. Run through who will use the result, when they will use it, and what they will do immediately before and after. Check where the item and its companions will live when not in use. If any answer is vague, resolve it now, while resolving it is still free, rather than after delivery, fitting or first use has made it expensive in time and patience.
Keep a few simple notes as you go, and keep them afterwards. Record the measurements you settled on, the criteria that mattered most, what you chose and why, and any care steps that proved important in the first weeks. These notes feel unnecessary on the day everything is new, yet they become quietly valuable later: when a matching item is needed for another room, when a part or companion piece has to be replaced, when a new household member asks how something should be looked after, or when you face the same decision again years from now and cannot remember what you learned the first time. A single page of honest notes, kept where you keep household paperwork or saved with your other home records, turns one good decision into a reusable piece of household knowledge rather than a lesson that has to be relearned from scratch.
Then read the relevant pick in this guide one final time with your criteria list beside it, and mark each need as met, partly met or unmet by what the guide actually says, not by what you hope might be true. A partly met need is acceptable when you have a realistic way to cover the gap with something you already own or a habit you are genuinely willing to keep. An unmet need is a signal to look at another pick rather than to hope. This unglamorous final pass is what separates the households that buy once and settle from those that buy, doubt, return and buy again.
Barbecue Smoker FAQ
How long should I expect a careful choice in this category to last?
That depends far more on care and fit than on the item itself. A choice that suits the space, is used as intended and is looked after little and often will usually serve for a long time, while a poor fit wears out patience long before it wears out materials. Judge lifespan by how well the choice matches your routine, and by whether you are willing to keep up the small habits that protect it.
What should I check in the first week of use?
Check the things that are easy to change early: position, setup, the order of your routine, and whether everyone who uses it can do so comfortably. Small frictions noticed in the first week are useful information, not failures. Correct what can be corrected while habits are still forming, and note anything that genuinely fails a need on your original list.
Is it worth keeping a spare or a backup?
For items in daily use, a modest backup often saves real disruption, provided you have somewhere sensible to keep it. For occasional items, a backup usually just becomes clutter. Decide by asking how disruptive a short gap would be, and how likely the item is to be needed again at short notice in your household.
How do I know when it is time to replace rather than repair or adjust?
Replace when the item fails a genuine need, when wear affects how safely or comfortably it can be used, or when you have already adjusted position and routine and the same problem keeps returning. Adjust or repair when the problem is local, recent or clearly caused by setup. A clear original criteria list makes this judgement much easier.
Can one choice serve two different rooms or purposes?
Sometimes, and versatility is worth credit when it is real. Test the idea honestly against both jobs, though: a compromise that serves two purposes poorly helps nobody. If the second use is occasional and undemanding, a shared choice often works well. If both uses are daily and demanding, separate choices usually serve better.
Should I involve the rest of the household in the decision?
Yes, at least briefly, for anything used daily by more than one person. Other users notice different frictions: a reach that is awkward, a step that gets skipped, a preference that changes how the item should be set up. Five minutes of their input before you commit is far cheaper than months of small complaints afterwards, and people look after things better when they helped choose them.
What if my space or needs are unusual?
Then weight the criteria in this guide by your own situation rather than following the general order. Unusual spaces and routines do not need unusual products nearly as often as they need honest measuring, a clear list of needs, and a willingness to test setup and position during the first weeks. The worked scenarios above show how to reorder priorities when your household does not match the average case.
What is the single most useful habit after buying?
Keep the small routine: use the item as intended, deal with marks and mess promptly, let things dry and settle properly, and review the setup once after the first weeks rather than never. That one loop of use, quick care and occasional review prevents most of the problems that lead people to replace items in this category far earlier than they needed to.
What is the easiest smoker for a beginner?
Electric and pellet models are the simplest because they hold a set temperature.
Which gives the strongest smoke flavor?
Charcoal and wood-fired smokers usually give the most pronounced smoke.
Do I need a thermometer?
Yes. A separate probe is the most reliable way to know when meat is done.
How much space do I need?
Check the dimensions on the listing and leave clearance around the smoker.
How long does a smoker take to heat up?
It depends on the type and the weather. Electric and pellet models usually reach temperature faster than charcoal. Plan on a warm-up period before adding food, and check the manual for the maker's guidance.
Can I use a smoker in cold or windy weather?
Yes, but it will use more fuel and temperatures may swing. Shelter it from the wind, choose a safe spot away from structures, and use a probe thermometer to track the real heat.
Do I need to use a water pan?
Not always. Some designs include one to help steady temperatures and add moisture, while others work without it. Follow the manual for your model.
What is the stall?
It is a pause in rising meat temperature during a long cook, usually from moisture evaporating at the surface. Keep the smoker steady and wait it out, or follow a wrapping method if you prefer.
Can I grill on a smoker?
It depends on the type. Pellet grills often can, while most electric cabinets and bullets are built for low and slow cooking. Check what temperature range the listing states.
How often should I clean my smoker?
Empty ash and grease after each cook once it is cool, and do a deeper clean periodically. Heavy grease build-up is a fire risk and can affect flavor.
Is a bigger smoker always better?
No. A larger unit uses more fuel, takes longer to heat and needs more space. Choose a size that matches your usual cook and leaves a little room for occasional larger batches.
The Short Version
For charcoal, the Weber Smokey Mountain. For easy electric, the Masterbuilt. For pellets, the Traeger Pro 575. For another pellet choice, the Camp Chef. For capacity, the Dyna-Glo vertical. For a second electric, the Char-Broil.


