A good steak grill needs strong, even heat for searing and enough control to finish the inside gently. Gas grills give quick, steady heat, while charcoal and pellet models add smoky flavor.
The six grills below cover those styles, from a mid-size gas model to a ceramic-style kamado. We have not used these products ourselves, so treat the descriptions as general guidance and confirm size, burner count and accessories on the current listing before buying. It also helps to have a good meat thermometer and a clean, well-oiled grate, whichever grill you choose.
As an Amazon Associate we earn from qualifying purchases. Links below are affiliate links, and they do not change the product information we give.
What to Look For
| Feature | Why it matters |
|---|---|
| Sear heat | Look for grills known for strong, even high heat |
| Grate material | Cast iron and thick stainless hold heat well |
| Control | Burner or vent control helps with finishing temperature |
| Lid fit | A tight lid keeps heat steady |
| Cleanup | Grease management reduces flare-ups |
In this guide
Specs at a Glance
| Product | Type | Fuel | Notes |
|---|---|---|---|
| Weber Spirit II E-310 | Gas grill | Propane | Three burners |
| Masterbuilt Gravity Series 560 | Charcoal grill | Charcoal with digital control | Fan-driven heat control |
| Char-Griller Akorn Kamado | Kamado grill | Charcoal | Insulated steel body |
| Napoleon Rogue 425 | Gas grill | Propane | Stainless burners |
| Traeger Pro 575 | Pellet grill | Wood pellets | Wi-Fi control |
| Broil King Baron 420 | Gas grill | Propane | Four burners |
The 6 Best Grills for Steaks
Top pickBest for weeknight steaks
1. Weber Spirit II E-310 Gas Grill
A three-burner propane grill from a long-trusted brand. It is a common recommendation for owners who want reliable searing on a mid-size grill. It heats up fast and recovers well after the lid is opened.
Suits: weeknight steaks. Strengths: even heat and a strong brand. Weaknesses: fewer extras than bigger models. Skip it if you want a very large grill.
View Weber Spirit II E-310 Gas Grill on Amazon
Best for charcoal flavor with set-it control
2. Masterbuilt Gravity Series 560
A charcoal grill that uses a hopper and a fan with a digital controller, so you can sear hot or hold a lower temperature. Check what the listing includes, such as a griddle. The hopper gives long cook times without refueling, so check capacity on the listing.
Suits: charcoal flavor with set-it control. Strengths: smoke flavor and temperature control. Weaknesses: a larger, heavier build. Skip it if you prefer a simple flame grill.
View Masterbuilt Gravity Series 560 on Amazon

Best for charcoal fans on a moderate budget
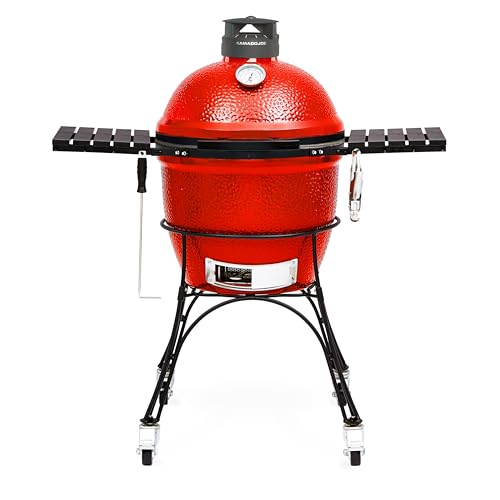
3. Char-Griller Akorn Kamado Charcoal Grill
An insulated steel kamado-style charcoal grill. The thick body holds heat well, which suits a hot sear and a lower finish. Its thick walls help it hold a steady temperature on a windy day.
Suits: charcoal fans on a moderate budget. Strengths: strong heat retention. Weaknesses: a learning curve with vents. Skip it if you want push-button start.

Best for searing and sides together
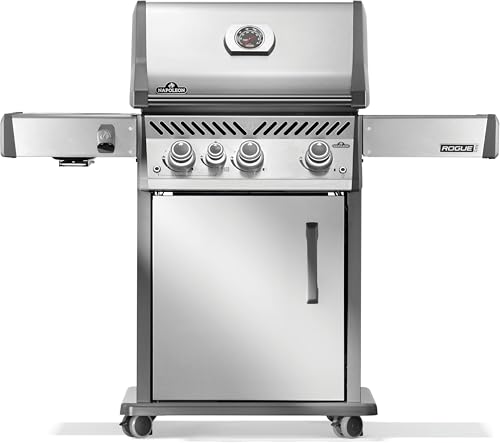
4. Napoleon Rogue 425 Gas Grill
A stainless steel gas grill from a brand known for outdoor cooking. Many versions offer a side burner, so check the exact model listing. Side burners are handy for finishing a pan sauce while the steak rests.
Suits: searing and sides together. Strengths: solid stainless parts. Weaknesses: it needs more room than compact grills. Skip it if you want a portable unit.

Best for smoky reverse-sear steaks
5. Traeger Pro 575 Pellet Grill
A pellet grill with app control that can smoke, roast and grill. Searing is gentler than on gas, so it suits steaks finished low and slow.
Suits: smoky reverse-sear steaks. Strengths: set-and-hold temperature. Weaknesses: a milder sear than gas. Skip it if you want fast direct heat.
View Traeger Pro 575 Pellet Grill on Amazon

Best for larger family cookouts
6. Broil King Baron 420 Gas Grill
A four-burner propane grill with heavy cooking grates and a well-regarded reputation for steady heat. Check the listing for cart and burner details. Four burners let you set a hot zone for searing and a cooler zone for resting.
Suits: larger family cookouts. Strengths: a roomy cooking surface. Weaknesses: a heavy body to move. Skip it if you have little space.

Care and Setup
- Preheat the grill fully before the steaks go on.
- Oil the grates lightly to reduce sticking.
- Scrape the grates after each cook.
- Empty the grease tray often.
- Check burners and igniters now and then so heat stays even across the grate.
Mistakes to Avoid
- Putting steaks on a cool grate.
- Pressing the meat and losing juices.
- Skipping a rest after cooking.
- Cooking cold steaks straight from the fridge.
- Cutting into the steak right away instead of letting it rest.
The Science Behind a Good Sear
A steak’s crust comes from the Maillard reaction, a set of browning reactions that happen when the surface of the meat is hot and dry. Two things hold it back: a surface that is wet, and a grill that cannot recover its heat when cold meat lands on it. Understanding both helps you choose a grill and cook better.
Dry the steak with paper towels before it goes on the grate. Moisture on the surface has to evaporate before browning can start, which lowers the temperature and delays the crust. Salting ahead of time and letting the steak rest uncovered in the refrigerator is a common technique for drying the surface, though timing preferences differ.
The grill matters for heat retention. Heavy cast iron or thick stainless grates store heat and transfer it into the meat, giving darker grill marks. Thin wire grates lose heat the moment cold meat touches them. A grill that preheats thoroughly, with the lid closed for the time the maker suggests, brings the grates up to temperature as well as the air. Look for strong burners or a deep bed of coals, a lid that closes tightly, and grates that are thick enough to hold heat. A grill that struggles to reach high heat on a cold or windy day will give gray, not browned, steaks.
Two-Zone Cooking and the Reverse Sear
Most good steak methods depend on two zones: a hot side for browning and a cooler side for finishing. On a gas grill, run some burners on high and leave others low or off. On a charcoal grill, pile coals on one side. On a pellet or kamado grill, you may use a separate setup, which depends on the model.
The classic method sears first, then moves the steak to the cooler zone with the lid closed to finish. The reverse sear flips the order. The steak cooks slowly in the cooler zone until it nears the target temperature, then goes over the hot side for a quick crust. Reverse searing suits thick steaks because it cooks the interior more evenly and gives you a wide window before overcooking. Pellet grills and kamados handle the low-and-slow stage well, while a gas grill with a hot zone handles the finish.
This is why a grill with several burners or a good vent system is more useful than one with a single heat setting. When comparing models, check how many separate burners or how much grate area you have, and whether the grill holds low temperatures steadily. A grill with a hot zone and a cool zone gives you the flexibility to cook different thicknesses and to rest the steak on the side while you finish others. Practice with inexpensive cuts first to learn how your grill behaves.
Fuel, Flavor and Convenience Compared
Each fuel has a character. Gas lights quickly, adjusts easily and keeps a steady temperature, so it suits weeknight cooking. It adds no smoke flavor by itself, and the taste of the steak comes from the meat and the sear. Charcoal burns hot, gives a distinct flavor from dripping fat and smoke, and rewards some attention. Lump charcoal burns hotter and cleaner, while briquettes burn steadier. Setup and cleanup take longer, and the fire needs managing.
Pellet grills use wood pellets fed by an auger, with electronic control. They hold temperatures well and add a mild wood flavor, but most are designed for lower temperatures, and searing is usually gentler. Many owners finish steaks on a hotter surface, as the post notes. Check the listing for the maximum temperature and whether a direct-flame option is available. Kamado-style cookers combine charcoal flavor with strong insulation, which holds heat for long cooks and performs well for searing, though they have a learning curve.
Choose based on habits, not just on theoretical performance. If you want steak in twenty minutes after work, gas is hard to beat. If you enjoy the ritual and the flavor, charcoal is rewarding. If you smoke other foods too, a pellet grill adds range. Consider storage and fuel logistics. Propane cylinders, charcoal bags and pellet bags each need dry storage, and running out mid-cook is a common frustration. Keep a spare fuel supply on hand.
Doneness, Thermometers and Resting
Cooking steak to your preferred doneness is easier with a thermometer than with timing or touch. Insert an instant-read probe into the thickest part, horizontally from the side, avoiding bone and fat. Remove the steak a little before your target, because the temperature continues to rise as it rests. Doneness preferences vary, and food safety agencies publish recommended minimum temperatures for beef, so check the guidance for your region.
Thickness changes everything. A thin steak cooks through before it browns well, so it needs very high heat and a short time. A thick steak gives you room to build a crust while keeping the middle as you like it. Bring the steak close to room temperature before cooking, for a short time only and in line with food safety guidance, so the interior does not stay far colder than the outside. Avoid pressing the meat with a spatula, as this squeezes out juices and does not improve browning.
Resting matters. Let the steak sit for several minutes on a warm plate or a rack after cooking, loosely covered if you like. During this time, the juices redistribute, and the slices stay moist when cut. Slice against the grain for tenderness. Salt and seasoning can go on before or after cooking, depending on your approach, but add them with a steady hand. A finishing touch such as butter or herbs adds flavor. Keep tongs and a clean plate ready, and never use the plate that held the raw steak.
Grate Care, Flare-Ups and Grill Upkeep
Clean grates give better marks and prevent sticking. Preheat the grill, then scrape the grates with a brush or scraper to remove residue, and wipe with a lightly oiled cloth held with tongs. Use brushes that do not shed bristles, and inspect them regularly, since loose bristles can end up in food. After cooking, scrape again while the grates are still warm.
Flare-ups happen when rendered fat drips onto flames or hot surfaces. A short flare is normal, but sustained flames char the surface and can blacken the steak. Move the steak to the cooler zone until the flames die down, keep the lid open if the flame is big, and avoid spraying water on a gas or charcoal fire. Trim excess fat from steaks, and clean grease from the drip tray and the bottom of the firebox regularly to reduce the risk of a grease fire.
For gas grills, check the hose and connections for leaks before each season, following the maker’s method. Clean burner ports and make sure the flame pattern is even. For charcoal grills, empty ash after each use, since it holds moisture and can corrode the bowl. For pellet grills, vacuum the fire pot and keep pellets dry. Cover the grill when not in use. Signs that parts need replacement include rusted-through grates, burners that burn unevenly, a lid that no longer seals and an igniter that fails. Replace worn parts with those approved by the maker.
Steak Grilling Terms Explained
Steak talk uses specific words. This glossary covers the ones that matter on a grill.
- Sear: cooking the surface at high heat to develop a brown crust.
- Two-zone setup: one side of the grill hot and the other cooler, giving you room to move food.
- Reverse sear: cooking gently first, then searing at the end.
- Carryover: the continued rise in internal temperature after food leaves the heat.
- Flare-up: a burst of flame when fat drips onto a hot surface.
- Grate: the metal cooking surface, made from cast iron, stainless steel or other materials.
- Probe thermometer: a device that reads the internal temperature of food.
- Burner or fire bed: the heat source underneath the grate.
Individual makers describe their grills in different terms, so refer to the product page and manual.
Which Grill Suits Which Steak Night
| Your style | What to consider | Planning note |
|---|---|---|
| Quick weeknight steaks | Gas grill with fast heat-up | Plan for a gas supply |
| Weekend cooks who like smoke flavor | Charcoal or pellet grill | Plan fuel storage |
| Thick cuts and reverse sear | Grill with good lid and zone control | Check the maker’s temperature range |
| Small patio | Compact grill | Check clearance rules |
| Cooking for a crowd | Large cooking area | Check grate dimensions |
The best grill is the one you will use regularly, so think about fuel, space and your willingness to manage a fire.
A Pre-Grill Checklist
- Take the steak out of the fridge in line with official food safety guidance.
- Pat the steak dry and season it.
- Clean and heat the grates before cooking.
- Set up the zones you plan to use.
- Keep tongs, a thermometer and a clean plate nearby.
- Know where your fire extinguisher or a source of sand is located.
- Check the wind and weather.
A little preparation makes the actual cooking calm and controlled.
Reading a Grill Listing Closely
Look at the cooking area, burner or fire design, and grate material. Check the lid and body construction, as thicker materials usually hold heat better. Read about temperature range and controls, and look for features such as built-in thermometers and side shelves.
See what the maker says about assembly, parts and support. Check the weight and whether the grill has wheels. Finally, read the care instructions, as grate care influences how easily steaks release.
Safety, Fuel and Following the Maker
Grills involve open flame, hot surfaces and fuel. Use them outdoors, away from walls, railings and anything flammable. Follow the manual for lighting, fuel connections and shutdown. For gas, check connections as the maker describes and never ignore the smell of gas. If you suspect a leak, turn off the supply and seek help from a qualified professional.
For food safety, follow official guidance for cooking temperatures and use a thermometer. Wash hands and tools after handling raw meat, and keep raw and cooked foods apart.
Choosing Steaks and Preparing Them for the Grill
Thickness matters more than most cooks expect. Thin steaks cook quickly and benefit from high heat, while thick cuts do better with a gentler first stage and a finishing sear. Ask your butcher about the cuts on offer, and choose pieces of similar thickness so they finish together.
Pat the surface dry with paper towels, since moisture slows browning. Season with salt and pepper or a simple rub, and add oil to the meat instead of the grill. Keep raw meat away from ready-to-eat food, and wash hands and boards afterward.
Think about how you like your steak and use a thermometer to check progress. Remove the steak from the heat a little before it reaches your target, since it will keep rising during the rest, and follow official guidance on safe temperatures. Keep a clean platter for the cooked steak, and do not place it on the plate that held raw meat.
Resting, Carving and Learning From Each Cook
Let the steak rest briefly after grilling, then slice against the grain if you plan to serve it sliced. Keep notes on heat, time and thickness, and adjust next time. Clean the grates while they are still warm, using the tool the maker recommends, and cover the grill when it is cool.
Reading the Picks Side by Side: A Deeper Comparison
The quick picks and individual reviews earlier in this guide give you the facts on each option for grills for steaks. What they cannot do in a short format is slow the decision down and show how the picks differ when you imagine them in your own kitchen, on your own schedule, doing the jobs you actually repeat every week. This section does that. It uses only the products already covered above, and it adds no new models, so use it as a way of comparing the shortlist you already have rather than as a second list competing with the first. For each pick, the useful questions are the same: who is this design really for, what should you double-check on the current listing before you commit, and what kind of owner tends to be happiest with this style of grill over months rather than minutes.
Who Should Shortlist the Weber Spirit II E-310 Gas Grill
Put the Weber Spirit II E-310 Gas Grill on your shortlist if its style, as described in its review above, matches the way you already cook and the space you already have. Read that review again with your own routine in mind: the meals you make most often, the number of people you usually feed, and the storage or counter space the grill will occupy every day, not just on the day it arrives. Before buying, confirm the current listing still shows the same model name, the same included accessories and the same care requirements described earlier in this guide, because line-ups change quietly over time. If two picks seem equal, the tie-breaker is rarely a headline feature; it is usually which design removes a small daily friction, such as awkward cleaning, a door or lid that fights your layout, or controls nobody in the household enjoys using. A pick that fits your habits will be used constantly, and regular use is what turns any grill from a purchase into a genuinely good buy.
Who Should Shortlist the Masterbuilt Gravity Series 560
Put the Masterbuilt Gravity Series 560 on your shortlist if its style, as described in its review above, matches the way you already cook and the space you already have. Read that review again with your own routine in mind: the meals you make most often, the number of people you usually feed, and the storage or counter space the grill will occupy every day, not just on the day it arrives. Before buying, confirm the current listing still shows the same model name, the same included accessories and the same care requirements described earlier in this guide, because line-ups change quietly over time. If two picks seem equal, the tie-breaker is rarely a headline feature; it is usually which design removes a small daily friction, such as awkward cleaning, a door or lid that fights your layout, or controls nobody in the household enjoys using. A pick that fits your habits will be used constantly, and regular use is what turns any grill from a purchase into a genuinely good buy.
Who Should Shortlist the Char-Griller Akorn Kamado Charcoal Grill
Put the Char-Griller Akorn Kamado Charcoal Grill on your shortlist if its style, as described in its review above, matches the way you already cook and the space you already have. Read that review again with your own routine in mind: the meals you make most often, the number of people you usually feed, and the storage or counter space the grill will occupy every day, not just on the day it arrives. Before buying, confirm the current listing still shows the same model name, the same included accessories and the same care requirements described earlier in this guide, because line-ups change quietly over time. If two picks seem equal, the tie-breaker is rarely a headline feature; it is usually which design removes a small daily friction, such as awkward cleaning, a door or lid that fights your layout, or controls nobody in the household enjoys using. A pick that fits your habits will be used constantly, and regular use is what turns any grill from a purchase into a genuinely good buy.
Who Should Shortlist the Napoleon Rogue 425 Gas Grill
Put the Napoleon Rogue 425 Gas Grill on your shortlist if its style, as described in its review above, matches the way you already cook and the space you already have. Read that review again with your own routine in mind: the meals you make most often, the number of people you usually feed, and the storage or counter space the grill will occupy every day, not just on the day it arrives. Before buying, confirm the current listing still shows the same model name, the same included accessories and the same care requirements described earlier in this guide, because line-ups change quietly over time. If two picks seem equal, the tie-breaker is rarely a headline feature; it is usually which design removes a small daily friction, such as awkward cleaning, a door or lid that fights your layout, or controls nobody in the household enjoys using. A pick that fits your habits will be used constantly, and regular use is what turns any grill from a purchase into a genuinely good buy.
Who Should Shortlist the Traeger Pro 575 Pellet Grill
Put the Traeger Pro 575 Pellet Grill on your shortlist if its style, as described in its review above, matches the way you already cook and the space you already have. Read that review again with your own routine in mind: the meals you make most often, the number of people you usually feed, and the storage or counter space the grill will occupy every day, not just on the day it arrives. Before buying, confirm the current listing still shows the same model name, the same included accessories and the same care requirements described earlier in this guide, because line-ups change quietly over time. If two picks seem equal, the tie-breaker is rarely a headline feature; it is usually which design removes a small daily friction, such as awkward cleaning, a door or lid that fights your layout, or controls nobody in the household enjoys using. A pick that fits your habits will be used constantly, and regular use is what turns any grill from a purchase into a genuinely good buy.
Who Should Shortlist the Broil King Baron 420 Gas Grill
Put the Broil King Baron 420 Gas Grill on your shortlist if its style, as described in its review above, matches the way you already cook and the space you already have. Read that review again with your own routine in mind: the meals you make most often, the number of people you usually feed, and the storage or counter space the grill will occupy every day, not just on the day it arrives. Before buying, confirm the current listing still shows the same model name, the same included accessories and the same care requirements described earlier in this guide, because line-ups change quietly over time. If two picks seem equal, the tie-breaker is rarely a headline feature; it is usually which design removes a small daily friction, such as awkward cleaning, a door or lid that fights your layout, or controls nobody in the household enjoys using. A pick that fits your habits will be used constantly, and regular use is what turns any grill from a purchase into a genuinely good buy.
Compared as a group, the picks above fall into natural camps rather than a single ladder from worst to best. Some are built for speed and convenience, some for capacity, and some for the cook who enjoys the process as much as the result. Ranking them without knowing your priorities would be misleading, which is why the reviews describe each one on its own terms. Your job is to name your top two priorities honestly, whether that is easy cleaning, a small footprint, generous room, simple controls or a particular cooking style, and then notice which camp keeps matching them. Most buyers find the decision becomes obvious at that point, and the remaining differences are preferences rather than problems.
Choosing for Your Real Routine, Not an Ideal One
Guides to grills for steaks are usually read in a hopeful mood, imagining weekend projects and relaxed meals. The better test is a tired Tuesday. Picture the grill being used when you are short of time, the kitchen is already messy and nobody wants a complicated clean-up afterwards. If the design still sounds appealing under those conditions, it is probably right for you. If it only appeals in the best-case version of your life, keep looking at the other picks. This honest test prevents the most common disappointment in kitchen buying, which is not poor quality but a poor match between a good product and the wrong household.
For Busy Weeknights
On weeknights, the winning qualities are fast setup, forgiving operation and a clean-up that takes minutes rather than a project. Favour the pick whose controls you can understand at a glance and whose parts you can wash without a strategy meeting. Think about who else will use it: a design that only one confident person in the house can operate will sit idle whenever that person is out. Simplicity also compounds over time, because an grill that is easy on a Tuesday gets used on Saturdays too, while a demanding one gradually becomes furniture. When you compare the reviews above, underline every mention of setup, preheating, monitoring and washing, and let those practical details carry as much weight as the cooking results themselves.
For Weekends, Guests and Bigger Projects
Weekend cooking makes different demands: more capacity, more control and more tolerance for a longer session. If you regularly cook for guests, cook in batches or like learning a technique properly, the pick that offers room to work and steady, adjustable performance will reward you far more than the smallest or simplest option. Think through the whole event, from preparation space to where finished food rests, to how the grill behaves when it is opened, loaded or checked repeatedly. Also consider noise, smoke, heat or steam in the space where people will gather, because a wonderful result served from an uncomfortable kitchen is only half a success. The right choice supports the occasion instead of becoming the occasion’s main challenge.
For Small Kitchens and Shared Spaces
Space is not only about the footprint on the day of delivery. It is about the cupboard the accessories live in, the clearance the lid or door needs, the route from storage to counter, and whether the grill can stay out permanently or must be moved for every use. Measure honestly, including the awkward realities such as low cabinets, narrow doors and sockets in inconvenient places. In shared homes, also think about how the appliance affects other people: heat, smells, noise and how long it monopolises a shared surface. A slightly less ambitious pick that lives happily in the space will outperform a larger one that is resented, squeezed in and rarely used. The reviews above note the style and form of each pick; match those notes against your measurements before you fall for any particular model.
Setup and First Use, Step by Step in Practice
Start by reading the assembly and safety pages of the manual that comes with your model, even if the design looks familiar, because vent placement, regulator connections and lid clearances differ between brands. Assemble or position the grill on a level, non-combustible surface away from siding, fences and overhangs, and check every connection before the first lighting. For a gas model, brush soapy water over the hose connections and look for bubbles that would signal a leak. For charcoal or pellet models, do a first empty burn or seasoning run if the maker recommends one, so manufacturing residues burn off before food ever touches the grates. Keep a spray bottle of water, long tongs and a clean tray within reach before you light anything, and decide in advance where raw food, cooked food and utensils will each sit so the cook stays organised from the first minute.
During the first few uses, resist the temptation to judge the grill by a single ambitious attempt. Start with something simple and familiar so the only new variable is the equipment itself, and pay attention to the small things: how long preparation really takes, where you naturally stand, what you wish you had within reach and how the clean-up feels. Adjust one thing at a time in the next session. Owners who treat the first week as a short learning period almost always end up happier than owners who expect mastery on day one, because most kitchen equipment has a personality that reveals itself through use rather than through its description. Write down what you learn while it is fresh; a few honest notes are worth more than a month of vague impressions when you later wonder which setting, position or routine produced your best result.
Cleaning, Care and Storage in Detail
Let the grates cool until they are warm rather than scorching, then brush or scrape away residue while it is still soft enough to release easily. Empty ash or grease only once it is completely cold, and store ash in a metal container away from anything flammable. Wipe exterior surfaces with a damp cloth rather than harsh chemicals, check the grease tray or cup before it overflows, and inspect hoses, igniters and vents at the start of each season. A fitted cover helps when the grill lives outdoors, but lift it occasionally after wet weather so trapped moisture does not sit against the finish. Grates that are cleaned little and often rarely need aggressive scrubbing, and a grill that is put away clean lights faster and cooks more evenly the next time you use it.
Storage deserves the same thought as cleaning. Keep the grill and its accessories together so nothing essential is missing when you come to use it, store cords loosely rather than tightly wound, and never put a unit away while it is still warm or damp inside. If space forces you to store it in a cupboard or garage, check that the spot is dry and that heavier items will not be stacked on top of it. Once a season, do a slightly deeper review: look for wear, check moving parts and seals, confirm accessories are complete and reread any care notes in the manual you may have forgotten. This light rhythm of daily wiping, weekly tidying and seasonal checking is what keeps kitchen equipment working well for years without ever demanding a dramatic rescue effort.
Troubleshooting: Working Through Common Problems Calmly
Uneven cooking usually traces back to heat management rather than the food itself: preheat fully, keep the lid closed as much as the recipe allows, and learn where your own grill runs hot by cooking a simple test batch and watching which pieces brown first. If flare-ups keep happening, move food to a cooler zone instead of spraying the flames, trim excess surface fat before cooking, and check that grease is not pooling where it can ignite. Trouble lighting often means an empty fuel supply, a blocked burner or vent, or damp fuel, so work through those basics before assuming a part has failed. When a problem involves gas connections, damaged hoses or electrical parts, stop using the grill and follow the maker’s guidance or call a qualified technician rather than improvising a repair.
Whatever the problem, change one thing at a time and observe the result, because changing three things at once teaches you nothing and often creates a new problem on top of the old one. Keep a short record of what you tried; patterns that are invisible in a single session become obvious across three or four. Also remember the limits of troubleshooting: anything involving damaged cords, gas, persistent electrical faults, cracked critical parts or a safety feature that is not working is a reason to stop and get professional help, not a challenge to improvise around. Most owners find that the great majority of frustrations are small, repeatable and fixable with setup, cleaning or technique, and that is genuinely good news, because those are the variables fully within your control.
Planning the Purchase Around Your Home and Budget
Because this guide deliberately avoids fixed prices, which change constantly, plan the budget side in a more durable way. Decide what the grill must do, what would merely be nice, and what you will never use, then let the must-do list set your tier. Remember the full cost of ownership includes the accessories you will genuinely need, any installation or professional help the design requires, replacement filters or parts where they apply, and the storage it will occupy. None of that argues for buying the cheapest option or the most expensive one; it argues for buying the option whose total picture you understand. Check the current listing for what is included in the box, what is sold separately and what the return options are, and keep your order details and the manual together after purchase.
Finally, give yourself a decision deadline and a shortlist of at most two or three of the picks above. Endless comparison feels thorough but usually produces confusion rather than confidence, because the differences between good options are smaller than the difference between a decision made and a decision endlessly postponed. Re-read the reviews of your finalists, check the measurements and the included accessories one last time, and choose the one that best fits the routine you described honestly at the start of this section. That is the process that leads, reliably, to an grill you will still be pleased to own long after the excitement of delivery has passed.
Steak Grill FAQ
Is gas or charcoal better for steaks?
Both work well. Gas is simpler, while charcoal adds smoke and can run very hot.
Do pellet grills sear well?
They can brown steaks, but they usually sear less hard than gas or charcoal, so many owners finish over direct heat.
Do I need a meat thermometer?
A good thermometer is the easiest way to hit your preferred doneness every time.
How thick should the steak be?
Thicker cuts sear well without overcooking the middle, and most grills here handle them. Thin steaks cook fast, so watch them closely.
How hot should the grill be for steak?
Most methods use very high heat for the sear and a cooler zone to finish. Follow the maker's preheat guidance and use the lid to hold heat.
What is a reverse sear?
It means cooking the steak slowly at a lower temperature first, then searing it briefly over high heat. It suits thick cuts.
Should I oil the steak or the grate?
Either works. A light coating of oil on the steak or a wiped grate helps prevent sticking, but too much oil causes flare-ups.
How long should a steak rest?
Several minutes is common, longer for thicker cuts. The juices settle and the steak stays moist when you cut it.
Why does my steak stick to the grate?
The grate may be dirty or not hot enough, or the steak may have been moved too soon. Preheat, clean the grates and let a crust form.
Is a pellet grill good for steak?
It can cook steaks well, especially with a reverse sear, but its searing is usually gentler. Check the maximum temperature on the listing.
Do I need thick grates?
Thicker cast iron or stainless grates hold more heat and give stronger sear marks, though technique matters as much as the grate.
How long should I expect a good grill to last?
Longevity depends far more on care and frequency of use than on any single feature. An grill that is cleaned after use, stored dry, and used within the limits its maker describes will usually serve a household for years, while the same design neglected after every session will age quickly. Treat the manual’s care schedule as part of the product you bought, keep accessories together so nothing is lost or forced into service as a substitute, and deal with small signs of wear early. When a safety-related part wears out, replace or retire the item rather than stretching its life; with ordinary parts and consumables, following the maker’s replacement guidance keeps performance close to how it felt when new.
What is the most common mistake new owners make?
The most common mistake is expecting the first session to go perfectly and blaming the grill when it does not. Almost every design in this category has a short learning curve involving setup order, timing, quantities or positioning, and the first few uses are best treated as practice with forgiving food or simple tasks. The second most common mistake is skipping the unglamorous steps: not reading the manual, not measuring the space, and not cleaning promptly afterwards. Owners who slow down for the first week, take a few notes and build a small routine around setup and clean-up almost always end up rating the same product far more highly than owners who rushed, because the product did not change; the ownership did.
Should I buy accessories at the same time?
Only the accessories you already know you will use belong in the first order. A basic tool that supports the way you already cook, such as the right tray, tongs, thermometer or storage cover for your situation, earns its place immediately, while elaborate kits bought in a burst of enthusiasm often end up as cupboard clutter. Live with the grill for a few weeks first, notice what you actually reach for and what genuinely slows you down, and then buy to fill those specific gaps. Check compatibility with your exact model on the current listing before ordering any accessory, because similar-looking parts are not always interchangeable, and keep the included accessories until you are sure a replacement suits you better.
How do I know if a pick is too big or too small for us?
Judge size against your largest regular job, not your largest imaginable one. If you size for a rare feast, you will live every day with an grill that is heavier to move, slower to prepare and harder to store than your routine needs, while sizing for an ordinary day and occasionally cooking in two batches is usually painless. Measure the space where it will live and where it will be used, including clearance for lids, doors and your own hands, and compare those numbers with the dimensions on the current listing. Then be honest about portions: count the people you feed most weeks, not at holidays. The picks above span different styles and capacities precisely so that both small households and generous hosts can find a sensible match.
Is it worth paying more for a premium version?
It can be, when the extra money buys things you will feel every week: sturdier construction, controls that are pleasanter to use, easier cleaning, better support from the maker or a design that fits your space more gracefully. It is not worth it when the premium buys only features you will rarely touch. The practical test is to list what the step-up pick actually adds, using its review above, and ask how many times a month each addition would matter in your home. If the honest answer is often, the upgrade tends to justify itself over years of use. If the answer is almost never, the simpler pick is not a compromise; it is the correct choice, and the money saved is better kept for accessories or ingredients you will genuinely enjoy.
The Short Version
For dependable gas searing, the Weber Spirit II. For charcoal with control, the Masterbuilt Gravity. For heat retention, the Char-Griller Akorn. For a stainless gas build, the Napoleon Rogue. For smoky steaks, the Traeger Pro. For family size, the Broil King Baron.