A great burger grill delivers strong, even heat for a good crust and enough control to cook patties through without drying them out. Charcoal gives that classic backyard flavor, gas brings speed, and flat-top griddles make thin smash burgers with crispy edges. It also helps to pick a grill that suits the size of your usual cookout.
The six grills below cover charcoal, kamado, gas and griddle styles. We have not used these products ourselves, so please confirm the model, cooking area and assembly needs on the current listing before buying. Searing and heat claims are the makers’ own.
As an Amazon Associate we earn from qualifying purchases. Links below are affiliate links, and they do not change the product information we give.
What to Look For
| Feature | Why it matters |
|---|---|
| Heat power | A hot, even surface gives burgers a better crust |
| Cooking area | Count how many patties fit at once |
| Control | Vents or burner dials let you manage flare-ups |
| Cleanup | A flat-top or easy-clean grate saves time after a burger night |
In this guide
Specs at a Glance
| Grill | Fuel | Style | Notes |
|---|---|---|---|
| Kamado Joe Classic II | Charcoal | Kamado | Ceramic body |
| Weber Performer Deluxe | Charcoal | Kettle with cart | Built-in work surface |
| Camp Chef Flat Top Grill 600 | Propane | Flat-top | Griddle surface |
| Nexgrill Evolution 4-Burner | Propane | Gas grill | Side burner |
| Cuisinart 360 Griddle | Propane | Portable griddle | Tabletop style |
| Napoleon Prestige 500 | Propane or natural gas | Gas grill | Premium build |
The 6 Best Grills for Burgers

Top pickBest for serious burger fans
1. Kamado Joe Classic II Charcoal Grill
A ceramic kamado grill that holds heat well and can sear burgers hot or cook them gently. The thick body is the signature of the design.
Suits: serious burger fans. Strengths: heat retention and flexibility. Weaknesses: the weight and the cost. Skip it if you want a light, simple grill.

Best for charcoal lovers who like convenience
2. Weber Performer Deluxe Charcoal Grill
A kettle-style charcoal grill built into a cart with a work surface and a gas-assisted ignition option, according to the series description.
Suits: charcoal lovers who like convenience. Strengths: classic charcoal flavor with a cart and shelf. Weaknesses: still a charcoal learning curve. Skip it if you want gas.
View Weber Performer Deluxe Charcoal Grill on Amazon
Best for smash burgers
3. Camp Chef Flat Top Grill 600
A propane flat-top griddle with a large steel surface designed for smash burgers, breakfast and stir-fry. Check the current listing for the exact size.
Suits: smash burgers. Strengths: a flat surface for crispy edges. Weaknesses: no grill marks or smoke. Skip it if you want open-flame flavor.
View Camp Chef Flat Top Grill 600 on Amazon
Best for backyard cookouts for family
4. Nexgrill Evolution 4-Burner Gas Grill
A four-burner propane grill with a side burner and ample space for a burger night. It is a popular mid-range value pick.
Suits: backyard cookouts for family. Strengths: ample room and a side burner. Weaknesses: build quality varies by model. Skip it if you want a premium finish.
View Nexgrill Evolution 4-Burner Gas Grill on Amazon
Best for small spaces and tailgates
5. Cuisinart 360 Griddle Cooking Center
A portable round griddle that sits on a tabletop or stand and is designed for smash burgers and breakfast on the go.
Suits: small spaces and tailgates. Strengths: a portable griddle surface. Weaknesses: smaller than a full-size unit. Skip it if you need a big cooking area.
View Cuisinart 360 Griddle Cooking Center on Amazon

Best for frequent grillers
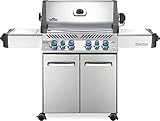
6. Napoleon Prestige 500 Gas Grill
A premium gas grill from Napoleon with a stainless build and several burners. It is a step-up pick for people who grill often.
Suits: frequent grillers. Strengths: a sturdy build and strong heat. Weaknesses: a premium-tier cost. Skip it if you want a basic grill.
Care and Setup
- Clean the grates or griddle while they are still warm.
- Oil the surface lightly before the burgers go on, using a high-heat oil and a folded towel held with tongs.
- Empty the grease tray after each burger night, since fatty beef leaves a lot behind and old grease can flare up.
- Wipe down griddles and season steel surfaces as the maker recommends.
Mistakes to Avoid
- Pressing patties with a spatula, which squeezes out juices.
- Using very lean beef that dries out quickly.
- Flipping patties more than once, which can break them apart and slow the crust.
- Skipping a thermometer and cutting burgers open to check.
Patty Choice, Fat Content and Thickness
The grill gets the credit, but the patty decides much of the result. Ground beef with a moderate amount of fat stays juicy and forms a better crust than very lean meat, which dries out quickly over high heat. Fresh ground beef handled gently makes a more tender burger than meat that has been worked hard. Mix in seasoning lightly and avoid compacting the meat too firmly.
Thickness changes the method. Thick patties suit a grill with a lid, where heat can cook through the center while the outside browns. Thin patties suit a flat-top or a hot skillet, where a quick sear gives a lacy crust. Make patties slightly wider than the bun, since they shrink as they cook, and press a shallow dimple into the center of thick patties so they stay flat instead of puffing up.
Keep the meat cold until it goes on the heat. Warm fat smears and makes patties stick and fall apart. Season the outside just before cooking, since salt mixed deep into the meat early changes the texture to something more like sausage. Follow current food safety guidance for ground beef and use a thermometer to check the center of each patty. The patty and the grill work as a team, so match one to the other.
Two-Zone Fires and Flare-Up Control
Burgers drip fat, and fat on a flame creates flare-ups that blacken the surface and give a bitter flavor. The best defense is a two-zone setup. On a gas grill, run some burners high and leave others low or off. On a charcoal grill, bank the coals to one side. This gives you a hot zone for searing and a cooler zone where burgers can finish gently or rest if flames rise.
When a flare-up happens, move the burgers to the cool side and close the lid briefly to starve the flame of air. Do not spray water on a gas grill or a hot charcoal fire. Clean grates and an empty grease tray reduce the fuel for flare-ups.
- Preheat the grill fully with the lid closed.
- Sear over the hot zone, then move to the cool zone for thick patties.
- Add cheese in the final moments and close the lid to melt it.
- Keep a spray bottle only for charcoal setups where the manual allows it.
Tending the fire carefully matters more than gadgets, so stay near the grill throughout the cook.
Grate Materials, Sear Marks and Sticking
The cooking surface affects how burgers brown and release. Cast iron grates hold heat and produce strong sear marks, but need seasoning and care to avoid rust. Stainless rod grates are durable and easy to clean, though they may heat less evenly. Porcelain-coated grates resist rust but can chip if scraped hard. A flat-top surface gives edge-to-edge browning, which many people prefer for smash burgers.
Sticking is common when the surface is not hot enough or not clean. Preheat grates, brush them clean and wipe them with a light coat of high-heat oil. Place patties and leave them alone until they release naturally. Forcing a stuck patty tears the crust and loses juices.
Grate spacing matters too. Wide gaps let small pieces fall through, while narrow ones support the patty but reduce airflow. If you cook small items or thin patties, consider a grill with a flat insert or a griddle plate. Check what your grill can accommodate and whether replacement grates are available. A good grate is part of the cooking system, and it pays to look after it.
Cheese, Buns and Timing the Finish
The last minutes of a burger cook set the final quality. Add cheese when the patty is nearly done and close the lid or use a dome so it melts evenly. Different cheeses melt differently, so choose types that suit your taste. Toasting the buns on the grill adds flavor and keeps them from going soggy under the patty, and it takes only a short time, so watch closely to prevent burning.
Rest burgers for a minute or two after cooking, which helps juices settle. Prepare toppings in advance so you can assemble as soon as the burgers come off. Warm plates and ready condiments make the process smoother when feeding a group.
If you are cooking for many people, plan batches. A larger grill can hold more patties at once, but crowding the grate lowers the temperature and traps steam. Cook in rounds, keep finished burgers warm in a covered tray and avoid holding them for too long. Use separate trays for raw and cooked patties, and wash hands and tools to prevent cross-contamination.
Cleaning Up and Looking After the Grill
Burgers are greasy, so cleanup matters. While the grill is still warm, scrape the grates with a suitable brush or scraper and wipe them down. If you cook on a flat-top, scrape the surface into the grease channel and re-oil it. Empty the drip tray or grease cup after the grill has cooled, since an overfull tray is a fire risk.
Check burners and ignition parts regularly. Gas grills may need burner tubes cleared of debris, and charcoal grills need ash removed so air can flow. A clogged vent or burner causes uneven heat and weaker sear. Cover the grill when it is cool to protect it from weather, and store fuel safely.
Signs that it may be time to replace parts or the grill include rusted-through grates, uneven flames that do not improve after cleaning, a cracked firebox, a broken ignition that cannot be repaired and a lid that no longer seals. Many parts are replaceable, so check whether the maker sells grates and burners for your model before deciding on a whole new grill.
A Pre-Purchase Checklist for a Burger Grill
Burgers ask a lot of a grill: fast, high heat for a good crust, steady control for even cooking and an easy way to deal with grease. Before you look at models, think about the way you cook and the people you cook for. The list below turns that into a set of questions you can check against any listing, including the Kamado Joe Classic II, Weber Performer Deluxe, Camp Chef Flat Top Grill 600, Nexgrill Evolution, Cuisinart 360 Griddle and Napoleon Prestige 500.
- How many patties do you cook at once on a normal night?
- Do you prefer open flame, a flat steel surface or a mix of both?
- How much cooking surface does the listing state, and is that the primary area only?
- Is there a lid, and does it have a thermometer?
- Where will the grill live, and does it need to be moved or covered?
- What fuel do you have access to: charcoal, gas from a cylinder or a connection at home?
Keep your answers handy while you compare. They will keep you from paying for features that you will never use.
Comparing Surfaces for Burgers
The cooking surface shapes the burger more than almost any other feature. Open grates give you char marks and a smoky flavor, but fat drips onto the heat source and can cause flare-ups. A flat steel top keeps the patty in contact with the hot surface and builds an even crust, while keeping the juices in the pan. Combination setups let you use both.
| Surface | Typical result | Think about |
|---|---|---|
| Open grates | Char marks, smoky edge | Flare-ups and sticking |
| Flat top | Even crust, easy toasting of buns | Seasoning and grease management |
| Kamado style | Heat control and smoke flavor | Weight and a learning curve for the vents |
| Gas grill | Fast lighting and steady temperature | Burner layout and fuel supply |
Mistakes That Ruin Burgers
The most common mistake is pressing down on the patty with a spatula, which squeezes out the juices and can cause flare-ups. Another is moving the patty too often. Let it form a crust before you flip it, and turn it once or twice at most. A third is using meat that is too lean or too warm. Cold patties hold their shape better on the heat, and a bit of fat helps keep them moist.
People also skip the preheat. A grill that is not hot enough steams the meat instead of searing it. Finally, many cooks forget about food safety and rely on guesswork. Use a food thermometer and follow official guidance from your local food safety authority for safe internal temperatures.
Setting Up the Grill for Better Control
Whatever fuel you choose, set up zones. Put the heat on one side and leave the other side cooler, so you can move a patty away from a flare-up or finish thick burgers more gently. Keep a spray bottle or a metal lid nearby for managing flames, and keep the cooking area clear of loose items.
Place the grill on a stable, level surface well away from walls, railings and overhanging branches. Follow the maker instructions for lighting, fuel connections and clearances. For any gas line or cylinder concern, such as a smell of gas, follow the manual and call a licensed professional or the emergency service.
Care and Cleaning After the Cook
Clean the cooking surface while it is still warm, using tools that the maker approves. Empty the grease tray regularly, since built-up fat is both messy and a fire risk. Cover the grill when it is cool, and check for rust and wear at the beginning of each season.
A Short Glossary of Grill Terms
- Two-zone cooking: arranging the heat so one side is hot and the other side is gentler.
- Flare-up: a burst of flame caused by dripping fat.
- Kamado: a thick-walled, egg-shaped cooker, often ceramic, that holds heat well.
- Flat top: a griddle-style steel surface without open grates.
- BTU: a heat output figure that is only useful when compared with cooking area and design.
- Vents or dampers: openings that control airflow and therefore temperature.
Choosing Between Fuel Types for Burgers
Charcoal gives a classic flavor and very hot searing, but needs time to light and a little practice to control. Gas lights quickly and holds a steady temperature, which suits weeknight cooking. A flat-top often uses gas and is great for large batches and for toasting buns on the same surface. Think about the rhythm of your week. If you cook burgers on a Tuesday after work, convenience may matter more than the smoke ring.
Also consider storage and local rules. Some apartment buildings and communities restrict charcoal or gas on balconies, so check the rules where you live before you buy.
Timing the Finish: Cheese, Buns and Resting
Plan the last two minutes of the cook. Add cheese near the end so it melts without turning oily, and toast the buns on a cooler zone while the patties rest for a short while. Resting lets the juices settle, and warm buns keep the burger from becoming soggy. Have toppings and plates ready before the meat comes off so everything reaches the table hot.
Keep raw and cooked foods apart, use clean utensils for serving and follow official food safety guidance on temperatures and holding times.
Burger Grill FAQ
Is a flat-top or a grill better for burgers?
A flat-top gives a crisp crust on smash burgers, while a grill adds smoke and grill marks. Both can be excellent.
Do I need a lot of heat?
Yes, a hot surface helps form a crust. Preheat well before the patties go on, and leave the lid closed on a grill to build heat before you start.
Charcoal or gas for burgers?
Charcoal gives more flavor. Gas is quicker and more consistent.
What is a good internal temperature?
Follow current food safety guidance for ground beef and use a thermometer to check the center of the patty. Judging by color alone is not a reliable way to tell when a burger is done.
What fat content should ground beef have for burgers?
A moderate amount of fat tends to keep burgers juicy and helps with browning, while very lean beef can dry out. Choose what you like and cook it to the safe temperature recommended by food safety guidance.
Should I put the lid down when grilling burgers?
For thick patties, a closed lid helps cook the center and melt cheese. For thin patties on a very hot surface, you may leave it open and watch closely.
How do I stop burgers from falling apart?
Keep the meat cold, handle it gently, make sure the grate is clean and oiled and avoid flipping too early or too often. Let the crust form before moving the patty.
What is the best way to toast buns on the grill?
Place them cut side down on a cooler part of the grill for a short time. Brush with a little butter or oil if you like, and watch them closely, since they burn quickly.
Can I cook frozen patties on the grill?
Many people do, but they take longer and may cook unevenly. Follow the package directions and use a thermometer to check that they reach a safe temperature.
How do I keep burgers warm for a crowd?
Hold them in a covered tray in a warm oven or on a cool part of the grill, and serve soon. Do not leave cooked food sitting out for long periods.
Choosing Grills for Burgers With More Care: The Details That Decide
The picks above give you the shortlist. This section slows the decision down and looks at the details that separate grills for burgers you will enjoy for years from the ones that quietly end up at the back of the cupboard. None of these points require specialist knowledge; they ask you to match the product to your grill, your food and your habits, which is where good purchases are actually made. Work through them with your own cooking in mind, especially burgers, and the buns and toppings around them, and the right pick usually identifies itself.
Heat Output and Recovery Between Batches
Burgers are a heat-budget test: cold patties on a hot surface, batch after batch. A grill for burgers must sear the first batch hard and still have fire left for the third. Recovery speed, driven by burner power, coal bed depth or grate mass, is the spec that predicts party success. To judge it on a listing, look past the headline claim and find the detail that proves it: a stated dimension, a named material, or a clear photo of the part you will actually handle. If the page stays vague on this point, treat that as information in itself and weigh the grills for burgers that explain it clearly more heavily.
Cooking Area in Honest Burger Units
Translate area into patties with elbow room: burgers need space around them for the spatula and for flare-up management. A grill that fits eight patties shoulder to shoulder really fits six working burgers. Count your typical party and add a batch’s worth of patience to the plan. In daily use this matters most on the third or fourth cook, not the first. The first session with new grills for burgers almost always goes well; it is the repeated heating, washing and storing that reveals whether this detail was designed properly or just described well. Buy for the routine you will repeat all season, not for the unboxing.
Grate Material and Sear Quality
Heavy cast iron grates store the heat that crusts a patty on contact; thinner steel grates heat fast and recover between flips differently. For smash-style cooking you need a flat surface or plancha zone instead. Match the grate system to your burger style before all else. A practical way to test the claim before you commit is to compare it against the grills for burgers you already own or have used. Note what frustrated you there, then check whether this option genuinely fixes that frustration or simply moves it somewhere else. Improvements you can point to concretely are worth more than long feature lists.
Two-Zone Capability
Even burger specialists need a gentle zone: to hold finished patties, melt cheese without burning bottoms, toast buns and park the vegetarian option. A grill that runs only fierce forces you to serve in anxious waves. Zones turn burger night into a system. There is usually a trade-off hiding inside this point, and honest listings make it visible. More of one quality tends to mean less of another, whether that is weight, space, speed or simplicity. Decide which side of the trade-off suits your cooking before you shop, so the comparison between grills for burgers stays anchored to your priorities.
Grease and Flare-Up Management
Burgers render fat directly over the fire, so the grill’s grease routing, burner covers and your access for moving patties decide whether flare-ups kiss the food or consume it. Judge this with a fatty blend in mind, not the lean patties of January. Match this criterion to the foods you cook most, which here means burgers, and the buns and toppings around them. A feature that shines with one kind of food can be irrelevant, or even a nuisance, with another. The strongest choice is rarely the one with the longest specification list; it is the one whose strengths line up with your regular menu.
Grills for Burgers in Real Life: Four Situations Worth Planning For
Product pages describe features; households live in situations. Here is how grills for burgers behave in the situations that actually come up around a backyard or patio, and what to do in each so the equipment helps rather than hinders.
Family Burger Night
A steady rhythm wins: patties in batches, cheese on in the gentle zone, buns toasted last in the residual heat. Set up the topping station before the first patty lands, because burgers wait for no one’s ketchup hunt. The grill’s zones choreograph the whole meal. The routine that makes this work is preparation: have everything cut, seasoned and within reach before the heat is on, because once cooking starts there is rarely a spare moment to go back inside. A small tray or board beside the grill turns a scramble into a sequence you can repeat.
The Big Cookout
For a crowd, cook to order in small batches rather than holding dozens of patties. A holding zone at gentle heat keeps early batches warm without cooking them further. Communicate the rhythm to guests; people happily queue for fresh burgers when the system is visibly working. Timing is the skill to practise here. Foods finish at different speeds, so start the slowest items first and add the quicker ones in stages rather than loading everything at once. That single habit does more for the result than any accessory, and it is free.
Smash Burger Sessions
Smash style needs a flat, fiercely hot surface, a stiff spatula and parchment for clean releases. If your grill has a plancha zone or accepts an insert, that is its stage. Work in pairs, season after smashing, and accept the delicious mess as the method’s signature. Keep notes the first few times, even if only mentally: what the heat felt like, how long each item took, and what you would move earlier or later next time. Grills for Burgers reward cooks who adjust in small steps instead of changing everything at once.
Mixed Menus: Meat, Veggie and Chicken Burgers
Different patties want different heat and timing, and must not share raw-meat zones carelessly. Run the grill in territories: chicken started first in its zone, beef in the fierce zone, veggie patties in the clean, gentle zone. The map in your head is the tool. For serving, plan the landing zone before you start: a clean platter, resting space and somewhere safe for hot tools. Good results are often lost in the last two minutes, when cooked food waits around getting cold or overcooks in its own residual heat because nothing was ready for it.
Using, Cleaning and Storing Your Grills for Burgers: A Working Routine
Long life from grills for burgers is mostly routine, not luck. The steps below follow the order of a real cook, from before the heat goes on to the moment everything goes away, and they apply whichever pick from the list above you choose. Adapt the details to your model’s manual where the two differ, since the maker’s instructions always win on safety and warranty questions.
Preheat Longer Than the Dial Suggests
Grate temperature, not air temperature, sears burgers. Give heavy grates their full preheat with the lid down, and test with a sacrificial small patty if the event matters. A grill rushed to service cooks the first batch pale and the cook frustrated. Make it a habit rather than a project: two minutes of attention straight after cooking replaces an hour of soaking and scrubbing later, and it keeps every part working the way it did on day one.
Season and Handle Patties Cold
Keep patties cold until they meet the heat, season boldly at the surface, and handle them minimally once cooking. Cold fat renders slower, patties hold together, and crust forms before the centre overcooks. Warm, overworked patties are the dry burger’s origin story. Always let hot parts cool enough to handle safely before you start, and keep water away from anything electrical or still holding serious heat. A cracked surface or a warped part often traces back to one impatient cleaning session.
Clean Grates Between Sessions, Oil Lightly
Burger residue carbonises fast and glues the next batch down. Brush while warm after every session and wipe with an oiled cloth before the next preheat. A clean grate is half the sear; the other half is patience at the flip. Dry everything fully before it goes away. Trapped moisture is the quiet cause of rust, odours and sticking, and it does its damage in storage where nobody notices until the next cook.
Manage the Grease Path
Empty grease trays before big burger sessions, not after the overflow, and check that burner covers or coal arrangements are not pooling fat. Burger nights produce more grease than a week of chicken; the grill’s plumbing must be ready for it. Use the mildest tool that does the job first, and step up only if residue survives. Aggressive scrubbing solves today’s mess by creating tomorrow’s sticking problem, especially on coated or seasoned surfaces.
Rest Patties Briefly, Serve Buns Toasted
A two-minute rest on a warm tray keeps juices in the meat while buns toast in the grill’s last heat. This small sequencing step is the difference between a good burger and the one people describe on the drive home. Store the piece where air can move around it and where it will not be knocked, stacked under heavy pans or left at the damp end of a cupboard or garage. Storage conditions decide lifespan as much as build quality does.
How the Picks Above Compare When You Cook Side by Side
Read as a group, the six picks in this guide are not six attempts at the same product; they are six answers to six slightly different questions. The comparison that matters is therefore not which one is best in the abstract, but which one’s strengths land on the cooking you do most. The guide’s own summary positions them as follows, and it is worth translating those positions into everyday terms before you decide.
The Kamado Joe is the pick put forward for heat retention. In practice that makes it the natural shortlist-topper if that description sounds like your household, and the one to pass over if it clearly does not, however strong its other qualities are.
The Weber Performer is recommended for charcoal with a cart. Treat that as a statement about fit rather than rank: it will feel like the best product on this page to the cook it was chosen for, and like an odd compromise to anyone else.
The Camp Chef covers the case for smash burgers. If that case is your default weeknight rather than an occasional event, weight this pick heavily; if it happens twice a year, let one of the more general picks win instead.
The Nexgrill is the answer for a roomy gas grill. Notice that this is a different promise from the picks around it, which is exactly why the guide keeps all six: most households recognise one of these descriptions immediately as their own situation.
The Cuisinart is positioned for a portable griddle. The honest way to use that is as a filter: say yes to it if the description matches your grill, your space and your menu, and do not let a feature you will never use argue you out of the match.
The Napoleon rounds out the list for a premium gas grill. For the right buyer it is not a consolation choice at all but the most sensible one here, because buying capacity, size or toughness you never use is its own kind of waste.
When two picks still tie, decide with three questions. Which one fits the equipment you already own without adapters, workarounds or wishful thinking? Which one will you clean without resentment on an ordinary evening? And which one’s main strength addresses the frustration that sent you shopping in the first place? The pick that answers all three is the right one, and it is rarely decided by a single headline feature.
More Mistakes That Trip Up Owners of Grills for Burgers
The mistakes section earlier in this guide covers the classics. These four are the quieter ones, the habits that do not ruin a single meal but steadily shorten the life of grills for burgers or make them less pleasant to use.
Pressing Patties Flat on the Grate
Pressing a cooking patty squeezes out the juice you seasoned and chilled to protect. The exception is the deliberate smash, done once in the first seconds on a flat surface. On grates, place the patty, then leave it entirely alone until the flip. The fix costs nothing: slow down at this one step and check before the heat, the guests or the hunger make the decision for you. Most equipment problems that get blamed on build quality turn out to be this exact moment, repeated.
Flipping Repeatedly
Each flip restarts the crust and cools the surface. One flip, confidently timed when the patty releases and the first side is properly crusted, gives the best result and the calmest cook. If you are flipping from anxiety, the thermometer and the clock are your friends. If you recognise your own habit here, change the routine rather than the product. A written or mental checklist at the grill sounds excessive until the first time it saves a meal; after that it just becomes how you cook.
Toasting Buns as an Afterthought
Buns thrown on at serving time come off raw or burnt while patties cool. Toast them in the holding phase, watching closely, because buns go from pale to perfect to past it in under a minute. Assign the job to a helper with tongs and full attention. This mistake also compounds. One rushed session leaves residue, damage or bad seasoning behind, and the next session starts from a worse position, which makes the same shortcut tempting again. Breaking the cycle once, with a proper reset, is usually enough.
Overcrowding to Feed Everyone at Once
A grill carpeted with patties drops in temperature, steams its load and flares where fat pools. Batches with space cook faster per patty and taste better. Guests forgive a short wait; they remember a grey burger. It is worth saying out loud to anyone you share the equipment with, too. Shared grills for burgers suffer most from inconsistent habits, where one careful owner undoes another person’s shortcut, or the other way round.
More Grills for Burgers Questions, Answered
Buyers ask a second round of questions once the first cook is done and the equipment has to earn its place week after week. Here are the ones that come up most often for grills for burgers, answered in the same spirit as the rest of this guide: practical, and honest about what depends on your model.
What fat ratio makes the best grilled burger?
Blends with enough fat to stay juicy over open heat are the traditional choice, with leaner blends needing gentler handling and precise timing. Whatever you buy, keep patties cold, season well and cook to temperature rather than colour alone. Your butcher’s advice for your grill style is worth taking.
Should burgers be cooked with the lid open or closed?
Lid down traps heat for even cooking and faster cheese melting; lid up gives control and reduces flare-up intensity. Most cooks sear with the lid as the grill’s design intends, then finish as the thickness demands. Thick patties benefit most from lid-down finishing.
How do I stop burgers shrinking into footballs?
Start with patties wider than the bun, press a shallow dimple into the centre of each, keep them cold, and do not press them while cooking. The dimple counteracts the centre’s natural puffing as proteins contract, giving you a flat, bun-fitting result.
Can I cook frozen patties well?
Yes, with moderate heat, more time and one extra flip, accepting a slightly less dramatic crust than fresh. Keep frozen patties separated until they firm up on the grill, season once the surface thaws, and verify the centre’s temperature before serving.
What is the best way to melt cheese evenly?
Add cheese in the final minute, move the patty to the gentle zone, and close the lid or cover with a small dome if you use one. The trapped warmth melts without burning the base. Cheese added too early slides off and carbonises on the grates.
How many burgers should a grill handle for a party?
Plan in batches you can manage calmly, often six to eight at a time on a mid-size grill, with a holding zone for finished patties. Two relaxed batches beat one frantic one. If your parties regularly exceed that rhythm, size, not technique, is your bottleneck.
Ownership Notes: Getting More From Your Grills for Burgers
One underrated step before buying any of the grills for burgers above is to measure the space it has to live in, not just the space it cooks on. Check the working area, the storage spot and the path between them, because equipment that is awkward to reach for gets used less, whatever its merits on paper. A tape measure and five honest minutes prevent the most common return reason of all: it simply did not fit the way the household actually works.
Read the manual that comes with your pick, even if you have owned similar grills for burgers before. Makers differ on seasoning, maximum heat, dishwasher safety and which parts can be immersed, and the warranty usually assumes you followed their version. Ten minutes with the booklet protects both the equipment and your claim if something fails early, and it often reveals a small feature or warning that the product page never mentioned.
Plan a low-stakes first cook with your new purchase. Choose forgiving foods, keep the group small and treat the session as calibration: learning how this piece behaves with heat, timing and cleanup in your own a backyard or patio. A relaxed trial run teaches more than any guide, and it means the first important meal, the one with guests and expectations, is cooked with knowledge instead of hope.
Think about the season as a whole when you judge value. Grills for Burgers that get used weekly for months should be chosen for durability and easy cleaning above almost everything else, while a piece bought for one annual event can reasonably trade some toughness for price or compact storage. Matching the purchase to the real frequency of use is the simplest way to spend the right amount in the right place.
Keep a simple ownership routine on the calendar: a quick inspection at the start of the season, a proper clean before storage, and a mid-season check of the parts that wear, loosen or corrode. Small checks catch small problems while they are still cheap and easy, and they mean the equipment is ready on the first warm weekend instead of needing rescue work.
Safety deserves a line of its own. Work on a stable, level surface, keep handles and cords where nobody brushes past them, and give hot equipment a clear landing zone away from children, pets and paper or cloth clutter. None of this is complicated, but it has to be arranged before the cooking starts, because mid-cook is the worst moment to improvise it.
If you are choosing between two finalists among the grills for burgers above and going in circles, decide by cleanup. When cooking performance is close, the piece you will happily wash on a tired weeknight is the one that gets used, and used equipment is always better value than excellent equipment that lives in a cupboard. Honest self-knowledge about your own habits is a legitimate buying criterion.
Before you buy, check that replacement parts and accessories for the model are easy to find: the wear items specific to grills for burgers, such as the parts that heat, move, seal or take the scrubbing. A product whose consumables are unavailable becomes disposable the first time a small part fails, however solid the rest of it is. Five minutes checking parts availability has saved more good equipment than any warranty.
Read the warranty terms with the same care as the feature list, because the two describe different products: the features describe the best day, the warranty describes the worst one. Note what is covered, for how long, and what care the maker requires from you to keep the cover valid. File the details with the manual so a problem in year two starts with information, not archaeology.
Share the care routine with everyone who uses the equipment, in plain terms, at the grill rather than by message. Shared grills for burgers fail early when each user assumes someone else cleaned, dried or checked them. A two-minute demonstration, plus the checklist kept with the tools, aligns the whole household’s habits and quietly doubles the equipment’s life.
The Short Version
For heat retention, the Kamado Joe. For charcoal with a cart, the Weber Performer. For smash burgers, the Camp Chef. For a roomy gas grill, the Nexgrill. For a portable griddle, the Cuisinart. For a premium gas grill, the Napoleon.


