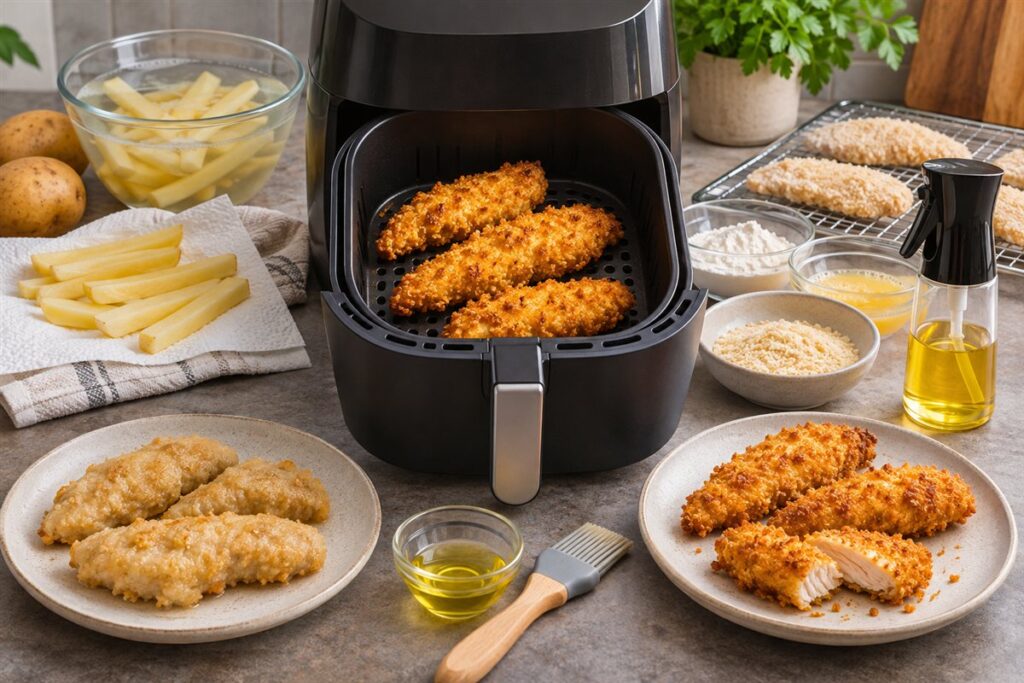
Food stays soft in an air fryer when moisture cannot escape or hot air cannot reach every surface. Drying the food, spacing it out, and using a thin coat of oil usually brings back the crunch. Here is a plain list of what to change.
The Main Culprits
Crisp edges need dry surfaces and moving air. Wet food steams before it browns, and a crowded basket traps that steam. Frozen foods with ice crystals or sauces on the outside can make this worse.
Work Through These Steps
- Pat food dry with a paper towel before it goes in, especially vegetables and marinated meat.
- Use a thin, even coat of oil. Too little leaves food pale, and too much can make it greasy.
- Cook in a single layer, in smaller batches if needed.
- Leave breaded or battered items undisturbed until the coating has set, then turn them gently.
- Add a few minutes at the end for extra browning, watching closely.
- Serve soon after cooking, since crisp food softens as it sits and steams in its own heat.
Ingredients and Prep That Help
- Potatoes: cut evenly, rinse, and dry well before oiling.
- Coatings: press crumbs on firmly so they stay in place during the cook.
- Frozen items: cook straight from frozen if the pack says so, and do not thaw them into a wet pile.
- Sauces: add them after cooking, or brush on near the end, so they do not soften the crust.
Loose Ballpark Ranges
Crisping tends to work in the upper part of the usual range, often around 180 to 200 degrees Celsius, for roughly 10 to 20 minutes depending on the food. Use this only as a loose ballpark and follow the guidance in your manual. Thicker foods need lower heat for longer so the inside cooks too.
Keep the Machine in Good Order
Built-up grease on the basket or tray can smoke and affect airflow, so clean them as the maker describes. Make sure vents are not blocked by the wall or other items. If results stay poor despite good habits, check the manual and contact the maker about a possible fault. Do not open the housing or work on electrical parts.
Patience matters too. Resist the urge to open the basket too often in the first few minutes, since coatings need time to dry and set before they brown. Once the surface looks dry and lightly golden, a final short burst of heat usually finishes the job.
Moisture Is the Real Obstacle
Crispness is mostly a question of water. A crust forms when the surface of the food dries out enough to brown, and every drop of water on or just under that surface has to evaporate first. Until it does, the temperature at the surface stays low and the food looks pale and soft. That is why two pieces of the same food can behave so differently depending on how wet they were when they went in.
Foods differ a great deal in how much water they release as they heat. Mushrooms, courgettes, aubergine, and fresh potatoes give off plenty, while a dry cracker coating gives off very little. Salt pulls water out of vegetables and meat, so salting well ahead of time and then blotting the surface can help, whereas salting just before cooking can leave a damp film behind.
- Blot, then wait: after patting dry, leave cut vegetables on a clean towel for a few minutes so the surface loses its shine.
- Air-dry in the fridge: chicken pieces left uncovered on a rack for a while before cooking often have drier skin, which suits crisping.
- Drain marinades: let excess liquid drip off, and wipe away pooled bits of marinade.
- Rinse starch, then dry: cut potatoes can be rinsed to remove surface starch, but the drying step afterwards matters just as much.
If you only change one habit, make it drying the surface thoroughly. It costs nothing and improves results with almost every food that is meant to have a crisp edge.
Oil Choice and How to Apply It
Oil helps heat move into the surface and promotes even browning, but the type and the method both matter. Oils differ in how well they cope with high heat before they start to smoke. Refined oils with a high smoke point are the usual choice for hot cooking, while strongly flavored or unrefined oils can turn bitter or smoky. Check the label on your oil and the guidance in your air fryer manual.
How you apply the oil often matters more than which one you pick. Tossing food in a bowl with a small amount of oil coats every surface evenly with far less than you would pour straight into the basket. A brush works well for larger pieces such as chicken thighs or fish. A refillable pump sprayer gives a fine mist, which suits coated foods where a heavy drizzle would make the crumbs soggy.
- Dry the food first, since oil does not stick well to a wet surface.
- Add oil a little at a time and mix, rather than pouring a large amount at once.
- Look for a light sheen, not visible puddles at the bottom of the bowl.
- For foods that already contain fat, such as sausages or skin-on poultry, you may need very little or none.
Some makers advise against aerosol cooking sprays because propellants and additives can build up on nonstick surfaces. If your manual says so, use a pump bottle instead. Already-crisp frozen products are often made to cook without extra oil, so read the pack before adding any.
Making Coatings Stay Crunchy
Breaded and battered foods are where many people lose the crunch. A standard breading goes in three stages: a dusting of flour, a dip in beaten egg, and then the crumbs. The flour gives the egg something to grip, and the egg acts as the glue for the crumbs. Skipping the flour step is a common reason crumbs slide off. Press the crumbs on firmly with your palm, not just a sprinkle.
Wet batters, the kind that pour like thick cream, generally do not suit an air fryer because they drip through the basket before they set. Dry or thick coatings work much better. If a recipe was written for deep frying with a loose batter, look for an air fryer version rather than forcing it.
- Coarse crumbs such as panko tend to give a lighter, craggier crunch, while fine crumbs give a denser, even shell.
- Rest the coated food for a few minutes before cooking so the coating hydrates and holds together.
- Mist the surface lightly with oil, especially on dry crumb areas that look floury, since uncoated patches stay pale.
- Do not stack or press coated pieces against each other, which tears the crust.
Seasoning can go into the crumbs rather than only onto the food, so the flavor sits in the part you taste first.
Loading the Basket for Airflow
Hot air does the crisping, so anything that stops air reaching the food works against you. A basket filled to the brim puts pieces in contact with each other, and the touching faces steam instead of brown. A useful rule is to cover the base in one layer with gaps between pieces, and only go deeper with foods that you will shake, such as chips or small florets.
The holes in the basket or tray matter too. Parchment liners and foil that cover most of the base can block upward airflow, and they can lift into the heating area if they are not weighed down by food. Use only liners with the holes the maker intends, and never run a liner with nothing on top of it.
- Cook in rounds: two small batches usually beat one crowded batch for texture.
- Use a rack if one is included: some models offer a raised rack that lets air reach the underside of the food.
- Flip big pieces: the side facing the base of the basket gets less direct air, so turn it partway.
- Allow clearance: food touching the top element or the fan area can cook unevenly and may be a hazard, so keep it clear.
Tall, narrow baskets and wide, shallow trays behave differently, so the amount that cooks well in one may be too much in another. Learn the right quantity for your own machine.
Finishing and Serving for Lasting Crunch
Many people achieve a good crust and then lose it in the last minute. Food straight out of the basket is full of steam, and steam is exactly what softens a dry surface. Moving it onto a wire rack, or at least a wide plate without a lid, lets that steam escape instead of settling back into the underside.
A two-stage approach helps thicker foods. Cook first at a moderate setting so the inside comes up to temperature without the outside darkening too much. Then raise the heat for a final short burst to dry and brown the surface. This works for chicken pieces, thick-cut potato wedges, and roasted vegetables, and it avoids the usual trap of a dark outside with a cool middle.
- Judge by color and sound: a crust that looks dry, deeply golden, and slightly rigid is ready, while a glossy or pale surface needs longer.
- Shake the basket and listen. Crisp pieces make a lighter, drier sound than soft ones.
- Check the center of thick or meat items with a thermometer, as a good surface does not guarantee that the inside is cooked.
- Toss with seasoning or fine salt straight after cooking, while the surface still holds it.
Hold sauces and dips on the side. Food that is meant to stay crunchy should meet the sauce at the table, not in the basket.
FAQ
Do I need a lot of oil to get crisp food?
No. A light, even coat is usually enough, and extra oil can pool and make things soggy.
Why does food soften after cooking?
Trapped steam moves back into the surface. Serving promptly, or spreading food on a rack, helps it stay crisp longer.
Why are my homemade chips soft in the middle but not crisp outside?
Cut pieces unevenly or too thick, and surface moisture likely stayed in place. Cut to a similar size, rinse and dry thoroughly, and try a lower first cook followed by a hotter finish. Thin pieces crisp faster, while thick ones need more time.
Does preheating help with crispness?
It can, because food meets hot air right away and the surface starts to dry sooner. Not every maker calls for a preheat, so follow your manual and see whether it improves your results.
Can I crisp up food that was already cooked and went soft?
Often yes. A short time at a moderate to high setting, in a single layer, can drive off surface moisture. Keep the time brief to avoid drying out the inside.
Is it better to use frozen food straight from the freezer?
For products made for the air fryer, usually yes, and the pack will say so. Thawing can release water that makes the surface wet, so follow the instructions on the packaging.
Why does breading fall off in the basket?
The coating may not have had a floury base or enough pressing, or the pieces touched while cooking. Use the flour, egg, and crumb order, press firmly, rest briefly, and keep pieces apart.
Will a bigger air fryer make food crispier?
Not automatically. Extra space helps you avoid crowding, but results depend on airflow and how much food you load, not just the size of the unit.
Should I add oil to food that is already fatty?
Usually not much. Foods with their own fat, such as sausages or skin-on chicken, often brown well with little or no added oil.
The Short Version
Dry the food, add a thin coat of oil, and give it room. Cook in batches, and follow your manual for settings and care.