Putting a baking dish inside an air fryer can open up recipes such as baked pasta, egg dishes or small cakes. A dish that simply slides through the opening is not automatically a good match, though. It also needs to be heat-compatible, leave room for air to move and be possible to lift out without a struggle.
What to do
Measure the cool basket, the dish including its handles and the clearance the appliance guidance asks you to leave. Check the dish maker’s temperature and use instructions, then plan how you will remove it using suitable heat protection such as oven gloves or a lifting aid.
In this guide
Measure in three places
- Width across the handles: the widest point of the dish, not the body of the bowl, is what has to clear the basket sides.
- Height of the dish and its contents: food that rises or bubbles needs space between the top and the heating element.
- Gap around the dish: air should still be able to circulate past the sides, not be sealed off by a snug fit.
Write the three numbers down and compare them with the manual’s clearance guidance before you cook anything.
A mistake to avoid
Do not use a bowl just because it fits or looks like ceramic. Appearance does not establish that a material is suitable for oven or air-fryer temperatures. Some glass and ceramic can crack when heated quickly or when cold food is placed in hot cookware, so rely on the dish maker’s stated use and temperature limits.
A detail worth checking
Account for the food’s height, not only the empty dish. A combination that clears the heater when empty may not be suitable once the recipe and its expected rise are included. Batters, cheesy toppings and puddings can swell, so leave extra room and fill the dish less than you would for a conventional oven.
Try this practical check
With the appliance unplugged and cool, place the empty dish in the basket. Check that the drawer or door closes without force, that approved supports and handles still work, and that you can see a clear gap above the dish. Then practise lifting the dish out wearing the gloves you would use, so the first real attempt is not with a hot, full dish.
Making a Paper Template Before You Try the Real Dish
A quick way to check fit without risking a heavy dish is to trace its outline on paper. Place the dish upside down on a sheet of baking paper or thin card, draw round the base and the widest part of the rim, then cut out the shapes. Lay the cut-outs inside the empty basket or chamber to see how they sit.
The base outline tells you whether the dish will rest flat. The rim outline shows whether the widest part clears the walls. If the rim shape touches or overlaps the sides, the dish is too wide for comfortable use. Hold the paper at the height where the dish would sit to judge how close it comes to the heating area and the fan opening.
This also helps with handles. Many dishes have lugs that extend beyond the body, and they need room too. Add the handles to your tracing, then re-check. A template costs nothing and avoids scraped coatings and stuck dishes.
Where the Air Needs to Go
An air fryer works by moving hot air around food. If a dish fills the chamber, air has nowhere to travel, and cooking becomes uneven. Aim to leave a visible gap around the sides, and keep the top of the food well away from the heating element or fan.
Signs of poor airflow
- The top browns far faster than the bottom.
- Edges cook more than the centre.
- Steam collects and the surface looks pale or wet.
Signs of good airflow
- A visible margin around the dish.
- Food sitting well below the top of the chamber.
- Even colour across the surface after a similar cooking time.
The exact gap needed varies by model, so check the manual or listing for guidance. When in doubt, choose a smaller dish and cook in batches.
Understanding Heat Ratings and Material Labels
Not every dish is meant for high, fast, dry heat. Look for markings on the base or the packaging that say what the dish is designed for. Some are made for ovens only, some can also go in a microwave, and some are suitable for the grill. An air fryer is a compact, fan-assisted oven, so check that the dish is marked as suitable for oven use and for the temperatures you intend to use. If the label is missing or faded, do not guess.
| Material | General notes | What to check |
|---|---|---|
| Ceramic and stoneware | Holds heat well, can be heavy | Oven-safe marking, sudden temperature changes |
| Heat-resistant glass | Lets you watch browning | Maker’s guidance on temperature limits |
| Metal tins | Light and quick to heat | Fit, handles, and coating care |
| Silicone moulds | Flexible and easy to remove | Heat limit printed on the product |
| Foil trays | Disposable, light | Must not touch the element or block airflow |
When the guidance from the dish maker and the air fryer maker differ, follow the stricter one.
Height, Rise and Spill Planning
A dish may fit in width yet fail in height. Foods that rise, such as cakes, bubbling pasta bakes or egg dishes, need headroom. Fill the dish only partway, as the maker’s recipe or guidance suggests, so there is space for expansion.
Liquid mixtures need extra thought. A full dish will slop when you carry it, and the fan may blow light batter or topping around. Cover or shield delicate tops only if the instructions allow, and make sure any covering cannot lift into the heating element.
Place the dish on a flat tray or directly in the basket as your manual describes. Put the dish in with both hands where possible, and use oven gloves. Allow the dish to cool a little before moving it, and rest it on a heat-safe surface, never directly on a cold, wet counter.
Troubleshooting a Dish That Does Not Work Well
If a dish fits but results disappoint, a few adjustments may help.
Uneven cooking
Try a smaller portion, or turn the dish halfway through if the recipe allows. Make sure nothing blocks the vents.
Pale tops
Use a shallower dish, which lets more air reach the surface. Check the recipe for guidance on browning.
Burnt edges and raw centre
The dish may be too large or too thick. A narrower dish with lower sides can improve heat distribution.
Sticking
Lightly grease or line the dish where the recipe permits, and allow cooling before releasing food.
Strange sounds or smells
Stop, unplug, let everything cool and check that nothing is touching the element or fan. Read the manual and, if needed, contact the maker.
A Short Checklist and Glossary
- Trace the base, rim and handles on paper.
- Check for a visible gap on every side.
- Read the dish label for oven suitability.
- Check the air fryer manual for dish guidance.
- Fill partway to allow rising and bubbling.
- Use oven gloves and a heat-safe landing spot.
- Cool before washing, and follow the care label.
Short glossary
- Headroom: the empty space above the food inside the chamber.
- Rim: the upper edge of a dish, often its widest part.
- Element: the part that produces heat.
- Thermal shock: damage caused by a sudden change in temperature.
Worked Examples: Matching Dishes to Common Recipes
Examples help turn principles into practice. The cases below show the thinking, not exact sizes, so always measure your own equipment.
A small pasta bake for two
Choose a shallow, round or oval dish with low sides. The food should sit well below the rim to avoid spills, and the surface needs to be open to the moving air so the topping browns. If the dish nearly touches the chamber walls, switch to a smaller one.
Baked eggs or a small frittata
A small ramekin or a shallow dish works well, as long as it sits flat and the contents do not rise too close to the element. Fill only part way, and check the recipe for guidance on cooking time.
A small cake or loaf
Tall tins can catch the fan airflow unevenly. Pick a tin that leaves a clear gap and has enough headroom for rising. Line it as the recipe suggests so the cake can be lifted out easily.
Reheating leftovers in a dish
A heat-safe, shallow dish helps the food heat evenly. Spread the food out instead of piling it, and stir or turn it if the recipe suggests.
In each case, the key questions remain the same: does it fit, does air move around it, is it marked as suitable for oven heat and can you lift it safely?
Lifting, Moving and Cooling Safely
Handling is where many accidents happen. Hot dishes are heavy, slippery and hard to see into.
- Switch the appliance off and unplug it before reaching in for anything heavy, if the instructions suggest this.
- Wear well-fitting oven gloves, not damp cloths, which can transfer heat quickly.
- Use a lifting sling made of heat-resistant material if the dish is hard to grip, and follow its maker’s guidance.
- Keep the path to the landing spot clear before you lift.
- Set the hot dish on a heat-safe mat or board, not on a cold surface that could crack it.
- Let the dish cool before washing, and never plunge a hot dish into cold water.
Keep children and pets away from the work area. If you ever feel unsure about handling a dish, wait for it to cool or ask for help.
Alternatives When a Dish Does Not Fit
Sometimes the best answer is to change the plan. If your preferred dish is too large or the wrong material, consider other options.
- Divide the recipe into two smaller dishes and cook them one after the other.
- Use the conventional oven for the main bake and the air fryer for a finishing touch, if the recipe suits.
- Choose a dish designed for air fryers, with the size listed clearly in the product details.
- Cook the food directly in the basket on a suitable liner, if the manual allows.
- Adapt the recipe, using smaller portions or individual servings.
None of these requires special skills, only a willingness to adjust. The goal is a dish that cooks well, comes out easily and does not damage your appliance.

Products Worth a Look
As an Amazon Associate, Air Fryer Kitchen Supply earns from qualifying purchases. These picks come from our guide: 7 Best Air Fryers: Basket, Dual and Oven Styles (2026).
-
Ninja AF101, 4 Quart
-
COSORI TurboBlaze, 6 Quart
 Cosori TurboBlaze Air Fryer
-
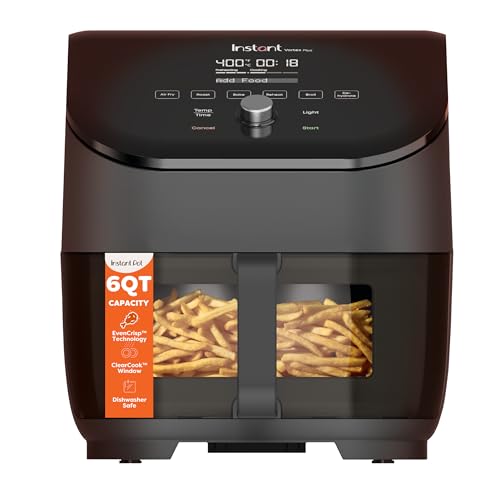
Instant Pot Vortex Plus ClearCook, 6 Quart
 Instant Pot Vortex Plus ClearCook 6 Qt 6-in-1 Air Fryer
Quick Answers
Can I use metal tins?
Often, yes, if the manual allows them and they fit with clearance. Check coatings and size, and avoid anything the maker excludes.
Should I cover the dish?
Only if the instructions permit it. Loose foil or lids can interfere with airflow or be lifted by the fan, so follow the appliance guidance.
Will cooking time be the same as in an oven?
Often it is shorter, but not always. Start with the recipe written for your appliance, and check the food as it cooks.
Materials and Heat Ratings: What to Look For
Size is only half of the question; the other half is what the dish is made of and how it handles heat. Metal pans, such as aluminum and steel cake tins, usually heat quickly and respond well to the fast circulation inside an air fryer. Silicone molds are flexible and easy to lift, but they can sag under heavy batter, so place them on a firm base or use a rigid support if the manual allows. Glass and ceramic hold heat evenly but are more sensitive to sudden temperature changes.
Look for a clear statement from the dish maker. Labels such as oven-safe, with a stated temperature limit, are a good start, but they do not guarantee suitability in an air fryer, where heat comes from close quarters and moving air. Check whether the manual of your appliance lists approved cookware types. If there is no information for a dish, treat it as unapproved rather than guessing.
Avoid decorative bowls, thin plastic, anything with glued parts, wooden handles or unlisted coatings. Enamel, paint and nonstick finishes vary in how they tolerate heat, so confirm the maker’s use instructions. Also check for chips, cracks or scratches, since damaged ceramic and glass are more likely to fail. When in doubt, choose a simple, plain metal tin made for baking, and keep the others for conventional ovens.
Shapes, Handles and Airflow Gaps
Round, square and loaf-shaped dishes behave differently inside a basket. A round dish tends to leave even gaps on all sides in a round basket, while rectangular pans can leave awkward corners in a round space and fit neatly in a rectangular one. Aim for a shape that mirrors the basket, which gives air room to flow around every side.
Handles and rims are the usual surprise. A dish whose body fits easily may be blocked by its handles, or may rest on the edge of the basket at an angle. Look at how the rim sits relative to the basket walls and whether the dish can rest flat. A tilted dish bakes unevenly and may spill. Flared rims can also catch on the drawer or door mechanism, so slide the dish in and out while the appliance is cool.
Gaps matter because the fan moves air around food. A dish that fills the basket almost completely can reduce circulation, which lengthens cooking and produces pale or uneven tops. On the other hand, a very small dish in a large basket may shift when you open the drawer. Where possible, use a trivet or stand only if the manual approves it, and keep the dish centered. Do not let any part of the dish or its contents touch the heating element or the fan housing.
Depth, Fill Levels and Rise
Depth decides whether your food will brush the heating element. Measure the dish height, then add room for what the recipe does as it cooks. Cakes and egg dishes puff, cheese melts and bubbles, and pasta bakes can foam at the edges. A tall dish filled to the brim is a recipe for spills and burnt tops. A good habit is to fill less than the dish capacity, leaving a visible margin at the top, and to choose a shallower pan for items that rise.
Think about weight too. A dish loaded with a dense bake can be heavy to lift in and out, and the basket or drawer may not be designed for much load. Check the manual for any weight guidance, and keep the load balanced. If you must use a deep dish, check the food partway and consider lowering the temperature to avoid the top browning before the middle sets.
For items that need little height, such as brownies, flatbreads and shallow gratins, a low pan gives more even results. For recipes with liquids like custard or baked eggs, small individual ramekins can be easier to fit and lift than one big dish, and they cook more quickly. Whatever you choose, test the arrangement with water or an empty dish first to see how it sits, then adjust.
Lifting, Handling and Spill Safety
The riskiest moment is not cooking but removal. A hot dish full of food or liquid is awkward in a confined basket, and a slip can burn you or damage the appliance. Plan the lift before you cook. Use well-fitting oven gloves, a pair of tongs made for the purpose, or a lifting sling if the manual allows one. Place a heat-safe trivet or board nearby so you can set the dish down immediately.
Switch off and open the drawer or door carefully, as steam and hot air can escape. Keep your face and forearms back from the opening. If the basket is deep, slide the dish out slowly, keeping it level. Do not try to lift by the rim alone if the dish is wide, and avoid carrying a brimming dish across the kitchen.
If something spills, switch off the appliance, let it cool, and clean before the next use. Burnt-on residue can smoke and affect later food. Never run the appliance with a spill sitting on the heating element, and do not wash electrical parts in water. Keep children and pets away while you remove hot dishes, and give the dish time to rest before cutting or serving, since contents can stay hot long after the surface seems cool.
When to Skip the Dish or Choose Another Method
Sometimes the better answer is not to force a dish into the basket. If the only candidate barely fits, has an uncertain material, or would sit almost flush with the sides, use another method. A conventional oven, a toaster oven or a stovetop may be more suitable for large casseroles or glass dishes of unknown origin.
Consider a purpose-made accessory instead. Baking pans designed for air fryers are made with typical basket sizes and airflow in mind, and some come with handles or lifting aids. Check that any accessory is compatible with your model, and avoid mixing sizes in ways the manual does not support. Silicone and metal accessories may be easier to handle than a mismatched household dish.
You can also adapt the recipe. Split a large recipe into two small portions, use disposable foil containers only if the manual approves them, or cook components separately and combine them at the end. A frozen or very cold dish should not go straight into a hot appliance, since thermal shock can crack some materials. Let it come toward room temperature first. Finally, if the dish ever shows damage after a cook, retire it from air fryer use rather than risk a break during the next one.
Common Questions
Can I put a glass dish in an air fryer?
Only if the dish maker and your appliance manual both allow it. Glass can crack with sudden temperature changes, so avoid moving it between the fridge and a hot unit.
Do I need to leave a gap around the dish?
Yes. Air needs room to circulate, and the manual usually states a clearance. A dish that fills the space can cook unevenly.
What size dish is typical?
It varies by model and basket shape. Measure your own basket and compare it with the dish, including handles, rather than relying on a general size.
Can I use a dish with a lid?
Only if the lid is approved for heat and does not block airflow or touch the element. Many cooks leave lids off unless the recipe requires them.
How do I know if a dish is too tall?
If the filled dish gets close to the heating element or the top of the basket, it is too tall. Remember that foods can rise during cooking.
Is a disposable foil tray acceptable?
Check your manual. Some allow foil in certain forms, but loose edges can lift into the fan. Keep it weighed down and clear of the element.
Related reading
6 Best Air Fryer Baking Pans: Cake, Brownie and Loaf (2026)
Reference and further practice
Philips Airfryer manufacturer manual: model-specific use and care
Going Deeper: What This Guide’s Shortlist Cannot Show You
The reviews and comparisons above give you the facts about each fitting a baking dish in an air fryer on the shortlist. What they cannot give you is your own context: your kitchen, your routine and the people you share both with. The sections that follow are about that context. They dig into the criteria that decide long-term satisfaction, walk through the situations a fitting a baking dish in an air fryer actually meets in a real home, compare the picks above from the angle of daily life rather than specification, and finish with the care habits and questions that owners raise once the first month has passed. Read them with your own measurements and habits in mind, and let them argue with the shortlist where they need to.
Choosing a Fitting a baking dish in an air fryer: The Criteria in Depth
Every fitting a baking dish in an air fryer looks competent on a product page. The differences that matter emerge over months, and they cluster around a handful of criteria that are easy to rush past while shopping. Work through these six slowly, in order, and score your shortlist against each one in writing. A simple written score, even a rough one, protects the decision from the two forces that ruin most household purchases: a persuasive photograph and a persuasive discount. Neither of those forces will be present on the ordinary Tuesday when the product has to perform.
The dish’s full outline including handles and rims
Start with the dish’s full outline including handles and rims. The cooking vessel’s widest points are rarely its body, so measure across handles, pouring lips and flared rims before judging the fit. In practice, this is where a fitting a baking dish in an air fryer either earns its place in your kitchen or becomes a quiet source of friction, because it shapes every single use rather than just the first impression. Before you commit, picture the most ordinary day you will spend with it, not the best day, and ask whether this point still works then. Write your answer down beside the other points on your shortlist, because a fitting a baking dish in an air fryer chosen on written evidence stays satisfying far longer than one chosen on a feeling in a shop or a photograph online.
The height of the dish plus the food’s rise
Next, look closely at the height of the dish plus the food’s rise. Batters climb, souffles puff and fatty foods bubble, so the clearance above the uncooked fill line is part of the dish’s real height. Shoppers often treat this as a minor detail, yet with a fitting a baking dish in an air fryer it tends to decide how the product feels after the novelty has worn off. Compare the options on your shortlist on this point alone, and be honest about your own habits while you do it: the right answer for a careful, patient household can be the wrong answer for a busy one. If a listing or a manual is vague about this point, treat the vagueness itself as information and favour the option that explains itself clearly.
The air gap around the dish once it sits in the basket
Give real weight to the air gap around the dish once it sits in the basket. Hot air needs a channel on every side, and a dish that scrapes in will cook unevenly however oven-safe it is. This is the sort of factor that rarely appears in a headline, yet it is the one owners mention when they describe whether they would buy the same fitting a baking dish in an air fryer again. Think about how it interacts with the rest of your kitchen: the space it sits in, the people who share it and the routine it joins. A choice that fits those surroundings will be used more, cared for better and replaced later, which is the quiet definition of good value in any category.
The material’s suitability for the temperature you plan
Do not skip the material’s suitability for the temperature you plan when you compare models. Glass, ceramic, metal and silicone each carry their own limits and handling rules, and the dish’s own markings or maker guidance decide, not habit. The temptation is to rank a shortlist by the features that are easiest to count, but a fitting a baking dish in an air fryer is judged in daily life by how its awkward points behave, and this is often one of them. If you can, test this point in person or find it described in the maker’s own documentation rather than in marketing copy. Where two options seem equal elsewhere, let this factor break the tie, and note the reason in your shortlist so the decision still makes sense to you months later.
A Fitting a baking dish in an air fryer in Real Life: Situations to Test Your Shortlist Against
Specifications describe a product; situations describe a life. The five scenes below are the ones a fitting a baking dish in an air fryer is most likely to meet, and each one reorders the priorities in the criteria above. Find the scene closest to your household and let it carry extra weight in your decision. If none of them resembles your life, that is valuable information too, because it means your deciding scene is unusual enough to deserve its own written list of demands before you spend anything.
A small cake or loaf in a metal tin
Picture a small cake or loaf in a metal tin. In that situation, where the tin’s outline, the batter’s rise and a reliable way to lift the tin out are the three checks that matter. The lesson is to judge a fitting a baking dish in an air fryer against this kind of ordinary, repeatable moment rather than against an idealised one, because it is the ordinary moments, repeated weekly, that decide whether the purchase was wise. Think through the small steps involved, where your hands are, what else is happening in the kitchen at that moment, and which feature quietly does the work. If the option you are considering handles this scene gracefully, it will handle most of what your household asks of it.
Eggs or a frittata in a ceramic dish
Consider eggs or a frittata in a ceramic dish. Here, where gentle, even heat and a dish that is not crowded against the basket walls give the cleanest set. What matters is not whether a fitting a baking dish in an air fryer can cope once, in favourable conditions, but whether it copes calmly every time this scene repeats, with different people and different levels of patience. Run the scene mentally from start to finish: setting up, using, finishing and putting things away. The option that makes the whole sequence feel unremarkable is usually the right one, because unremarkable, in a working kitchen, is another word for well designed.
Reheating a portion of a casserole
Think about reheating a portion of a casserole. For this household, where a shallow layer in a wide dish reheats faster and more evenly than a deep, narrow pot. Notice how the priorities reorder themselves in this scene: the headline feature that dominates a product page may matter very little here, while a modest detail carries the day. That reordering is exactly why reading a guide against your own life, rather than against a generic ideal buyer, produces better decisions. If your home matches this scene, weight the relevant points in the criteria above more heavily and let the rest matter less.
A crumble or baked fruit dessert
Imagine a crumble or baked fruit dessert. In this case, where bubbling juices demand headroom and a dish with enough rim to keep the basket clean. The practical move is to prepare for this scene before you buy: measure for it, list what it needs and check the shortlist against that list, because retrofitting a solution afterwards is always more expensive in money or patience than choosing correctly once. A fitting a baking dish in an air fryer that fits this scene without improvisation will also tend to fit your unplanned moments, which is the closest thing to future-proofing a household purchase can offer.
Weighing the Approaches Side by Side
The main sections of this guide set out the options and the reasoning behind them. This comparison gathers the threads into one place, so the trade-offs can be judged together rather than piecemeal. No approach wins on every point, and any source that claims otherwise is selling rather than advising. What follows weighs the approaches against the criteria that matter most in a real kitchen: fit with the space, fit with the routine, effort to maintain, and forgiveness when life gets busy and the ideal method slips for a week or two.
On the dish’s full outline including handles and rims, the honest position is this: the cooking vessel’s widest points are rarely its body, so measure across handles, pouring lips and flared rims before judging the fit. Judged against the alternatives, that makes this point a genuine deciding factor for households where it bites hardest, and a minor one where it does not, which is why this guide keeps returning to your own situation rather than declaring a universal winner.
On the height of the dish plus the food’s rise, the honest position is this: batters climb, souffles puff and fatty foods bubble, so the clearance above the uncooked fill line is part of the dish’s real height. Judged against the alternatives, that makes this point a genuine deciding factor for households where it bites hardest, and a minor one where it does not, which is why this guide keeps returning to your own situation rather than declaring a universal winner.
On the air gap around the dish once it sits in the basket, the honest position is this: hot air needs a channel on every side, and a dish that scrapes in will cook unevenly however oven-safe it is. Judged against the alternatives, that makes this point a genuine deciding factor for households where it bites hardest, and a minor one where it does not, which is why this guide keeps returning to your own situation rather than declaring a universal winner.
On the material’s suitability for the temperature you plan, the honest position is this: glass, ceramic, metal and silicone each carry their own limits and handling rules, and the dish’s own markings or maker guidance decide, not habit. Judged against the alternatives, that makes this point a genuine deciding factor for households where it bites hardest, and a minor one where it does not, which is why this guide keeps returning to your own situation rather than declaring a universal winner.
Day-to-Day Care, Cleaning and Storage in More Detail
Ownership is the longest part of a product’s story and the part shopping guides most often skip. A fitting a baking dish in an air fryer asks for a small, regular investment of attention, and the five habits below are the ones that repay it. None of them is difficult, and all of them are easier in the first month, when they are being learned, than in the second year, when their absence has already done its quiet work. Adapt the rhythm to your household, but keep the rhythm: regularity is the entire mechanism by which care works.
Make it a habit to keep a paper template of your basket’s floor with the dish’s outline drawn on it. This matters because future purchases and cupboard rummages can be checked in seconds without hauling the machine out. Small, regular attention of this kind is what separates a fitting a baking dish in an air fryer that serves for years from one that declines quietly and is replaced early. Tie the habit to something you already do in the kitchen, such as a weekly clean or a seasonal clear-out, so it happens without willpower. The first few times, follow the maker’s guidance exactly; once the routine is familiar it takes minutes, and those minutes are repaid every time the product works exactly as it should.
Add this step to your routine: wash and dry dishes fully before storing them with your air fryer accessories. The reason is simple: so the set you reach for is always the set that fits, with no surprises. Owners who build this check into their normal rhythm rarely meet the problem it prevents, while owners who wait for a symptom usually meet it at the least convenient moment. If you share the fitting a baking dish in an air fryer with others, make the routine visible, on a note or in a shared list, so the standard does not depend on one person’s memory. Consistency, far more than any special product or tool, is the whole secret of keeping household equipment in good order.
Do not overlook this: inspect glass and ceramic dishes for chips before each use. It is worth the small effort because a chipped dish under thermal stress is a failure waiting for its moment. Treat the first month with a new fitting a baking dish in an air fryer as the time to learn its particular version of this routine, since every model and material has its own preferences and its own early warning signs. The maker’s manual is the authority here, ahead of general advice including this guide, and where the two seem to differ, the manual wins. A routine grounded in the manual and repeated calmly will outlast any amount of enthusiastic but irregular deep cleaning.
Regularly, store a suitable lifter, tongs or mitts with the dishes. This is one of those tasks whose value only becomes obvious in its absence, because the removal plan is part of the dish’s fitness, and the tools should live together. Schedule it lightly and often rather than heavily and rarely, and keep whatever it needs within reach of the fitting a baking dish in an air fryer itself, since a tool stored in another room is a task postponed. While you do it, look at the whole item with fresh eyes: wear, looseness, marks and changes are easiest to catch during a familiar routine, and catching them early is what turns maintenance from a rescue into a rhythm.
Where People Commonly Go Wrong
The mistakes below are not careless ones. They are the reasonable-seeming shortcuts and assumptions that most owners make at least once, usually in the first season, and they are collected here so that your first season can skip the tuition fees. Each one follows the same pattern: a small decision, taken in a hurry or on an assumption, whose cost arrives later and disguised as the product’s fault. Recognising the pattern is most of the cure.
Testing the fit with the dish empty and forgetting the food
A common misstep is testing the fit with the dish empty and forgetting the food. The trouble is that fill, rise and bubbling all add height, and the batch that kisses the element is usually the one that was only checked empty. The fix costs nothing but attention: pause at the moment this mistake usually happens, which is normally when you are hurried or working from habit, and do the slower, correct thing instead. If others in the household share this fitting a baking dish in an air fryer, share the reasoning too, because a mistake understood is a mistake avoided, while a rule without a reason is a rule quietly dropped within the month.
Forcing a dish past a tight point in the basket
Watch out for forcing a dish past a tight point in the basket. People fall into it because it feels efficient or harmless at the time, but if it scrapes going in cold, it will be worse hot, heavier and full, so tight means no. Build the alternative into your routine so the right action is also the easy action: prepare what you need in advance, keep the relevant check on your written list, and let the small upfront effort protect you from the much larger downstream one. Experience in any kitchen is mostly a collection of these small protections, learned once and applied without drama.
Placing a cold glass dish straight into a fully hot basket
Another frequent error is placing a cold glass dish straight into a fully hot basket. It persists because the consequence rarely arrives immediately, so the habit survives its own feedback. Remember that sudden temperature change stresses glass and ceramic, so follow the dish maker’s guidance on warming and cooling. When you catch yourself about to do it, treat that moment as the product asking for the one thing it needs from you. A fitting a baking dish in an air fryer used with that level of attention will outlast and outperform a nominally better one used carelessly, which is worth remembering whenever an upgrade tempts you more than a habit change.
Choosing a dish that leaves no finger room and improvising removal with a towel corner
Do not fall into choosing a dish that leaves no finger room and improvising removal with a towel corner. The short-term saving is real but small, while that improvisation is how hot food ends up on the floor, so plan the lift before the cook, not during it. If the correct approach feels burdensome, that is useful information about fit: either the routine needs simplifying or the fitting a baking dish in an air fryer needs to be one that suits your real habits better. Honesty on that point, applied before the next purchase rather than after it, is what turns a string of almost-right products into a home full of right ones.
More Questions About a Fitting a baking dish in an air fryer, Answered
The main FAQ above covers the questions buyers ask before ordering. These are the questions owners ask afterwards, once the fitting a baking dish in an air fryer has met real life. The answers stay practical and, where a detail depends on your exact model, they point you to the manual or the maker, because that is where the authoritative version of the answer lives.
How much space should I leave around a dish?
A clear channel on all sides that you can see daylight through when the dish is centred. If the dish touches the basket walls in places, expect uneven cooking and a difficult removal. As a rule of thumb, start from the guidance in the main sections above, test the answer against your own kitchen once, and adjust in small steps rather than changing your whole approach at once.
Can I use my regular oven dishes?
Only those that fit with clearance and whose material is rated by their maker for the temperature and style of heating. Oven-safe is necessary but not sufficient; size and handling complete the check. If your situation differs from the one described, the principle still holds even where the detail changes: measure first, follow the maker’s guidance where it exists, and let one observed result at a time refine what you do next.
What if a dish fits the basket but not under the element?
Then it does not fit. Height is as decisive as width, and food rising into the element’s zone will scorch on top while staying raw below. Most households find this settles into common sense after the first few uses. The important part is noticing the pattern early, while the habit is still easy to change, rather than after a season of small frustrations.
Is metal better than ceramic in an air fryer?
Metal heats and cools quickly and is light to lift; ceramic holds heat and suits gentler bakes. Choose by the recipe and by which dish passes the fit and handling checks more comfortably. When in doubt, choose the option that is easier to undo. With a fitting a baking dish in an air fryer, as with most household equipment, reversible experiments teach you plenty and cost you little, while irreversible ones demand certainty you rarely have at the start.