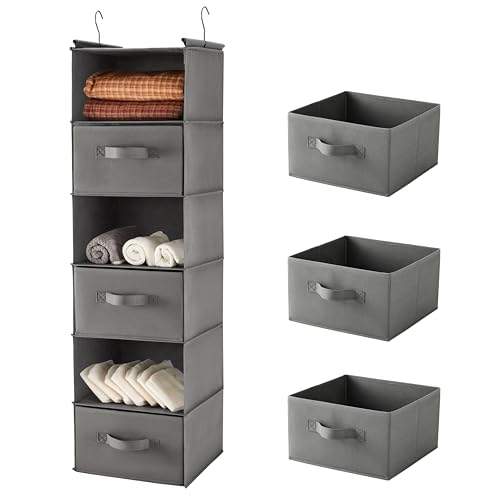
A good laundry storage setup keeps detergent and related items within easy reach of the machine, dry, labeled and out of the way of children and pets. Measure the space, decide what you store, then choose containers and shelving to match. The steps below keep it practical.
List What You Keep
Begin with an inventory. Lay everything out on the counter and group it by use.
- Detergent, in liquid, powder or pod form.
- Stain treatments and softener or boosters.
- Dryer sheets or wool balls.
- Small tools such as a lint brush or a measuring scoop.
Note the sizes of the bottles and boxes, because they decide shelf depth and height.
In this guide
Measure the Space
- Measure the width, depth and height of the wall, cabinet or shelf you plan to use.
- Check the space above the washer and dryer, including clearance for lids and doors that open upward.
- Look for pipes, vents and outlets that you must keep clear.
- Leave room for your hand to reach in without knocking things over.
Storage Options Compared
| Option | Good for | Consider |
|---|---|---|
| Wall shelf | Small rooms with free wall space | Fix to the wall as the maker directs |
| Closed cabinet | Households with children or pets | Add a latch if suitable |
| Rolling cart | Narrow gaps beside the machine | Needs a flat floor |
| Decanter containers | Neat look | Label them clearly, and keep the original pack information |
| Over-the-door caddy | Tight closets | Check weight limits |
Sensible Habits for Cleaning Products
Keep cleaning products in their original packaging when possible, so instructions and warnings stay with them. If you decant a product, label the new container clearly and keep the details of the original. Store everything out of reach of children and pets, away from food, and in a dry spot. Never mix different products, and follow the maker’s directions for use and storage.
Keep the layout practical day to day. Place the products you use most at chest height, with rarely used items higher or lower. Leave a small shelf or ledge for a scoop, a measuring cap or a stain stick, so nothing ends up on top of the machine. Wipe the shelf every month, since drips and powder dust build up quickly. If the room is shared or small, a simple label on each container keeps everyone using the right product.
Check the space once a season. Remove empty containers, check lids, and wipe the shelves. If a product has changed its packaging, make sure the instructions are still visible. A tidy setup saves time and prevents spills.
A Step-by-Step Planning Walkthrough
This sequence turns a cluttered shelf into a plan.
- Empty the current storage spot completely. Throw away empty packs and set aside anything you no longer use, following local guidance for disposal of household products.
- Wipe the shelf or cabinet and let it dry.
- Group items by task: washing, stain care, drying and tools. Keep each group together.
- Decide the height for each group. Daily items go at easy reach, while occasional ones can sit higher or lower.
- Choose containers. If you keep products in their original packs, shelves with a lip may be enough. If you decant, choose containers with tight lids and wide mouths, and check what the product maker says about transferring.
- Label every container with the product name and any key directions, and keep the original details in a safe place nearby.
- Decide who can reach what. Place anything that must stay away from children in a closed cabinet, up high, or behind a latch the maker or a licensed professional can advise on.
Common Scenarios
A laundry closet with no shelf
An over-the-door caddy or a slim wall shelf creates room. Check weight limits and follow the maker’s fitting instructions.
A flat with a kitchen-based washer
Products near food need extra care. Use a closed cabinet or lidded bin that keeps them separate and dry.
A busy household with children
A closed cabinet with a latch, placed high, is more appropriate than open shelves. Keep the original packs for their instructions.
A shared building laundry area
A lidded caddy that you carry to and from your own space keeps products tidy and prevents mix-ups with neighbours.
Mistakes to Avoid
- Decanting without labels. Unlabelled containers lead to mix-ups, so name every one.
- Storing products where they can get damp. Powders clump and lids rust, so choose a dry spot.
- Leaving products within a child’s reach. Closed storage at a safe height is the usual advice, so follow the packaging.
- Stacking too high. Tall piles tip and spill, and the bottom containers get crushed.
- Mixing products. Different cleaning products can react, so keep them apart and follow the maker’s warnings.
Care and Upkeep Over Time
Wipe the shelves once a month and sweep powder dust from corners. Check lids and caps for cracks and replace any that no longer close. Look for sticky rings where bottles sit, and clean them before they harden. Rotate older products to the front so they are used first. If you decant, wash and dry containers fully before refilling, and never top up a container with a different product. Check the packaging for storage advice, such as temperature ranges, and follow it.
Quick Troubleshooting
| Symptom | Likely cause | What to try |
|---|---|---|
| Powder has clumped | Humidity or open lid | Move to a drier spot and close lids tightly |
| Sticky shelf | Drips from bottles | Wipe up and add a tray or liner |
| Container leaks | Cracked lid or seal | Replace the lid or the container |
| Labels peel | Damp or low-quality adhesive | Use a label made for damp use and keep it dry |
| Shelf sags | Overloaded or weak fixing | Reduce the weight and check the fixings with the maker’s guide |
A Short Glossary
- Decanting: moving a product from its original pack into another container.
- Caddy: a small carrier or holder that groups items together.
- Latch: a catch that keeps a cabinet door closed.
- Pod: a pre-measured detergent unit sold in a closed tub.
- Clump: when powder sticks together because of damp.
- Wall fixing: the screw, plug or bracket that holds a shelf to the wall.
Most of these ideas come down to one habit: keep information with the product. If you can read the name, the directions and the warnings on every container in your setup, the system is working as it should.
Choosing Containers and Materials
If you decide to decant or add bins, the container itself deserves thought. The key qualities are a tight seal, a wide mouth for scooping or pouring, and a material that does not react with the product. Check the container listing for what it is made of and whether it is intended for household cleaning products, rather than food only.
Clear containers let you see how much is left, which helps with restocking. Opaque ones hide clutter and may protect contents from light. Either can work, as long as the label is easy to read. A container with a built-in spout or a pump can reduce drips, but think about whether it suits thick liquids or fine powders, because a narrow spout can clog.
Shape matters for shelves. Square or rectangular containers use space better than round ones, and containers with flat bases stack more safely. If you plan to stack, check that the lids are strong enough to take weight and that the design is meant for stacking.
- Seal: a gasket or snug lid keeps out damp and dust.
- Opening: wide enough to scoop, narrow enough to pour without spills.
- Handle: useful for larger containers that you lift often.
- Cleanability: smooth interiors without crevices are easier to wash.
Remember that the original pack often carries directions and warnings. If you transfer a product, keep that information close by, for example on a card stuck inside a cabinet door.
Planning for Children, Pets and Shared Spaces
Safety shapes the whole layout. Cleaning products can be harmful if swallowed or if they touch skin and eyes, and brightly colored packs, pods or bottles can look appealing to a child or pet. Plan storage so that these items are out of sight and out of reach, not just on a high shelf that a determined climber could reach.
A closed cabinet with a latch suited to the door is a common choice. Look for latches that are easy for adults to use with one hand but hard for small fingers. Follow the latch maker’s fitting instructions, and if you are unsure about drilling into a cabinet or wall, ask a licensed professional.
Think about guests, babysitters and visiting relatives. Anyone unfamiliar with your system may open the wrong door. A simple rule helps: all cleaning products live in one place, and nothing else does. That avoids the risk of a product being placed beside food.
- Keep products away from food, drinks and medicines.
- Put the household emergency contact information somewhere visible, as advised by local health services.
- Return products to the cabinet immediately after use instead of leaving them on top of the machine.
- Close lids fully every time, and wipe drips so the outside of the bottle is not slippery.
If a spill or accidental contact occurs, follow the instructions on the pack and contact local poison advice or medical services as needed.
Shelf Height, Depth and Layout Details
Once you know what you store, translate it into shelf dimensions. Start with the tallest bottle and add clearance so you can lift it out without tilting it against the shelf above. Measure the widest box and allow a little room on each side. Shelves that are too deep hide items at the back, while shelves that are too shallow let bottles hang over the edge.
Zones help. Place the daily-use detergent and softener at the easiest height, put stain treatments next to them, and reserve higher or lower spots for backup stock. Keep heavy refills low to avoid lifting weight overhead, where a slip could cause a spill or injury.
A lip or rail along the front edge of a shelf stops bottles from sliding off, and a liner or tray beneath liquids catches drips. If you use baskets, choose ones with solid sides and bases so powders do not leak through.
- Eye level: the items you use every wash.
- Lower shelves: heavy refill packs, if there is no child access issue.
- Upper shelves: light, occasional items.
- Door or side space: scoops, cloths and small tools.
Sketch the plan on paper before buying anything. A quick drawing with measurements shows whether a unit will fit and whether the doors can open fully without hitting the machine.
Budget Tiers Described Simply
You do not need an elaborate system for a tidy laundry area. Think in tiers and match them to your space and household rather than chasing the most complete option.
Basic tier: use what you already have. A tray or box that keeps products together, a few labels and a clear spot on an existing shelf can solve most problems. This suits renters and small spaces, and it costs little.
Mid tier: add a purpose-made shelf, a closed cabinet or a set of matching containers. This tier suits households that want a neater look and need better safety, especially where children or pets live in the home. Check the weight rating of shelves and the fixing advice in the manual.
Higher tier: fitted cabinetry or a custom unit built to the room. This can make the best use of awkward gaps, but it takes planning and may need a professional for fitting and any work near pipes and wiring.
- Spend first on safety and dryness, such as a latch or a closed cabinet.
- Spend second on fit, so everything is easy to reach.
- Spend last on looks, such as matching containers.
If you rent, check your agreement before drilling into walls. Freestanding units and over-the-door options often leave no marks.
Signs Your Setup Needs a Reset
A system that worked last year may no longer fit. Watch for small clues that it is time to reorganize. If you often cannot find a product, if items are piled on top of the machine, or if you have bought duplicates because you forgot what you had, the layout is not working.
Physical signs matter too. Rust rings on a shelf, warped boards, sagging brackets, cracked containers or a lingering damp smell point to moisture or overload. Powder dust drifting into corners suggests lids are not closing properly. Sticky patches show where drips have been ignored.
Changes in your household are another trigger. A new baby, a pet or a different washing routine may call for closed storage, a new location or fewer products. If you switch to a different product type, such as moving from liquid to pods, the old containers may no longer suit it.
- Empty everything out and clean the space.
- Discard products that are expired, damaged or unlabeled, following local disposal guidance.
- Re-measure and re-plan, instead of putting everything back where it was.
- Replace worn containers, lids and labels.
A seasonal check, as described earlier, keeps problems small and prevents a full overhaul.


Ready to Buy? Start Here
If this guide helped you decide what to look for, these products are a place to start.


As an Amazon Associate we earn from qualifying purchases. Prices and availability are shown on Amazon.
Matching Containers to the Forms of Detergent You Use
Laundry products come as liquids, powders, pods and sheets, and each behaves differently once it leaves the original packaging. The container you pick should suit the form, the amount you buy at a time and the shelf you plan to use. Decanting into tidy jars looks pleasing, but only do it when the container is clean, dry and clearly labeled.
- Liquids work well in containers with a pour spout or a pump, and a wide mouth makes refilling easier.
- Powders suit an airtight canister with a scoop, kept away from damp air so they do not clump.
- Pods and sheets are best kept in their original sealed package or a closed container that matches the maker’s guidance.
- Additives such as softeners and stain removers deserve their own labeled spots.
Keep laundry products out of reach of children and pets, ideally in a closed cabinet or a high shelf with a latch. Never mix different products in one container, and keep the original label or the maker’s instructions where you can read them.
Shelf, Cabinet and Wall Options Compared
Where the supplies live decides how easy they are to grab and how well the space copes with spills.
| Setup | Strength | Limit |
|---|---|---|
| Open shelf above the machine | Everything is in sight and within reach | Dust, humidity and curious hands |
| Closed cabinet | Hides clutter and keeps products shut away | Needs a tray in case of leaks |
| Wall-mounted rack or caddy | Frees floor and counter space | Must be fixed securely to carry the weight |
| Rolling cart between machines | Uses a narrow gap well | Check that it fits the width and rolls smoothly |
Spill Control and Label Habits
Line shelves with a wipeable mat or a shallow tray, so a small drip does not reach the finish below. Wipe the neck of every bottle after pouring. Write the product name, and the date you filled a decanted jar, on a label. Keep a small cloth nearby and clean the shelf every few weeks.
Read the maker’s storage notes on temperature and moisture, and avoid storing products near a heat source or a damp wall. If a container cracks or a lid stops sealing, replace it promptly.
Refill Routine and Bulk Buying Limits
Buying large jugs saves trips, but only if you have a sensible place to keep them. Before you stock up, check the shelf height and weight limits, and think about how you will lift a heavy jug to pour. A small pump dispenser on the counter and a large refill tucked in a lower cabinet is a practical pairing. Date new bottles, use older ones first and read the maker label for any shelf-life note.
Going Deeper: Judging the Details That Decide Daily Success
The main guide above covers the essentials of choosing a laundry detergent storage setup. What follows goes further into the judgements that separate a choice that merely works on the first day from one that still works, comfortably and safely, a year later. Most disappointments in this area are not caused by buying or doing something dramatically wrong; they come from one small detail — a measurement guessed instead of taken, a material chosen for looks against the room it must live in, a routine that suited the first week but not real life — quietly compounding until the whole thing feels like a mistake. Working through the details below, in the order your own home presents them, is how that compounding gets stopped before it starts.
Safety sets the layout before convenience does: detergents, pods and treatments belong out of children’s and pets’ reach, in original labelled containers, whatever system you choose.
Pods and liquids have opposite enemies — pods hate moisture and dissolve into a clump, liquids hate tipping and dripping — so storage should be designed around the format you actually use.
Decanting looks tidy and causes most laundry storage accidents and mix-ups; if you decant anything, label it fully and keep the original packaging until it is used up.
Hold those points against your own situation one at a time, and be suspicious of any general advice — including advice in guides like this one — that ignores the specific room, household or plant in front of you. The right answer for choosing a laundry detergent storage setup is always the answer that fits the measurements you took, the light and water and traffic you actually have, and the people who will live with the result every day. Where two good options remain, choose the one that is easier to clean, easier to adjust and easier to undo, because real homes change and forgiving choices change with them.
Planning Properly Before You Begin
Plan a laundry storage setup around the wash cycle itself: where products are grabbed, where drips land, where wet hands open containers, and where everything goes back one-handed while the machine is being loaded. Walk the routine through once with empty hands before buying or building anything, and notice the reaches, bends and stretches it demands. Keep the system small enough to clean properly — a laundry shelf that cannot be wiped in two minutes will not be wiped at all — and leave room to grow by one product, not by ten.
Make a short written list before you start: what you need, what you already own that could do the job, and what would make you stop and rethink. Households waste the most effort not on the main task but on mid-task discoveries — the missing fixing, the unmeasured corner, the product that turns out to be the wrong format — each of which a ten-minute planning pass would have caught. Decide, too, what ‘finished’ looks like for this job, in one sentence you could check at the end. A clear finish line stops both under-doing, where the last ten percent that matters most gets skipped, and over-doing, where a simple improvement swells into a weekend project that never quite ends.
Real-Life Situations, Worked Through
General rules bend in real homes, so here are the situations that come up most often, and how the principles in this guide apply to each of them. Find the one closest to your household and start there; the others are worth reading anyway, because most homes drift between situations as seasons, guests and family life change.
A small utility cupboard
Go vertical with a shelf or riser, keep the everyday product at front, and store bulk refills elsewhere so the working cupboard never becomes a warehouse.
A family laundry with children
Height and latches lead every decision: products up high or in a latched cupboard, pods in their original child-resistant packaging, and a strict nothing-on-the-machine-top rule if small hands can climb.
A shared or rental laundry space
A lidded caddy or tray that contains your products, travels with you and contains drips protects both your supplies and the shared space.
Storing bulk buys
Keep bulk stock sealed, dry and rotated — oldest in front — in a second location, and only the working container in the laundry area itself.
A Practical Routine for Care, Cleaning and Keeping Things Working
Wipe bottles and the shelf monthly; detergent drips are slippery, attract dust and quietly damage some surfaces.
Check lids, seals and pod tubs for moisture after every few uses, and discard any product that has clumped, leaked or lost its label.
Keep a small cloth or tray under liquids permanently, so the inevitable drip lands somewhere designed for it.
A laundry area stays safe and pleasant on a short, fixed rhythm: wipe bottles and the shelf as you put things back, check seals and lids whenever a container feels sticky or gritty, and do one proper clean-out each season where everything comes off the shelf, the surface is washed and dried, and anything unlabelled, leaking or long unused is dealt with properly. Keep products in their original containers to the end of their lives, and let the routine — not a scare — be what keeps the area safe for children, pets and visitors.
Comparing the Options in This Guide Side by Side
When you compare the options already discussed in this guide, resist ranking them by a single feature. Instead, score each one honestly against the same short list: does it fit the space you measured, does it suit the way your household actually behaves, can you clean and maintain it with the time you really have, and does it still make sense if your routine changes — a new pet, a growing child, a move, a busier season? An option that scores steadily across all four almost always beats one that is brilliant on a single point and awkward on the rest, because daily life tests the weak points, not the strong ones.
Use the descriptions in the guide above as your evidence, and be careful with outside claims that cannot be checked. Where the guide notes a material, a size range or a design feature, weigh that fact; where a claim is vague — ‘premium’, ‘luxury’, ‘heavy duty’ without anything behind it — treat it as decoration, not information. If you are choosing between two close options, imagine the worst ordinary day each one will face: the wettest, busiest, most tired version of its job. The option you would still choose on that day is usually the right one, and the exercise takes less than a minute.
Step by Step: From First Check to Final Tidy
First, observe before touching anything: look at the space, the existing setup and the way it is currently used, and note the one thing that causes the most daily friction. Second, measure and record the numbers that matter, in writing, rather than trusting your eye. Third, prepare everything the job needs in one place, so the work flows in one pass. Fourth, do the main task slowly enough to notice problems while they are still small and correctable. Fifth, test the result in real conditions — real light, real traffic, real use — before you put tools away or throw packaging out. Sixth, tidy completely, including the unglamorous parts: wiping surfaces, returning borrowed tools, and noting anything you learned that the next person, or future you, will need to know.
That sequence sounds obvious, and it is — but most failed attempts skip exactly one step, usually the first or the fifth. Skipping observation means solving the wrong problem beautifully; skipping the real-conditions test means discovering the flaw at the least convenient moment, when the packaging is gone and the receipt is lost. If time is short, shorten the main task rather than the checks around it: a smaller job properly tested beats a larger one that has to be redone, every time.
Mistakes That Quietly Undo Good Work
Decanting pods into a pretty jar on the counter — attractive to children, unlabelled, and exposed to the moisture pods hate most.
Storing products on top of a vibrating machine, from which they walk themselves off the edge over a season of cycles.
Mixing cleaning chemicals into the same unlabelled shelf zone as laundry products, inviting a dangerous grab in a hurry.
Keeping everything ever bought in the working area until finding the everyday detergent becomes an excavation.
Notice what these mistakes have in common: none of them feels like a mistake at the moment it is made. Each one is a shortcut, an assumption or a moment of optimism that saves minutes now and costs hours later. The defence is not perfectionism — it is the habit of pausing at the few moments where a decision cannot easily be undone, checking the measurement, the label or the fit one more time, and only then going ahead. Build that pause into the job and most of the classic mistakes simply never happen.
Safety, Comfort and the Long Term
Safety in everyday home and garden decisions is rarely dramatic; it is the accumulation of small, sensible habits. Keep walkways and routes clear, respect makers’ guidance on fixings, loads, heat, water and cleaning products, and treat any instruction you do not understand as a reason to pause and check rather than to improvise. Comfort deserves the same seriousness: a setup that is slightly awkward — a reach that is slightly too far, a surface slightly too high, a routine slightly too fussy — will be encountered hundreds of times, and small frictions multiplied by hundreds are what make a home feel tiring. Adjust early, while adjusting is cheap.
Think, finally, about the long term and the wider household. Choose things that can be cleaned, repaired, adjusted or passed on rather than replaced whole; keep the paperwork and spare parts that make that possible; and involve the people who share the space in the decision, because a choice everyone understands is a choice everyone maintains. The most sustainable and economical option is almost always the one that is still in use, working properly, in five years’ time — and that outcome is decided far more by fit, care and honest routines than by anything claimed on a box.
When to Adjust, Repair or Replace
Not every problem needs a new purchase or a fresh start. Adjust first: many setups improve completely with a change of position, a tightened fixing, a thorough clean or a small accessory used as its maker intended. Repair second, where a maker’s parts, a simple fix or a professional’s help can restore full function safely. Replace only when the item can no longer do its core job, when it has become unsafe, or when you have adjusted honestly twice and the same friction remains — that pattern means the mismatch is real, not a settling-in problem. Keeping that order saves money, saves waste, and teaches you what actually went wrong, which makes the next choice better.
Keeping Perspective: A Few Final Checks Before You Call It Done
Keep a simple record as you go: a note on your phone with the date, what you chose or changed, and anything you would do differently. It sounds like admin, but it is what turns one season of experience into next season’s good judgement, and it is invaluable when you come back to a job after months away and cannot remember why something was done the way it was.
Involve a second pair of eyes at the planning stage if you can. Someone who does not share your assumptions will spot the blocked route, the awkward reach or the impractical material in minutes, precisely because they are not attached to the idea. You do not have to take every suggestion — you only have to hear the one that saves you from the obvious mistake.
Think about guests, helpers and future occupants as well as yourself. A setup that only works for the person who designed it fails the first time a partner, a grandparent, a cleaner or a house-sitter has to use it without instructions. If a stranger could walk in and use the result sensibly within a minute, the design is honest.
Seasonal change is the test most home decisions quietly fail. Light moves, temperatures swing, rooms get busier and gardens get wetter, and a choice made in one season meets all the others in turn. Before you finalise anything, ask how it behaves in the opposite season from the one you are in — the answer often changes a detail or two, cheaply and in time.
Be honest about maintenance appetite, your own included. The best system is not the most thorough one you can describe; it is the most thorough one you will still be doing in six months, on a tired weekday, without resenting it. Design the routine down to that level and it will actually happen, which beats an abandoned perfect routine every time.
Small trials beat big commitments wherever a trial is possible. Tape the outline, borrow the equivalent, try the routine for a week with what you already own — real use reveals in days what imagination argues about for weeks. Treat the trial as data, not delay: you are buying certainty at the cheapest price it is ever sold.
Leave margin in every direction you can: a little spare space, a little spare capacity, a little spare time in the schedule. Homes are not static, families grow and shrink, hobbies arrive, and the choices that age best are the ones that were never stretched to their absolute limit on day one. Margin is not waste; it is what the future uses.
When something does go wrong, diagnose before you replace. Work backwards from the symptom to the cause — fit, material, routine, environment — and fix the cause you actually find. A surprising share of replacements simply repeat the original problem in a newer box, because the cause was never in the product at all.
Set a review date the day you finish, roughly a month out, and keep it. On that date, walk through the result with fresh eyes and a short list: what works exactly as hoped, what is merely tolerable, and what has already been quietly worked around. Tolerable and worked-around are your adjustment list, and catching them at a month — while receipts, packaging and motivation are still around — is far cheaper than catching them at a year.
Accessibility is not a special feature for other households; it is good design for everyone, including you on a tired, ill or injured day. Check reaches, grips, weights and routes as if one hand were occupied and your attention were elsewhere, because in real life one hand usually is and attention usually is too. Small choices — a lever instead of a knob, a lighter item instead of a heavier one, a route without a step — compound into a home that stays usable for decades.
If children or pets share the space, do one dedicated safety pass after everything else is finished, at their eye level, not yours. Get down low, look for what can be pulled, climbed, chewed, trapped or toppled, and check the result against the makers’ guidance for the items involved. Repeat the pass whenever the child grows, the pet changes, or the arrangement moves — safety checks expire faster than any other kind.
Keep the paperwork together in one labelled place: receipts, care labels you have cut off, makers’ instructions and a note of any fixings or parts used. It feels like clutter until the day something needs cleaning correctly, repairing, returning or reordering, at which point that small folder becomes the most useful object in the house. Photographing the labels with your phone is a perfectly good modern equivalent.
Know when a job deserves a professional. Anything involving structural fixings into unfamiliar walls, electrical work beyond changing a bulb or battery, gas, or a problem that keeps returning despite honest adjustment is a job to hand over. A professional visit for the risky ten percent protects the ninety percent you did yourself, and most tradespeople would far rather advise early than repair late.
Renters and owners should weight the same decision differently. If you rent, favour choices that are reversible, portable and kind to surfaces, and keep the landlord’s rules in the plan from the start. If you own, you can invest in permanence — but permanence raises the stakes on measuring and testing first, because undoing a fixed mistake costs real money and real weekends.
Climate and aspect quietly shape every home decision. A room, garden or bathroom that faces the weather behaves differently from a sheltered one, and local conditions — hard water, coastal air, long damp winters, fierce summer sun — wear materials in ways national advice cannot fully predict. Ask neighbours what lasts on your street; that unglamorous local knowledge is often worth more than any specification sheet.
Finally, protect the result from slow drift. Most good setups do not fail in a moment; they erode, one small exception at a time — an item stored in the wrong place just for tonight, a surface borrowed just for this week. A five-minute weekly reset, returning things to where the plan says they live, is the cheapest maintenance there is, and it is what keeps a good decision looking deliberate instead of accidental.
Talk through the plan with the people who will live with it before the work is finished, not after. A partner, teenager or housemate who understands why something is placed, stored or done a certain way will maintain it without being asked; someone presented with a finished mystery will quietly route around it. Five minutes of explanation is the difference between a household system and one person’s fragile preference.
FAQ
Do pods need special storage?
Keep them in their closed container, dry and well out of reach of children, as the maker advises.
Can I keep detergent in a damp room?
Powders can clump in humidity, so choose a dry shelf and keep lids tightly closed.
Is it better to decant or keep the original pack?
The original pack keeps instructions and warnings with the product. Decanting can look neater, but label it clearly and keep the original details nearby.
Where should I keep the scoop?
Store it in a clean, dry spot close to the container, such as a small hook or a lidded tray, so it does not collect dust.
How do I fit a shelf above the machine?
Follow the shelf maker’s instructions and use wall fixings that suit your wall. If you are unsure about the wall type or any pipes and cables behind it, ask a licensed professional.
Should I store detergent above or beside the washer?
Either can work if the space is dry and you can reach it comfortably. Above the machine suits tight rooms, but allow room for lids and doors to open, and avoid placing heavy items high. Beside the machine suits carts or tall slim units.
Can I keep laundry products in the garage?
Some people do, but garages can be damp and subject to big temperature swings. Check the product pack for storage advice and choose a dry, closed spot that is out of reach of children and pets.
How do I label containers so labels last?
Use labels made for damp conditions and press them on a clean, dry surface. A label maker or a permanent marker on a suitable label works well. Check the label every so often, since steam and drips can loosen adhesive.
Is it safe to put different products on the same shelf?
Yes, as long as the lids are closed and the products cannot spill into each other. Keep them apart in separate trays or bins if you want a margin of safety, and never mix them together.
What should I do with old or leftover products?
Follow local guidance for household product disposal and the directions on the pack. Do not pour unknown products together or into other containers. Your local authority can explain what facilities are available.
How can I keep powder from clumping?
Store it in a dry place with a tightly closed lid and avoid scooping with a wet scoop. If the room is steamy, a closed cabinet or an airtight container can help, but check the pack for the maker's advice.
Do I need a separate spot for dryer sheets?
It helps to keep them in their own container or box so they do not leave residue on other items. Keep them closed and out of reach of children and pets, as the pack directs.
Should I decant detergent into nicer containers?
The safest answer is no for pods and powders, and only with full labelling for liquids. Original packaging carries the safety information, child-resistant closures and dosing guidance that a plain jar throws away.
Where is the safest place to store pods?
In their original container, closed, dry, and up high or in a latched cupboard out of children’s sight and reach. Treat them with the same respect as medicines, because to a small child they look like sweets.
How do I stop powder clumping and pods sticking?
Keep containers sealed, dry and away from the steam path of the machine and any sink splashes. A scoop stored outside the powder box, dry hands for pods, and not overfilling the storage shelf all help.
Can detergent expire or lose strength?
Products can lose effectiveness over time, especially once opened or stored in damp heat. Rotate stock, buy sizes you will use, and follow any dates or guidance on the packaging rather than hoarding bulk indefinitely.
What should I do about drips and sticky shelves?
Line the shelf or use a washable tray, wipe bottles before putting them back, and clean the shelf monthly. Sticky build-up is not just ugly — it hides labels and makes containers slide.
How much storage do I really need?
One working container of each product you genuinely use, plus sealed backup stock stored elsewhere, is enough for most homes. If the shelf holds products you have not touched in months, the system is storing clutter, not detergent.
The Short Version
List what you store, measure the space and choose a closed or shelved setup that suits your household. Label items, keep originals handy and store everything out of reach. Check the setup each season.