A small leak around a hot tub fitting, a cracked trim piece or a loose cover bracket can often be fixed with the right sealant. The catch is that hot tub water is warm, chemically treated and constantly wet, and not every tube in the hardware aisle is meant for that. Always match the product to the material you are repairing and read the maker’s guidance on water contact and cure time.
The six products below cover silicone, marine-grade polyurethane, epoxy and a liquid rubber coating. They are real, widely sold items, but we have not used them ourselves, so confirm the size, color and intended use on the current listing before buying. For leaks inside the shell or plumbing, a dealer may be the safer call.
As an Amazon Associate we earn from qualifying purchases. Links below are affiliate links, and they do not change the product information we give.
What to Look For
| Feature | Why it matters |
|---|---|
| Water contact | Look for products made for full or constant submersion |
| Chemical resistance | Chlorine and bromine can break down weaker sealants |
| Flexibility | Shells and fittings move as they heat and cool |
| Cure time | The tub must stay drained until the product has fully set |
In this guide
Specs at a Glance
| Product | Type | Best for | Notes |
|---|---|---|---|
| Gorilla 100% Silicone Sealant | Silicone | Trim and gaps | Waterproof; check cure time |
| GE Silicone 2 Kitchen and Bath | Silicone | Wet-area seams | Mold-resistant formula |
| 3M Marine Adhesive Sealant 5200 | Polyurethane | Strong bonds | Permanent; hard to remove |
| Loctite Marine Epoxy | Two-part epoxy | Cracks and rigid repairs | Mix before use |
| Flex Seal Liquid | Liquid rubber | Coating small leaks | Not for submerged surfaces, check label |
| Boat Life LifeCalk | Polysulfide | Deck-style seams | Marine product; check the listing |
The 6 Best Hot Tub Sealants

Top pickBest for the best silicone for hot tubs on a budget
1. Gorilla 100% Silicone Sealant
A widely sold silicone caulk marketed as waterproof and flexible. It is a general-purpose choice for sealing trim and gaps around fittings, but check that the label allows continuous water contact.
Suits: the best silicone for hot tubs on a budget. Strengths: easy to find and apply. Weaknesses: not built for structural repairs. Skip it if you need a hard bond.

Best for trim and edge seams
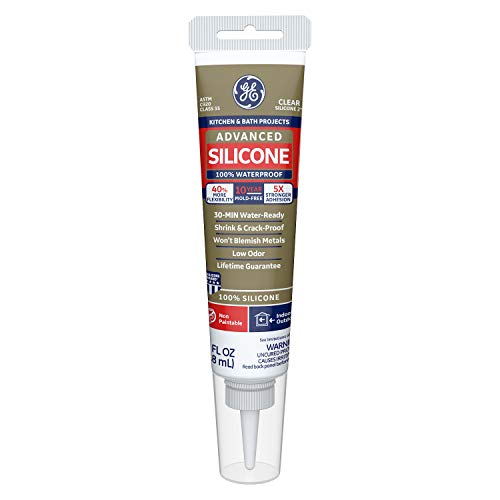
2. GE Silicone 2 Kitchen and Bath Sealant
A well-known silicone sealant sold for wet areas, with a formula described as mold-resistant. It suits seams and edges that stay damp but are not under constant pressure.
Suits: trim and edge seams. Strengths: a long-running brand. Weaknesses: built for bathrooms, not heavy chemical exposure. Skip it if the seam is below the waterline.


Best for the best glue for hot tubs when a bond must last
3. 3M Marine Adhesive Sealant 5200
A marine polyurethane sealant and adhesive known for strong bonds, often used on boats. It suits permanent repairs where the part will not be removed again.
Suits: the best glue for hot tubs when a bond must last. Strengths: a strong, flexible hold. Weaknesses: very hard to undo. Skip it if you may need to take the part off later.

Best for best adhesive for hot tub repairs on rigid parts
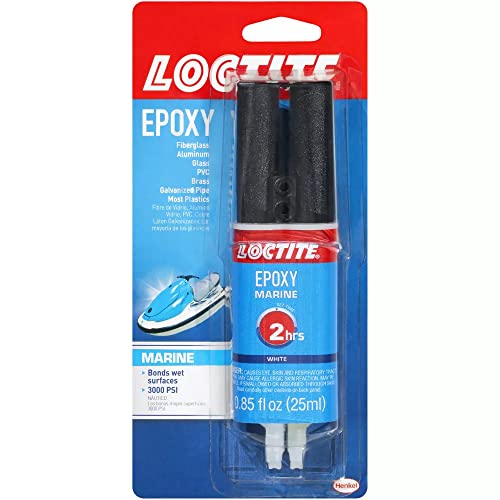
4. Loctite Marine Epoxy
A two-part epoxy sold for marine repairs. Epoxy sets hard, so it fits cracks and chips in rigid parts rather than seams that flex.
Suits: best adhesive for hot tub repairs on rigid parts. Strengths: a hard, gap-filling set. Weaknesses: mixing and a fixed working time. Skip it if the area flexes.

Best for a best sealant for hot tub leaks on dry surfaces
5. Flex Seal Liquid
A liquid rubber coating that is brushed or poured on to seal small leaks and gaps. It is often used for outdoor patches, so confirm the label before using it near treated water.
Suits: a best sealant for hot tub leaks on dry surfaces. Strengths: easy to brush on. Weaknesses: not a plumbing fix. Skip it if the surface stays submerged.


Best for wet seams that flex
6. Boat Life LifeCalk Sealant
A marine polysulfide sealant used on decks and hulls, known as a flexible and durable option. It can fit hot tub projects, but check the label for chemical contact.
Suits: wet seams that flex. Strengths: a flexible marine formula. Weaknesses: a longer cure and less common in stores. Skip it if you want a simple tube from a hardware aisle.

Care and Setup
- Drain the tub below the repair and dry the surface fully.
- Clean off oils, scale and old sealant before applying.
- Let the product cure for the full time on the label.
- Keep the tub empty until the repair has set.
Mistakes to Avoid
- Applying sealant to a wet surface.
- Using a bathroom silicone below the waterline.
- Refilling the tub before the cure is done.
- Patching a leak without finding its source.
How the Main Sealant Types Behave in Warm, Treated Water
The products in this roundup fall into a few chemical families, and each has strengths and limits that matter around a hot tub. Silicone stays flexible, handles movement and resists water well, which makes it a common choice for trim joints and gaps that flex as the tub heats and cools. Its weakness is adhesion: it bonds well to smooth, clean, non-porous surfaces but poorly to some plastics, and painting over it is difficult. Many silicone labels are written for kitchens and baths, so look for wording about continuous submersion if the joint will sit below the waterline.
Polyurethane marine sealants bond strongly and are used on boats where parts must stay put under constant water. They cure to a tough, rubbery state, but they can be hard to remove later, so they suit permanent repairs. Check the label for chemical resistance, because the sanitizers in a spa are different from lake water.
Epoxy is a two-part system that hardens into a rigid mass. It works well for filling chips and bonding rigid parts, but it does not flex, so a joint that moves will crack. Polysulfide sealants stay flexible and are used on decks and hulls. A liquid rubber coating forms a film over a surface and can seal small areas, though it is not an adhesive and may not suit anything under pressure or submerged.
No single type fits everything. Look at the material you are repairing, whether the joint moves, whether it is above or below the waterline and how much heat the area reaches. Then compare these facts to the label of the product, which should state compatible materials, water contact, temperature range and chemical exposure. If a label does not address spa use, consider asking the maker or choosing another product.
Finding the Real Source of a Leak First
Sealants fix surface gaps, so the most important step is figuring out where the water is actually coming from. Water that appears under the tub may have traveled a long way from the leak. Start by drying everything under and around the tub, then check the water level. Mark the waterline, wait a day without using the tub and see how much it drops. Compare it with normal evaporation, which depends on temperature and the cover.
Look at the equipment in the cabinet while the pumps run. Fittings, unions, hose connections, drains and the heater housing are common drip points. Run a dry paper towel along the lines and watch for dampness. Run the jets to see if the leak only appears under pressure, which often points to a pump seal or union. If the leak shows only when the water is at a certain level, the source may be a fitting at that height, such as a skimmer, light or jet face.
Check the shell. Hairline cracks and blisters can leak slowly. Examine the area around jets, lights and any penetrations through the shell. A tub on an uneven base can flex and stress fittings. Dye tests, where you place a small amount of food coloring near a suspected spot and watch for it being drawn in, can reveal tiny leaks, but follow the maker’s instructions for safe materials.
Once you have located the source, decide whether a sealant is the right fix. Loose plastic fittings often need tightening or a new gasket instead of a sealant. Cracked pipe or a failed pump seal needs replacement parts. A sealant is best for cosmetic joints, trim and small surface gaps. When in doubt, consult a tub dealer or technician.
Surface Preparation and Application Technique
Most failed repairs fail at the surface. The area must be clean, dry and free of oils, scale, mold and old sealant. Remove old caulk with a plastic scraper or the tool recommended for your surface, taking care not to gouge the shell. Wipe with a cleaner or solvent that the sealant label approves, then let it dry fully. Moisture trapped under the bead will weaken the bond.
Roughening can help adhesion on some materials. A light scuff with fine sandpaper gives the sealant something to grip on smooth plastics, but check your shell material and the label, since some finishes should not be sanded. Wipe away dust afterward. Tape off the edges with masking tape for a clean line, and remove it before the sealant skins over.
Apply the product in a continuous bead with steady pressure, pushing it into the joint rather than dragging it over the top. Tool the surface with a gloved finger, a spatula or a smoothing tool dipped in a soapy water solution if the label allows, then pull the tape. Avoid overworking the bead, which can create gaps. For two-part epoxy, mix thoroughly in the proportions given, apply within the working time and keep your work area ventilated.
Check temperature and humidity limits on the label. Cold, damp conditions can slow curing or prevent a good bond, and a hot surface can make a product skin over too quickly. Work in a dry, moderate environment when possible. Wear gloves and eye protection, and follow ventilation advice, since solvents and curing fumes can be irritating.
Cure Times, Chemical Exposure and Refilling Safely
Cure time is not the same as skin-over time. A sealant may feel dry on the surface within minutes or hours but still be soft underneath, and it needs the full time on the label before it faces water, heat and chemicals. Silicones, polyurethanes and epoxies cure by different chemistry and at different rates, and deep or thick beads take longer than thin ones. If the label gives separate times for light contact and full immersion, use the longer one for a hot tub.
Think about what the product will touch. A tub contains sanitizer, pH adjusters and heat, and some sealants soften or discolor with prolonged exposure. Look for labels that mention resistance to chlorine, bromine or chemicals, or contact the maker. Fully cured sealant should not affect water chemistry, but uncured product can leach, cloud the water or leave residue, which is why rinsing and a short wait after curing is wise.
Consider whether the repair is in contact with the water you soak in. If so, check whether the label says it is safe for such use. Not every marine or construction product is intended for water that people soak in, and some may carry warnings. Err on the side of products that clearly state suitability, and when the label is silent, treat that as a caution.
Refill slowly after the cure, watch the repaired area closely for the first day and run the pumps to check for seepage. Keep a record of the product used, the date and the location of the repair. If water appears again, drain below the repair, dry and reassess instead of adding more sealant over the old layer.
Knowing the Limits: Warranty, Safety and When to Call a Pro
A tube of sealant cannot fix every problem, and a bad repair can make a proper fix harder. Cracks in the shell, structural issues, leaking heaters and failing pumps or plumbing are matters for a technician. A repair on a pressurized line can fail suddenly, and electrical equipment near water is dangerous. Always turn off power at the breaker and unplug the tub before working in the equipment area, and remember that the tub’s electrical system should only be handled by someone qualified.
Warranty is another consideration. Many makers specify who may repair the shell and which materials may be used, and a do-it-yourself fix could affect coverage. Before you repair anything that might fall under warranty, read the terms and contact the maker or dealer. They may provide a repair kit made for your shell or advise on approved products.
Inspect the repair over time. Check sealed joints every few weeks at first, then at each drain and refill. Look for shrinking, cracking, peeling or discoloration, which indicate that the product is failing or was applied under poor conditions. Replace failing beads promptly, after removing the old material.
Finally, think about whether the tub itself is worth fixing. Recurring leaks, multiple cracks or an aging shell can mean you are spending time and money on a tub near the end of its life. Compare the cost and effort of continued repairs with a replacement or professional refurbishment, and make a decision based on the condition of the whole tub and not on a single leak.
Silicone, Epoxy or Marine Sealant: Understanding the Options
Sealants and adhesives for spas come in different chemistries, and the right one depends on the material and the location of the repair. Silicone sealants stay flexible, seal gaps and resist moisture, which makes them popular for small leaks and edges. Epoxy products bond hard materials and fill cracks, but they set into a rigid mass and need careful mixing. Marine sealants are made for boats and are designed to stay bonded in wet conditions. Not every product is approved for contact with spa water, chemicals and high temperatures, and some can affect water quality or fail with heat. Check the label for suitability, and ask your spa manufacturer or dealer which products they recommend.
| Type | Strength | Keep in mind |
|---|---|---|
| Silicone | Flexible and water-resistant | Does not accept paint and needs a clean surface |
| Epoxy | Hard, strong bond for repairs | Needs precise mixing and cure time |
| Marine sealant | Designed for wet environments | Check suitability for spa chemicals and temperature |
| Liquid sealant | Can seal small seeps | Not a fix for structural cracks |
Finding the Leak Before You Seal
A sealant cannot fix a problem you have not found. Water on the ground may come from a fitting, a pump seal, a jet or a crack, and sealing the wrong place wastes effort. Dry the area, check connections, and watch where the water first appears. Fill the tub to different levels to see if the leak changes. If a leak comes from plumbing, a pump or the shell itself, a spa technician has the tools to find it. Avoid repairs that cover a fault the maker or dealer should handle under warranty.
Surface Preparation and Cure Time
Most sealants need a clean, dry surface. Remove old sealant, clean with the solvent that the product label allows, and let the area dry fully. Apply the sealant as directed, smooth it, and give it the full cure time before you refill the spa or run the jets. Rushing the cure is a common reason for repeat leaks. Ventilate the area, wear gloves and follow label precautions.
When to Call a Professional
Cracks in the shell, leaks inside the cabinet near electrical parts and repeated failures are good reasons to call a spa technician. Water and electricity do not mix, so turn off power before you check any wet equipment.
Storing and Handling Sealant Tubes
Keep tubes capped and in a cool place, because open tubes can harden. Note the expiry date on the package, and use fresh product for repairs that matter. Cut the nozzle at a small angle for a thin bead, and keep a damp cloth ready for cleanup before the sealant skins over. Read the safety data on the label, and dispose of empty tubes and rags as local rules say.
How to Choose a Hot tub sealant: Criteria That Matter Most
Sealant is a small purchase that protects a large one. The right product depends entirely on where the leak or joint is, what materials it must stick to and whether it will live under water, so the criteria below matter more than any brand name on the tube.
Suitability for constant water contact
Suitability for constant water contact. A sealant around a hot tub must tolerate warm, treated water without softening or letting go. Check that the product is described for wet, submerged or marine-style use where your repair needs it, rather than assuming a general bathroom sealant will cope. When you compare options side by side, this is one of the first points to pin down, because it shapes how the hot tub sealant feels in daily use rather than just how it looks in a listing photograph. Go back through the picks above and ask how each one answers this point in its own review section, and be cautious with any listing that leaves the question vague. Shoppers often skip this check when a headline feature catches their eye, then meet the compromise only after the hot tub sealant is in regular use. A few minutes spent thinking it through now, in the context of your home, your routine and the people who will share it, is what turns a good-looking choice into one you stay pleased with season after season.
Flexibility once cured
Flexibility once cured. Hot tubs expand, contract and vibrate gently in use. A sealant that cures flexible moves with the joint; a rigid one cracks and reopens the leak you just fixed. Match the flexibility to a joint that moves. It helps to treat this as a practical test rather than a box-ticking exercise. Picture the hot tub sealant in the exact spot where it will live, at the busiest time of day, being used by the person who will use it most. If the answer still works in that picture, the point is probably covered; if it raises doubts, look again at how the different picks in this guide handle it. The reviews above describe each option in its own terms, so use them as the reference instead of relying on a single headline claim. Small mismatches here are the ones that quietly decide whether a purchase feels easy or becomes a chore.
Adhesion to your tub’s materials
Adhesion to your tub’s materials. Acrylic, fibreglass, PVC fittings and metal all behave differently. The reviews describe what each product bonds well to, so confirm your surfaces are on its list before you open the tube. This point matters more than it first appears, because it tends to affect every session rather than just the first one. A hot tub sealant can impress on day one and still disappoint if this side of it does not suit your habits. As you read the individual reviews, note which picks speak directly to this concern and which leave you guessing, and let that guide your shortlist. Where the guide describes a trade-off, take it seriously rather than assuming you will adapt to it later. Most returns and regrets in this category come from exactly this kind of overlooked detail, not from the headline features people spend longest comparing.
Cure time and when the tub can be refilled
Cure time and when the tub can be refilled. Some products need the joint kept dry for a stated period before water returns. Plan the repair around that window rather than discovering it with the tub already drained and guests arriving. A useful way to judge this is to ask what happens on an ordinary, unremarkable day rather than on the best day. Routines are where a hot tub sealant earns its keep, and this is the point that decides whether using it stays effortless. Compare the picks with your own routine in mind: who is involved, how much time is available, and how much patience there is for extra steps. If one option clearly fits that picture better than the others, that is a strong signal, even when the listings look similar at first glance. The sections above give you the material to make that call without guessing.
Application method and tidiness
Application method and tidiness. Cartridges, squeeze tubes and liquid coatings suit different joints and different levels of confidence. A product you can apply neatly in the space available beats a theoretically stronger one you cannot reach properly. Finally, do not treat this point in isolation. It interacts with the other criteria in this section, and the right balance depends on your priorities rather than on any single winner. Read the pick reviews as a set, mark the option that handles this point in the way you prefer, and check whether it also holds up on the points you care about most. If two picks seem close, this is often the deciding factor that separates them in real use. Writing down your own answer before you order, even in a sentence or two, makes the final choice calmer and far less likely to be second-guessed later.
Hot tub sealant in Real Life: Matching a Pick to Your Situation
Sealant jobs around a hot tub fall into a few recognisable patterns. Finding yours below will point you to the right type of product in the guide.
Resealing around jets and fittings
Resealing around jets and fittings. Leaks at jet bodies and fittings call for a flexible, waterproof seal applied to clean, dry surfaces. Work through the maker’s preparation steps carefully, because adhesion here depends more on preparation than on the product itself. In this situation the priorities shift a little, and it is worth re-reading the pick reviews with this exact scenario in mind. Ask which option the guide presents as suiting this kind of use, and whether its described strengths line up with what the moment actually demands. It also helps to think about frequency: something used this way every week needs to be convenient enough that nobody starts avoiding it. The best choice here is rarely the most elaborate one; it is the one whose everyday behaviour matches the routine with the least friction, so the hot tub sealant gets used as intended instead of becoming an occasional novelty.
A crack or damaged spot in the shell
A crack or damaged spot in the shell. Shell damage is a repair first and a sealing job second. Assess whether the product in the guide is described for that kind of fix, and take professional advice for structural cracks rather than covering them and hoping. For this kind of use, small practical details carry more weight than headline appeal. Think through where the hot tub sealant will be, who else is around, and what happens immediately before and after. The reviews above are most useful when you read them against a concrete picture like this one, because a strength that sounds minor in a listing can become the thing you appreciate most in this setting. Equally, a limitation the guide mentions honestly may not matter here at all. Matching the pick to the situation, rather than chasing the option that tries to do everything, is what leads to a purchase that keeps making sense.
Sealing pipework and plumbing joints
Sealing pipework and plumbing joints. Under the cabinet, the right adhesive sealant can secure and seal plumbing joints. Access, dryness and cure time decide success, so plan the job when the tub can stay empty and open. This scenario is a good stress test for any shortlist. If a pick still looks right when you imagine this use, week in and week out, it is probably a sound choice; if it only works when everything goes perfectly, keep looking. Pay attention to how much setup, supervision or tidying the situation involves, since those hidden minutes decide whether the hot tub sealant fits your life. The guide’s per-pick sections describe who each option suits, so let those descriptions do the work here. Choosing for the life you actually lead, rather than an idealised version of it, is the simplest way to avoid disappointment.
Preventive resealing of an ageing seam
Preventive resealing of an ageing seam. If a seam looks tired but has not leaked yet, renewing it on a calm weekend is far easier than an emergency repair. Choose the product whose finish and flexibility match the original seam as closely as you can. When this is your main reason for buying, let it lead the decision instead of treating it as an afterthought. Start from the pick whose review speaks most directly to this situation, then check it against the criteria earlier in this guide to make sure nothing important has been traded away. It is also worth planning the practical side in advance, from where things will be kept to who is responsible for upkeep, so the routine is settled before the hot tub sealant arrives. A choice made this way tends to settle quickly, because every part of it has already been thought through against a real need.
How the Picks in This Guide Compare With Each Other
No two picks in this guide are trying to do exactly the same job, and that is deliberate. The reviews above present each hot tub sealant in its own terms, with its own intended user, strengths and honest limitations. The fairest way to compare them is not to hunt for a single winner, but to hold each one against the criteria and situations set out in this guide and ask which description sounds most like your home, your routine and your priorities. The notes below walk through the shortlist in the same order as the reviews, to help you do exactly that.
Gorilla 100% Silicone Sealant. In its review section above you will find who it suits, where it is strongest and where its limits lie, and those are the points to weigh here. Set them against the criteria earlier in this guide: if this pick handles the points you care about most, and its stated limitations fall in areas you can live with, it deserves its place on your shortlist. If its strengths aim at a situation that is not yours, a simpler or different pick further down the list may serve you better, however impressive this one looks in isolation.
GE Silicone 2 Kitchen and Bath Sealant. In its review section above you will find who it suits, where it is strongest and where its limits lie, and those are the points to weigh here. Set them against the criteria earlier in this guide: if this pick handles the points you care about most, and its stated limitations fall in areas you can live with, it deserves its place on your shortlist. If its strengths aim at a situation that is not yours, a simpler or different pick further down the list may serve you better, however impressive this one looks in isolation.
3M Marine Adhesive Sealant 5200. In its review section above you will find who it suits, where it is strongest and where its limits lie, and those are the points to weigh here. Set them against the criteria earlier in this guide: if this pick handles the points you care about most, and its stated limitations fall in areas you can live with, it deserves its place on your shortlist. If its strengths aim at a situation that is not yours, a simpler or different pick further down the list may serve you better, however impressive this one looks in isolation.
Loctite Marine Epoxy. In its review section above you will find who it suits, where it is strongest and where its limits lie, and those are the points to weigh here. Set them against the criteria earlier in this guide: if this pick handles the points you care about most, and its stated limitations fall in areas you can live with, it deserves its place on your shortlist. If its strengths aim at a situation that is not yours, a simpler or different pick further down the list may serve you better, however impressive this one looks in isolation.
Flex Seal Liquid. In its review section above you will find who it suits, where it is strongest and where its limits lie, and those are the points to weigh here. Set them against the criteria earlier in this guide: if this pick handles the points you care about most, and its stated limitations fall in areas you can live with, it deserves its place on your shortlist. If its strengths aim at a situation that is not yours, a simpler or different pick further down the list may serve you better, however impressive this one looks in isolation.
Boat Life LifeCalk Sealant. In its review section above you will find who it suits, where it is strongest and where its limits lie, and those are the points to weigh here. Set them against the criteria earlier in this guide: if this pick handles the points you care about most, and its stated limitations fall in areas you can live with, it deserves its place on your shortlist. If its strengths aim at a situation that is not yours, a simpler or different pick further down the list may serve you better, however impressive this one looks in isolation.
Read as a set, the picks form a ladder of priorities rather than a ranking from best to worst. One end of the list will suit readers who want the straightforward option described at the top of the guide, while other picks trade simplicity for a particular strength the reviews call out. Your job is simply to find the rung that matches your situation. When two picks still seem close after that, choose the one whose limitations you mind least, because strengths are enjoyed occasionally while limitations are met every single time the hot tub sealant is used.
Using, Cleaning and Looking After Your Hot tub sealant
A sealed joint is not a fit-and-forget job. The habits below keep repairs sound and help you spot the next tired seam before it becomes a leak.
Prepare surfaces exactly as directed
Prepare surfaces exactly as directed. Clean, dry and free of old sealant and grease is the standard every product asks for. Rushing preparation is the single most common reason a repair fails, whatever the tube cost. Build this into a short, repeatable routine rather than treating it as an occasional big job. Little and often is what keeps a hot tub sealant pleasant to use and helps it last, and it is far easier to keep up than a rare deep session that everyone dreads. Follow the maker’s own instructions where they differ from general advice, since materials and mechanisms vary between models. If you share the hot tub sealant with others, agree who does what, so the routine does not quietly fall to one person or get skipped altogether. A few steady minutes of care protect the money you spent far better than any accessory.
Respect the full cure time
Respect the full cure time. Keep the joint dry and undisturbed for as long as the product instructs, even if it feels set sooner. Filling the tub early is a false economy that quietly undoes the whole repair. This step is easy to overlook because the hot tub sealant usually keeps working while it is neglected, right up until it does not. Treat the guide’s care notes and the manufacturer’s manual as your starting point, and keep any products or tools the maker recommends within easy reach of where the hot tub sealant lives. Convenience is what makes care happen. While you are at it, give the hot tub sealant a quick visual once-over for wear, looseness or damage, because small issues are cheapest and simplest to deal with when they are caught early. That habit, repeated calmly over months, is what separates items that age gracefully from those that fail early.
Inspect seams and fittings each season
Inspect seams and fittings each season. Run a finger along seams and look for lifting edges, cracks or discolouration. Catching a failing edge early turns a reseal into a small job rather than a leak hunt. Think of this as part of using the hot tub sealant, not as a separate chore bolted onto it. The few minutes it takes are repaid in reliability, comfort and safety every time the hot tub sealant is used afterwards. If several people share the job, a simple shared note of what was done and when prevents both duplication and neglect. Avoid improvised shortcuts that the manual does not sanction, however tempting they seem, because finishes, seals and moving parts often react badly to the wrong treatment. Gentle, regular attention in line with the maker’s guidance is almost always the approach that keeps things working as they should.
Keep water balanced to protect seals
Keep water balanced to protect seals. Aggressive or neglected water chemistry shortens the life of seals and sealants alike. Balanced water, maintained steadily, is kind to every flexible material in the tub. Where you keep the hot tub sealant between uses matters as much as how you treat it during use. A sensible, consistent home for it protects it from knocks, damp, dust and curious hands, and makes the next use quicker to start. The storage advice in the maker’s instructions is worth following closely here, particularly anything about position, covering or preparation before a longer break. Before putting the hot tub sealant away after a longer gap in use, run through the same checks you would before its first use. That small discipline keeps surprises away and means the hot tub sealant is ready whenever it is wanted.
Store leftover sealant properly
Store leftover sealant properly. Seal the nozzle, store the tube as the maker directs and note when it was opened. A tube that has skinned over or thickened will not give a sound repair, so replace doubtful leftovers rather than trusting them. Finally, keep a light record of anything you notice: a change in sound, feel, fit or behaviour is often the earliest sign that something needs attention. Comparing what you notice with the troubleshooting notes in the manual usually tells you whether it is a simple fix or a job for the maker or a professional. Do not force anything that resists, and do not keep using the hot tub sealant in a way that feels unsafe while you hope a problem will pass. Prompt, calm attention at this stage protects both the hot tub sealant and the people using it, and it preserves any warranty options you may need.
Hot Tub Sealant FAQ
Can I use any silicone in a hot tub?
No. Choose one that the maker states is safe for constant water contact and check the product page before buying.
What if the leak is in the plumbing?
Fittings and pipes are usually fixed with the right parts, not a surface sealant. A tub dealer can help find the source.
Will repairs void a warranty?
Possibly. Check your tub’s warranty terms before repairing the shell or fittings yourself.
How long should I wait before refilling after a repair?
Follow the full cure time on the product label, which may be longer than the skin-over time. Cure depends on thickness, temperature and humidity. When unsure, wait longer.
Can I put sealant over old sealant?
Usually it is better to remove the old material first, because new sealant may not bond to old silicone. Clean and dry the surface. Check the label for guidance.
What is the best way to remove old silicone?
Cut it away with a plastic scraper or blade suited to your surface, then clean residue with a solvent the sealant label approves. Take care not to scratch the shell. Let the area dry fully.
Are clear sealants as strong as colored ones?
Color does not decide strength, which depends on the formula. Choose based on the label's stated uses, then pick the color that suits the look. Clear can show dirt or yellowing in some products.
Can I use sealant on a leaking jet or fitting?
Usually fittings need correct gaskets, tightening or replacement parts, not extra sealant. Some assemblies call for a specific sealant or tape from the maker. Check the manual or ask a technician.
Is it safe to soak right after the repair?
Only after the full cure and a rinse, and when the water is balanced. Check the label for water safety. If you are not sure, wait or ask the maker.
How do I prevent leaks from coming back?
Find the cause, such as movement, poor prep or a failing fitting, and fix that. Inspect joints regularly, keep the tub level and avoid harsh chemicals. Use the right product for the material.
Can temperature changes crack a sealant bead?
Rigid products can crack if the joint moves with heat and cold, while flexible products tolerate it better. Choose a flexible one for joints that move. Check the label's temperature range.
Can I apply hot tub sealant underwater or to a wet surface?
Most sealants need a clean, dry surface to bond properly, and the products in this guide should be used as their makers direct. A repair attempted on a wet, soapy joint usually fails quietly and leaks again. Draining the tub, drying the area thoroughly and respecting the cure time is slower but is what makes the repair last. If a product is specifically described for damp application, follow its own instructions exactly.
How do I find where a hot tub is leaking?
Start with the tub full and the equipment off, and watch whether the level falls; then run the pump and watch again, which helps separate a shell or seam leak from a plumbing or jet leak. Look inside the cabinet for damp insulation, wet fittings and drips at joints. Work methodically from the evidence rather than sealing at random, and involve a professional if the source stays hidden.
How long should a sealant repair last?
A well-prepared repair with the right product should last a good length of time, but no sealant is permanent: heat, treated water and movement all age it. That is why seasonal inspection matters. If the same joint fails repeatedly, treat that as a sign of movement or damage that needs a different fix, and take advice rather than adding more sealant.
Is silicone sealant safe for hot tub water?
Products sold for hot tub, bath and marine sealing are made to be used around water once fully cured. The key steps are choosing a product described for this use, applying it as directed and letting it cure completely before refilling. If a product’s instructions say it is not for a particular material or for constant immersion, believe them and choose another pick from the guide.
The Short Version
For general silicone, the Gorilla. For wet-area seams, the GE Silicone 2. For a permanent bond, the 3M 5200. For rigid cracks, the Loctite Marine Epoxy. For a liquid coat, the Flex Seal. For a flexible marine seam, the Boat Life LifeCalk.