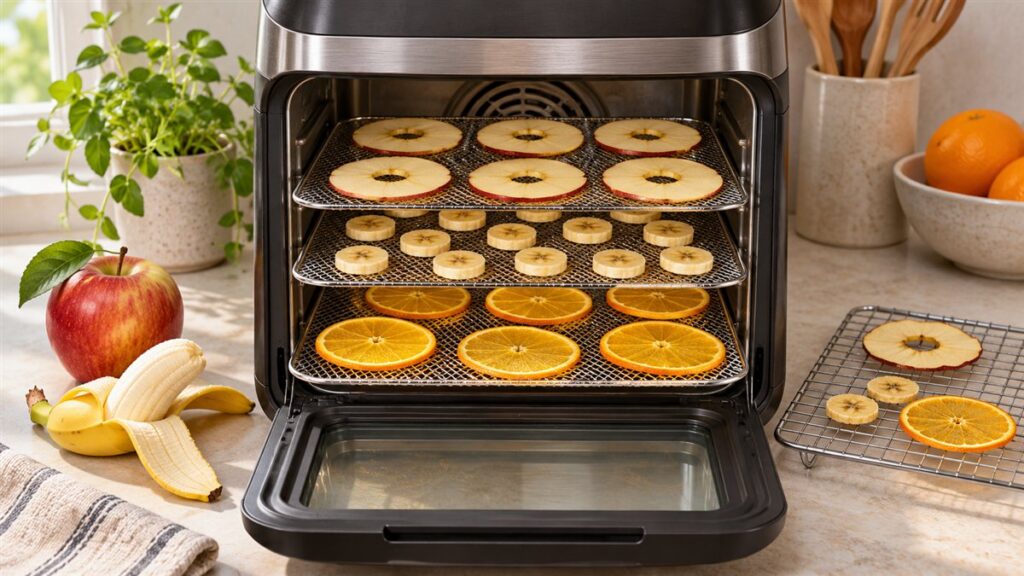
Some air fryers have a dehydrate setting, and many others can dry fruit on their lowest temperature if you slice thinly and give the pieces room. Expect it to take a few hours rather than minutes, with plenty of checking along the way.
Before You Begin
Check your manual first. Models with a built-in dehydrate mode usually come with racks and a stated temperature range. If yours has no such mode, see whether the lowest manual setting is suitable for long, gentle runs.
- Choose firm, ripe fruit without bruises.
- Use a sharp knife or a slicer with care; keep fingers clear of the blade.
- Aim for slices of about 3 to 5 mm (roughly one eighth to one quarter inch), as even as you can manage.
- Have a rack or mesh tray that suits your basket so air reaches both sides.
Drying Method
- Wash and dry the fruit, then slice it evenly. Remove cores and large seeds.
- For apples or bananas, a quick dip in lemon juice diluted with water can slow browning, though it is optional.
- Pat the slices dry with a towel.
- Lay them in a single layer without overlap. Pieces that touch dry unevenly.
- Use the lowest suitable temperature. A usual range for fruit is about 55 to 70 C (130 to 160 F); follow your model’s guidance.
- Rotate or flip the pieces every hour or so and swap rack positions if you have more than one level.
- Take out pieces as they finish, since thin slices dry before thick ones.
Rough Time Guide
| Fruit | Slice | Likely window |
|---|---|---|
| Apple rings | Thin | 3 to 6 hours |
| Banana coins | Medium | 4 to 7 hours |
| Citrus wheels | Thin | 3 to 5 hours |
| Strawberry slices | Medium | 3 to 6 hours |
These windows are only a guide. Humidity, fruit ripeness and model all change the result.
Knowing When It Is Done
Let a piece cool for a few minutes, then bend it. Chewy fruit should feel leathery with no wet spots when torn. Crisp chips should snap. If you see moisture, return it for another round.
Once cool, store the fruit in a clean, airtight container. Dried food that was not fully dried can spoil, so follow trusted food-safety guidance on drying and storage, and consult your maker’s manual for long-run instructions.
Which Fruits Dry Well and Which Do Not
Not every fruit behaves the same when dried. Apples, pears, bananas, strawberries, citrus slices, mango and pineapple are common choices because they hold their shape when sliced thin and dry into chewy or crisp pieces. Fruits with a lot of water, such as melon, can take a long time and shrink dramatically, while very soft fruits like ripe berries may stick to trays and collapse. Pick fruit that is ripe but firm, since overripe fruit is mushy and underripe fruit can taste sour or dry out leathery.
Think about the final texture you want. Thin slices dry crisp like chips, thicker slices stay chewy, and fruit pieces with a lot of sugar become sticky. Fruits with tough skins, such as grapes or blueberries, often need to be split or pricked so moisture can escape. Check a trusted drying guide for how to prepare specific fruits, since some require pre-treatment while others do not.
Wash fruit well and dry it. Remove stems, cores, pits and seeds. Peeling is optional for apples, pears and stone fruit, but peels on some fruits, like pineapple and mango, should be removed. Always use fruit that is clean and free of bruises or mold. If you plan to dry a large amount, cut all pieces to the same size and keep them in water with a little lemon juice to limit browning until you are ready.
Preventing Browning and Adding Flavor
Cut fruit such as apples, pears and bananas darkens when exposed to air. This is a cosmetic issue, but many people prefer a lighter color. A short dip in a mixture of lemon juice and water can slow browning, and some cooks use diluted citrus or pineapple juice. Follow a trusted ratio, drain the pieces and pat them dry before arranging them on the tray. These steps are optional and slightly change the taste.
Flavor can be added lightly. A sprinkle of cinnamon on apple slices, a squeeze of lime on mango, or a dusting of chili and salt on pineapple add interest. Keep seasoning light because flavors concentrate as water leaves. Sugar coatings can make fruit sticky and prone to burning, so avoid heavy sugar. If you plan to store the fruit for a while, plain pieces are easier to judge for dryness.
- Apples: cinnamon or a light citrus dip.
- Bananas: a lemon dip helps keep color.
- Citrus: slice thin and dry well, as they hold more moisture.
- Strawberries: slice evenly and place cut side up.
Keep everything clean and use clean hands and tools, because moisture and sugar attract spoilage.
Be sure to wash your hands and clean your tools before handling the cut fruit, as clean surfaces reduce spoilage later.
Arranging Racks and Managing Airflow
Airflow is the heart of dehydrating. Pieces should sit in a single layer without touching, with room for air to move across both sides. A rack or mesh tray lifts the fruit off the basket floor, which helps both sides dry. Check that any rack you use is suitable for your air fryer and does not block the fan. Avoid foil or paper that restricts airflow unless the maker says it is safe.
Lightweight slices can blow around in a strong fan, so some cooks cover them with a second mesh tray or use a rack that holds the pieces in place. Do not overload the basket. It is better to dry several small batches than to pack the tray and have uneven results. If your unit has more than one rack level, rotate trays during the process so the top and bottom dry evenly.
Keep the unit in a well-ventilated spot, because drying releases moisture into the air. Make sure nothing touches the heating element and that the cord and plug are clear of the heat. If your air fryer has a dehydrate mode, use it as directed. If it does not, check whether your manual lists a low-temperature setting that suits drying, and consider whether another appliance would suit long drying sessions better.
Testing for Dryness and Conditioning
Judging dryness is more reliable by feel than by time. Remove a piece, let it cool for a few minutes, then bend and tear it. A properly dried chewy piece should feel leathery, with no visible moisture or sticky wet pockets inside. Crisp chips should snap cleanly. Pieces from the middle of the tray may take longer than those at the edges, so test several.
Conditioning helps even out leftover moisture. After drying, place the cooled fruit loosely in a clean, airtight container, filling it about two thirds, and leave it for a few days, shaking it daily. If condensation appears, the fruit needs more drying. Trusted food-preservation guidance explains this step in more detail, and it is worth consulting for any fruit you intend to keep for a while.
Fruit that is not dry enough can grow mold in storage. If you see fuzz, an off smell or slimy texture, discard it. Do not taste questionable fruit. When you are unsure, dry it further or eat it soon, and keep batches small until you gain confidence. Let the fruit cool fully before sealing it, since warm fruit creates condensation inside a container.
Label each jar with the date and fruit type, and check it again after a week to be sure no moisture has built up.
Storage, Uses and Safety
Store dried fruit in airtight containers in a cool, dark place. Glass jars, food-safe plastic containers and sealed bags all work. Label each container with the type and date. Keep storage areas dry and away from heat sources. For longer storage, some people use the refrigerator or freezer, and general food-preservation guidance gives details on how long dried foods keep at their best.
Dried fruit has many uses. Eat slices as a snack, add them to oatmeal or yogurt, chop them into trail mix or baked goods, or rehydrate them in warm water for cooking. Crisp apple or citrus chips make attractive garnishes for drinks and desserts. Dried fruit is concentrated in sugar, so portions go a long way, and it may be sticky for teeth, so check serving sizes if this matters to you.
Safety matters for any long drying session. Do not leave the air fryer running unattended for many hours unless the manual specifically allows it, and keep it on a stable, heat-resistant surface. Clean the basket and rack after each batch, because sugary residue can attract pests and burn on the next use. If you plan to dehydrate regularly, a dedicated dehydrator may be a better fit, since it is designed for long, low-heat drying.
FAQ
Can I use the normal air fry setting?
Usually the heat is too high and the fan too strong, which can harden the outside while leaving the inside moist. Use a low or dehydrate mode where available.
Why are my slices curling?
Thin, light slices curl as they dry and may blow about. A mesh cover or rack designed for your model can hold them flat.
Do I need to pre-treat the fruit?
Not always. Treating with lemon juice only affects color. Check a trusted drying guide for fruits that need special handling.
Can I dry fruit with the skin on?
For apples, pears and stone fruit, yes. Remove peels from fruit such as pineapple or mango, where the skin is tough or inedible.
How thin should I cut the slices?
Even slices of about 3 to 5 mm work for many fruits. Thinner dries faster and crisper, and thicker stays chewier but takes longer.
Why are my slices dry outside and wet inside?
The heat may be too high or the slices too thick. Use a lower temperature, cut thinner and allow more time.
Can I dry different fruits together?
Yes, in the same session if the thickness is similar, but flavors can mingle slightly and drying times differ, so check each type separately.
How long does dried fruit keep?
It depends on the fruit, how dry it is and storage conditions. Check trusted food-preservation guidance and discard anything that smells or looks off.
The Short Version
Slice evenly, keep pieces apart, dry on the lowest suitable setting and check often. Judge doneness by feel, cool before storing, and follow food-safety guidance and your manual.