Over-the-range microwaves are the most common built-in microwave in American kitchens. They mount above the stove, save counter space, and usually include a vent fan and a light for the cooktop below. Because they bolt to the wall and cabinet, the installation is more involved than a countertop unit.
The six microwaves below are well-known over-the-range models. We have not used these products ourselves, so confirm width, venting method, mounting kit and capacity on the current listing before buying. Most need a 30 inch opening and either exterior venting or a recirculating setup, so check how yours is built. Measuring the space between the cooktop and the cabinet above is also worth doing.
As an Amazon Associate we earn from qualifying purchases. Links below are affiliate links, and they do not change the product information we give.
What to Look For
| Feature | Why it matters |
|---|---|
| Width | Most are 30 inches; confirm your cabinet opening |
| Venting | Exhaust outside or recirculate through a filter |
| Fan power | A stronger fan clears smoke faster |
| Capacity | Interior size limits the dishes you can heat |
| Controls | Sensor cooking and presets simplify daily use |
In this guide
Specs at a Glance
| Microwave | Type | Install | Notes |
|---|---|---|---|
| Whirlpool WMH31017HS | Over-the-range | Mounts above the stove | Check the listing |
| GE JVM3160RFSS | Over-the-range | Mounts above the stove | Check the listing |
| Samsung ME21M706BAS | Over-the-range | Mounts above the stove | Check the listing |
| LG LMV2031ST | Over-the-range | Mounts above the stove | Check the listing |
| Amana AMV2307PFS | Over-the-range | Mounts above the stove | Check the listing |
| Frigidaire Gallery FGMV176NTF | Over-the-range | Mounts above the stove | Check the listing |
The 6 Best Over-the-Range Built-In Microwaves
Top pickBest for replacing an older microwave
1. Whirlpool WMH31017HS Over-the-Range Microwave
A widely sold over-the-range microwave that combines cooking and a vent fan. Check the listing for the interior size and fan power. It is also easy to find manuals and replacement filters.
Suits: replacing an older microwave. Strengths: a familiar brand and common size. Weaknesses: dated looks. Skip it if you want a drawer or flush install.
View Whirlpool WMH31017HS on Amazon

Best for standard 30 inch openings
2. GE JVM3160RFSS Over-the-Range Microwave
A GE over-the-range microwave with a vent fan and cooking presets. It is a common replacement choice, so parts and manuals are easy to find.
Suits: standard 30 inch openings. Strengths: a common size with sensor cooking options. Weaknesses: check the venting needs. Skip it if your opening is not standard.

Best for modern kitchens
3. Samsung ME21M706BAS Over-the-Range Microwave
A Samsung over-the-range microwave with a modern look and sensor cooking features. Confirm the finish and size on the listing. Samsung microwaves of this type often use sensor cooking to adjust time automatically.
Suits: modern kitchens. Strengths: a sleek design. Weaknesses: features differ by model. Skip it if you want a basic unit.
View Samsung ME21M706BAS on Amazon
Best for stainless kitchens
4. LG LMV2031ST Over-the-Range Microwave
An LG over-the-range microwave with a stainless finish and a vent fan. Check the listing for capacity and fan details. Make sure the listed width and mounting hardware match your cabinet.
Suits: stainless kitchens. Strengths: a clean look. Weaknesses: check the fan power. Skip it if you want a drawer.

Best for simple replacements
5. Amana AMV2307PFS Over-the-Range Microwave
A basic over-the-range microwave from a budget-friendly appliance brand. Confirm the finish and capacity on the listing. It is a plain, no-fuss option for a straightforward replacement.
Suits: simple replacements. Strengths: straightforward use. Weaknesses: fewer features. Skip it if you want sensor cooking.
View Amana AMV2307PFS on Amazon
Best for mid-range kitchens
6. Frigidaire Gallery FGMV176NTF Over-the-Range Microwave
A Gallery series over-the-range microwave with a vent fan and presets. Check the listing for the exact features. Gallery models sit between basic and premium, so compare fan speeds and extras.
Suits: mid-range kitchens. Strengths: a balance of features. Weaknesses: check the specifics. Skip it if you want the largest interior.
View Frigidaire Gallery FGMV176NTF on Amazon
Care and Setup
- Clean or replace the grease filters regularly, since grease buildup weakens the vent fan and can become a hazard.
- Wipe the interior after messy reheats and use a cover for splatter.
- Replace charcoal filters if recirculating.
- Check the door seal.
Mistakes to Avoid
- Ignoring the vent method, which can cause poor fan performance.
- Buying a different width than your opening.
- Using metal in the microwave.
- Skipping the mounting plate check.
Measuring the Space Above Your Range
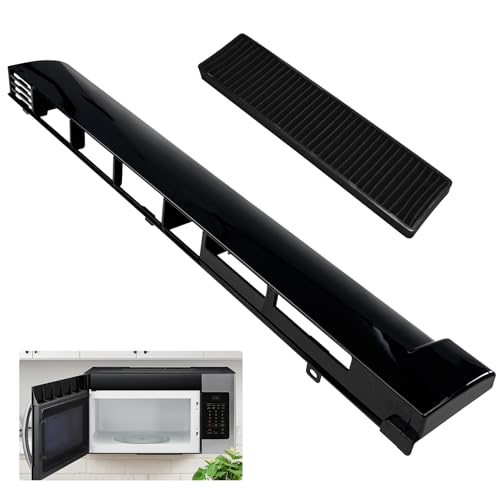
An over-the-range microwave hangs from a wall plate and from the cabinet above, so the space has to be right. Measure the opening width, which for most models is a standard figure but should still be confirmed. Measure the height from the cooktop surface to the underside of the cabinet, and the depth of the cabinet and the wall. The manual specifies a minimum clearance between the cooktop and the bottom of the microwave, and a taller or shorter gap may not meet it.
Note the depth and projection. Over-the-range models stick out further than the cabinets, and a deep unit can bump a tall person’s head or make it hard to reach back burners. Check that it will not block a window, a wall switch or an adjacent cabinet door. If you are replacing an old unit, compare the old model’s dimensions and mounting plate hole pattern with the new one. Different brands can use different layouts, which may mean drilling new holes or patching old ones.
Wall strength matters. These microwaves are heavy, and they must be anchored into studs or with the hardware the manual specifies. Do not rely on drywall anchors alone. Look for the cabinet hole position for the top bolts and make sure the cabinet base can take the load. If your wall is unusual, such as tile over concrete, ask an installer. A secure mount protects people and cabinets.
Venting: Ducted or Recirculating, and What That Means for Smoke
The vent fan is a second job these microwaves do, and how well it works depends on the setup. In a ducted installation, the fan pushes air through a duct to the outside, which removes smoke, steam and odors. Ducts can run up through the cabinet to the roof or out the back wall, and the existing duct location should match the microwave’s outlet, or an adapter may be needed. Duct length, bends and size all affect airflow.
In recirculating mode, the fan pulls air through a filter, usually a charcoal one, and blows it back into the room. That is simpler to install, because no duct is needed, but it removes less steam and heat. The charcoal filter wears out and must be replaced on the schedule in the manual. If you cook with heavy frying or strong odors, ducted venting is generally more effective.
Check the fan details on the listing: the number of speeds, the airflow rating and whether it has a sensor or boost mode. Compare it with the size of your cooktop and the way you cook. Over a gas range, which produces more heat and combustion products, good ventilation matters even more. Also check how loud the fan is; a powerful fan can be noisy, and in an open kitchen that may matter.
Interior Size, Power and the Controls You Actually Use
Interior capacity decides which dishes fit. Measure a typical dinner plate and a favorite casserole dish, and check whether the turntable and the height are enough. Over-the-range models range in size, and a larger interior may mean a deeper body that projects further. Remember that the turntable diameter is smaller than the overall interior, so check the listing for its size.
Power is stated in watts, and higher wattage usually heats food faster. Recipes and package instructions often assume a particular wattage, so a different one may need time adjustments. Sensor cooking detects steam and adjusts time, which is useful for reheating and for vegetables, but works best with covered dishes and routine foods. Preset buttons for popcorn, potatoes and beverages are common conveniences.
Controls matter because you use them daily. Look for a clear display, buttons you can press easily and a door that opens with moderate effort. Features such as child lock, a mute option for beeps and an add-30-seconds button are small but welcome. Some models include convection, which lets you bake or roast in a limited way, but they cost more and may have a smaller interior. Keep your own routine in mind and choose accordingly.
Installation, Electrical Needs and Clearances
Installation is a two-person job, because the unit is heavy and awkward to lift. You will usually fit a mounting plate to the wall, hang the microwave on it, then secure it to the cabinet above with bolts. Follow the template provided to mark the holes, and make sure the plate is level. Connect the duct or set up the recirculating kit as the manual describes. Take care not to damage the electric cord or the cabinet.
Electrical requirements vary, so check the listing and manual for voltage, amperage and whether a dedicated circuit is needed. The outlet is typically in the cabinet above the unit, and the cord must reach it without being pinched. Do not use an extension cord or a power strip. If the outlet is missing or in the wrong place, have a licensed electrician help. Check that the outlet is properly grounded.
Clearance above the cooktop affects safety and use. Follow the minimum distance in the manual, and do not mount it lower to improve reach. Make sure the underside light, the fan and the controls are not blocked by cookware or tall pots on the range. After installation, test the lights, the fan and a short heating cycle before you finish. Keep the template, manual and model number for later reference.
Filters, Grease and Knowing When It Is Time to Replace
The grease filters under the microwave capture cooking oils, and a clogged filter weakens the fan and can become a fire risk. Remove and wash the metal mesh filters on the schedule in the manual, often monthly for heavy cooks, using warm soapy water or the dishwasher if the maker says it is safe. Dry them fully before replacing. If recirculating, replace the charcoal filter at the recommended interval, since washing does not restore it.
Clean the underside and the vent grilles with a damp cloth, and wipe the cooktop light cover. Keep the interior tidy by wiping splatter after use, and clean the door seal so it closes tightly. Do not let grease build up on the surface above the stove, and never leave the fan off when cooking at high heat. Cover dishes to limit mess.
Signs that it is time to replace include a fan that is noisy or weak after cleaning, a heating function that fails or is uneven, a door that does not latch, sparks, a burning smell or damaged hinges. For over-the-range models, check replacement availability: matching the width and the mounting hole pattern makes installation much simpler. Compare the cost of repair with a new unit, and ask about warranty and installation services when you buy.
Why Over-the-Range Models Are a Special Case
An over-the-range microwave does two jobs: it heats food and it acts as a range hood for the cooktop below. That means it has a fan, a light and often a vent, and its installation depends on your wall, your cabinets and your venting setup. Because it hangs above the stove, the mounting is a major consideration, and the dimensions matter a great deal.
| Question | What to check |
|---|---|
| Width | Must match the space between cabinets, commonly in standard widths |
| Height above the cooktop | The maker states a minimum clearance |
| Venting | Outside venting or recirculating, depending on the home |
| Mounting | Wall plate and upper cabinet fixing points |
| Power | Dedicated outlet, location and cord reach |
Download the installation guide before buying and compare it with your kitchen, particularly the distance from the cooktop to the cabinet above.
Venting Options Explained
Over-the-range microwaves can vent in several ways. Some send air through the back or top to a duct that leads outside. Others recirculate air back into the kitchen through a filter. Your existing setup determines what is practical. If you have a duct, check where it exits and whether the microwave can connect to it. If you do not, check that the microwave can recirculate and that you have the right filter.
- Outside venting is generally more effective at removing steam and smoke.
- Recirculating vents are easier to install but rely on filters that need replacing.
- Check the fan speeds and how loud they are.
- Look at the grease filters and how to clean them.
Installation Notes and Safety
Over-the-range microwaves are heavy and mount high. Installation usually needs two people, a stud finder, correct fasteners and careful alignment. Follow the maker’s template and instructions exactly, and fix the mounting plate to studs or to hardware made for the weight. Mistakes can cause the unit to fall. If you are not comfortable, hire a qualified installer.
- Switch off power at the breaker.
- Mark the wall using the supplied template.
- Locate the studs and fix the mounting plate.
- Lift the unit into place with help.
- Secure it to the cabinet above.
- Connect any venting and check for leaks of air.
- Restore power and test the controls.
Electrical work should follow local codes. If you need a new outlet, hire a licensed electrician.
Cooking Features Worth Using
Microwaves have many presets, but a few features make a real difference. A turntable with the option to turn it off helps with large dishes. Sensor cooking adjusts time automatically, according to the maker, based on steam. Inverter-style power control gives more even heating at lower settings, if the maker describes it. Check the interior size against your largest dish, and look at how the door opens and how the controls feel.
Cleaning the Unit and the Vent
Wipe the interior regularly, and clean the grease filters according to the manual, which may include soaking in warm soapy water or using a dishwasher. Change charcoal filters if you use recirculating mode on the schedule the maker gives. Wipe the underside, where steam and grease collect, and replace the cooktop light bulbs as described in the manual. Keep the vent areas clear of dust and grease.
Range Safety Under the Microwave
Because the microwave hangs over the stove, follow the maker’s guidance on cooking with tall pots and on using the cooktop under the unit. Do not leave flames or hot oil unattended, and avoid storing items on top of the microwave that could block vents or fall. Keep the fan on when cooking with high heat, and make sure the filters are clean to reduce fire risk.
Measuring the Space Above Your Stove
Before you order, check the distance between the cooktop surface and the bottom of the cabinet above. The maker states a required clearance, and local rules may add to it. Measure the width of the opening between cabinets, and the depth of the cabinets so the microwave sits properly. Check the height of the unit and what remains between the top of the microwave and the ceiling or the upper cabinet.
- Measure from the cooktop to the cabinet bottom at several points.
- Measure the width at the front and the back of the cabinets.
- Check the wall for studs and for outlets or ducts.
- Check that the new unit’s depth matches the cabinets for a tidy look.
- Look at the old unit’s mounting holes, which may not match the new one.
If the dimensions do not match, a filler panel or a different model may be needed. The maker’s template will show where fixings go.
Replacing an Old Microwave
When swapping an old over-the-range microwave, take photos of the existing installation. Switch off power, unplug the old unit, and have a helper support it while you remove the fixings. Check the wall plate and holes for damage. Confirm that the outlet is in the right place, since many new units use a different cord position. Dispose of the old unit according to local rules, as microwaves contain parts that may need recycling.
Over-the-Range Microwave FAQ
Can I replace any microwave with an over-the-range model?
Only if the cabinet opening and wall support match. Compare the width, the mounting plate and the vent location of the old and new microwave before ordering.
Do these microwaves vent outside?
Many can vent outside or recirculate, depending on the setup. Recirculating mode uses a charcoal filter, which wears out and needs replacing.
Do they need special wiring?
Check the electrical requirements on the listing. If you are changing a model, compare the new bracket and vent layout with the old one.
How high should it be mounted?
Follow the maker’s clearance guidance, and compare the height between the cooktop and the underside of the microwave.
How far above the cooktop should an over-the-range microwave be?
Follow the minimum distance in the manual for your model. Do not mount it lower than the maker specifies.
Can I switch from ducted to recirculating venting?
Many models support both, but the setup differs. Check the listing and manual for the conversion steps and any filter that is needed.
How often should I clean the grease filters?
Many makers suggest washing them regularly, such as monthly for heavy cooking, but follow the manual. Dry them fully before putting them back.
Does an over-the-range microwave replace a range hood?
It includes a fan and a light, but its venting is often less powerful than a dedicated hood. If you cook with heavy smoke or steam, consider how well the fan is vented.
Will a new microwave fit the old mounting holes?
Not always, since brands use different layouts. Compare the template of the new unit with the old plate before ordering.
Do I need a dedicated circuit?
Check the electrical requirements on the listing and manual. A licensed electrician can confirm what your kitchen supports.
Why is my turntable not turning?
The roller ring may be misaligned or dirty, or the glass tray may be seated wrongly. Clean and reseat it, and if it still fails, check the manual or contact service.
Choosing Over-the-Range Built-In Microwaves With a Clearer Eye: The Criteria That Actually Matter
Listings for over-the-range built-in microwaves tend to lead with the headline feature, but the choice you live with is decided by quieter details: how the microwave fits your space, how it behaves on an ordinary weekday, and how much effort it asks from you after the cooking is done. Start by writing down the job you need done most often. A household cooking the same favourite meals every week needs something different from a household that experiments at weekends, and both need something different from someone buying for a second home, a rental or a gift. When the main job is clear, the rest of the comparison becomes much simpler, because features that do not serve that job can be ignored instead of paid for in money, space and upkeep.
Next, measure before you fall in love with a model. Measure the cabinet, wall unit or range position where it will live, the access route to it, and the working room you need around it, then compare those figures with the dimensions on the listing and in the manual. Pay attention to electrical supply, ventilation and the trim or mounting kit, because a model that fits the gap but cannot be connected, vented or used as the maker intends is not a fit at all. Photographs on a listing can make almost anything look compact or spacious; your own tape measure is the only version of the truth that matters on delivery day.
Finally, judge the everyday details: how the controls feel and read, how the parts you touch daily are made, what is included in the box, and whether replacement parts and accessories are easy to find. Read the description of each pick in this guide again with those questions in mind. The right choice among over-the-range built-in microwaves is rarely the one with the longest feature list; it is the one whose size, controls and care routine match the way your household actually cooks, week after week.
Matching the Picks to Real Households and Real Routines
It helps to picture a week of use rather than a single special occasion. The scenarios below follow the descriptions already given for each pick in this guide, so you can line your own routine up against them and see which profile sounds most like your home.
Whirlpool WMH31017HS Over-the-Range Microwave. This pick is presented above as suiting replacing an older microwave, with a familiar brand and common size as its noted strength. Picture it in a household that matches that description and it makes immediate sense: the strength is the thing you will benefit from every time you cook, not just on the first weekend. Keep the honest limitation in view as well, because the guide notes dated looks. If your routine leans heavily on exactly the thing it does less well, look again at the neighbouring picks before deciding, and remember the guide’s own steer that it is one to skip if you want a drawer or flush install.
GE JVM3160RFSS Over-the-Range Microwave. This pick is presented above as suiting standard 30 inch openings, with a common size with sensor cooking options as its noted strength. Picture it in a household that matches that description and it makes immediate sense: the strength is the thing you will benefit from every time you cook, not just on the first weekend. Keep the honest limitation in view as well, because the guide notes check the venting needs. If your routine leans heavily on exactly the thing it does less well, look again at the neighbouring picks before deciding, and remember the guide’s own steer that it is one to skip if your opening is not standard.
Samsung ME21M706BAS Over-the-Range Microwave. This pick is presented above as suiting modern kitchens, with a sleek design as its noted strength. Picture it in a household that matches that description and it makes immediate sense: the strength is the thing you will benefit from every time you cook, not just on the first weekend. Keep the honest limitation in view as well, because the guide notes features differ by model. If your routine leans heavily on exactly the thing it does less well, look again at the neighbouring picks before deciding, and remember the guide’s own steer that it is one to skip if you want a basic unit.
LG LMV2031ST Over-the-Range Microwave. This pick is presented above as suiting stainless kitchens, with a clean look as its noted strength. Picture it in a household that matches that description and it makes immediate sense: the strength is the thing you will benefit from every time you cook, not just on the first weekend. Keep the honest limitation in view as well, because the guide notes check the fan power. If your routine leans heavily on exactly the thing it does less well, look again at the neighbouring picks before deciding, and remember the guide’s own steer that it is one to skip if you want a drawer.
Amana AMV2307PFS Over-the-Range Microwave. This pick is presented above as suiting simple replacements, with straightforward use as its noted strength. Picture it in a household that matches that description and it makes immediate sense: the strength is the thing you will benefit from every time you cook, not just on the first weekend. Keep the honest limitation in view as well, because the guide notes fewer features. If your routine leans heavily on exactly the thing it does less well, look again at the neighbouring picks before deciding, and remember the guide’s own steer that it is one to skip if you want sensor cooking.
Frigidaire Gallery FGMV176NTF Over-the-Range Microwave. This pick is presented above as suiting mid-range kitchens, with a balance of features as its noted strength. Picture it in a household that matches that description and it makes immediate sense: the strength is the thing you will benefit from every time you cook, not just on the first weekend. Keep the honest limitation in view as well, because the guide notes check the specifics. If your routine leans heavily on exactly the thing it does less well, look again at the neighbouring picks before deciding, and remember the guide’s own steer that it is one to skip if you want the largest interior.
Notice how the picks divide the work between them. Some are aimed at smaller households and tighter spaces, some at larger groups and heavier use, and some at buyers who simply want the least complicated route to a good result. There is no single winner for every home, and that spread is deliberate: choosing well means matching the profile to your household, not picking the name you recognise first.
Setup, Placement and the First Week
Good results with any built-in microwave start before the first meal. Setup means measuring the opening carefully, confirming ventilation clearances and the correct trim kit, checking the electrical requirements in the manual, and arranging proper support for the weight of the unit. None of that is glamorous, but each step prevents a common disappointment: a unit that rocks, a door that will not seal, a control that behaves oddly, or a first cook spoiled by packaging or residue that should have been dealt with beforehand. Keep the manual open during setup rather than relying on habit, because models that look alike often differ in one important instruction.
Placement deserves the same care. Think about where heat, steam, smoke or splashes will travel, what surfaces sit nearby, and whether you can move around the microwave safely while carrying hot or heavy food. Think, too, about the unglamorous logistics: where ingredients and tools will wait, where finished food will land, and where you will put hot parts down. A cooking area that works on paper but forces you to cross a busy room with a full, hot load will annoy you every single time you use it.
Use the first week as a gentle trial rather than a test of limits. Cook familiar food, learn how the controls respond, and note anything that surprises you: uneven results, noises, smells from new materials, or parts that feel loose. Check fixings and connections again after the first few uses, because vibration and heat cycles can settle things. If something seems wrong, stop and consult the manual or the maker while the purchase is new, rather than adapting your cooking around a fault.
Everyday Technique: Getting More From the Same Equipment
Technique matters as much as the model you choose. In practice, good everyday use of a built-in microwave means using microwave-safe containers, stirring or turning food partway through, letting food stand after cooking so heat evens out, and keeping the vents unobstructed while it runs. Those habits sound simple, yet they are where most disappointing results are born: food crowded so it steams instead of browning, equipment used before it is ready, or settings chosen by habit rather than by the food in front of you. Slow down the first minute of any cook and the rest usually follows.
Build a small rotation of reliable meals before you chase ambitious ones. When you know exactly how a familiar dish behaves, you can judge the equipment fairly and adjust one variable at a time: a different position, a little more or less time, a different order of cooking. Keep brief notes, even just on your phone, naming the dish, the setting and the result. After a month those notes are a personal manual that no general guide can match, because they describe your microwave, your ingredients and your tastes.
Also plan the cook around the people eating. Work backwards from serving time, allow for resting and for the side dishes, and keep finished food somewhere sensible rather than rushing everything to finish at once. The cooks who seem effortlessly good with equipment like this are rarely doing anything mysterious; they have simply arranged the sequence so that the microwave is never the bottleneck and nothing waits long enough to spoil.
Cleaning, Care and Storage That Keep It Working Well
Care is where ownership is won or lost, and for a built-in microwave the routine centres on the cavity walls, turntable or tray, door seal, vents and control panel. Let everything cool to a safe point first, then clean while residue is still fresh enough to lift easily. Follow the manual on which parts can be immersed, which cleaners are safe and which tools to avoid, because coatings, seals and sensors vary and the wrong scourer or spray can do quiet, permanent damage. A soft cloth, mild soapy water and patience cover most of what everyday cleaning requires.
Make the routine small enough to actually happen. A quick wipe and empty after each use, a slightly deeper clean on a regular rhythm, and a periodic check of the parts that wear, block or perish will prevent the slow build-up that turns a pleasant appliance into a chore. While you clean, look at the equipment as well as at the dirt: seals that are cracking, surfaces that are changing, fixings that have loosened and vents that are clogging all announce themselves early to anyone who is paying attention.
Storage matters too. Keep the microwave with the door closed and the cavity clean and dry, and with nothing stored on top that could block ventilation. If it will sit unused for a long period, clean it thoroughly first, because old residue attracts smells and pests and hardens into a much bigger job. Store any removable parts and accessories together with the unit, and keep the manual with it or photographed on your phone, so the next person to set it up is not guessing.
Problems, Causes and Fixes Worth Knowing
Most problems with equipment in this category follow a pattern: the result disappoints, and the cause turns out to be preparation, loading or timing rather than a broken machine. Before concluding that a built-in microwave is faulty, repeat the cook with the basics corrected: the right preparation, sensible spacing, the setting the recipe or manual actually specifies, and enough patience to let the process finish. A surprising number of faults disappear at that point, and the ones that remain are much easier to describe accurately to the maker.
Keep a simple order of checks. Is the microwave set up as the manual describes, with every part seated and every supply properly connected? Is it clean in the places that affect performance? Are you asking it to handle more, larger or wetter food than it is meant to? Work through those questions in order, change one thing at a time, and note the result. Random changes teach you nothing and can turn one small issue into several confusing ones.
Know, too, when to stop troubleshooting. Burning smells from electrical parts, damaged cords or connections, doors or lids that will not close and seal properly, fuel smells you cannot explain, and any sparking or smoke from places that should not smoke are all stop-and-seek-help signals. Unplug, switch off or disconnect as the manual directs and contact the maker or a qualified professional. No meal is worth pressing on with equipment that is telling you something is wrong.
How the Picks Compare, Side by Side
The table below restates the positioning already given for each pick in this guide, gathered in one place so the trade-offs are easy to scan. It adds no new claims; it simply lines up who each pick suits and what it does best, which is the comparison most buyers actually need.
| Pick | Suits | Strengths | Honest limitation |
|---|---|---|---|
| Whirlpool WMH31017HS Over-the-Range Microwave | Replacing an older microwave | A familiar brand and common size | Dated looks |
| GE JVM3160RFSS Over-the-Range Microwave | Standard 30 inch openings | A common size with sensor cooking options | Check the venting needs |
| Samsung ME21M706BAS Over-the-Range Microwave | Modern kitchens | A sleek design | Features differ by model |
| LG LMV2031ST Over-the-Range Microwave | Stainless kitchens | A clean look | Check the fan power |
| Amana AMV2307PFS Over-the-Range Microwave | Simple replacements | Straightforward use | Fewer features |
| Frigidaire Gallery FGMV176NTF Over-the-Range Microwave | Mid-range kitchens | A balance of features | Check the specifics |
Read the table by elimination. Cross out any pick whose limitation collides with your most common cook, then compare what remains on the strength that matters most to you. If two picks still look equal, decide on the practicalities: the one that fits your space better, includes what you need in the box, or has the care routine you are most likely to keep. Those everyday factors separate near-equal products far more reliably than any headline feature.
Living With It: Costs, Parts and Knowing When to Replace
The purchase is only the first part of ownership. Over its life a built-in microwave asks for consumables, occasional replacement parts and a little of your time, and the picks in this guide differ in how easy those things are to find and fit. Before buying, check that the parts most likely to wear are available for the model you are considering, and keep the model details from your order somewhere safe. A photograph of the nameplate or box label, plus the order confirmation, makes any future conversation with a seller or maker far shorter.
Judge value across the whole period you expect to keep it. A model that suits your routine, cleans easily and has parts available will usually serve you better than a more elaborate one that fights your habits. Equally, replacing a worn part promptly is often the sensible middle path between struggling on and replacing the whole unit: if the body, controls and core function are sound, a fresh wear part can restore the performance you were missing.
Replacement time comes when repairs stop making sense: when the core function has degraded, when safety-related parts are involved, when parts are no longer available, or when your household has simply outgrown the size or style. When that day comes, this same process applies: define the job, measure the space, compare the current picks on the criteria above, and let your notes from the old unit tell you what to prioritise. Experience is the best buying guide there is, and by then you will have plenty of it.
One more check that saves real regret: read the listing photographs as carefully as the description. Photographs show what is actually included, the shape of the controls, the finish of the parts you will handle daily and sometimes accessories that the text mentions only in passing. Compare the photographs with the written list of what is in the box, and if the two disagree, ask the seller before ordering rather than assuming the more generous version is correct. Small mismatches discovered at checkout are trivial; the same mismatch discovered on your counter, with the old equipment already gone, is a genuine problem.
Think about who else will use the equipment, not just who is buying it. A partner, a teenager learning to cook, an older parent or a housemate will each approach the controls differently, and the best choice is one that everyone in the home can use confidently and safely. Clear markings, positive-feeling controls and a manual that explains things plainly matter more in a shared kitchen than in a solo one. If one person will do all the cooking, weight your own habits; if the work is shared, weight clarity and forgiveness, because equipment that only one person understands tends to be used by only one person.
Consider the noise, heat and smells a purchase brings into the home, because listings rarely dwell on them. Equipment that heats a small kitchen in summer, hums through an open-plan living space or holds cooking smells in soft furnishings changes how a home feels, not just how dinner turns out. None of that makes a product good or bad, but it does mean the right home for a given model depends on the building as well as the cook. Where you can, plan ventilation, placement and timing of big cooks around the comfort of the household, not only around the recipe.
Delivery and returns deserve a thought before you order, especially for anything large, heavy or fragile. Check how the item is delivered, whether it comes to the door or into the room, and what you are expected to do with packaging and with any old unit being replaced. Keep the packaging until the new equipment has been set up and tested through its basic functions, because returns and replacements are far simpler with the original box. Photograph the unboxing if anything looks damaged, and test the essentials promptly while the returns window is wide open rather than discovering a fault weeks later.
More Questions Buyers Ask About Over-the-Range Built-In Microwaves
How do I measure a space for a built-in model?
Measure the opening in several places and compare with the installation dimensions and the trim kit requirements in the manual, not just the capacity headline. Ventilation space is part of the fit, so an opening that matches the box but starves the vents is not a correct fit.
Why does food heat unevenly?
Microwave energy does not reach every part of a dish equally, so stirring, turning and standing time matter. Arranging food in a ring, covering it appropriately and letting it stand after cooking evens out most hot and cold spots without any change of machine.
What containers are safe to use?
Use containers described as microwave-safe, and avoid metal, foil trims and anything the manual warns against. When you are unsure about a dish, check the maker guidance rather than testing it with food inside, because unsuitable materials can damage both the meal and the oven.
How do I keep the cavity smelling fresh?
Wipe spills promptly, clean the door seal where splashes collect, and warm a bowl of water with a little lemon if the manual allows it, then wipe the softened residue away. Regular small cleans prevent the baked-on build-up that makes the job unpleasant later.
What should I check about ventilation before buying?
Find out whether the model vents to the front, into ducting or back into the room, and what clearances the manual requires around it. Steam and heat need somewhere to go, and cabinetry fitted tight against the wrong venting arrangement can suffer over time.
When should a built-in model be serviced rather than cleaned?
Stop using the oven and seek qualified help if the door does not close and latch properly, if you see sparking, or if it runs with the door open. Door seals and interlocks are safety parts, and they are never a do-it-yourself adjustment.
The Short Version
For a familiar brand, the Whirlpool. For standard replacements, the GE. For a modern look, the Samsung. For stainless, the LG. For simple use, the Amana. For a mid-range, the Frigidaire Gallery.