A professional cooktop gives a home kitchen the look and power of restaurant equipment. Most are stainless steel gas cooktops with heavy cast-iron grates, sealed burners and high-output heat, although induction and radiant designs have joined the category. They install into a counter cutout, so size, fuel type and clearance matter as much as the brand.
The six cooktops below cover several well-known makers across gas and induction. We have not used these products ourselves. Widths, burner outputs, fuel conversions and cutout sizes differ between listings, so confirm each detail on the current listing before buying and check your local installation requirements.
As an Amazon Associate we earn from qualifying purchases. Links below are affiliate links, and they do not change the product information we give.
What to Look For
| Feature | Why it matters |
|---|---|
| Fuel | Gas offers instant visual control; induction heats quickly and cleans easily |
| Burner mix | A high-output burner sears, and a low simmer burner handles sauces |
| Grates | Continuous cast-iron grates let you slide heavy pots |
| Width | Match the cutout to your counter and ventilation |
| Ignition | Automatic reignition and flame-failure protection add safety |
In this guide
Specs at a Glance
| Cooktop | Fuel | Grates | Notes |
|---|---|---|---|
| ZLINE gas cooktop | Gas | Cast iron | Stainless finish; several widths |
| Thor Kitchen gas cooktop | Gas | Cast iron | Pro-style look |
| Empava gas cooktop | Gas | Cast iron or enameled | Sealed burners |
| Frigidaire Professional induction | Induction | Glass-ceramic top | Check the listing for sizes |
| GE Profile cooktop | Gas or induction | Varies | Smart or standard variants |
| Bosch Benchmark induction | Induction | Glass-ceramic top | Premium appliance line |
The 6 Best Professional Cooktops
Top pickBest for gas cooks
1. ZLINE Professional Gas Cooktop
A stainless gas cooktop with heavy cast-iron grates, offered in several widths. It brings a restaurant look to a built-in cooktop at a variety of sizes.
Suits: gas cooks. Strengths: a bold look and size options. Weaknesses: specs vary by model. Skip it if you want induction.
View ZLINE gas cooktop on Amazon
Best for pro-style kitchens
2. Thor Kitchen Professional Gas Cooktop
A pro-style gas cooktop with continuous cast-iron grates and sealed burners, from a brand known for restaurant-look appliances.
Suits: pro-style kitchens. Strengths: continuous grates and sturdy build. Weaknesses: check the fuel setup. Skip it if you want a glass top.
View Thor Kitchen gas cooktop on Amazon

Best for upgrading a standard kitchen
3. Empava Gas Cooktop
A built-in stainless gas cooktop with sealed burners that is sold in common widths. It is a more modest way to get a professional look.
Suits: upgrading a standard kitchen. Strengths: an easy-to-clean sealed layout. Weaknesses: a smaller brand. Skip it if you want a premium name.


Best for fast heating and easy cleaning
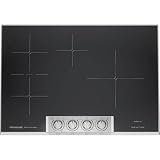
4. Frigidaire Professional Induction Cooktop
An induction cooktop from a mainstream brand that heats pans magnetically and keeps the surface cooler. A fast, tidy option for cooks who like professional results without an open flame.
Suits: fast heating and easy cleaning. Strengths: quick response. Weaknesses: needs magnetic cookware. Skip it if you use copper or aluminum pans.
Best for practical upgrades
5. GE Profile Cooktop
A mainstream line that includes gas and induction versions, some with smart features. A comfortable middle ground between everyday and pro-style cooktops.
Suits: practical upgrades. Strengths: a familiar brand and service network. Weaknesses: less restaurant drama. Skip it if you want heavy-duty styling.
View GE Profile cooktop on Amazon

Best for design-focused kitchens
6. Bosch Benchmark Induction Cooktop
A premium induction cooktop from a European appliance maker, with a glass-ceramic surface and flexible cooking zones. Aimed at cooks who want precise control and a flat, sleek look.
Suits: design-focused kitchens. Strengths: precision and a clean surface. Weaknesses: requires magnetic cookware. Skip it if you cook over open flame.

Care and Setup
- Wipe spills promptly, and let grates cool before cleaning. Sealed burners and removable grates keep cleanup manageable, though heavy cast iron takes some lifting.
- Wipe induction glass with a soft cloth once the surface has cooled, and avoid sliding rough pot bottoms across it.
- Clean burner ports with a soft brush.
- Use only cleaners the maker approves for glass tops.
- Hire a licensed installer for gas lines and electrical work.
Mistakes to Avoid
- Ordering before measuring the counter cutout.
- Ignoring ventilation needs.
- Forgetting a propane conversion kit if needed.
- Dragging heavy pans across glass.
Planning the Cutout, Clearances and Cabinet Below
A cooktop drops into a hole in the counter, and the details of that hole decide whether installation goes smoothly. Start by getting the cutout dimensions from the manufacturer’s installation guide, which is often a downloadable document linked from the listing. Compare the width, depth and corner radius with your counter, and note that the overall cooktop is larger than the cutout, since it rests on the counter edge. If you are replacing an existing cooktop, an older cutout may be slightly different, so measure rather than assume.
Clearances matter for safety and performance. The guide will state minimum distances from the cooktop to side walls, to a back wall and to cabinets or combustible surfaces, and from the cooktop to the hood or microwave above. Keep these distances exactly as stated. Also check the depth below the counter, since a cooktop needs space for its burners, wiring or gas connection, and for airflow in the case of induction. A drawer or shelf directly beneath may need to be shortened or removed.
Think about the counter material. Stone and solid surfaces need accurate cutting, and heat or weight around the opening should be considered. A professional installer can help check the counter, and many manufacturers require professional installation for warranty reasons. Plan ahead for gas line access, a shut-off valve and electrical outlets, because these may require carpentry or a licensed tradesperson. Do not order until you have confirmed that the cooktop will fit, that the utilities are available and that the delivery path is clear.
Burner Layout, Power and Control Feel
A cooktop with the right burner mix matches how you cook. High-output burners boil water quickly and sear meat, medium burners handle everyday sauces and sautes, and a low-output or simmer burner holds delicate sauces without scorching. Look at how the listing describes these burners, and keep in mind that power figures are the maker’s own and that real performance also depends on cookware and flame control.
Layout matters as much as power. A cooktop with burners spaced far apart lets you use large pots side by side, while a tightly packed layout can make big pans collide. Check where the biggest burner sits, and think about whether you can reach the back burners comfortably. Continuous grates let you slide pots between burners, which many cooks like, although they can be heavy to remove for cleaning.
Controls change the way a cooktop feels. Knobs are familiar and offer instant feedback on gas models, and metal knobs can feel sturdy while plastic ones can feel light. Front-mounted controls are easy to reach but may be a risk around young children, while side or top controls are harder to bump. On induction models, touch controls or sliders vary in how responsive they feel. If possible, try the controls in person or read what owners say about them. Check for features such as child lock, pause function and timers, if they matter to you.
Ventilation and Kitchen Air Quality
A powerful cooktop produces more heat, steam and grease, so ventilation deserves as much thought as the cooktop itself. A range hood or downdraft vent should be sized to the cooktop’s width and output. As a general idea, a hood should cover at least the width of the cooktop and be mounted at the height recommended by the maker. A hood that is too small or too weak lets grease coat nearby surfaces and leaves cooking smells in the room.
Check how the hood vents. A hood that sends air outside is generally better than one that recirculates air through a filter, because it removes heat and moisture as well as smoke. Ducting should be as short and straight as possible, with a duct size matching the hood’s requirements. Large hoods may need make-up air, meaning a way for fresh air to enter the home, and local building rules may require it for high-output gas cooktops. Ask your installer or local authority about these requirements.
Gas cooktops release combustion byproducts as well as cooking fumes, so good ventilation is especially important, and using the hood whenever you cook is a sensible habit. Induction produces no combustion gases, but cooking still creates fumes and grease. Clean or replace hood filters on the schedule in the manual. If your kitchen is open to a living area, think about noise, since powerful hoods can be loud. A quiet setting for everyday use and a strong one for searing is a practical combination.
Cookware Compatibility and Surface Care
Your cookware shapes your experience, so match it to the cooktop. Gas works with nearly any pan, but flat bottoms are more stable and heat more evenly, and very small pans may sit unsteadily on large grates. Induction needs cookware with a magnetic base, which you can check by seeing whether a magnet sticks to the bottom. Many stainless and cast iron pans work, while pure aluminum, copper and some glass do not unless they have a magnetic layer. Check each pan before you commit.
Pan size and flatness also matter on induction and glass. A warped pan can have poor contact and heat unevenly, and a pan much smaller than the cooking zone may not trigger the zone. Lift pans rather than sliding them, since rough bases can scratch glass-ceramic surfaces. Heavy cast iron should be handled with care on glass.
For care, follow the maker’s advice. Let a surface cool before wiping it, use cleaners and tools that the manual approves, and avoid abrasive pads on glass and finished metal. On gas models, remove grates and burner caps for cleaning when they are cool, scrub with a non-scratch pad and dry them before putting them back. Keep burner ports clear using a soft brush or the tool the maker suggests. Wipe spills early, because baked-on residue is harder to remove, and keep sugary spills off glass-ceramic surfaces while hot unless the manual says it is safe.
Budget Tiers, Questions to Ask and Signs It Needs Service
Lower-tier cooktops usually offer a simpler layout, lighter grates and fewer burner levels. Mid-tier models tend to add heavier grates, a better burner range and nicer controls. Premium models add stronger construction, finer simmer control, flexible cooking zones on induction and extra safety features. A higher tier does not guarantee a better fit for your cooking, so choose features you will use.
Before you buy, ask several questions. What are the exact cutout and clearance dimensions? Which fuel and utilities does it need, and can my home provide them? Does the hood match the cooktop’s size and output? Does it include a conversion kit if I use propane, or is it sold separately? Do my pans work on it? Who will install it, and does the warranty require a professional? Is service available in my area, and are replacement parts easy to find?
Signs that a cooktop needs service include burners that will not light or stay lit, an uneven or yellow flame, a smell of gas, clicking that does not stop, a zone that does not heat, a cracked glass surface, error codes, or a control that does not respond. If you smell gas, turn off the supply, ventilate the room and call your gas provider or a qualified technician. Do not try to repair gas or electrical components yourself.
Gas or Induction: Matching the Heat Source to Your Kitchen
Professional-style cooktops come in gas and induction forms, and each suits different homes. Gas offers visible flame, instant adjustment and compatibility with nearly all cookware. Induction heats the pan directly with magnetic energy, giving fast response and a flat, easy-to-wipe surface, but it only works with magnetic cookware.
Check what your kitchen already has. A gas cooktop needs a suitable gas line, and an induction model needs a dedicated electrical circuit of the capacity the maker states. Switching from one type to the other can mean new utility work, so speak with a licensed professional before you commit.
A Quick Comparison
| Point | Gas | Induction |
|---|---|---|
| Cookware | Works with most pans | Needs magnetic bottoms |
| Cleaning | Grates and burners to remove and wash | Flat glass surface to wipe |
| Installation | Gas line and ventilation | Electrical circuit and clearances |
| Response | Visible flame adjusts instantly | Very quick and precise |
| Power outage | May still light with a match, depending on the model | Needs electricity |
Take a magnet to your existing pots and pans. If it sticks firmly to the bottom, the cookware is likely to work on induction.
Ventilation and Cutout Planning
High-output cooktops produce heat, steam and sometimes combustion byproducts, so a suitable hood or downdraft system is part of the plan. Check the maker’s guidance on hood height, capture area and airflow, and consult a qualified installer to match the ventilation to your cooktop. Local building codes may have requirements for gas appliances and exhaust systems.
Look at the cutout dimensions in the specification sheet, and measure your countertop opening carefully. Leave the required clearances to cabinets and walls, and confirm the thickness and material of the counter. Professional installation is strongly advised for gas and electrical connections.
Control Layout and Everyday Use
Knobs and touch controls each have their fans. Knobs give a direct feel, while touch controls clean easily but can be sensitive to spills. Check where the controls sit, and whether you must reach across a hot burner to adjust them. Burner layout matters too: a large burner for stockpots, a small one for simmering, and enough space between them so that large pans do not collide.
- Check the burner output ranges described by the maker.
- Look for a simmer setting if you cook delicate sauces.
- Consider a bridge or flex zone for griddles and long pans.
Maintenance Habits for a Long Life
Wipe spills promptly once the surface is cool. For gas models, remove grates and burner caps for washing as the manual describes, and clear any blocked ports using the method the maker recommends. For induction, use cleaners made for glass or ceramic surfaces, and avoid dragging rough pan bottoms across the top. If you notice a gas smell, leave the area and follow your gas supplier’s emergency guidance.
Cookware Choices That Match the Cooktop
Flat-bottomed pans make the best contact on both types, and warped pans waste heat. Heavy, well-made pots hold steady temperatures, and lids help control simmering. Before you buy a new set, check that the maker lists it as suitable for your cooktop type, and read the care notes for any coating.
Noise, Heat and Kitchen Comfort
A powerful cooktop changes how a kitchen feels. Gas burners radiate heat into the room, so good ventilation keeps the space comfortable during long cooking sessions. Induction releases less heat into the air, though the cookware itself gets hot, and some people notice a faint hum or fan noise from the unit when it runs at high power. Ask the maker about expected sounds, and think about whether your kitchen opens onto a living room.
Consider safety features such as automatic shut-off, child lock, pan detection and residual heat indicators. These are useful in busy homes and for anyone who shares the kitchen. Follow the manual for clearance from the wall behind and for any combustible materials around the unit. If something about the installation seems uncertain, a licensed installer can give you a clear answer.
Professional Cooktop FAQ
Gas or induction?
Gas gives visible flames; induction offers speed and easy cleaning. Pick the one that fits your cookware.
Do I need a stronger hood?
High-output burners create more heat and smoke, so ventilation matters. Gas and electrical work should also be done by a qualified installer, never by guesswork.
How wide should I go?
Choose the width of your cutout, and leave counter space on each side. Many cooks also leave room for a landing zone beside the burners where hot pots can rest safely.
Will my existing cookware work?
Gas works with nearly any pan. Induction needs cookware that a magnet sticks to, so test your pots before you commit.
What should I check before ordering a cooktop?
Confirm the cutout size, the clearances to walls and cabinets, the fuel or power requirements and the ventilation plan. Also check that the cooktop is available in the width and fuel type you need. Ask a professional installer if you are unsure.
Can I convert a natural gas cooktop to propane?
Many models can be converted with a kit, but not all, and the conversion should be done by a qualified person. Check the listing and the manual to see whether a kit is included or sold separately.
How wide should my range hood be?
Many guides suggest a hood at least as wide as the cooktop, and sometimes wider, mounted at the height the maker recommends. Follow the manual for your hood and cooktop and check any local rules.
Is induction easier to clean than gas?
Induction has a flat surface that wipes clean easily, and spills do not burn on as much because the surface itself does not get as hot. Gas has grates and burner parts to remove and clean, but they are usually sturdy.
Do I need a dedicated circuit for an induction cooktop?
Induction cooktops often need a dedicated electrical circuit with a specific rating. Check the installation guide and have a licensed electrician confirm that your home can support it.
Why does my gas burner click repeatedly?
Moisture, a dirty burner cap or a misaligned part can cause constant clicking. Turn the burner off, let it cool, clean and dry the parts and reseat them. If the problem continues, contact the maker or a technician.
Will my existing pans scratch a glass-ceramic surface?
Rough or dirty bases can scratch glass, so keep pan bottoms clean and smooth and lift rather than slide them. Check the manual for approved cookware and cleaning methods.
Going Deeper: A Step-by-Step Way to Choose a Professional cooktops
By the time you reach this point in the guide, you have seen the headline differences between the picks. What most buyers still struggle with is not finding options, it is choosing between two or three good ones without second-guessing the decision for months afterwards. The method below slows the choice down in a useful way. It works whether you end up with the ZLINE Professional Gas Cooktop, the Thor Kitchen Professional Gas Cooktop, or any other pick on the list, because it starts from your routine rather than from a feature list.
Start by writing down the job you actually need done, in one plain sentence. Not the job you might do one day, and not the job a salesperson describes, but the one that happens in your kitchen most weeks. A professional cooktops that is perfect for that sentence will feel right almost every time you use it, while one bought for an occasional edge case tends to gather dust or cause small daily frustrations. Be honest about frequency, too. Something used every day deserves more of your budget and attention than something pulled out a few times a year, and the other way round is equally true.
Next, look at the space the professional cooktops has to live in, work in, and be stored in. Measure the spot rather than guessing at it, and think about the path between storage and the place you will actually use it. A pick that has to be carried, dragged out, or squeezed past other items will slowly stop being used, no matter how well it performs. Allow room for doors, lids, handles, cords, vents, and your own hands. If two people use the same space, picture the busier moment of the day, not an empty kitchen at a quiet moment.
Then separate the features into three honest piles: things you will use weekly, things you will use occasionally, and things that simply sound appealing. Pay for the first pile. Be cautious about paying a lot for the third. Many disappointed buyers discover that the feature that sold them is the one they touch least, while a plain detail they barely noticed, such as how a lid sits, how a control feels, or how a surface wipes clean, shapes their opinion every single day.
Finally, read the limitation noted for each pick in the reviews above one more time, and ask a simple question: can I live with that on an ordinary, tired, busy day? Every product on this list, from the ZLINE Professional Gas Cooktop to the Empava Gas Cooktop, involves some trade-off, because that is the nature of kitchen equipment at any level. The right choice is rarely the one with no weakness. It is the one whose weakness lands on something you genuinely do not care much about, while its strengths land exactly on the jobs you do most.
Professional cooktops in Real Life: Matching the Pick to Your Routine
Guides tend to describe products in isolation, but a professional cooktops earns its place inside a routine. Think through a normal week before you decide. On a weekday, speed and easy cleanup usually matter more than maximum capability. On a weekend, you may have more time and more people around, and the same product gets used in a completely different way. A pick that handles both rhythms comfortably is worth more than one that shines in a single scenario and feels awkward the rest of the time.
Consider who else will use it. A partner, a teenager, a parent, or a housemate may approach the same professional cooktops with different habits, different strength in their hands, and different patience for instructions. Controls and steps that are obvious to you may not be obvious to them, and a product that several people can use confidently and safely is a calmer product to own. If one person will be the only user, you can safely lean harder into personal preference. If it will be shared, lean towards the clearer, simpler option.
Think about what sits around it, too. A new professional cooktops changes small things nearby: where other items get stored, which outlet or burner gets used most, what gets moved to make room. Buyers often blame a product for frustrations that are really about the reshuffle it caused. Planning the neighbouring space at the same time, even roughly, prevents that. Keep the items you use alongside it within easy reach, and give the things it replaces an honest new home or an honest goodbye.
It also helps to picture the second month, not just the first day. Novelty hides friction at first. Ask how the professional cooktops will feel when you are using it half awake, when guests are waiting, when you are cleaning up later than planned, or when you are preparing something familiar for the hundredth time. The picks in this guide, including ZLINE Professional Gas Cooktop, Thor Kitchen Professional Gas Cooktop, Empava Gas Cooktop, Frigidaire Professional Induction Cooktop, GE Profile Cooktop, and Bosch Benchmark Induction Cooktop, were chosen because they hold up under that kind of ordinary repetition, which is where kitchen equipment quietly proves itself.
If you are buying as a gift, apply the same routine test to the person receiving it rather than to yourself. Their space, their habits, and their patience are what matter. A modest pick that fits their kitchen and their way of cooking will be used and appreciated far more than an ambitious one that asks them to change how they do things. When in doubt, favour the option that needs the least explanation and the least extra equipment to be useful from the first day.
Your First Week With a New Professional cooktops: Setup and Early Habits
The first week with a new professional cooktops sets patterns that tend to last for years, so it is worth treating setup as part of the purchase rather than an afterthought. Begin by reading the manual properly, even if the product looks self-explanatory. Manuals for kitchen equipment hide their most useful information in unglamorous places: the cleaning notes, the warnings about what not to do, and the small print about parts that wear out and can be replaced. Ten quiet minutes with the manual now can prevent the most common early mistakes entirely.
Unbox and set up when you are not in a hurry, and keep the packaging until you are sure the pick suits you. Check every part against the parts list, look over surfaces and fittings before first use, and wash or wipe down whatever the maker tells you to prepare before food goes near it. If anything arrives damaged, missing, or different from what the listing described, deal with it straight away rather than after weeks of use, when returns and exchanges become much harder to arrange.
For your first few uses, choose familiar jobs rather than ambitious ones. Cook or prepare things you already know well, so that any difference in the result is down to the new professional cooktops and not to an unfamiliar recipe or process. Pay attention to the small signals: how it feels to handle, how long tasks take compared with your old way, what needs wiping afterwards, and which step you keep having to think about. Those early observations tell you more about long-term fit than any single impressive first result.
Build the supporting habits in the same week. Decide where the professional cooktops lives when it is not in use, where its accessories and parts go, and what your quick clean-up routine will be straight after use. A routine that takes a couple of minutes and happens immediately is far more sustainable than a thorough one that gets postponed. If other people will use it, show them the basics once, in person, rather than assuming the manual will be read. Most early damage and most early frustration come from one person not knowing the one thing another person assumed was obvious.
Keep notes, even rough ones, during the first week. A few lines on your phone about what worked, what needed adjusting, and what you would do differently next time will save you relearning the same lessons months later. This is especially useful for anything you use in cycles or seasons, where the gap between uses is long enough for hard-won know-how to fade.
Long-Term Care: Keeping a Professional cooktops Working Well for Years
Most kitchen equipment does not fail suddenly. It drifts. Performance fades a little, small parts wear, residues build up in places that are easy to ignore, and one day the owner concludes that the product was never very good. In many cases the product was fine and the care simply thinned out over time. The good news is that the care a professional cooktops needs is rarely complicated. It is mostly about little-and-often habits rather than occasional heroic deep cleans.
Clean as you go whenever you can. Spills, splashes, crumbs, grease, and moisture are all far easier to deal with while they are fresh than after heat, time, and repeated use have baked or pressed them in. Use the cleaning method the maker recommends for each surface and part, and be wary of harsh tools and strong products on finishes that were not designed for them. When you are unsure, the gentler method, repeated, almost always beats the aggressive method used once.
Give wear parts the attention they deserve. Seals, gaskets, filters, blades, hinges, latches, cords, and moving joints, whatever your particular professional cooktops relies on, are the pieces that decide how long it stays pleasant and safe to use. Check them now and then with your eyes and fingers. Cracks, stiffness, looseness, discolouration, lingering smells, and parts that no longer sit where they should are all early warnings. Replacing a small part early is almost always cheaper and less disruptive than replacing the whole product later.
Storage matters more than most people expect. Store the professional cooktops dry, clean, and in a position that does not strain its parts. Avoid stacking heavy items on top of it, trapping its cord, or leaving it somewhere damp, dusty, or exposed to strong heat. If it will sit unused for a long stretch, follow the maker’s guidance for putting it away, and give it a quick check and clean before it goes back into service. Products that are stored well tend to come back to life instantly. Products stored badly often need coaxing, cleaning, and occasionally repair.
Keep the paperwork. The manual, the receipt, and any warranty details are worth a single folder or a photo on your phone. If something does go wrong, having the model details and proof of purchase to hand turns a frustrating search into a short conversation. And if you ever pass the professional cooktops on to someone else, the manual goes with it, which is a small kindness that also keeps the next owner using it safely.
When Something Feels Off: A Calm Troubleshooting Order
Sooner or later, every professional cooktops does something that makes its owner pause: a result that is not quite right, a sound that was not there before, a part that feels different, a job that suddenly takes longer. The order in which you check things matters. Start with the simple and the free before assuming the product is broken, because in everyday kitchens the cause is usually ordinary: something not seated properly, something that needs cleaning, a setting chosen in a hurry, or a step skipped without noticing.
First, stop and reset the basics. Switch off or set the professional cooktops down safely, let anything hot cool, and go back to the state the manual assumes. Check that parts are fitted the way they should be, that nothing is obstructing a vent, a seal, a blade, a burner, or a contact point, and that the surface or power source you are using is the one the product expects. A surprising share of problems end at exactly this step, with no tools and no cost involved.
Second, clean the areas the problem might touch. Build-up is a quiet cause of poor results, odd smells, sticking, uneven performance, and parts that no longer move or seal as they should. Clean carefully, dry thoroughly, and try again with a simple, familiar job so you can judge the result fairly. If the problem disappears, you have learned something valuable about how often that particular clean needs to happen in your kitchen, with your water, your food, and your habits.
Third, change one thing at a time. When a result disappoints, it is tempting to adjust everything at once, after which nobody knows what actually helped. Adjust a single variable, the amount, the timing, the setting, the order of steps, and observe. This slower approach feels tedious for about a day and then pays for itself for years, because you end up genuinely understanding your professional cooktops instead of collecting superstitions about it.
If the problem persists, or if anything involves damage, exposed wiring, leaking, cracking under pressure or heat, or a safety part that no longer works as described, stop using the product and contact the maker or the seller. Do not improvise repairs on safety-related parts. Photograph the issue, note when it started and what you had already tried, and have your model and purchase details ready. A clear, calm report gets a faster and better answer than a frustrated one, and it protects your warranty position as well.
Comparing the Picks in Plain Language
Specifications and feature lists only go so far, so here is a plainer way to compare the names in this guide. Read the write-up of the ZLINE Professional Gas Cooktop again and notice two things: who it is described as suiting, and the limitation the guide is honest about. Then do exactly the same for the Thor Kitchen Professional Gas Cooktop. In most cases the better choice for you becomes obvious at that point, not because one is simply better, but because one description sounds like your kitchen and the other sounds like someone else’s.
The Empava Gas Cooktop deserves the same treatment, especially if your first instinct was to skip past it. Picks that sit in the middle of a list are often the balanced ones, the ones that give up a headline feature in exchange for being easy to live with across many jobs. If your needs are broad rather than specialised, that balance is frequently the smartest place to land. Specialised picks reward specialised users. Balanced picks reward everybody else, quietly, every day.
It is also worth comparing how each pick will age in your home. Ask which one you would rather clean after a messy job, which one you would rather store in the space you actually have, and which one you would rather explain to another person in the household. Those unglamorous questions predict satisfaction surprisingly well, because daily friction, not peak performance, is what owners actually experience most of the time.
If you are torn between two, decide by imagining a return. Which one would you be more reluctant to send back after a month of normal use? Which one’s absence would you actually feel at the moment you reach for it? That small thought experiment cuts through feature comparisons and lands on attachment, and attachment, for a professional cooktops you will use for years, is a perfectly rational thing to buy.
And if, after all this, two picks still feel equal, choose the one that is simpler to own: easier to clean, easier to store, easier to get parts or support for, and easier to understand without the manual open. Equal performance plus lower effort is not a compromise. Over the life of the product, it is a genuine advantage that compounds every single week.
More Questions Buyers Ask About Professional cooktops
How long should I spend deciding between two professional cooktops picks?
Long enough to check the practical points in this guide: the space it will live in, the jobs you do most, the limitation you are being asked to accept, and how it will be cleaned and stored. For most buyers that is one careful read and a few measurements, not days of research. If two options still feel equal after that, they probably are equal for your purposes, and you can choose on simplicity and move on with confidence.
What should I check before ordering a professional cooktops?
Confirm the size against the space you measured, check that your home setup suits it, whether that means the right outlet, hob type, storage spot, or work surface, and read what is included so you know which accessories, if any, you need to add yourself. Check the returns route as well, while you are calm and before you need it. A few minutes of checking before ordering prevents the most common and most avoidable disappointments.
How do I keep a new professional cooktops clean without spending ages on it?
Attach cleaning to use rather than to a separate chore. Wipe, rinse, empty, or dry the parts the maker highlights straight after use, while residues are fresh and the job takes moments. Then give it a slightly deeper clean on a rhythm that matches how often you use it. Little and often beats rare and thorough, both for hygiene and for how the product performs, and it keeps cleaning from ever becoming the reason you stop using it.
Are extra accessories for a professional cooktops worth buying straight away?
Usually not all of them, and rarely on day one. Live with the basic setup first and notice what you genuinely reach for and miss. Then add the one accessory that solves a real, repeated annoyance. Accessories bought speculatively tend to fill drawers, while accessories bought in response to experience get used constantly. The exception is any spare or replacement part the maker treats as a consumable, which is worth having before you need it.
When should I repair a professional cooktops and when should I replace it?
Start with the maker’s support route, especially while any warranty still applies, and be guided by what has actually failed. A worn replaceable part, a tired seal, or a lost accessory points towards repair. Damage to the main body, to heating or pressure or motor systems, or to anything safety related points towards replacement, or at minimum towards professional advice before further use. Sentiment is understandable, but safety and reliability come first with kitchen equipment.
Can I use a professional cooktops in a small kitchen?
In most cases yes, provided you plan for it honestly. Measure the working space and the storage space separately, because they are different problems. Think about what it displaces, where parts and accessories will go, and whether you can clean up around it comfortably. Small kitchens reward picks that are simple to move, simple to store, and simple to clean, and they punish bulky extras. Choose for the kitchen you have, not the one you plan to have one day.
What is the most common mistake new owners of a professional cooktops make?
Judging it too quickly, in both directions. Some owners declare it a triumph after one good result and stop learning how to get the best from it. Others hit one disappointing early attempt, usually caused by an unfamiliar process or a skipped step in the manual, and quietly give up. Give it a fair run of familiar jobs, keep small notes, adjust one thing at a time, and judge it after a few weeks of ordinary use rather than a single outing.
How should I store a professional cooktops between uses?
Clean, dry, and unstrained. Make sure it is fully dry before it goes away, store it where air can circulate and dust and damp cannot settle into it, and avoid resting heavy items on it or trapping cords and flexible parts at awkward angles. If it will be stored for a long period, follow the maker’s guidance and check it over before the next use. Good storage is invisible when it works: the product simply comes out ready, every time.
The Short Version
For a restaurant look, the ZLINE. For continuous grates, the Thor Kitchen. For a modest gas option, the Empava. For fast induction, the Frigidaire Professional. For a practical upgrade, the GE Profile. For sleek precision, the Bosch Benchmark.
Related Guides
- 6 Best Kitchen Cooktops: Induction, Gas and Portable (2026)
- 6 Best Cooktops: Induction, Gas and Electric Picks (2026)
- Gas vs Electric vs Induction Cooktops for Home Cooks
- 6 Best Portable Induction Cooktops: Single and Double (2026)
- 6 Best Commercial Induction Cooktops: Portable and Foodservice (2026)

