Starting out with an outdoor oven can feel like a leap, especially if you worry about fire management. The easiest models run on gas or electricity, heat up quickly and need little more than a peel and some dough.
The six below lean toward simple controls and approachable setups. We have not used these products ourselves, so confirm the details on the current listing before you buy. Read recent owner feedback to see what first-time buyers say about assembly and learning curves.
As an Amazon Associate we earn from qualifying purchases. Links below are affiliate links, and they do not change the product information we give.
What to Look For
| Feature | Why it matters |
|---|---|
| Simple ignition | Push-button starts mean less fuss |
| Gas or electric | Easier than wood for a new user |
| Included accessories | A starter peel or stone helps you begin |
| Clear instructions | Good manuals and videos shorten the learning curve |
| Learning resources | Popular models come with extra tutorials and recipes online |
In this guide
Specs at a Glance
| Oven | Material | Size | Notes |
|---|---|---|---|
| Ooni Koda 12 | Powder-coated steel and stone | 12-inch class | Gas; folding legs |
| Cuisinart Alfrescamore | Stainless steel and stone | Compact | Gas; thermometer |
| Gozney Tread | Steel and stone | Compact | Gas; portable |
| Ninja Woodfire Outdoor Oven | Steel and stone | Compact | Electric; presets |
| Bertello Outdoor Pizza Oven | Stainless steel and stone | Compact | Multi-fuel; stone |
| Blackstone Pizza Oven | Steel body and stone | Mid-size | Propane; stand |
The 6 Best Outdoor Ovens for Beginners
Top pickBest for first pizza ovens
1. Ooni Koda 12 Gas Powered Pizza Oven
A compact gas pizza oven with a simple dial and a fast heat-up. It is widely seen as a first oven and has plenty of tutorials online. Because it is so common, any question you have will probably already have a video or forum thread.
Suits: first pizza ovens. Strengths: easy lighting and lots of guides. Weaknesses: a smaller baking space. Skip it if you want to burn wood.
Best for casual beginners
2. Cuisinart CPO-600 Alfrescamore Portable Outdoor Pizza Oven
A portable gas oven from a household name. It comes with a stone and a temperature gauge, and its controls are easy to understand. Its simple dial and included stone make it easy to get a first pizza on the table.
Suits: casual beginners. Strengths: approachable controls. Weaknesses: less premium build. Skip it if you want a heavy-duty oven.

Best for people who like a design-forward look
3. Gozney Tread Portable Pizza Oven
A compact gas pizza oven from Gozney that is easy to carry. It is aimed at buyers who want a well-made portable oven without a steep learning curve. It is light and well designed, which makes it easier to set up and put away between uses.
Suits: people who like a design-forward look. Strengths: portable and tidy. Weaknesses: limited cooking space. Skip it if you want to cook large pizzas.

Best for balconies and small yards
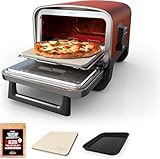
4. Ninja Woodfire Outdoor Oven OO101
An electric outdoor oven with a wood pellet flavor unit and clear preset modes. It plugs in, so there is no gas to light. It sits on a counter, runs off an outlet, and has presets so you can concentrate on technique.
Suits: balconies and small yards. Strengths: push-button settings. Weaknesses: needs an outlet. Skip it if you cook far from power.
Best for adventurous beginners
5. Bertello Outdoor Pizza Oven
A multi-fuel portable oven that is an easy way to try wood-fired pizza at home. It takes a bit of practice but is approachable. Starting with wood or charcoal teaches fire control, so expect a few imperfect pies at first.
Suits: adventurous beginners. Strengths: multi-fuel flexibility. Weaknesses: requires fire tending. Skip it if you want a no-effort oven.
View Bertello Outdoor Pizza Oven on Amazon
Best for backyard starters
6. Blackstone Pizza Oven
A propane pizza oven from a brand beginners often know through griddles. It includes a stand and a stone for backyard use. It pairs well with a griddle or grill in the same family, which keeps all your outdoor gear consistent.
Suits: backyard starters. Strengths: familiar brand. Weaknesses: less insulation. Skip it if you want high-end results.
View Blackstone Pizza Oven on Amazon
Care and Setup
- Read the manual before the first lighting.
- Test the stone with a plain flatbread first.
- Keep a cover on the oven when not in use.
- Store the peel where it stays dry.
- Practice launching the dough using flour on the peel.
- Wipe the outer shell only when it is cool.
Mistakes to Avoid
- Using too much sauce on the first pizza.
- Launching a pizza that sticks to the peel.
- Turning the heat too high too fast.
- Skipping a practice run with simple dough.
Choosing the Right Fuel for a First Oven
Your fuel choice shapes how steep the learning curve is. Gas, usually propane from a refillable cylinder, is the simplest: you turn a dial, press an ignition button and the flame stays steady. Heat is easy to adjust, and you do not need to build or feed a fire. Electric ovens are simpler still because you plug in and select a setting, but they need an outdoor-rated outlet and tend to cost more to run and place.
Wood and charcoal give a classic flavor and a rewarding process, but fire management takes practice. You must build the fire, feed it at intervals and watch the flame position as it changes. Expect uneven results at first, and keep the dough simple while you learn. Multi-fuel ovens let you start on gas and graduate to wood, which can be a smart middle path if you are curious.
Consider where you will cook. A balcony, rooftop or tight yard may have rules about open flames and propane, so check your lease, local regulations and building policy first. If you plan to travel with the oven, a lightweight gas model is easier to pack. Whichever fuel you pick, confirm on the listing what comes in the box. Some ovens ship without a regulator, hose or fuel, and you may need to buy those separately.
Size, Weight and Portability for New Owners
Bigger is not better for a first pizza oven. A small oven heats quickly, uses less fuel and is easier to store, but it limits how large your pizzas can be. A larger oven handles bigger pies and lets you cook two things at once, but it weighs more and takes longer to warm up. For most beginners, a compact oven that makes pizzas of a normal personal size is plenty.
Check the weight and the carrying method. Folding legs, a stand or a tabletop design affect where the oven can sit and how safely. A heavy oven on a wobbly table is a risk, so confirm that your surface can handle the weight and the heat. Heat-resistant surfaces matter, since the base of an oven can get hot enough to damage wood or composite tables.
Think about storage as well. If you will bring the oven in after each use, look for removable parts and a modest footprint. If it will stay outside, a fitted cover is a good investment. Measure the opening, because the width of the mouth determines what size pizza peel and pan fit. A wide opening makes launching easier, while a low roof helps heat bounce back on the pizza top.
Accessories a First-Timer Actually Needs
You do not need a pile of gear, but a few items make early attempts much smoother. A peel is the most important. A thin metal peel slides under a cooked pizza easily, while a wooden one is better for launching raw dough because it grips flour. Some beginners start with both. A small turning peel helps rotate the pizza in the oven, so edges brown evenly.
An infrared thermometer is useful to check the stone temperature, since the built-in gauge on some ovens measures air, not the baking surface. Heat-resistant gloves protect your hands, and a stiff brush cleans the stone. A bench scraper helps portion dough, and a wire rack stops cooked pizzas from steaming underneath.
Do not forget fuel-related items: a regulator and hose for gas, a lighter or matches for wood and charcoal, and a spare cylinder or bag of fuel so the evening does not end early. Read the listing to see what is included. Skip fancy extras until you know what you use. Many experienced cooks find that a good peel, a thermometer and a bench scraper cover most needs, and anything else can come later.
Dough and Technique Basics
Great equipment will not rescue poor dough handling, so focus on a few basics. Use a simple recipe with flour, water, salt and yeast, and give it time to rise. A longer, cooler rise often gives better flavor and texture. Let the dough come close to room temperature before shaping, as cold dough fights back and tears.
Shape gently with your hands, pressing from the center outward and leaving the rim puffy. Avoid rolling pins, which squeeze out the air that gives a light crust. Dust the peel with a little flour or semolina so the pizza slides. Build the pizza quickly, because a wet topping or a long wait makes the dough stick.
Keep toppings modest. A thin layer of sauce, a light scatter of cheese and a few toppings let the crust cook through. Launch with a quick shake and a confident motion. Turn the pizza partway through the bake so it browns evenly. If the bottom burns before the top is done, lower the heat or let the stone settle for a minute between pies. Keep notes about timing and temperature so you can repeat what worked.
Safety and Upkeep for Newcomers
A pizza oven gets very hot on the outside as well as the inside, so treat it with respect from day one. Set it up outdoors on a stable, level, heat-safe surface away from walls, overhangs and anything flammable. Never use a gas or wood oven in a garage, tent or enclosed porch. Keep children and pets back, and let the oven cool fully before moving or covering it.
For gas models, check the hose and connection each time you attach the cylinder. A soapy water test, done as the manual describes, reveals leaks as bubbles. Store cylinders upright and outdoors. For wood or charcoal, use only the fuel the maker recommends, and dispose of ash only when it is cold.
Cleaning is straightforward. Brush the stone while it is still warm, and let burnt bits burn away rather than scrubbing with water, which can crack a stone. Wipe the exterior once it is cool, using a soft cloth. A cover protects against moisture. Check screws and legs now and then, and read the warranty so you know how to get replacement parts. Done consistently, this light routine keeps a first oven in good shape for years.
A Beginner Readiness Checklist
Buying an outdoor oven is exciting, and a little planning keeps the first cook relaxed. Before the box arrives, walk through the following items so you are not hunting for something while the oven is already hot.
- A stable, level, heat-tolerant surface of the kind your maker approves, away from walls, fences and overhanging branches.
- The fuel your oven uses, with a spare supply on hand, stored as the maker instructs.
- A peel, a turning tool and heat-resistant gloves that suit the oven you chose.
- Prepared dough and toppings laid out before you light the oven.
- A clear path and a plan for keeping children and pets away from the hot area.
Read the manual in full before the first light. Gas, pellet and wood models each have their own steps for setup, lighting and shutdown, and the maker’s instructions always outrank general advice.
How to Read a Pizza Oven Listing
Product pages for outdoor ovens love to quote a maximum temperature and a time to reach it. These figures describe ideal conditions, so treat them as a ceiling and not a promise. Wind, outside temperature and fuel quality all change real-world heating times.
Look at the cooking surface size, since it limits how large a pizza you can bake. Check the weight and whether it comes with legs or a stand, because some models are designed to sit on a table and others need their own base. Note what is included in the box and what is sold apart, such as covers, peels and carry bags.
Finally, look closely at the fuel and ignition details. A gas model needs a compatible supply and connection, and you should follow the maker’s guidance or consult a qualified professional for anything involving gas lines.
Choosing Between Fuel Types
| Fuel | What beginners often like | What to consider |
|---|---|---|
| Gas | Simple lighting and steady control | Needs a safe supply and storage |
| Wood | Classic flavor and flame | Takes practice managing the fire |
| Pellets | Moderate control and smoky notes | Needs dry pellets and a feeding routine |
| Multi-fuel | Flexibility to experiment | More parts and settings to learn |
If you are unsure, gas is often seen as the easiest to learn, while wood rewards patience. Pick the one that fits your space and how much attention you want to give the fire.
Your First Cook Plan
For a first attempt, aim for a small, simple pizza so you can focus on the oven rather than a complicated recipe. Preheat for the time the maker recommends, and use the surface temperature guidance in the manual. Dust the peel lightly, build the pizza quickly so it does not stick, and slide it in with a confident motion.
Turn the pizza regularly so it cooks evenly, because the side nearest the flame often cooks faster. Expect the first few to be imperfect; that is part of the learning. Keep notes on dough hydration, bake time and what you would change.
When you finish, let the oven cool completely before covering or moving it, and follow the maker’s cleaning steps. Never leave a hot oven unattended.
Mistakes to Avoid With a First Outdoor Oven
Most early disappointments with outdoor ovens come down to a handful of avoidable errors. The first is rushing the preheat. The stone or cooking floor needs time to soak up heat, and a pizza placed on a surface that is not ready will cook unevenly and stick. Use the maker’s guidance, and give the oven a few extra minutes between pizzas so the floor recovers.
The second is using dough that is too wet or too cold. Dough straight from the refrigerator is stiff and tears, while very wet dough clings to the peel. Let the dough come up in temperature and flour the peel lightly before building the pizza.
- Loading too many toppings, which weigh the pizza down and leave the center undercooked.
- Leaving the pizza on the peel too long before launching it into the oven.
- Placing the oven on a surface that is not approved for heat.
- Forgetting to rotate the pizza, so one side burns while the other stays pale.
- Cleaning the cooking floor with water or soap while hot.
Treat each cook as practice. Keep a short note of what you did, how long it took and how the result looked, and change one thing at a time. Within a few sessions you will find a rhythm.
Whenever you are unsure about fuel, ventilation or placement, return to the manual or contact the maker. For anything involving gas connections, ask a qualified professional.
Choosing Between Ooni Koda 12 Gas Powered Pizza Oven and the Other Picks for Your Garden
Comparisons in this guide make most sense against your real pattern of entertaining. Ooni Koda 12 Gas Powered Pizza Oven leads the line-up for the reasons its review sets out, but capacity questions decide real satisfaction: how many people do you feed at once, how patient are they about eating in rounds, and how much garden or patio space can the oven honestly claim? A compact model that comes out weekly will serve a household better than a large one that feels like an event to set up.
Cuisinart CPO-600 Alfrescamore Portable Outdoor Pizza Oven and Gozney Tread Portable Pizza Oven represent different answers to the fuel and portability questions. A model that travels to campsites, friends’ gardens or a holiday home lives a different life from a fixed centrepiece, and fuel choice shapes everything from flavour to how spontaneous a session can be — gas for weeknight ease, wood for ceremony and smoke. Neither is objectively better; they are better for different cooks.
Finally, factor in the accessories you will genuinely use: a stand, a cover, peels in the sizes the oven needs, and a thermometer. Budgeting for those alongside the oven, rather than discovering them afterwards, gives a fairer comparison between picks whose headline appeal may rest on different assumptions.
Building an Outdoor Oven Routine That Goes Beyond Pizza Night
Outdoor ovens earn their place in a garden when they cook more than the dish they were bought for. Pizza is the obvious starting point, and the reviews above cover that ground thoroughly, but the same retained heat that blisters a crust will roast vegetables with properly charred edges, bake flatbreads, sear steaks in a cast-iron pan, and finish a tray of nachos for a crowd. Thinking of the oven as a small, very capable outdoor hearth rather than a single-recipe appliance changes how often it gets used — and how quickly it justifies its footprint.
A practical way to broaden the repertoire is to cook in sequence as the oven’s heat evolves. While the temperature is at its peak, pizzas and flatbreads go in. As it settles, use the still-serious heat for roasting potatoes, peppers and onions, or for a cast-iron pan of sausages. Later, the gentler residual warmth will bake a crumble or keep dishes warm for serving. Planning a menu around that arc means one firing feeds a whole evening, which is both economical with fuel and a pleasure to host around.
That versatility is part of what separates the picks above. Ooni Koda 12 Gas Powered Pizza Oven may be the natural centrepiece for a household that cooks this way often, while Cuisinart CPO-600 Alfrescamore Portable Outdoor Pizza Oven could suit a garden where the oven comes out for gatherings rather than weekly use. Decide which household you are before you decide which oven you want.
Dough, Toppings and the Craft of a Better Outdoor Pizza
Great outdoor pizza is mostly decided before anything meets the heat. A dough given time to ferment develops flavour and stretches without fighting back; a dough rushed from mixing to oven tears, springs back, and bakes up bready rather than crisp. Let shaped dough rest until it relaxes, stretch it on a well-floured surface, and remember that a slightly thinner centre with a puffier rim gives the classic contrast of crisp base and soft, blistered edge.
Toppings reward restraint. Too much sauce soaks the base, too much cheese insulates it, and wet vegetables release water exactly where you want dryness. Use sauce sparingly, consider cooking down a watery sauce in advance, pat mozzarella and vegetables dry, and save delicate toppings — fresh herbs, cured meats that crisp quickly, a drizzle of good oil — for the moment the pizza comes out. The oven’s fierce heat does the rest in a very short time, which is why preparation, not oven heroics, is where quality is won.
Work in an assembly line if you are feeding several people: one person stretching, one topping, one watching the oven and turning pizzas as the reviews’ guidance for each pick suggests. Pizzas cooked one at a time and eaten straight away, sliced and shared as they emerge, beat a stack of finished pizzas going cold while the last one cooks.
Fuel, Fire and Heat Management Outdoors
Whether a pick above runs on gas, wood, pellets or a combination, the principle is the same: the oven needs time to become a heat store, not just a hot flame. The stone or cooking surface must be thoroughly heated through, because the base of a pizza cooks from the stone while the toppings cook from the air and flame above. Judging readiness by the surface temperature — with an infrared thermometer if you have one, or by the behaviour of a test pinch of dough or a dusting of flour — prevents the common disappointment of a charred top over a pale, soft base.
For wood-fired models, small dry pieces burn hotter and cleaner than large logs, and the fire should be established well before the first pizza so you are cooking over lively flame and embers rather than smoke. For gas models, the discipline is patience during preheat and restraint afterwards; turning the burner to maximum between every pizza can scorch toppings before bases catch up. In all cases, wind is the hidden variable: a sheltered position, used with proper clearances, keeps heat where it belongs and makes sessions far more predictable.
Between pizzas, give the stone a short recovery moment. Back-to-back pizzas draw heat out of the surface, and a brief pause — long enough to stretch and top the next base — lets the stone recharge so the fifth pizza cooks as well as the first.
Siting, Safety and Living With an Outdoor Oven
Choose the oven’s home with the same care as its menu. It needs a stable, level, non-combustible surface, sensible clearance from fences, walls, furniture and overhanging branches, and a position where the cook can work without guests — especially children — crowding the hot opening. Think about the route from kitchen to oven as well: you will carry dough, toppings and finished pizzas along it many times in an evening, so a clear, well-lit path matters more than a picturesque corner at the far end of the garden.
Hot tools are part of the setup. A proper turning peel, heat-resistant gloves, and a safe place to set down a scorching peel between turns prevent the improvisations that cause burns and dropped pizzas. Keep a clear landing zone beside the oven — a board or tray that only ever receives finished food — and agree it with anyone helping, so raw and cooked items never share a surface.
When the session ends, let the oven cool completely before covering or moving it, and store it dry. Ash from wood-fired models must be fully cold before disposal into a metal container. Covers protect against weather, but trapping a damp oven under a cover invites corrosion, so dry first, cover second.
What Your First Five Sessions Will Teach You
Treat your first sessions as tuition and they will repay you for years. The first teaches logistics: where everything should stand, how the dough behaves, and how long a firing really takes from lighting to first pizza. Cook something simple and forgive the results. The second teaches heat: how the stone’s readiness feels, how recovery between pizzas works on your model, and how wind changes the evening.
By the third session, turning and timing start to become rhythm rather than concentration, and you will notice your pizzas emerging more evenly. The fourth is the session to invite forgiving friends, because cooking for an audience while tending a fire is its own skill. The fifth is when most owners first cook beyond pizza — a roasted dish in the settling heat — and discover the second half of what they bought.
Keep brief notes after each session: what the weather did, what you would change, which topping combinations disappeared first. Five sessions of notes will teach you your own oven better than fifty pages of generic advice, including this guide.
Menus for Different Kinds of Gatherings
A family pizza night, a birthday in the garden and an evening built around a sporting event each ask different things of an outdoor oven. For families, set up a topping station with small bowls and let everyone build their own; the oven becomes entertainment as much as appliance, and children who have topped a pizza rarely refuse to eat it. Cook in a steady rhythm, slice each pizza as it emerges, and keep a simple salad and drinks flowing so nobody is hostage to the next base.
For a larger party, shift the format: a cook-and-serve station where pizzas come out continuously, cut into smaller slices for grazing, works better than attempting to seat everyone simultaneously. Offer two or three topping combinations rather than a free-for-all, which keeps the line moving and the quality consistent, and plan a substantial starter that does not need the oven, so the first pizzas are a pleasure rather than a rescue.
For a quieter evening of couples or close friends, use the oven’s full arc — pizzas at peak heat, a roasted dish as it settles, a baked dessert in the residual warmth — and eat in courses around the fire. The same appliance supports all three formats; what changes is the plan, and planning, as this guide keeps suggesting, is most of the craft.
Dough Management for a Crowd
Feeding more than four people from an outdoor oven is a dough logistics exercise. Make the dough the day before and let it ferment slowly in the fridge, which improves flavour and, just as importantly, moves the work off the day itself. Portion it into individual balls before chilling, stored in a lightly oiled tray or containers with room to expand, so that on the day you are shaping rather than dividing and rounding under pressure.
Bring dough to room temperature before stretching — cold dough fights back, tears, and bakes unevenly — but work through the batch in order, keeping unused balls covered so their surfaces do not dry and crack. If the evening runs long, the last balls will be the most relaxed and extensible; if it runs very long, a ball or two held back in the fridge covers the guest who arrives late or the pizza that meets with an accident.
Have a deliberate plan for surplus dough, because there is always surplus dough. It freezes well in balls for another day, or it can become garlic flatbreads, dough sticks for dips, or a simple focaccia in the oven’s residual heat, so nothing made with care goes to waste.
Accessories That Matter and Accessories That Do Not
The short list of accessories that genuinely change outdoor oven cooking starts with peels: a larger one for launching and a smaller turning peel for rotating pizzas in the heat, sized to the oven you choose. An infrared thermometer removes the guesswork from judging the stone, and for many owners it is the single purchase that most improves consistency. Heat-resistant gloves, a long-handled brush for sweeping the stone, and a stand or stable table at a comfortable working height complete the working kit.
Beyond that, buy from experience rather than anticipation. A dough scraper and good storage boxes help anyone who makes dough in batches. Pizza screens, specialty cutters and elaborate serving boards are pleasures rather than necessities, and they earn their storage only once your routine is established and you know exactly which friction they would remove.
The accessory to be most careful with is the cover: buy the one made or sized for your oven, fit it only to a cool, dry oven, and check under it occasionally through winter so a small problem is found while it is still small.
A Short Pre-Purchase Conversation to Have With Your Household
The most underrated step in buying anything shared is a five-minute conversation with the people who will share it. Who will use it most? Who will clean it, honestly? Where will it live, and what gets moved to make room? Are there features one person loves that another will find fiddly every single day? Surfacing those answers before purchase prevents the quiet resentment of a product that suits one household member and burdens the rest.
Agree the care routine in the same conversation, while it is still theoretical and therefore easy to discuss. The routine in this guide is deliberately modest, but it only works if it belongs to everyone rather than to the person who happened to read the manual. Households that share the small tasks — the wipe-down, the check, the cover — keep equipment in better condition with less friction than households where care is one person’s invisible job.
And agree what success looks like: the meals, drinks or gatherings this purchase is really for. When the first of those happens and goes well, the purchase is justified; everything after that is dividend.
Long-Term Ownership: What Changes After the First Year With Your Choice
The first month with an outdoor oven is about novelty; the first year is about fit. By the end of it you will know which of the promises in the reviews above actually shaped your routine and which turned out to be decoration. Features that sounded minor at purchase — a handle that stays comfortable, a lid that is easy to store, a control that can be read at a glance — tend to become the reasons a product is still loved, while headline capabilities that did not match your habits quietly stop being mentioned. That is normal, and it is why this guide weighs everyday behaviour so heavily.
Year one is also when maintenance habits either settle or slip. The owners who are happiest at the two-year mark are rarely the most meticulous; they are the ones with a small routine attached to each use, so care never becomes a backlog. If your routine has slipped, the answer is a reset — one thorough clean and check, following the care guidance earlier in this guide — rather than guilt. Products recover remarkably well from a single honest reset, and the reset is a good moment to re-read the manual’s key pages with experienced eyes.
Finally, keep your proof of purchase and any registration details somewhere findable. Support, spare parts and warranty conversations all go faster with paperwork in hand, and the middle of a problem is the worst time to discover where yours went.
The Mistakes Experienced Owners Warn Beginners About
Ask experienced owners what they would tell their earlier selves and the same themes recur for an outdoor oven. The first is impatience at the start: rushing the first uses, skipping the setup and care steps in the manual, and judging the product on a debut performance that says more about the learning curve than about the equipment. The second is its opposite — neglect once the novelty fades, when small cleaning and checking tasks are postponed until they become big ones.
The third theme is buying twice: choosing on a single headline feature, discovering that everyday fit matters more, and replacing the product within a couple of years. The reviews in this guide are structured to prevent exactly that, by spending as much time on handling, care and honest limitations as on strengths. If you are wavering between two picks, re-read their limitation notes rather than their praise; the limitation you can live with happily is the better buy.
The fourth is ignoring the environment the product lives in — the space, the weather, the storage, the people who will also use it. Equipment does not fail in the abstract; it fails in a particular kitchen, garden or household, and most of those failures are visible in advance to a buyer who pictures real life honestly.
How Ooni Koda 12 Gas Powered Pizza Oven Fits Into a Thoughtful Final Decision
If Ooni Koda 12 Gas Powered Pizza Oven is on your shortlist, give it a fair final test on paper. Write down the three jobs you will ask of it most often, the space it will live in, and the care routine you are genuinely willing to keep. Then read its review above one more time, checking each of those points against what the review actually reports — its strengths, its handling, and its stated limitation. A pick that survives that exercise is rarely a disappointment, because the decision was made against your life rather than against an advertisement.
Do the same for one alternative — the pick whose limitation bothered you least or whose strengths matched your second priority — and compare the two written summaries rather than the two products in the abstract. If they still tie, decide on the practicalities: availability of parts and support, how the product fits your storage, and which one you would rather clean on a tired evening. Those tiebreakers sound mundane and decide real satisfaction.
Then commit. Endless comparison after a sound decision only manufactures doubt, and the cooks who enjoy their equipment most are the ones who buy carefully once and then get on with cooking.
Beginner Outdoor Oven FAQ
What should I cook first?
Start with thin flatbreads or a basic pizza and a small amount of toppings.
Do I need special flour?
Bread flour or pizza flour helps, but regular flour works for practice.
How long does it take to learn?
Most people feel comfortable after a few cooks, once they understand how their oven heats.
Should a beginner choose gas or wood?
Gas is easier, because the flame stays steady. Wood is rewarding but needs patience and a feel for fire.
How long does a pizza oven take to heat up?
Heat-up time varies by model and fuel, so check the listing or manual. Gas ovens generally warm faster than wood fired ones. Give the stone enough time to reach the right temperature, not just the air.
Why does my pizza stick to the peel?
Sticking usually comes from wet dough, slow topping or too little flour on the peel. Work quickly and shake the peel before launching. Semolina or a light dusting of flour helps.
Is a pizza stone necessary?
Most outdoor ovens include a stone or baking surface, because it provides the strong bottom heat that crisps crust. Check that one comes with your model. Replace a cracked stone rather than use it.
Can I cook things other than pizza?
Many ovens can handle flatbread, roasted vegetables or small cast iron dishes. Check the maker's guidance on cookware and the maximum temperatures. Keep an eye on food, since heat is intense.
Do I need a cover?
A cover helps protect the oven from rain, dust and sun when it is not in use. Let the oven cool completely first. Look for one made for your specific model.
What if my pizza burns on the bottom?
The stone may be too hot. Lower the flame or wait between pizzas so the surface settles. Rotating the pizza and using a thinner layer of flour on the peel can also help.
Can I use it on a balcony?
Rules differ by building and region. Check lease terms, local fire regulations and the manual's clearance requirements. If open flames or propane are restricted, consider an electric model.
Is wood-fired flavour noticeably different from gas?
Wood adds a gentle smokiness and the theatre of a live flame, which many cooks love, while gas offers push-button convenience and steadier heat that suits weeknights and beginners. At the very high temperatures these ovens reach, the cooking itself is fast either way, so choose based on the experience and routine you want, not on flavour alone.
What else can I cook in an outdoor oven besides pizza?
A great deal: flatbreads and garlic bread, roast vegetables, baked potatoes in the residual heat, steaks and chops seared in a cast-iron pan, traybakes, baked pasta dishes, and desserts such as crumbles or baked fruit once the fiercest heat has passed. Cooking in sequence as the oven cools turns one firing into a full menu.
How do I stop pizza bases sticking to the peel?
Use a light, even dusting of flour or fine semolina on the peel, build the pizza quickly once it is on the peel, and give the peel a gentle shake before launching to confirm the base moves freely. If it sticks at one spot, lift that edge and blow a little extra flour underneath rather than forcing it, which usually tears the dough.
Can an outdoor oven stay outside all year?
Most can live outdoors with a well-fitting cover, but they last longer stored dry and, where space allows, under shelter through the worst weather. Always let the oven cool and dry fully before covering, keep vents and burners clear, and check the cooking surface and fittings at the start of the season before the first firing.
Why is the top of my pizza cooked but the base pale?
The stone was not heated through, even if the air felt fiercely hot. Give the oven a longer preheat, judge the stone rather than the flame, and allow the surface a short recovery between pizzas. Also check that the base is not overloaded with wet toppings, which cool the dough from above while it is trying to crisp from below.
How can I practise without wasting dough on a crowd?
Hold a few small solo sessions with a single batch of dough and no audience. Make two or three pizzas in a row, changing one thing each time — a longer preheat, a lighter hand with the sauce, a different moment to turn — and eat the evidence as you go. Solo practice removes the pressure to perform, lets you watch the stone and the flame closely, and builds the turning and launching rhythm that group sessions demand. By the time friends are invited, your hands will know the routine and you can enjoy the evening you are hosting.
The Short Version
For a classic first oven, the Ooni Koda 12. For simple controls, the Cuisinart. For a stylish portable, the Gozney Tread. For electric ease, the Ninja Woodfire. For multi-fuel play, the Bertello. For a familiar name, the Blackstone.