A good meat smoker turns tough cuts like brisket, ribs and pork shoulder into tender, smoky barbecue by holding a low, steady temperature for hours. The right choice depends on how much work you want to do, since pellet and electric models automate heat while charcoal and offset smokers reward hands-on tending.
The six smokers below span pellet, electric, charcoal bullet and offset designs. We have not used these products ourselves, so confirm the cooking space, dimensions and features on the current listing before buying. Always set up a smoker outdoors, away from walls, and follow the maker’s safety guidance.
As an Amazon Associate we earn from qualifying purchases. Links below are affiliate links, and they do not change the product information we give.
What to Look For
| Feature | Why it matters |
|---|---|
| Fuel type | Pellet, electric, charcoal and wood each change flavor and effort |
| Temperature control | Steady heat matters more than a high maximum |
| Cooking space | Check rack area against the cuts you actually smoke |
| Build quality | Thick steel and tight seals hold heat and save fuel |
| Cleanup | An ash pan or grease tray makes maintenance easier |
In this guide
Specs at a Glance
| Smoker | Type | Size class | Notes |
|---|---|---|---|
| Traeger Pro Series Pellet Grill | Pellet grill and smoker | Medium to large class | Digital controller; wood pellets |
| Weber Smokey Mountain Cooker | Charcoal bullet smoker | 18 inch class | Water pan; vertical layout |
| Camp Chef Woodwind Pellet Grill | Pellet grill and smoker | Medium to large class | Smoke control; pellet fed |
| Oklahoma Joe’s Highland Offset Smoker | Offset charcoal and wood smoker | Large class | Side firebox; steel build |
| Pit Boss Pro Series Pellet Smoker | Vertical pellet smoker | Tall, multi-rack class | Digital control; stacked racks |
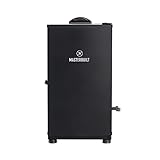
| Masterbuilt Digital Electric Smoker | Electric smoker | 30 inch class | Digital panel; side wood chip loader |
The 6 Best Meat Smokers
Top pickBest for set-and-forget smoking
1. Traeger Pro Series Pellet Grill
A well-known pellet grill that feeds wood pellets automatically to hold your set temperature. It is popular with people who want smoke flavor without watching a fire all day.
Suits: set-and-forget smoking. Strengths: automatic heat and wood flavor. Weaknesses: needs power and a pellet supply. Skip it if you want a simple charcoal setup.
View Traeger Pro Series Pellet Grill on Amazon
Best for traditional charcoal smoking
2. Weber Smokey Mountain Cooker
A classic vertical charcoal smoker with a water pan that helps steady the temperature. It has a long reputation among backyard cooks for turning out dependable low and slow results.
Suits: traditional charcoal smoking. Strengths: proven design and steady heat. Weaknesses: you must tend the fire. Skip it if you want push-button control.

Best for flexible smoke and grill cooking
3. Camp Chef Woodwind Pellet Grill
A pellet grill from a brand known for outdoor cooking gear, with controls aimed at adjusting how much smoke flavor you get. It is a versatile pick for grilling and smoking in one unit.
Suits: flexible smoke and grill cooking. Strengths: versatility and pellet convenience. Weaknesses: a larger footprint. Skip it if you have limited patio space.
View Camp Chef Woodwind Pellet Grill on Amazon
Best for traditional stick-burner style
4. Oklahoma Joe’s Highland Offset Smoker
A classic offset smoker with a side firebox, built for cooks who enjoy managing a wood and charcoal fire. It offers generous cooking room for large gatherings.
Suits: traditional stick-burner style. Strengths: big capacity and authentic flavor. Weaknesses: a learning curve and constant tending. Skip it if you want an easy first smoker.

Best for smoking more food in less space
5. Pit Boss Pro Series Pellet Smoker
A vertical pellet smoker that stacks racks to give you plenty of vertical space in a small footprint. It suits cooks smoking several items, such as sausages, ribs and chicken, together.
Suits: smoking more food in less space. Strengths: stacked racks and pellet convenience. Weaknesses: less sear ability than a grill. Skip it if you also want a flat-top grill.
View Pit Boss Pro Series Pellet Smoker on Amazon
Best for easy electric smoking
6. Masterbuilt Digital Electric Smoker
An electric smoker with a digital panel and a side loader for wood chips, so you can add smoke without opening the door. It is a convenient choice for steady, low-effort smoking.
Suits: easy electric smoking. Strengths: simple controls and chip loading. Weaknesses: milder smoke than charcoal. Skip it if you want a heavy bark.
Care and Setup
- Clean grease trays and ash pans after each cook.
- Keep pellets and wood chips dry and sealed.
- Cover the smoker once it has fully cooled.
- Season a new smoker as the maker directs.
Mistakes to Avoid
- Opening the lid too often during a cook, which lets heat and smoke escape.
- Using wet or low-quality wood.
- Skipping a meat thermometer and relying on the clock alone.
- Smoking in a cramped or enclosed space.
How Fuel Shapes Flavor and Effort
The fuel decides what the day of smoking feels like. Pellet smokers feed small wood pellets into a firepot with an auger and a controller, so the temperature holds with little attention. The smoke flavor is real but often milder than that from a log fire. Electric smokers use a heating element and usually add smoke from wood chips or chunks, which suits people who want low effort and steady heat but may give lighter flavor.
Charcoal smokers burn lump charcoal or briquettes, often with wood chunks for flavor. They need more attention to airflow and fuel, but many cooks like the control and the taste they get. Offset smokers use a side firebox with wood or charcoal and demand the most skill, since you manage the fire, airflow and temperature all through the cook.
- Pellet and electric: best if you want predictable results and can plan around power.
- Charcoal: a good middle path if you will tend the fire and want a traditional taste.
- Offset: best for people who enjoy fire management and cook for larger groups.
Be honest about how much time you have. A smoker that sits unused because it feels like too much work is worse than a simpler one you use every weekend. Consider fuel costs and where you will buy pellets, charcoal or wood, and whether storage space exists.
Cooking Space and Planning What You Will Smoke
Rack area on the listing tells you how much meat fits, but how it fits depends on the shape. A whole packer brisket, a pork shoulder, several racks of ribs and a few chickens each take space differently. Measure your typical cuts and compare them with the usable width and depth of the grates, not just total square inches. Remember that meat needs room around it so smoke and heat can flow.
Vertical smokers stack racks to hold a lot in a small footprint, though upper racks can run at a different temperature than lower ones. Horizontal or offset smokers spread the food out, and the end nearest the fire is often hotter. Learn the hot spots of your smoker by using an oven thermometer on a few different spots on the grate, and rotate food when needed.
Think about how often you cook for crowds. A smoker sized for a family meal is cheaper and easier to run, while a large one lets you smoke ahead for gatherings. A larger smoker also uses more fuel and takes longer to heat up, and small batches in a big cooker can feel wasteful. If you want to smoke sausages, fish or cheese, check whether the smoker can hold a low temperature and whether accessories are available.
Temperature Control, Thermometers and Doneness
Low and slow cooking depends on stable temperature. Built-in dome thermometers can be inaccurate or read air near the lid rather than at the food level, so a separate probe at grate level is a good habit. Many cooks use a two-probe thermometer: one in the meat and one clipped near the grate. Wireless models let you monitor from indoors.
Target internal temperatures matter more than elapsed time. Different cuts finish at different points, and food safety guidance sets minimum safe temperatures for poultry and ground meats. Large cuts such as brisket and pork shoulder often have a stall, a period where the temperature stops rising for a while as moisture evaporates from the surface. Patience matters; raising the heat too early may toughen the meat. Some cooks wrap the meat in paper or foil to push through the stall, which also changes the bark.
- Probe thick cuts in the thickest part without touching bone.
- Rest large cuts wrapped in a towel inside a cooler to let juices settle.
- Write down times, temperatures and results for each cook to build your own notes.
Weather affects every smoker. Wind, cold and rain change how much fuel you burn and how steady the temperature stays, so shield the smoker and allow extra time.
Wood, Smoke Quality and Seasoning
Good smoke is thin, pale and blue-ish; thick white smoke often means a smoldering fire with poor airflow, which can leave a bitter taste. Use dry, seasoned wood, and avoid wet wood, which creates harsh smoke. Do not use treated or painted wood, or softwoods with heavy resin, which can taint the meat and may be unsafe.
Wood choice affects flavor. Stronger woods such as hickory and oak suit beef and pork, while fruit woods such as apple are often described as milder and are used with poultry and pork. Match the strength to the meat, and start with less smoke than you think you need, because over-smoking is a common mistake. Chips burn faster than chunks, so use chunks for longer cooks in charcoal and offset smokers if the manual allows.
Season a new smoker as the manual directs. This usually means running it at a moderate temperature for a while to burn off manufacturing residues and to build a thin layer of smoke on the interior. Do not scrub the inside to bare metal; a seasoned surface helps resist rust. Follow the maker’s instructions for the first run.
Keep ventilation and safety in mind: use smokers outdoors, away from buildings and overhanging branches, and keep a safe distance from decks and fences.
Cleaning, Storage and Signs of Wear
Regular cleaning keeps a smoker safe and the food tasting right. Empty ash pans and grease trays after each cook, once they are cool. Grease buildup can cause flare-ups and fires, particularly in pellet and offset smokers. Scrape grates while warm, and wipe or scrape the interior as the manual allows. Remove old pellets from the hopper if they have absorbed moisture, as damp pellets can jam the auger.
Store fuel dry and sealed. Pellets, charcoal and wood chips all suffer in damp conditions. Cover the smoker after it has cooled, using a cover that is breathable or allows moisture to escape so condensation does not cause rust. Keep it off wet ground.
Know the signs of wear:
- Rust that has eaten through the body or firebox.
- Loose or leaking seals around the door or lid.
- A controller or igniter that fails to work after cleaning.
- Warped doors that no longer close tightly.
- Heating elements or probes that read incorrectly.
Check replacement parts availability before buying. Some smokers have common replacement elements, probes and gaskets, while others do not. A good warranty and clear manual are worth considering alongside features.
A Checklist for Choosing Among Meat Smokers
The word smoker covers a wide range of cookers, and the right one depends on how much time, space and attention you want to give it. The questions below can narrow the field before you look at individual models. Check the answers against the maker’s specification sheets.
- Decide how much time you want to spend tending the cooker. Some designs need regular attention, and others hold temperature on their own.
- Measure the outdoor space where it will live, and check the clearance from walls, railings and anything flammable.
- Think about the amount of food you will cook at once, and compare it with the cooking space.
- Check whether the model needs electricity, and where the outlet is.
- Consider fuel storage, including pellets, charcoal or wood, and how you will keep it dry.
- Look at the weight and the wheels or handles if you plan to move it.
- Read about cleaning and ash removal.
Smoker Types and Who They Suit
| Type | Fuel | Who tends to like it |
|---|---|---|
| Pellet smoker | Wood pellets fed by an auger | People who want steady temperature with little tending |
| Electric smoker | Electric element with wood chips | Beginners who want a simple process |
| Charcoal smoker | Charcoal and wood | People who enjoy managing a fire |
| Offset smoker | Wood or charcoal in a side firebox | Enthusiasts who like close fire control |
Planning a Long Cook From Prep to Plate
Smoking is slow, and a plan helps. Choose your cut, then work backward from the time you want to eat, adding a generous buffer, because large cuts rarely follow the clock. Prepare your rub, set up the cooker and let it come to a stable temperature before the food goes in. Place the thickest part of the meat toward the heat if the maker suggests it, insert a probe thermometer and avoid opening the lid more than necessary.
When the meat is done, rest it as your recipe advises before slicing. For safe internal temperatures, follow official food safety guidance for the type of meat you are cooking. Keep notes on each cook, including weather, fuel and timing, because they help you improve with every session.
A Short Glossary for Smoker Shoppers
- Firebox: the chamber where fuel burns.
- Baffle: a plate that directs heat and smoke through the cooking chamber.
- Auger: the screw that moves pellets into the fire pot in a pellet smoker.
- Smoke ring: a pink layer just under the surface of some smoked meat.
- Bark: the dark, flavorful crust that forms on the outside.
- Stall: a long pause in temperature rise during a big cook.
Seasoning, Cleaning and Safe Use
New smokers often need a first run to burn off manufacturing residue, and the manual explains how. After each cook, let the unit cool before you remove ash, empty drip pans and scrape grates. Keep grease under control, because built-up fat can flare up. Store fuel in a dry place, and cover the smoker when it is not in use.
Always use the smoker outdoors in the open, never in a garage or enclosed space, because smoke and combustion gases are hazardous. Keep a safe distance from buildings, follow local fire rules and call a qualified technician for any electrical fault.
Wood Choices and Clean Smoke
The wood you burn shapes the flavor of the food, and the quality of the smoke matters as much as the type. Thin, pale smoke that you can barely see is generally what cooks aim for, while thick, white or yellow smoke can taste harsh. Give the fire enough air, use dry, seasoned wood or pellets and avoid soaking chips unless the maker advises it. Different woods have different personalities: fruit woods tend to be mild, and woods such as oak and hickory are stronger.
Use wood intended for cooking, and never burn treated lumber, painted wood or anything that has been exposed to chemicals. Store wood in a dry place off the ground, and keep it away from the cooker until you need it.
Thermometers and Doneness Without Guesswork
Smoking relies on temperature, both in the cooking chamber and inside the food. The dial on a lid can be inaccurate, and a second thermometer placed near the food gives a better picture. A probe thermometer in the thickest part of the meat tells you when it reaches the target. Many cooks use two probes, one for the food and one for the chamber, so they can watch both from a distance.
Official food safety guidance lists safe internal temperatures for each kind of meat, and those figures are your final target. Tenderness in large cuts such as brisket and pork shoulder depends on time as well, so follow the cues in a trusted recipe.
- Calibrate thermometers if the maker explains how.
- Place probes away from bones and fat pockets.
- Rest large cuts, wrapped loosely, before slicing.
- Write down your temperatures and times for the next cook.
Comparing the Picks Above, Side by Side in Practice
The 6 picks above, including Traeger Pro Series Pellet Grill, Weber Smokey Mountain Cooker and Masterbuilt Digital Electric Smoker, approach outdoor cooking from different directions, and the reviews describe those differences in terms of who each one suits. Start your comparison there: identify the two picks whose described strengths match your most frequent cook, whether that is weeknight grilling for a few people or long, low sessions for a crowd. Then check the listings for the practical details behind those descriptions, such as cooking area, fuel type and how the unit is cleaned and stored, and picture each one in your actual space.
Between finalists, think about the whole season rather than the first cook. How will you store the unit, how far will you move it, how does its fuel get bought and kept dry, and how much cleaning does an ordinary session leave behind? A model that fits your storage and your patience will be used constantly, while a technically impressive one that is awkward to house becomes an obstacle. If you cook with a partner or family, involve them in the control and height questions too, because shared equipment has to suit every cook who will use it.
Finally, read what each listing and maker page states about warranty, spare parts and replacement components such as grates and burners. Outdoor equipment lives a hard life, and the ability to replace a worn part in year three is worth real money. Choose the pick whose support you can actually reach, set it up carefully, season or burn it in as directed, and spend your first month learning it with forgiving foods. The best pick on this list is the one still being used with pleasure three summers from now.
Heat Control Is a Skill You Build, Not a Setting You Find
Every grill and smoker in this guide rewards the cook who treats heat as something to manage actively rather than a number to set and forget. Fuel burns in phases: it lights, it peaks and it settles, and food cooked during each phase behaves differently. Learning to read those phases, by watching how the fire responds when you adjust vents or add fuel, matters more than any single feature on a listing. When you compare the picks above, think about how each one lets you add fuel, move food away from direct heat and recover when the temperature drifts, because those moments decide real cooks far more than the first ten minutes do.
Two-zone cooking is the technique that makes almost everything easier. By banking fuel to one side or lighting only part of a burner arrangement, you create a hot zone for searing and a gentler zone where food can finish without burning. Thick cuts, skin-on poultry and anything with a sugary sauce all benefit from a safe place to rest while the fire calms down. If a model makes two-zone cooking awkward, you will fight it on every ambitious cook, so picture your most common meals and check the layout against them before ordering.
Wind, weather and fuel quality all push temperatures around. A breezy day can strip heat from a lid or fan a fire hotter, and damp fuel smoulders instead of burning cleanly. Experienced cooks respond by changing one variable at a time and waiting several minutes before judging the result, because stacked adjustments overshoot. Keep notes on your first few cooks with a new unit: what the weather did, how much fuel you used and where the food sat. Those notes teach you your own equipment faster than any generic chart.
Planning Capacity for Real Meals, Not Just Headline Numbers
Listings describe cooking areas and capacities in ways that are hard to compare, so translate them into your own meals. Picture the largest cook you realistically host: how many burgers, racks, sausages or vegetables need to fit at once, and how much of that food needs gentle heat rather than a hard sear. Food also needs elbow room. Crowded grates steam instead of browning, and pieces packed edge to edge cook unevenly because heat cannot circulate. A slightly larger cooking surface used comfortably will outperform a crammed smaller one every time.
Think in courses as well as in totals. Appetizers, mains and sides rarely need the same heat at the same moment, so a layout that lets you hold finished food warm while the next batch cooks is worth more than raw area alone. Warming racks, lids that close over tall items and side space for trays and tools all shape how smoothly a cook runs. When you read the descriptions of the picks above, check what each says about lids, racks and work space, and match those details to the way you actually serve a meal outdoors.
Leftovers and batch cooking change the maths again. Many owners use a big weekend cook to stock the freezer with smoked or grilled portions for the week, which favours capacity and fuel efficiency over speed. Others cook small and often, and value fast setup and easy cleaning more. Neither is wrong, but they point to different picks, and being honest about your pattern now prevents the common regret of buying for imaginary dinner parties while cooking for two on most nights.
Setup, First Cooks and Learning Your New Equipment
Give any new grill or smoker a proper first session before guests depend on it. Assemble it on a level surface, check every fastener and fitting as the manual directs, and run the initial burn-off or seasoning process exactly as the maker describes, because coatings, oils and residues from manufacturing need to be burned away before food goes on. This is also the moment to test how the lid fits, how the vents or controls move and where the hot spots are, using a simple test cook rather than an expensive joint of meat.
Choose forgiving foods while you learn. Sausages, chicken thighs, burgers and sturdy vegetables tolerate temperature swings and teach you how the unit responds without punishing small mistakes. Keep the lid closed as much as the recipe allows, note how long the equipment takes to recover heat after opening, and practise moving food between zones. By the third or fourth cook, patterns emerge: which corner runs hot, how the fire behaves in wind and how much fuel a typical session really uses.
Build a small kit around the equipment from the start. Long-handled tongs, a wide spatula, a sturdy brush for the grate, heat-resistant gloves and a reliable thermometer cover almost every task. Keep fuel dry and stored off the ground, and keep a spray bottle of water and a lidded metal container nearby according to the safety guidance for your fuel type. A tidy, repeatable setup makes every later cook calmer, because you stop improvising the basics and can pay attention to the food.
Cleaning Routines That Protect Flavour and Equipment
Cleaning is where outdoor cooking equipment either ages gracefully or deteriorates fast, and the routine matters more than any special product. After each cook, while the grate is still warm, brush away residue so the next session does not start with old, burnt flavours. Let ash cool completely before handling it, and dispose of it as your local guidance directs, in a metal container away from anything combustible. Ash left sitting in a damp firebox holds moisture against metal and encourages corrosion, so emptying it promptly is maintenance, not fussiness.
Grease management deserves the same discipline. Drip trays, grease cups and channels should be emptied or cleaned regularly, because built-up grease is both a flavour problem and a fire risk. Wipe exterior surfaces with a cloth and mild detergent, rinse and dry them, and check that vents and air paths are clear of debris. For smokers, a heavy internal scrub is rarely needed and can strip the seasoned layer that protects the interior; follow the maker’s guidance and aim for clean grates and managed grease rather than a spotless firebox.
Once a season, go deeper. Inspect grates for flaking or damage, check hinges, handles and wheels, and look over hoses, regulators and connections on gas equipment exactly as the manual instructs, replacing anything that looks perished or damaged rather than hoping it lasts. Covers help, but only on equipment that is clean and dry underneath; a cover over a wet, dirty grill traps moisture. Store the unit under shelter where you can, and your future self will start each season cooking instead of repairing.
Placement, Weather and Cooking Outdoors Safely
Where outdoor cooking equipment lives shapes both safety and results. Set it on a level, non-combustible surface with the clearances the manual specifies from walls, fences, eaves and overhanging branches, and never use it in enclosed spaces such as garages or tents, where smoke and carbon monoxide can build up invisibly. Keep children and pets out of the working triangle between the hot equipment, your prep surface and the door, and plan the route you will carry hot trays so nobody crosses it unexpectedly.
Weather asks for adjustments rather than surrender. Wind is the biggest variable: it can cool one side of a unit and superheat the other, blow ash and sparks, and make lids awkward to handle. Position the equipment sheltered where the manual allows, rotate food more often, and allow extra time and fuel on cold or windy days. Rain demands care with electrical components and pellet or charcoal storage, since damp fuel is the enemy of steady heat. In very hot, dry conditions, be extra careful with sparks, dripping fat and nearby dry vegetation.
Fire safety habits should be boring and automatic. Never leave a lit grill or smoker unattended, keep a suitable extinguisher or a bucket of sand within reach as appropriate for your fuel, and know how to shut your equipment down safely before you need to do it in a hurry. Let everything cool fully before covering or moving it. At the end of the cook, confirm the fire is out or the gas is off at the source, following the maker’s shutdown steps in order.
Matching the Equipment to Your Cooking Style
The best choice among the picks above depends on the food you cook most, not the food you cook once a year. If weeknight speed dominates, you will value quick lighting, fast preheating and easy cleanup, and you should weigh those qualities heavily even if a model gives up some low-and-slow finesse. If weekend projects are the point, with ribs, brisket or whole birds spending hours over gentle heat, then stability, fuel capacity and room to manoeuvre matter more than a fast start.
Consider who cooks and who helps. Controls that are simple to read, handles that stay manageable and a working height that suits the main cook all affect whether the equipment gets used weekly or gathers dust. Think about storage too: a unit that must be wheeled out of a shed for every use needs to be light enough, and small enough when folded or covered, that the effort never becomes the reason you order takeaway instead. Measure the storage spot as carefully as the cooking spot.
Finally, be honest about maintenance appetite. Every style of outdoor cooker asks for something: ash handling, grate care, fuel storage, cover discipline or periodic deep cleaning. The picks above differ in how much of that work they demand and how forgiving they are when you skip a step. Choosing the model whose upkeep matches the effort you will genuinely give is not settling; it is how equipment stays enjoyable for years instead of becoming a chore you resent.
Troubleshooting Common Outdoor Cooking Problems
When food keeps burning outside while staying raw in the middle, the usual cause is heat that is too direct for too long, not a faulty unit. Move the food to a gentler zone, lower the heat earlier and let carryover warmth finish the job, and use a thermometer rather than colour alone to judge doneness. Pale, steamed-looking results point the other way: food was crowded, wet or cooked with the lid venting too much heat. Dry surfaces, space between pieces and a properly preheated grate fix most cases.
Temperature that will not settle is the classic smoker and grill frustration. Check the simple things first: fuel that is damp or inconsistent, vents blocked by ash or grease, a lid that is being opened every few minutes, or a thermometer positioned where it reads the fire rather than the food. Change one thing, wait, and observe. Experienced cooks keep a small notebook because the fix that worked on a calm day may be wrong on a windy one, and written notes beat hopeful memory.
Off flavours have identifiable causes too. Thick, heavy smoke over a long period can make food bitter, while old grease and residue add stale notes that no sauce hides. Clean grates, managed grease and a fire that is burning cleanly before food goes on solve most of it. If a problem persists across several careful cooks, consult the maker’s guidance or support line with your notes to hand; a clear description of fuel, weather and timings gets you a useful answer far faster than a general complaint.
A word about accessories: buy them in the order your cooking reveals the need. A good thermometer, proper tongs and heat-resistant gloves earn their place immediately. Covers, extra racks and specialty tools should follow once you know your habits, because the wrong accessories become clutter that lives in a shed. When a listing bundles extras with a pick above, value the bundle by the items you will actually use weekly, not by the longest list of parts.
Fuel storage quietly decides how spontaneous your cooking can be. Keep charcoal, pellets or other dry fuels sealed, off the ground and away from damp, and keep gas connections and spare cylinders handled exactly as the supplier and manual direct. Rotate stock so old fuel gets used first, and never store fuel inside living spaces. A cook that starts with dry, fresh fuel and a clean firebox is halfway to a good result before any food appears.
Lastly, remember that outdoor cooking improves fastest with repetition on a small menu. Cook the same few dishes several times on your new equipment, changing one variable each time, and you will learn its character in a month. Chasing a new recipe every session teaches you recipes; repeating a dish teaches you the cooker. The picks in this guide are all capable of excellent food once their owner understands them, and that understanding, more than any feature list, is what guests actually taste.
Meat Smoker FAQ
Which type of smoker is easiest?
Pellet and electric smokers hold their own temperature, so they take the least attention.
Do I need to season a new smoker?
Many makers suggest a short burn-in before the first cook. Follow the manual. This burns off oils from manufacturing and helps you learn the controls.
Which wood is best?
Hickory, oak and apple are common choices. Match the strength of the smoke to the meat.
How big should my smoker be?
Pick a size that fits your largest cut, with room for air to move around it.
What is the stall when smoking meat?
It is a period when the meat's internal temperature stops rising for a while, often with large cuts like brisket or pork shoulder. Keep the smoker steady and wait, or wrap the meat if you prefer.
Is white smoke bad?
Thick white smoke often points to a smoldering fire and poor airflow, which can taste bitter. Aim for thin, pale smoke by improving airflow and using dry wood.
How long should I rest smoked meat?
Resting lets juices settle, and large cuts are commonly rested for a while wrapped in a towel inside a cooler. Follow a trusted recipe for the cut you are cooking.
Can I use my smoker in the rain or cold?
You can, but weather affects temperature and fuel use. Shield the smoker from wind, allow extra time and keep electrics dry.
Do I need a separate thermometer?
It is a good idea. Built-in thermometers can read inaccurately, and a probe in the meat and one at grate level give a clearer picture.
How do I store pellets?
Keep them in a dry, sealed container off the ground. Damp pellets swell and can jam the auger.
How often should I clean the smoker?
Empty the ash and grease after each cook, and do a deeper clean as the manual suggests. Buildup can cause flare-ups and off flavors.
How do I know when my grill or smoker is really ready for food?
Readiness means the cooking surface is fully heated and the fire or burners have settled into a steady state, not merely that a dial or thermometer shows a number. Grates should be hot enough that food releases instead of sticking, and fuel should be burning cleanly rather than smoking heavily from fresh lighting. Give the equipment the preheat time the manual suggests, brush the grate clean while it is hot, and only then start cooking. Rushing this stage is behind more stuck, pale food than any recipe error.
Why does my food cook faster on one side than the other?
Almost every grill and smoker has hot and cool zones caused by burner layout, fuel distribution or wind. Learn your unit’s pattern with a simple test cook, then use it deliberately: start thick items in the hotter area, finish delicate items in the cooler one, and rotate pieces partway through. Rotating food is not a sign of bad equipment; professional cooks do it constantly. What matters is knowing the pattern exists rather than blaming the food.
How can I stop food sticking to the grate?
Start with a clean, hot grate, dry food surfaces and patience. Wet marinades and cold food on a lukewarm grate are the usual causes. Let food cook undisturbed until it releases naturally; forcing it early tears the surface and leaves half the crust behind. A light brushing of oil on the food rather than the grate helps with lean items. If sticking persists, check that the grate is not damaged or heavily corroded, because a rough surface grips food no matter what you do.
What is the safest way to shut down after cooking?
Follow the maker’s shutdown sequence for your fuel type and never rush it. Gas equipment should be turned off at the controls and at the source as directed, charcoal should be closed down and allowed to burn out and cool completely, and ash must be cold before it is handled or disposed of in a metal container. Keep the equipment uncovered until it is fully cold, and store fuel separately and safely. A calm, routine shutdown is as much a part of the cook as lighting up.
How often should I replace parts like grates, burners or seals?
Replace parts when condition, not the calendar, says so: grates that flake, crack or rust through, burners with uneven or blocked flames, perished hoses or connections and seals that no longer close properly. Inspect everything at the start of the season and after any incident such as a large grease fire. Use the maker’s parts or clearly compatible replacements, and if you are unsure whether a component is safe, have it checked rather than cooking on a guess. Food is not the place for optimism about failing hardware.
Can I cook in the rain or in winter?
Usually yes, with adjustments and care. Allow more time and fuel, because cold air and wind strip heat every time the lid opens, and keep openings brief. Protect electrical components and dry fuel from water exactly as the manual directs, and never move the cooking into a garage or enclosed space to escape the weather, because smoke and carbon monoxide make that genuinely dangerous. Dress for the conditions, keep your path to the door clear of ice, and accept that winter cooks run slower.
Why does my smoked food sometimes taste bitter?
Bitterness usually comes from smoke that was too thick for too long, from dirty grates and old grease, or from food left in heavy smoke after it had taken on all it could. Aim for a thin, steady smoke, clean the cooking surfaces, manage grease and remember that meat absorbs smoke most readily early in the cook. If one wood type repeatedly tastes harsh to you, try a milder one. Keep notes, because the fix is in the pattern of your cooks, not in a single ingredient.
Do I need to let grilled meat rest, and for how long?
Yes: resting lets the juices, which cooking drives towards the centre, redistribute through the meat instead of flooding the board at the first cut. Small items need only a few minutes, while large roasts and smoked joints benefit from a longer, loosely tented rest. Keep rested food somewhere warm but not cooking, and use the time to finish sides and sauces. Slicing too early is one of the most common ways to turn a well-cooked piece of meat into a dry disappointment.
The Short Version
For automatic pellet cooking, the Traeger Pro Series. For classic charcoal, the Weber Smokey Mountain. For flexible smoke, the Camp Chef Woodwind. For a stick-burner, the Oklahoma Joe’s Highland. For vertical space, the Pit Boss. For easy electric, the Masterbuilt.
Related Guides
- 6 Best Smokers for Meat: Pellet, Kamado and Offset (2026)
- 6 Best Commercial Smokers: Pellet, Charcoal and Offset (2026)
- 6 Best Oklahoma Joe's Smokers: Offset, Charcoal, Pellet (2026)
- 6 Best Professional Smokers: Pellet, Offset and Charcoal (2026)
- 6 Best Value Smokers: Pellet, Offset and Charcoal (2026)


