Lefse is a thin Norwegian flatbread made from potato dough, rolled very thin and cooked on a hot, dry surface until it blooms with light brown spots. A dedicated lefse grill is a large, round, flat electric cooking plate that gives you the wide, even surface the dough needs. A big flat griddle or a cast iron comal can do the same job.
The six picks below include a purpose-built lefse grill, three large flat griddles that home bakers often use for flatbread, a griddle-style cooker and a turning stick. We have not used these products ourselves, so please confirm sizes, wattage and included parts on the current listing before you buy. Plate diameter matters most, because lefse rounds are usually rolled wide.
As an Amazon Associate we earn from qualifying purchases. Links below are affiliate links, and they do not change the product information we give.
What to Look For
| Feature | Why it matters |
|---|---|
| Cooking surface | A flat, wide plate that fits a full round of dough without folding |
| Heat control | A dial or thermostat helps you hold a steady, dry heat |
| Coating | A smooth, nonstick or well-seasoned surface keeps the dough from sticking |
| Tools | A turning stick and a grooved rolling pin make the work much easier |
In this guide
Specs at a Glance
| Product | Type | Size | Notes |
|---|---|---|---|
| CucinaPro Lefse Grill | Round electric grill | Large round plate, check listing | Made for lefse and flatbread |
| Presto Cool Touch Electric Griddle | Rectangular electric griddle | Roomy flat plate | Nonstick surface |
| Presto Tilt-n-Drain Big Griddle | Large electric griddle | Extra-wide flat plate | Tilts for easy cleanup |
| Cuisinart Griddler | Contact grill and griddle | Mid-size plates | Opens flat as a griddle |
| Victoria Cast Iron Comal | Stovetop cast iron | Round, flat, several sizes | Needs seasoning |
| Norpro Lefse Turning Stick | Wooden tool | Long, thin stick | Lifts and flips thin dough |
The 6 Best Lefse Grills and Tools
Top pickBest for bakers who make lefse often
1. CucinaPro Lefse Grill
A purpose-built round electric grill meant for lefse, tortillas and other thin flatbreads. It is the closest match to the traditional grill that many Norwegian-American bakers use at holiday time.
Suits: bakers who make lefse often. Strengths: a shape and plate made for the job. Weaknesses: size and finish details vary, so read the listing. Skip it if you only bake flatbread once a year.
View CucinaPro Lefse Grill on Amazon
Best for beginners who want a griddle that does more
2. Presto Cool Touch Electric Griddle
A long-running rectangular electric griddle with a nonstick plate and a removable heat control. The flat surface gives you room to cook one round of dough at a time, and the cool-touch handles help when you lift and turn.
Suits: beginners who want a griddle that does more. Strengths: a familiar, widely sold design. Weaknesses: corners waste a little plate space. Skip it if you want a round plate.


Best for large rounds and family batches
3. Presto Tilt-n-Drain Big Griddle
A larger electric griddle that tilts so grease drains away. Lefse needs no grease, but the big flat plate gives you space to cook large rounds and keep a second round warming nearby.
Suits: large rounds and family batches. Strengths: a wide cooking area. Weaknesses: bulky to store. Skip it if your kitchen is small.

Best for cooks who want one multi-use appliance
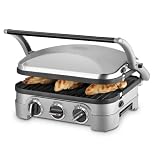
4. Cuisinart Griddler
A contact grill that opens flat to act as a griddle. The plates are removable, and the open position works for flatbread, pancakes and sandwiches in turn.
Suits: cooks who want one multi-use appliance. Strengths: several cooking modes. Weaknesses: plates are smaller than a dedicated lefse grill. Skip it if you want the biggest surface possible.
Best for stovetop bakers
5. Victoria Cast Iron Comal
A round, flat cast iron plate made for tortillas and flatbreads on a stovetop burner. Cast iron holds heat well and gives a classic, toasty finish on thin dough.
Suits: stovetop bakers. Strengths: durable material and no electric cord. Weaknesses: needs seasoning and heat practice. Skip it if you want a dial for temperature.
View Victoria Cast Iron Comal on Amazon
Best for completing a lefse toolkit
6. Norpro Lefse Turning Stick
A long, slim wooden stick used to lift, move and flip fragile rounds of lefse without tearing them. It is not a cooker, but it is a classic part of any lefse kit.
Suits: completing a lefse toolkit. Strengths: a simple, traditional tool. Weaknesses: does not cook anything on its own. Skip it if you already own a good stick.
View Norpro Lefse Turning Stick on Amazon
Care and Setup
- Let the plate cool fully before wiping it down.
- Keep the plate dry and dust it lightly with flour as the recipe directs.
- Season cast iron plates with a thin film of oil after washing.
- Store flat tools where they will not warp or bend.
Mistakes to Avoid
- Cooking lefse on a plate that is too small for your rounds.
- Adding oil to a surface meant to be cooked dry.
- Rolling the dough too thick for the plate to cook evenly.
- Skipping the preheat and then stacking damp rounds.
Dough and Potato Prep That Makes Grilling Easier
Most of the success of lefse is decided before the dough meets the plate. Traditional recipes start with potatoes, which are boiled until tender and then riced or mashed until completely smooth. Lumps leave thick spots that will not roll thin and can tear on the grill. Many bakers use a ricer for this reason, and some recipes call for the riced potatoes to cool or even chill before the flour is added, because warm potato dough turns gummy and absorbs too much flour.
Recipes differ on fats and liquids. Many add butter, cream or milk, plus a little salt and flour, and the dough is then kept cold until it is time to roll. Cold dough is easier to handle. Dividing it into equal portions helps you roll rounds of similar size, which means they fit the plate and cook at the same speed. Work in small batches and keep the rest covered so it does not dry out.
Because the dough is sticky, a light dusting of flour on the board and rolling pin is normal, but too much flour makes the finished lefse stiff and tough. Brush off excess flour before the round goes to the grill, since loose flour will scorch on the hot surface and leave bitter specks. If you are new to lefse, follow a trusted recipe closely and treat the first few rounds as practice. The goal is a round that is thin enough to see the pattern of the board through it, yet strong enough to lift without tearing.
Rolling Tools and the Working Surface
The tools you use to shape the dough matter nearly as much as the cooking surface. A grooved rolling pin, often used for lefse, presses a pattern into the dough that helps it spread thin without sticking. A smooth pin can work, but you will need more flour and care. Many bakers also use a pastry cloth or a canvas-covered board, which holds a little flour in the weave and lets the round slide without tearing.
The board should be large enough for the whole round, and stable enough that it does not shift as you roll. Lefse rounds are rolled wide, so a small cutting board leaves little room. Think about the surface height too. Standing at a counter that is a comfortable height lets you roll with your whole arm instead of just your wrists, which gives more even pressure.
Moving the round from board to plate is the hardest step. This is where a long turning stick helps, since you can roll the thin round loosely around the stick and unroll it onto the grill. The stick is also used to flip the round when brown spots appear, and to lift it off. Keep the stick clean and dry, as damp wood can make the dough stick. Some bakers keep several sticks nearby, which speeds up the process when many rounds are being made in a row.
Plate Size, Heat and Timing
Lefse is cooked on a hot, dry surface, so the plate decides the quality of the finished bread. A plate should be wide enough to hold a full round without folding. If your rounds are rolled large, a small griddle forces you to trim the dough or to cook it in sections. Check the cooking diameter on the listing, since the outside size of the appliance can be larger than the heated plate.
Even heat is key. Hot spots scorch parts of the round while other parts stay pale and soft. A thermostat or a dial makes it easier to hold a steady temperature, and you may need to adjust it as the plate heats during a long baking session. Recipes often give a temperature range, so follow yours and let the plate fully preheat before the first round. Wipe away flour crumbs between rounds so they do not burn.
Timing is brief. A thin round typically cooks in a short time on each side, and you will see light brown spots as it cooks and bubbles. Flip it once and avoid pressing down, because the goal is soft, flexible bread with pale brown spotting, not a crisp cracker. Overcooked lefse becomes brittle, while underdone lefse tastes pasty. Stack finished rounds between clean towels as they come off, so they stay soft. Cover them so they do not dry out, and let them cool before storing. If the plate runs hot or cool compared with your recipe, adjust the dial in small steps.
Serving, Storing and Reheating Lefse
Fresh lefse is soft and pliable, and it is traditionally served simply. Common toppings include butter with sugar or cinnamon, and many families also serve it with savory fillings or alongside meals. Rolled up like a wrap, it holds a variety of fillings. Let the rounds cool a little first so steam does not make them soggy, then fold or roll as you like. Keep serving simple if you are new to it, since the bread is the star.
Storage matters because lefse dries out quickly when left open. Once cooled, stack the rounds with a sheet of parchment or a towel between layers, and keep them in an airtight bag or container. Refrigerate if you plan to eat them within a short time, or freeze for longer storage. Follow food safety guidance for how long to keep cooked potato products in the refrigerator.
To bring dry lefse back to life, many bakers sprinkle it lightly with water or wrap it in a damp towel for a while. Frozen lefse should thaw in its wrapping so condensation does not make it sticky. Reheat gently, in a warm pan or in a short burst in a microwave, wrapped in a damp towel, so the bread softens without becoming tough. Avoid reheating on high heat, which can make it brittle. Label packages with a date, and separate rounds with parchment so they do not stick together in the freezer.
Dedicated Lefse Grill or Multi-Use Griddle
The decision between a purpose-built lefse grill and a general-purpose griddle comes down to how often you bake and how much space you have. A dedicated round grill matches the shape of the dough and gives you a wide, flat plate, so you can lay a large round down in one motion. If you bake lefse each holiday season for family and friends, or make large batches, a dedicated plate saves time and gives more consistent results.
A large electric griddle is a flexible alternative. It cooks pancakes and sandwiches during the rest of the year, and it often costs less than a specialty item, but corners waste some of the plate, and you may need to cook slightly smaller rounds. Look for a flat, evenly heating surface with a reliable thermostat. A contact grill that opens flat may work for smaller rounds, though the plates are smaller.
A cast iron comal on the stovetop is another route, with no cord and strong heat retention, but it requires skill to manage the burner and keep the temperature steady. It also needs seasoning and careful drying to prevent rust. Whatever you choose, make sure the surface is smooth and clean, as dough picks up any residue. Check the cord length and the location of your outlet, since lefse baking can take hours. Think about storage too. A round plate can be bulky, so measure your shelf before you buy.
A Checklist for Your First Lefse Session
Lefse rewards preparation more than almost any other flatbread. Before the potatoes even go into the pot, run through this list so nothing surprises you at the grill.
- Clear a generous stretch of counter, because rolled rounds are large and fragile.
- Gather your heated surface, rolling pin, turning stick and a stack of clean towels.
- Set out flour for dusting, and keep a small brush nearby to sweep away extras.
- Prepare a covered spot, such as a towel-lined container, where finished rounds can rest.
- Read your recipe twice and mark the steps that depend on temperature or timing.
- Plan a helper if you can, since one person rolling and another griddling keeps the work moving.
Many families treat lefse as a shared activity, with each person taking a station. Even if you are cooking alone, arranging your space like an assembly line saves effort.
Dedicated Plate, Griddle or Comal: Matching the Tool to Your Kitchen
The picks above include several kinds of heated surfaces. This table offers a general comparison, and each maker’s manual has the details for any particular model.
| Surface | Strong point | Consider |
|---|---|---|
| Round lefse grill | Plate shaped for large rounds | Mostly suited to this one job |
| Flat electric griddle | Roomy and useful for other meals | Check how evenly the surface warms |
| Griddle with a drain edge | Handy for pancakes and bacon too | Slope may affect how rounds sit |
| Cast iron comal | Holds heat well on a range | Needs seasoning and careful handling |
If you only make lefse a few times a year, a multi-use griddle probably makes sense. If it is a yearly tradition for a large crowd, a purpose-built grill may feel worth its shelf space.
Common Texture Problems and What They Suggest
When a batch goes wrong, the symptoms often point to a cause. Dry, brittle edges can mean the dough or the rounds sat uncovered for too long. Tearing while rolling often means the dough was either too warm or too wet. Pale rounds with no browned spots may suggest the plate is not warm enough, while burnt patches may signal too much heat or too much flour on the surface.
Change one thing at a time so you can tell what helped. Keep notes after each session, including the type of potato, the amount of flour and the setting you used on the plate. Over a few batches your notes become your own personal recipe.
Following the Manual for Heating Equipment
Electric griddles and cast iron both get very hot, so follow the maker’s instructions for setup, cord handling and cleaning. Keep the cord clear of the work area and never leave heated equipment unattended. Check the manual for guidance on what utensils the surface can take, and on how to clean it after a long session.
Setting Up a Cozy Lefse Day
Because lefse is as much a gathering as a recipe, think about the atmosphere. Choose a day when you are not hurried, and put on music or a favorite program. Offer simple toppings so that the first warm rounds can be enjoyed right away, such as butter with a light sprinkle of sugar, or a savory filling.
Keep a notepad beside you to record what worked, and invite a younger relative to try the turning stick under supervision. Passing the skill along is half the fun. When the work is done, let the equipment cool fully before you clean it, and put the rolling tools away in a dry place so they are ready for next season.
Lefse Grill FAQ
Do I need a dedicated lefse grill?
No. A large flat griddle works well, though a round lefse grill matches the shape of the dough.
Why is the plate size so important?
Lefse is rolled wide and thin, so a plate that is too small forces you to fold or trim the dough.
What else helps?
A turning stick and a grooved rolling pin, plus a pastry cloth, make rolling and flipping much easier.
Why does my lefse turn tough?
Common causes include too much flour, overworking the dough, rolling unevenly or overcooking. Follow your recipe, keep the dough cold, and take the round off the plate when pale brown spots appear.
Do I need a ricer for the potatoes?
A ricer helps make a smooth, lump-free base, which rolls thinner. A masher can work if you get the potatoes completely smooth, but lumps often cause tears.
Should the plate be oiled?
No. Lefse is cooked on a dry surface, and oil can change the texture. Brush off loose flour between rounds so it does not burn.
How do I keep finished rounds soft?
Stack them between clean towels as they come off the plate and keep them covered. Drying out is the main cause of stiff lefse.
Can I freeze lefse?
Yes. Cool the rounds, separate them with parchment and seal them well. Thaw in the wrapping, and warm gently before serving.
Is a grooved rolling pin necessary?
It is not required, but it helps spread the dough thin with less flour. A smooth pin works if you use a floured pastry cloth and a light touch.
How big should the plate be?
It should be wide enough for a full rolled round without folding. Check the heated plate diameter on the listing, not the outside size of the appliance.
Can a pancake griddle make lefse?
Often it can, if the surface is flat, clean and evenly heated. Corners may limit the round size, so you might roll slightly smaller pieces.
How to Judge Lefse grill for norwegian flatbread by the Way You Cook Outdoors
Outdoor cooking rewards honesty about your habits. The right choice among lefse grill for norwegian flatbread depends on how often you cook outside, how many people you usually feed, and whether you enjoy tending a fire or prefer to set things up and socialise. A grill or smoker that fits a weekly family routine is a different proposition from one bought for two large parties a year. Start by listing the meals you genuinely cook outdoors, burgers and sausages, whole joints, vegetables, fish, low and slow cuts, and match the cooking surface, fuel style and layout in this guide to that list rather than to an imagined repertoire.
Think about the cooking area in terms of a real meal, not a headline figure. Picture the largest single cook you do regularly and lay it out in your mind: the main item, the sides that share the grate, and the food that needs a cooler or hotter zone. Two-zone cooking, a hot side and a gentler side, is the technique that makes outdoor food reliable, so check how each pick in this guide lets you arrange fuel or burners to create it, using the listing and manual descriptions. A slightly smaller surface you can zone well beats a vast one you cannot control.
Fuel and running routine deserve as much thought as the cooking itself. Charcoal, gas and pellet or wood styles each bring their own setup time, storage needs, ash or grease management and flavour. None is universally better; the best fuel is the one whose routine you will still enjoy in your twentieth cook, in your weather, in your space. Read the care and fuel sections of this guide alongside the product descriptions, and picture the full cycle, buying and storing fuel, lighting, cooking, cooling, cleaning and covering, before you choose.
Use Cases Worth Planning For
Weeknight grilling
On a weeknight, speed and simplicity decide whether outdoor cooking happens at all. A setup that lights quickly, a grate that is ready without a long ritual and a cleanup that can be finished the same evening will be used weekly; a demanding routine will not. When comparing lefse grill for norwegian flatbread, time the whole job honestly, from walking outside to sitting down, including the part where the grill cools and gets covered. The model whose routine fits a Tuesday is the one that earns its place.
Weekend gatherings
Feeding a group is a timing exercise. Food comes off the grill in waves, guests eat at different speeds, and the cook still wants to be part of the occasion. Plan which dishes the grill owns, which can be cooked ahead and held, and which belong to the kitchen. Side shelves, warming areas and a sensible place to rest cooked food matter more here than raw size. Check how each pick in this guide handles staging and resting space in its listing description, and rehearse the layout with trays and tools before the day.
Low, slow and project cooking
Long cooks are about stability and patience. Whether it is a smoker session or a slow roast, you need a setup that holds a steady temperature, fuel that lasts the session, and a way to check progress without losing all the heat. Think about where the unit sits for hours at a time, shelter from wind, distance from fences and play areas, and how you will monitor it. The picks in this guide approach long cooking in different ways, so match the method to how hands-on you actually want to be.
Setup, Placement and Safety Basics
Choose the spot before the unit arrives. Outdoor cooking appliances belong on a level, non-combustible surface, outdoors and well clear of buildings, fences, overhanging branches and anything that can catch or melt, following the clearances in the manual for your model. Think about wind, which pushes heat and smoke in one direction, about where smoke will drift relative to windows and neighbours, and about the route between kitchen and grill, which you will walk carrying hot trays. Good placement is a safety feature and a convenience feature at the same time.
Assemble and season patiently. Work through the manual in order, check every fitting twice, and do any initial burn-off or seasoning the maker describes before food goes on. The first cooks should be simple and familiar, so you learn how your unit heats, where its hot spots are and how its vents or controls respond, without the pressure of guests. Take notes, even rough ones, on fuel amounts, timings and vent positions for dishes you will repeat; outdoor conditions vary, and your own record is the fastest route to consistent results.
Keep the safety basics non-negotiable. Never use or store an outdoor cooking appliance in an enclosed space, keep children and pets at a sensible distance while it is hot, and have the right tools to hand: long tongs, heat-resistant gloves and a stable surface for hot trays. Know how to shut your unit down properly, whether that means closing vents, turning off the gas supply at the source as the manual directs, or letting fuel burn out safely. Coals and ash can stay hot far longer than they look; dispose of them only when fully cold, in a metal container.
Cleaning, Care and Storing Between Cooks
A grill that is cleaned in small steps stays a pleasure. While the grate is still warm after cooking, brush or scrape away residue as the maker recommends, empty grease catchers before they overflow, and once everything is cold, wipe surfaces and check for ash or grease build-up in the body. Grease management is not housekeeping vanity: built-up grease is the most common cause of flare-ups and unpleasant smoke, and ash left damp in a steel body invites corrosion. The manual for your model sets out what can be washed, what should only be wiped, and what must be kept dry.
Protect the unit between cooks and across seasons. A cover that fits properly, used on a clean and dry appliance, keeps rain and debris off without trapping moisture against the surfaces. Store fuel dry, charcoal and pellets especially suffer when damp, and keep accessories together in one place so the next cook starts without a search. Before the first cook after a break, inspect the whole unit: grates, burners or firebox, hoses and connections where fitted, and the ignition if it has one, following the checks the manual describes.
Treat wear honestly. Grates, seals, igniters and finishes are working parts in a hard environment of heat, weather and grease, and some will need attention or replacement over the years. Catching a small problem early, a perished seal, a clogged burner port, rust starting at a chipped edge, keeps it small. When you compare the picks in this guide, consider how their parts come apart for cleaning and whether replacement parts are described as available on the listing, because maintainability decides how long the appliance stays good to use.
Comparing the Picks in This Guide, One by One
CucinaPro Lefse Grill: what to check before you choose it
Look at the CucinaPro Lefse Grill through the questions this guide has built up. Start with how its overall size and shape will sit in the space you have measured, and whether its day-to-day routine matches the way your household actually works. Then re-read the original description of this pick earlier in the article, including who it suits and the honest limitation noted there, and test those points against your own notes rather than against a general idea of what a good purchase looks like. If the strength named for the CucinaPro Lefse Grill answers your main problem and its limitation touches something you rarely do, it is a strong candidate. If the reverse is true, keep moving, even if the pick is popular.
Presto Cool Touch Electric Griddle: what to check before you choose it
Look at the Presto Cool Touch Electric Griddle through the questions this guide has built up. Start with what its listing says about the parts you will handle and wash most often, and whether that cleaning routine is one you will keep up without resentment. Then re-read the original description of this pick earlier in the article, including who it suits and the honest limitation noted there, and test those points against your own notes rather than against a general idea of what a good purchase looks like. If the strength named for the Presto Cool Touch Electric Griddle answers your main problem and its limitation touches something you rarely do, it is a strong candidate. If the reverse is true, keep moving, even if the pick is popular.
Presto Tilt-n-Drain Big Griddle: what to check before you choose it
Look at the Presto Tilt-n-Drain Big Griddle through the questions this guide has built up. Start with how its format lines up with the use cases described earlier in this guide, especially the meals or loads you repeat every week rather than the ones you cook once a year. Then re-read the original description of this pick earlier in the article, including who it suits and the honest limitation noted there, and test those points against your own notes rather than against a general idea of what a good purchase looks like. If the strength named for the Presto Tilt-n-Drain Big Griddle answers your main problem and its limitation touches something you rarely do, it is a strong candidate. If the reverse is true, keep moving, even if the pick is popular.
Cuisinart Griddler: what to check before you choose it
Look at the Cuisinart Griddler through the questions this guide has built up. Start with whether the controls and layout described for it suit the person who will use it most, including anyone who cooks less confidently and needs a setup that explains itself. Then re-read the original description of this pick earlier in the article, including who it suits and the honest limitation noted there, and test those points against your own notes rather than against a general idea of what a good purchase looks like. If the strength named for the Cuisinart Griddler answers your main problem and its limitation touches something you rarely do, it is a strong candidate. If the reverse is true, keep moving, even if the pick is popular.
Victoria Cast Iron Comal: what to check before you choose it
Look at the Victoria Cast Iron Comal through the questions this guide has built up. Start with what is actually included in the box according to the current listing, since versions and bundles change, and whether anything you are counting on is listed as an optional extra. Then re-read the original description of this pick earlier in the article, including who it suits and the honest limitation noted there, and test those points against your own notes rather than against a general idea of what a good purchase looks like. If the strength named for the Victoria Cast Iron Comal answers your main problem and its limitation touches something you rarely do, it is a strong candidate. If the reverse is true, keep moving, even if the pick is popular.
Norpro Lefse Turning Stick: what to check before you choose it
Look at the Norpro Lefse Turning Stick through the questions this guide has built up. Start with how it compares with the pick listed just before and just after it in this guide on the single question that matters most to you, because narrowing by your top priority is the fastest honest way to choose. Then re-read the original description of this pick earlier in the article, including who it suits and the honest limitation noted there, and test those points against your own notes rather than against a general idea of what a good purchase looks like. If the strength named for the Norpro Lefse Turning Stick answers your main problem and its limitation touches something you rarely do, it is a strong candidate. If the reverse is true, keep moving, even if the pick is popular.
Mistakes That Spoil Outdoor Cooking
Cooking everything over maximum heat
High heat has its place, for searing and for foods that cook in minutes, but a whole meal cooked at full blast arrives burnt outside and raw inside. Learn to build or set two zones, use the gentler side for thicker items and vegetables, and let food rest before serving. A food thermometer removes the guesswork for meat and poultry. Most outdoor cooking improves the moment the cook stops treating the grill as an on-off device and starts managing heat as an ingredient.
Lifting the lid and poking constantly
Every look costs heat and adds time, and constant turning or pressing squeezes juices out of food and onto the fire. Set the food down, give it time to release and colour, turn it when it is ready, and use the waiting time to prepare the next stage. For long cooks, check on a schedule rather than on impulse. The discipline feels passive, but it is the difference between food that is managed and food that is merely worried over.
Neglecting grease and ash until it matters
The cook who empties the grease catcher only after a flare-up, or leaves ash sitting through a wet month, is borrowing trouble. Build the small habits into the end of every session: food off, grate cleaned while warm, unit closed down properly, and grease and ash dealt with once cold. Ten minutes of routine after each cook protects the appliance, the food and, on the grease side, safety itself.
A Calm Final Decision Worksheet
Before you order, answer five questions in writing. How often will I honestly cook outdoors, and for how many people? Which fuel routine fits my patience and my storage space? Where will the unit stand, and does that spot meet the clearances and give me a safe, practical working area? How does the cleaning routine look after a greasy cook? And which pick in this guide matches those answers with the fewest compromises? Working through the same questions for each pick turns a tempting specification into a decision grounded in your garden and your habits.
Finally, re-read the current listing for the model you choose on the day you buy. Included grates, covers, tools and configurations vary, and the listing states exactly what is supplied. Confirm the cooking area, fuel type and assembly requirements match your expectations, and plan assembly time honestly rather than starting an hour before guests arrive. Keep the manual somewhere you will find it at the start of the season. If two picks still feel equal, choose the one whose lighting, cleaning and storage routine you mind least; you will repeat that routine far more often than you will admire any single feature.
Cooking Outdoors Through the Seasons
Outdoor cooking changes character with the weather, and adjusting to that is part of the craft. Cold and wind steal heat and lengthen timings, so fuel plans and patience both need to grow, and food benefits from coming off the coldest part of the day where you can manage it. In hot weather the challenges flip: keeping raw food safely cool before it cooks, keeping the cook hydrated and shaded, and managing a fire that is already starting from a warm baseline. None of this should put you off; it simply means the notes you keep should record the conditions alongside the timings.
Shelter and light decide how much of the year the appliance gets used. A spot that is pleasant in June can be exposed in November, and a cook who cannot see the food properly will not cook well after dark. Think about where you stand, not just where the unit stands, and whether a simple change of position for the winter months makes the routine kinder. The more comfortable the setup is in ordinary weather, the more often it will be used, and frequency is what turns an occasional purchase into a household fixture.
Keep a modest kit together so every cook starts ready: fuel, lighting method, tongs, a thermometer, gloves, a tray for raw food and a clean tray for cooked food, kept separate as food hygiene requires. Restocking that kit as part of the clean-down, rather than discovering an empty fuel store with guests arriving, is one of those invisible habits that separates relaxed outdoor cooks from frantic ones. A short checklist on the inside of a cupboard door sounds excessive until the first time it saves a meal.
More Questions Buyers Ask About Lefse grill for norwegian flatbread
How much cooking space do I really need?
Lay out your most common outdoor meal on paper: the main item, the sides that share the heat and anything that needs a cooler zone. That layout, plus a little working room, is your real requirement. Headline area figures treat every corner as equal, but edges run cooler and shapes matter, so a well-zoned smaller surface often cooks a family meal better than a larger one used as a single hot plate.
How do I control temperature more reliably?
Start with fuel amount and arrangement, or burner settings, then use vents and lid position as the manual describes, changing one thing at a time and allowing the temperature to settle before judging. Wind and weather shift results, so note what worked. A thermometer you trust, for the grill and for the food, turns guesswork into a repeatable method within a few cooks.
What is the safest place to put it?
On a level, non-combustible surface outdoors, with the clearances from buildings, fences and overhangs that the manual specifies, and never in a garage, porch enclosure or tent. Think about smoke drift, the walking route with hot food, and keeping children and pets clear. If the only available spot fails the clearance checks, the honest answer is a different spot or a different appliance, not a compromise.
How do I stop flare-ups?
Most flare-ups come from grease, either dripping from very fatty food or built up in the body of the grill. Trim excess fat where the recipe allows, keep the grease path and catcher clean, cook fatty items over the gentler zone, and move food rather than pressing it when flames rise. If flames persist, close the lid or vents as the manual directs to starve them, and never use water on a grease fire.
When should I clean the grate, before or after cooking?
Both habits help: a brush-down while the grate is still warm after cooking removes most residue easily, and a quick pass during preheating deals with anything left. Follow the maker guidance on tools for your grate material, since coatings and cast iron have different needs. What matters is that residue does not accumulate across cooks, where it smokes, sticks and flavours the next meal.
Can I leave it outside all year?
Many outdoor appliances are built to live outside with a proper cover, but weather is hard on finishes, fittings and fuel. Use a cover that fits, on a clean dry unit, store fuel somewhere dry, and inspect everything before the first cook of the season. If you have sheltered storage and the unit moves easily, bringing it under cover for the worst months will extend its life; check the manual for what the maker recommends.
What should I cook first on a new grill or smoker?
Something familiar and forgiving that you have cooked before by another method, so differences you notice are about the appliance. Learn its hot spots with a simple, even load, note fuel and vent settings, and keep the first long cook for a day without guests. Confidence outdoors comes from a few documented successes, not from attempting the most ambitious recipe first.
How do I know when food is done and safe?
Use a food thermometer and the temperature guidance published by food safety agencies for the food you are cooking, checking the thickest part away from bone. Colour and juices are supporting clues, not proof. Rest meat as the recipe directs, keep cooked food away from raw marinades and the plates that carried raw items, and when in doubt, give it a little longer rather than serving early.
The Short Version
For a purpose-built grill, the CucinaPro. For an easy griddle, the Presto Cool Touch. For big batches, the Presto Tilt-n-Drain. For multi-use, the Cuisinart Griddler. For stovetop cooking, the Victoria comal. For flipping, the Norpro stick.