A large smoker gives you room for whole briskets, racks of ribs and pork shoulders without crowding, which matters because smoke needs to circulate around the meat. Larger chambers also help hold a steady temperature over the many hours that low and slow cooking takes. A good smoker also gives you space to run a water pan, add wood and rest meat, which all help with moisture and flavor.
The six below cover electric, offset, vertical, pellet and drum designs, so you can choose the style that matches how much tending you want to do. We have not used these products ourselves, and every detail should be confirmed on the current listing before you buy, including rack count, cooking area and assembly. Smokers burn fuel for hours, so put one on a level, non-combustible surface well away from walls. Keep a fire extinguisher nearby and never leave the cooker unattended for long.
As an Amazon Associate we earn from qualifying purchases. Links below are affiliate links, and they do not change the product information we give.
What to Look For
| Feature | Why it matters |
|---|---|
| Fuel | Electric and pellet are easiest, charcoal and wood take more attention |
| Cooking area | Count the racks and the usable space on each |
| Build | Thick steel and tight doors hold heat and smoke |
| Controls | Digital controllers and thermometers help you hold temperature |
In this guide
Specs at a Glance
| Smoker | Style | Fuel | Notes |
|---|---|---|---|
| Masterbuilt digital electric smoker | Vertical cabinet | Electric | Digital controls and multiple racks |
| Oklahoma Joe’s Highland | Offset | Charcoal and wood | Reverse flow design |
| Dyna-Glo vertical offset smoker | Vertical offset | Charcoal | Large cabinet with a side firebox |
| Camp Chef Woodwind Pellet Grill | Pellet | Wood pellets | Digital control and a large hopper |
| Weber Smokey Mountain Cooker | Bullet | Charcoal | Water pan design |
| Pit Barrel Cooker | Drum | Charcoal | Hang style cooking |
The 6 Best Large Smokers
Top pickBest for hands-off smoking
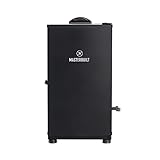
1. Masterbuilt Digital Electric Smoker
A large electric smoker cabinet with digital controls and several racks. You add wood chips, set the temperature and let it run. It is a friendly choice for first-time smokers.
Suits: hands-off smoking. Strengths: easy use and a big cabinet. Weaknesses: milder smoke than charcoal. Skip it if you want a heavy bark.
Best for traditional barbecue
2. Oklahoma Joe’s Highland Offset Smoker
A reverse flow offset smoker with a large cooking chamber and a firebox on the side. It gives classic wood smoke flavor but requires fire tending. The reverse flow design moves smoke across the meat before it exits.
Suits: traditional barbecue. Strengths: big cooking area and rich smoke. Weaknesses: a learning curve. Skip it if you want a set-and-forget cooker.

Best for smaller yards
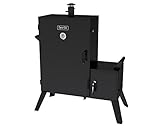
3. Dyna-Glo Vertical Offset Charcoal Smoker
A tall cabinet smoker with a side firebox and several racks. The vertical layout saves floor space compared with a long offset smoker. Check how the doors seal, since leaks waste fuel.
Suits: smaller yards. Strengths: many racks on a small footprint. Weaknesses: thin steel on some versions. Skip it if you prefer a heavy offset.
Best for set-and-forget smoking
4. Camp Chef Woodwind Pellet Grill
A pellet grill that doubles as a smoker, with a digital controller and a large hopper. It makes long cooks easier. You can also use it to grill and sear on some versions.
Suits: set-and-forget smoking. Strengths: steady temperature. Weaknesses: needs power and pellets. Skip it if you want a charcoal-only cooker.
View Camp Chef Woodwind on Amazon
Best for charcoal fans
5. Weber Smokey Mountain Cooker
A charcoal bullet smoker with a water pan, a trusted design among competition cooks. The 22 inch version is the large one, so check which size you see. It is a favorite for steady, low-fuss smoking.
Suits: charcoal fans. Strengths: steady temperatures and a proven design. Weaknesses: it has a limited footprint for huge cuts. Skip it if you want a digital controller.

Best for simple smoking
6. Pit Barrel Cooker
A drum smoker where meat hangs on hooks over the coals. It is simple to use and popular for ribs and chicken. It cooks fast compared with many smokers because the coals are close.
Suits: simple smoking. Strengths: easy operation. Weaknesses: limited rack space. Skip it if you want shelf racks.

Care and Setup
- Season the smoker as the maker directs before the first cook.
- Empty ash and grease after each use once it is cold.
- Keep a thermometer in the chamber, since built-in gauges can be off.
- Cover the smoker or store it dry between uses.
Mistakes to Avoid
- Using too much wood and creating bitter smoke.
- Opening the door often and losing heat.
- Starting without enough fuel for a long cook.
- Placing the smoker on a wooden deck. Use a stable, heat-safe spot.
Matching Fuel Type to Your Time and Patience
The fuel decides how your weekends feel. Electric smokers hold a set temperature with a heating element, so you load the food, add wood, and check in occasionally. Pellet cookers use a controller to feed small wood pellets into a fire pot, which gives a similar hands-off experience with more wood flavor. Charcoal bullets and drums need you to manage airflow, but once the vents are set they run steadily for hours. Offset smokers burn logs or charcoal in a side firebox and reward attention with a pronounced smoke flavor and bark, but they need a fire that is fed and watched.
Be honest about your routine. If you want to start a pork shoulder at night and sleep, a controller-driven electric or pellet unit is the practical choice. If you enjoy tending a fire, an offset gives you a skill to build. Do not buy an offset expecting set-and-forget results.
Think about supply as well. Pellets need a dry storage spot and a reliable source. Charcoal and wood are widely sold but take space. Electric models need an outlet within safe reach, and an extension cord should be rated for the load, so check the manual. Propane is not part of this list, but whichever fuel you choose, confirm the cost and availability near you before committing, because running costs add up over a season of cooking.
Finally, consider flavor goals. Electric tends toward milder smoke, so a heavy bark may be harder to achieve. Charcoal and wood-burning designs generally give stronger flavor.
Chamber Size and Rack Planning
A big smoker is only useful if you can arrange food in it. Total cooking area is a headline figure, but what matters is the usable space on each rack and the height between racks. A tall pork shoulder or a rack of beef short ribs needs more clearance than a pan of sausages. Measure the largest cut you expect to cook and compare it with the rack spacing on the listing.
Think in terms of meals. A brisket, two racks of ribs and a tray of beans for a gathering is a realistic load, and the layout should let smoke pass around each piece. Packing food tightly blocks airflow and leads to uneven cooking. In vertical cabinets, the bottom racks sit closer to the heat source and the top racks may run differently, so you rotate or swap items during a long cook.
Look at how racks are held and removed. Sturdy racks that slide out smoothly are safer when loaded with heavy meat. Flimsy racks bend under weight. A water pan, if the design includes one, takes space but helps stabilize temperature and add moisture, so account for it in your plan.
Finally, think about cooking for fewer people. A very large chamber uses more fuel to heat and hold at temperature, so it can be wasteful for a small cook. Choose a size that suits your typical meal, with some headroom for holiday cooking.
Build Quality, Seals and Heat Retention
Smokers lose heat through thin metal, gaps and poor seals, and every leak costs fuel and makes temperature harder to hold. When comparing models, look at the steel thickness if the listing states it, the weight of the unit, and how the lid or door closes. A heavier build generally holds heat better, though weight alone does not guarantee quality.
Check the door gasket and latch. A door that sits flat against a tight frame keeps smoke inside and air out. Some owners add heat-resistant gasket material to improve seals, but check the maker’s guidance before modifying anything. Look at welds and seams, and read the assembly notes, because a loosely assembled cabinet will leak even if the design is sound.
The finish matters for longevity. Painted steel can chip and rust if left uncovered, while stainless components resist corrosion better. Keep an eye on the firebox and the inside surfaces, which face the harshest conditions. Replaceable parts such as grates, water pans and heating elements are a plus because they extend the life of the unit.
Vents and dampers should open and close smoothly and hold their position. A damper that sticks makes temperature control a chore. If you plan to cook in cold or windy conditions, a well-built, insulated smoker will hold temperature far better than a thin cabinet. Plan on a windbreak or a sheltered spot regardless of the design.
Thermometers, Airflow and Clean Smoke
Good barbecue depends on clean smoke, not thick smoke. The ideal is a thin, pale blue wisp, while heavy white smoke often means the fire is starved of air and can leave food bitter. Learn to read the exhaust. Keep the exhaust vent open enough that smoke flows through and does not stagnate, and let a fire establish before putting food in.
Use a dependable thermometer at grate level rather than trusting the lid gauge. Built-in dials can be off and they measure the air near the lid, which can differ from the temperature where the meat sits. Leave-in probes for the meat itself help you cook to doneness, not to a clock. Follow food safety guidance for the meat you are cooking and check temperature in more than one spot on large cuts.
Wood choice and moisture matter. Dry, seasoned wood burns cleaner. Use small amounts and add them gradually. Soaking chips is debated, and many cooks skip it, so follow the smoker maker’s advice. Different woods vary in strength, so start mild and adjust.
Airflow also affects the cooking. Opening the door often drops the temperature and extends cook time, so peek only when needed. Let the meat rest after cooking, wrapped loosely, so juices settle before slicing. A rest period often improves the result more than any gadget.
Cleaning, Storage and Lifespan
A smoker will last for years if you clean it regularly and store it dry. After each cook, once everything is cold, remove ash, scrape the grates and empty any grease trays. Built-up grease is a fire risk and can add stale flavor to the next cook. Wipe the interior with a damp cloth when needed, but avoid scrubbing away the seasoned layer that protects bare steel on many models.
Check the water pan and drip tray. Pans should be washed and dried to prevent rust. In electric models, keep the element and controls clean and dry, and never spray water into the electrical area. Follow the manual’s cleaning steps for your design.
Store the smoker under a fitted cover in a dry spot. Moisture is the main enemy of steel. If the unit sits outside through winter, make sure it is covered and the vents are positioned so condensation can escape. Do not store pellets or charcoal inside a wet smoker, and keep fuel off the ground.
Signs it is time to replace or repair include rust through the cabinet walls, a door that no longer seals, a damaged element or controller, warped racks and a firebox with burned-through metal. Check with the maker for replacement parts before giving up on a unit. Many components, such as grates and gaskets, can be replaced at far less cost than a new smoker.
Electric, Charcoal, Pellet or Offset: A Side-by-Side Look
Large smokers use different fuels, and each one asks for a different kind of attention. Choosing a type that matches your patience and your weekends matters more than any single feature. The Masterbuilt is an electric model, the Dyna-Glo and Weber are charcoal cookers, the Oklahoma Joe’s is an offset design, the Camp Chef is a pellet grill and the Pit Barrel Cooker uses a hanging-style barrel layout.
| Fuel style | Attention needed | What you gain |
|---|---|---|
| Electric | Low | Simple temperature control and easy use |
| Pellet | Low to medium | Automated feed and wood flavor |
| Charcoal | Medium | Classic smoky flavor with practice |
| Offset | High | Large cooking area and fire management skills |
Be honest about how much time you want to spend tending a fire. A busy household often does better with a design that holds its temperature with minimal fuss, while someone who loves the craft may enjoy the extra work.
Safety and Setup Rules to Follow From the Manual
A smoker burns fuel or draws electric power for many hours, so the maker’s instructions on placement and operation deserve careful reading. General habits apply to all types, but specific distances and procedures belong to the manual for your model.
- Place the smoker outdoors on a firm, level surface away from walls, fences, branches and anything that can burn.
- Never use a charcoal or pellet smoker inside a garage, tent or any enclosed area.
- Keep children and pets back from the hot cooker.
- Use heat-resistant gloves and long tools when handling hot parts.
- Plug electric models into a suitable outlet suited to outdoor use and follow the maker’s guidance for cords.
- Let ash and embers cool fully before disposal, using a metal container as the instructions suggest.
For food temperatures and holding times, follow official food safety guidance rather than relying on guesswork or the color of the meat.
Planning a Cook Day
Large smokers reward planning. Work backward from serving time and leave a generous margin, because large cuts take as long as they take and cannot be hurried. Gather your fuel, wood, tools, thermometers and a clean tray in advance so you are not hunting for supplies halfway through.
Prepare the meat the evening before if the recipe calls for a rub, and keep it cold until it goes onto the cooker. Decide where finished meat will rest, and have a clean tray and wrap ready. Thinking about the entire sequence, from setup to cleanup, turns a long cook into a relaxed one.
A Short Glossary of Smoker Terms
Barbecue talk comes with its own vocabulary, and product pages assume you know it. These plain definitions will help you follow along.
- Low and slow: cooking at a gentle temperature for many hours.
- Bark: the dark, flavorful crust that forms on the outside of smoked meat.
- Firebox: the chamber where the fuel burns, found on offset models.
- Damper: an adjustable vent that controls airflow and therefore heat.
- Water pan: a tray of liquid placed inside to steady temperature and add moisture.
- Rest: the period after cooking when meat sits before slicing.
Learning these terms makes manuals, recipes and listing details far easier to follow. If you meet a word that is not covered here, check the instructions that came with your cooker, since each maker uses its own names for parts and controls.
It also helps to ask how each model handles ash removal, grease collection and access to the fuel while cooking. A cooker that is awkward to refill or clean tends to sit unused, so think realistically about the routine you will keep up over a season.
Large Smoker FAQ
What is the best smoker type for beginners?
Electric and pellet smokers are the easiest to control, so they suit new cooks.
How big should a large smoker be?
Choose a chamber that fits your usual cuts with space left for air to move.
Do I need a thermometer?
Yes. A reliable thermometer helps with both the chamber and the meat.
Which wood should I use?
Hickory, oak and fruit woods are popular. Follow the maker advice on quantity. Dry, seasoned wood gives cleaner smoke than green wood.
How long does a smoker need to preheat?
It depends on the design and the weather, so follow the manual. Electric and pellet models often reach temperature faster than offset cookers. Let the temperature settle before loading meat.
Should I use a water pan?
It can help steady temperature and add moisture, especially in cabinet and bullet designs. Some cooks skip it for a firmer bark. Follow the maker's advice for your model.
What is thin blue smoke and why does it matter?
It is a faint, almost clear smoke that comes from a clean, well-ventilated fire. It tends to give better flavor than thick white smoke, which can taste bitter. Adjust airflow and wood to get closer to it.
Can I smoke in cold weather?
Yes, but expect longer cooks and more fuel. A sheltered spot, a windbreak and a well-built smoker help. Never move a hot smoker or place it under a roof or against a building.
How often should I clean the grease tray?
Empty it after each cook once it is cool, and check it before a long session. Built-up grease is a fire risk and can affect flavor.
Do I need to wrap meat during the cook?
Not always. Wrapping can speed things up and keep meat moist, while leaving it unwrapped gives a firmer bark. It is a personal choice and many cooks try both.
How much wood should I add?
Start with a small amount and add gradually. Too much wood creates harsh smoke, so go lightly and adjust to taste.
Is it safe to leave a smoker running overnight?
Only if the maker's guidance allows it and you have a safe setup with a clear area, a stable surface and working smoke and carbon monoxide alarms near any living space. Many people prefer to stay on site during long cooks.
How to Judge Large smokers by the Way You Cook Outdoors
Outdoor cooking rewards honesty about your habits. The right choice among large smokers depends on how often you cook outside, how many people you usually feed, and whether you enjoy tending a fire or prefer to set things up and socialise. A grill or smoker that fits a weekly family routine is a different proposition from one bought for two large parties a year. Start by listing the meals you genuinely cook outdoors, burgers and sausages, whole joints, vegetables, fish, low and slow cuts, and match the cooking surface, fuel style and layout in this guide to that list rather than to an imagined repertoire.
Think about the cooking area in terms of a real meal, not a headline figure. Picture the largest single cook you do regularly and lay it out in your mind: the main item, the sides that share the grate, and the food that needs a cooler or hotter zone. Two-zone cooking, a hot side and a gentler side, is the technique that makes outdoor food reliable, so check how each pick in this guide lets you arrange fuel or burners to create it, using the listing and manual descriptions. A slightly smaller surface you can zone well beats a vast one you cannot control.
Fuel and running routine deserve as much thought as the cooking itself. Charcoal, gas and pellet or wood styles each bring their own setup time, storage needs, ash or grease management and flavour. None is universally better; the best fuel is the one whose routine you will still enjoy in your twentieth cook, in your weather, in your space. Read the care and fuel sections of this guide alongside the product descriptions, and picture the full cycle, buying and storing fuel, lighting, cooking, cooling, cleaning and covering, before you choose.
Use Cases Worth Planning For
Weeknight grilling
On a weeknight, speed and simplicity decide whether outdoor cooking happens at all. A setup that lights quickly, a grate that is ready without a long ritual and a cleanup that can be finished the same evening will be used weekly; a demanding routine will not. When comparing large smokers, time the whole job honestly, from walking outside to sitting down, including the part where the grill cools and gets covered. The model whose routine fits a Tuesday is the one that earns its place.
Weekend gatherings
Feeding a group is a timing exercise. Food comes off the grill in waves, guests eat at different speeds, and the cook still wants to be part of the occasion. Plan which dishes the grill owns, which can be cooked ahead and held, and which belong to the kitchen. Side shelves, warming areas and a sensible place to rest cooked food matter more here than raw size. Check how each pick in this guide handles staging and resting space in its listing description, and rehearse the layout with trays and tools before the day.
Low, slow and project cooking
Long cooks are about stability and patience. Whether it is a smoker session or a slow roast, you need a setup that holds a steady temperature, fuel that lasts the session, and a way to check progress without losing all the heat. Think about where the unit sits for hours at a time, shelter from wind, distance from fences and play areas, and how you will monitor it. The picks in this guide approach long cooking in different ways, so match the method to how hands-on you actually want to be.
Setup, Placement and Safety Basics
Choose the spot before the unit arrives. Outdoor cooking appliances belong on a level, non-combustible surface, outdoors and well clear of buildings, fences, overhanging branches and anything that can catch or melt, following the clearances in the manual for your model. Think about wind, which pushes heat and smoke in one direction, about where smoke will drift relative to windows and neighbours, and about the route between kitchen and grill, which you will walk carrying hot trays. Good placement is a safety feature and a convenience feature at the same time.
Assemble and season patiently. Work through the manual in order, check every fitting twice, and do any initial burn-off or seasoning the maker describes before food goes on. The first cooks should be simple and familiar, so you learn how your unit heats, where its hot spots are and how its vents or controls respond, without the pressure of guests. Take notes, even rough ones, on fuel amounts, timings and vent positions for dishes you will repeat; outdoor conditions vary, and your own record is the fastest route to consistent results.
Keep the safety basics non-negotiable. Never use or store an outdoor cooking appliance in an enclosed space, keep children and pets at a sensible distance while it is hot, and have the right tools to hand: long tongs, heat-resistant gloves and a stable surface for hot trays. Know how to shut your unit down properly, whether that means closing vents, turning off the gas supply at the source as the manual directs, or letting fuel burn out safely. Coals and ash can stay hot far longer than they look; dispose of them only when fully cold, in a metal container.
Cleaning, Care and Storing Between Cooks
A grill that is cleaned in small steps stays a pleasure. While the grate is still warm after cooking, brush or scrape away residue as the maker recommends, empty grease catchers before they overflow, and once everything is cold, wipe surfaces and check for ash or grease build-up in the body. Grease management is not housekeeping vanity: built-up grease is the most common cause of flare-ups and unpleasant smoke, and ash left damp in a steel body invites corrosion. The manual for your model sets out what can be washed, what should only be wiped, and what must be kept dry.
Protect the unit between cooks and across seasons. A cover that fits properly, used on a clean and dry appliance, keeps rain and debris off without trapping moisture against the surfaces. Store fuel dry, charcoal and pellets especially suffer when damp, and keep accessories together in one place so the next cook starts without a search. Before the first cook after a break, inspect the whole unit: grates, burners or firebox, hoses and connections where fitted, and the ignition if it has one, following the checks the manual describes.
Treat wear honestly. Grates, seals, igniters and finishes are working parts in a hard environment of heat, weather and grease, and some will need attention or replacement over the years. Catching a small problem early, a perished seal, a clogged burner port, rust starting at a chipped edge, keeps it small. When you compare the picks in this guide, consider how their parts come apart for cleaning and whether replacement parts are described as available on the listing, because maintainability decides how long the appliance stays good to use.
Comparing the Picks in This Guide, One by One
Masterbuilt Digital Electric Smoker: what to check before you choose it
Look at the Masterbuilt Digital Electric Smoker through the questions this guide has built up. Start with how its overall size and shape will sit in the space you have measured, and whether its day-to-day routine matches the way your household actually works. Then re-read the original description of this pick earlier in the article, including who it suits and the honest limitation noted there, and test those points against your own notes rather than against a general idea of what a good purchase looks like. If the strength named for the Masterbuilt Digital Electric Smoker answers your main problem and its limitation touches something you rarely do, it is a strong candidate. If the reverse is true, keep moving, even if the pick is popular.
Oklahoma Joe’s Highland Offset Smoker: what to check before you choose it
Look at the Oklahoma Joe’s Highland Offset Smoker through the questions this guide has built up. Start with what its listing says about the parts you will handle and wash most often, and whether that cleaning routine is one you will keep up without resentment. Then re-read the original description of this pick earlier in the article, including who it suits and the honest limitation noted there, and test those points against your own notes rather than against a general idea of what a good purchase looks like. If the strength named for the Oklahoma Joe’s Highland Offset Smoker answers your main problem and its limitation touches something you rarely do, it is a strong candidate. If the reverse is true, keep moving, even if the pick is popular.
Dyna-Glo Vertical Offset Charcoal Smoker: what to check before you choose it
Look at the Dyna-Glo Vertical Offset Charcoal Smoker through the questions this guide has built up. Start with how its format lines up with the use cases described earlier in this guide, especially the meals or loads you repeat every week rather than the ones you cook once a year. Then re-read the original description of this pick earlier in the article, including who it suits and the honest limitation noted there, and test those points against your own notes rather than against a general idea of what a good purchase looks like. If the strength named for the Dyna-Glo Vertical Offset Charcoal Smoker answers your main problem and its limitation touches something you rarely do, it is a strong candidate. If the reverse is true, keep moving, even if the pick is popular.
Camp Chef Woodwind Pellet Grill: what to check before you choose it
Look at the Camp Chef Woodwind Pellet Grill through the questions this guide has built up. Start with whether the controls and layout described for it suit the person who will use it most, including anyone who cooks less confidently and needs a setup that explains itself. Then re-read the original description of this pick earlier in the article, including who it suits and the honest limitation noted there, and test those points against your own notes rather than against a general idea of what a good purchase looks like. If the strength named for the Camp Chef Woodwind Pellet Grill answers your main problem and its limitation touches something you rarely do, it is a strong candidate. If the reverse is true, keep moving, even if the pick is popular.
Weber Smokey Mountain Cooker: what to check before you choose it
Look at the Weber Smokey Mountain Cooker through the questions this guide has built up. Start with what is actually included in the box according to the current listing, since versions and bundles change, and whether anything you are counting on is listed as an optional extra. Then re-read the original description of this pick earlier in the article, including who it suits and the honest limitation noted there, and test those points against your own notes rather than against a general idea of what a good purchase looks like. If the strength named for the Weber Smokey Mountain Cooker answers your main problem and its limitation touches something you rarely do, it is a strong candidate. If the reverse is true, keep moving, even if the pick is popular.
Pit Barrel Cooker: what to check before you choose it
Look at the Pit Barrel Cooker through the questions this guide has built up. Start with how it compares with the pick listed just before and just after it in this guide on the single question that matters most to you, because narrowing by your top priority is the fastest honest way to choose. Then re-read the original description of this pick earlier in the article, including who it suits and the honest limitation noted there, and test those points against your own notes rather than against a general idea of what a good purchase looks like. If the strength named for the Pit Barrel Cooker answers your main problem and its limitation touches something you rarely do, it is a strong candidate. If the reverse is true, keep moving, even if the pick is popular.
Mistakes That Spoil Outdoor Cooking
Cooking everything over maximum heat
High heat has its place, for searing and for foods that cook in minutes, but a whole meal cooked at full blast arrives burnt outside and raw inside. Learn to build or set two zones, use the gentler side for thicker items and vegetables, and let food rest before serving. A food thermometer removes the guesswork for meat and poultry. Most outdoor cooking improves the moment the cook stops treating the grill as an on-off device and starts managing heat as an ingredient.
Lifting the lid and poking constantly
Every look costs heat and adds time, and constant turning or pressing squeezes juices out of food and onto the fire. Set the food down, give it time to release and colour, turn it when it is ready, and use the waiting time to prepare the next stage. For long cooks, check on a schedule rather than on impulse. The discipline feels passive, but it is the difference between food that is managed and food that is merely worried over.
Neglecting grease and ash until it matters
The cook who empties the grease catcher only after a flare-up, or leaves ash sitting through a wet month, is borrowing trouble. Build the small habits into the end of every session: food off, grate cleaned while warm, unit closed down properly, and grease and ash dealt with once cold. Ten minutes of routine after each cook protects the appliance, the food and, on the grease side, safety itself.
A Calm Final Decision Worksheet
Before you order, answer five questions in writing. How often will I honestly cook outdoors, and for how many people? Which fuel routine fits my patience and my storage space? Where will the unit stand, and does that spot meet the clearances and give me a safe, practical working area? How does the cleaning routine look after a greasy cook? And which pick in this guide matches those answers with the fewest compromises? Working through the same questions for each pick turns a tempting specification into a decision grounded in your garden and your habits.
Finally, re-read the current listing for the model you choose on the day you buy. Included grates, covers, tools and configurations vary, and the listing states exactly what is supplied. Confirm the cooking area, fuel type and assembly requirements match your expectations, and plan assembly time honestly rather than starting an hour before guests arrive. Keep the manual somewhere you will find it at the start of the season. If two picks still feel equal, choose the one whose lighting, cleaning and storage routine you mind least; you will repeat that routine far more often than you will admire any single feature.
Cooking Outdoors Through the Seasons
Outdoor cooking changes character with the weather, and adjusting to that is part of the craft. Cold and wind steal heat and lengthen timings, so fuel plans and patience both need to grow, and food benefits from coming off the coldest part of the day where you can manage it. In hot weather the challenges flip: keeping raw food safely cool before it cooks, keeping the cook hydrated and shaded, and managing a fire that is already starting from a warm baseline. None of this should put you off; it simply means the notes you keep should record the conditions alongside the timings.
Shelter and light decide how much of the year the appliance gets used. A spot that is pleasant in June can be exposed in November, and a cook who cannot see the food properly will not cook well after dark. Think about where you stand, not just where the unit stands, and whether a simple change of position for the winter months makes the routine kinder. The more comfortable the setup is in ordinary weather, the more often it will be used, and frequency is what turns an occasional purchase into a household fixture.
Keep a modest kit together so every cook starts ready: fuel, lighting method, tongs, a thermometer, gloves, a tray for raw food and a clean tray for cooked food, kept separate as food hygiene requires. Restocking that kit as part of the clean-down, rather than discovering an empty fuel store with guests arriving, is one of those invisible habits that separates relaxed outdoor cooks from frantic ones. A short checklist on the inside of a cupboard door sounds excessive until the first time it saves a meal.
More Questions Buyers Ask About Large smokers
How much cooking space do I really need?
Lay out your most common outdoor meal on paper: the main item, the sides that share the heat and anything that needs a cooler zone. That layout, plus a little working room, is your real requirement. Headline area figures treat every corner as equal, but edges run cooler and shapes matter, so a well-zoned smaller surface often cooks a family meal better than a larger one used as a single hot plate.
How do I control temperature more reliably?
Start with fuel amount and arrangement, or burner settings, then use vents and lid position as the manual describes, changing one thing at a time and allowing the temperature to settle before judging. Wind and weather shift results, so note what worked. A thermometer you trust, for the grill and for the food, turns guesswork into a repeatable method within a few cooks.
What is the safest place to put it?
On a level, non-combustible surface outdoors, with the clearances from buildings, fences and overhangs that the manual specifies, and never in a garage, porch enclosure or tent. Think about smoke drift, the walking route with hot food, and keeping children and pets clear. If the only available spot fails the clearance checks, the honest answer is a different spot or a different appliance, not a compromise.
How do I stop flare-ups?
Most flare-ups come from grease, either dripping from very fatty food or built up in the body of the grill. Trim excess fat where the recipe allows, keep the grease path and catcher clean, cook fatty items over the gentler zone, and move food rather than pressing it when flames rise. If flames persist, close the lid or vents as the manual directs to starve them, and never use water on a grease fire.
When should I clean the grate, before or after cooking?
Both habits help: a brush-down while the grate is still warm after cooking removes most residue easily, and a quick pass during preheating deals with anything left. Follow the maker guidance on tools for your grate material, since coatings and cast iron have different needs. What matters is that residue does not accumulate across cooks, where it smokes, sticks and flavours the next meal.
Can I leave it outside all year?
Many outdoor appliances are built to live outside with a proper cover, but weather is hard on finishes, fittings and fuel. Use a cover that fits, on a clean dry unit, store fuel somewhere dry, and inspect everything before the first cook of the season. If you have sheltered storage and the unit moves easily, bringing it under cover for the worst months will extend its life; check the manual for what the maker recommends.
What should I cook first on a new grill or smoker?
Something familiar and forgiving that you have cooked before by another method, so differences you notice are about the appliance. Learn its hot spots with a simple, even load, note fuel and vent settings, and keep the first long cook for a day without guests. Confidence outdoors comes from a few documented successes, not from attempting the most ambitious recipe first.
How do I know when food is done and safe?
Use a food thermometer and the temperature guidance published by food safety agencies for the food you are cooking, checking the thickest part away from bone. Colour and juices are supporting clues, not proof. Rest meat as the recipe directs, keep cooked food away from raw marinades and the plates that carried raw items, and when in doubt, give it a little longer rather than serving early.
The Short Version
For electric ease, the Masterbuilt. For classic wood smoke, the Oklahoma Joe’s Highland. For a vertical layout, the Dyna-Glo. For pellets, the Camp Chef Woodwind. For charcoal precision, the Weber Smokey Mountain. For a simple drum, the Pit Barrel Cooker.
Related Guides
- 6 Best Meat Smokers: Pellet, Electric, Charcoal and Offset
- 6 Best Smokers: Drum, Offset, Pellet, Propane and Electric
- 6 Best BBQ Smokers for Competition: Pellet, Ceramic, Offset
- 6 Best Commercial Smokers: Pellet, Charcoal and Offset (2026)
- 6 Best Oklahoma Joe's Smokers: Offset, Charcoal, Pellet (2026)


