A smoker cooks food low and slow with wood smoke. For a first one, the key choices are the fuel type and how much attention it needs. Electric and pellet models hold a steady temperature with little effort, while charcoal models take more practice but give a classic flavor.
The six smokers below are well-known beginner-friendly models sold on Amazon. We have not used these products ourselves, and our notes are general. Please confirm the cooking area, fuel type and features on the current listing before buying.
As an Amazon Associate we earn from qualifying purchases. Links below are affiliate links, and they do not change the product information we give.
What to Look For
| Feature | Why it matters |
|---|---|
| Fuel type | Electric and pellet are easiest; charcoal and wood add flavor but need practice |
| Temperature control | A digital controller or a vent system helps hold heat steady |
| Cooking area | Match the rack space to the size of the cuts you cook |
| Build | Thicker steel and tight doors hold heat and smoke better |
| Cleanup | Look for an easy ash pan or grease tray |
In this guide
Specs at a Glance
| Smoker | Fuel | Style | Notes |
|---|---|---|---|
| Masterbuilt Digital Electric Smoker | Electric | Cabinet | Digital controls |
| Weber Smokey Mountain Cooker | Charcoal | Bullet | Classic bullet design |
| Pit Boss pellet smoker | Wood pellets | Pellet | Set-and-hold control |
| Dyna-Glo vertical charcoal smoker | Charcoal | Vertical offset | Offset firebox |
| Camp Chef Smoke Vault | Propane | Vertical cabinet | Gas fed |
| Pit Barrel Cooker Classic | Charcoal | Drum | Hanging hook cooking |
The 6 Best Entry Level Smokers

Top pickBest for beginners who want set-and-forget smoking
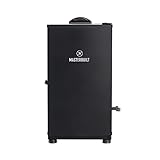
1. Masterbuilt Digital Electric Smoker
A popular electric cabinet smoker with digital controls and a wood chip tray. It is one of the easiest ways to learn, since you set the temperature and time. Check the listing for the cooking area and the controller type.
Suits: beginners who want set-and-forget smoking. Strengths: digital controls and easy use. Weaknesses: less smoke flavor than charcoal. Skip it if you want a charcoal flavor.
Best for learning charcoal smoking
2. Weber Smokey Mountain Cooker
A classic charcoal bullet smoker with a water pan and adjustable vents. It rewards practice and suits cooks who want traditional flavor. Confirm the size you want, since it is sold in more than one diameter.
Suits: learning charcoal smoking. Strengths: a proven design and vent control. Weaknesses: needs attention to the fire. Skip it if you want a hands-off cook.

Best for hands-off wood flavor
3. Pit Boss Pellet Smoker
Pit Boss sells pellet smokers and grills that feed wood pellets automatically to hold a set temperature. Many models also sear. Check the listing for the hopper size and the cooking area.
Suits: hands-off wood flavor. Strengths: automatic pellet feed. Weaknesses: needs electricity. Skip it if you cook where there is no power.

Best for cooking several racks at once
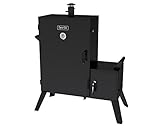
4. Dyna-Glo Vertical Offset Charcoal Smoker
A vertical charcoal smoker with an offset firebox and several racks. The design keeps coals away from the food. Verify the dimensions and the rack count on the listing.
Suits: cooking several racks at once. Strengths: an offset firebox and a vertical design. Weaknesses: needs charcoal tending. Skip it if you have a small patio.
Best for propane users
5. Camp Chef Smoke Vault
A vertical cabinet smoker fed by propane, with a wood chip box. Gas gives easy temperature control without electricity. Check the listing for the size and the burner details.
Suits: propane users. Strengths: easy heat control. Weaknesses: needs a propane tank. Skip it if you prefer a pellet feed.
View Camp Chef Smoke Vault on Amazon
Best for simple charcoal cooking
6. Pit Barrel Cooker Classic
A drum smoker that cooks with meat hung on hooks over charcoal. It has a simple setup and few controls. Verify what accessories are included on the current listing.
Suits: simple charcoal cooking. Strengths: a very simple setup. Weaknesses: unusual hanging cooking style. Skip it if you want shelves for racks.
View Pit Barrel Cooker Classic on Amazon
Care and Setup
- Season a new smoker according to the maker’s instructions before the first cook, which burns off oils from manufacturing and builds a protective layer.
- Empty ash and clean grease trays after each use.
- Cover the smoker to protect it from rain.
- Use a probe thermometer for the food instead of guessing, and let the meat rest after the cook so juices settle.
Mistakes to Avoid
- Opening the lid too often, which lets heat and smoke escape and stretches the cook time.
- Using too much wood and creating thick white smoke, which can leave a bitter taste on the food.
- Skipping the preheat step.
- Buying more smoker than you have space for.
The Learning Curve for Each Fuel Type
Choosing a fuel is really choosing how much practice you want. Electric smokers heat with a thermostat-controlled element and a wood chip tray, so you set a temperature and tend the chips occasionally. They are forgiving, and the main learning is about timing and how much smoke flavor you want. Pellet smokers feed small compressed wood pellets with an auger and a controller, giving steady heat and light attention, though they need electricity and a dry pellet supply.
Propane smokers heat with a gas burner and a wood chip box, adding simple heat control without needing a power outlet. Charcoal smokers, whether bullet, drum or offset, give classic flavor but ask you to manage airflow, fuel and temperature by feel. The reward is a deeper smoky taste and a connection to the craft, but expect a few uneven cooks while you learn how your vents and fuel behave.
Match fuel to your lifestyle. If you want to put a roast in the smoker and run errands, an automated model is the safer pick. If you enjoy fiddling and are happy to stay close, charcoal can be a satisfying hobby. Think also about where you live: apartments may restrict charcoal or wood smoke, and cold or windy weather affects every type. Starting simple and moving up later is a common path, and the lessons about temperature, smoke and patience transfer between smokers.
Temperature Stability and Airflow
Smoking works because food cooks gently for hours, so holding a steady temperature matters more than hitting a high number. Insulation, door seals and wall thickness all affect stability. Thin steel and loose doors lose heat in wind and cold, forcing the fire or element to work harder. A thicker body and a tight seal help, though gasket quality varies and no listing can promise perfect performance.
Airflow is the second half. In charcoal and wood smokers, the intake vents control how much oxygen reaches the fire, and the exhaust vent controls how quickly smoke and heat leave. Small adjustments make a big difference, so move vents a little at a time and wait several minutes for the temperature to respond. Keep the exhaust open enough to let smoke flow out; closing it fully can lead to stale, bitter smoke.
Digital controllers on electric and pellet models handle these adjustments for you but are only as accurate as their sensors. The probe is often placed near the heat source, so a separate thermometer at grate level gives a truer picture. Check the temperature at the cooking grate, not just the lid dial. Expect swings when you open the door; every time you lift the lid, you lose heat and smoke. Resist peeking, and use a probe thermometer to monitor food from outside.
Wood, Smoke Quality and Flavor Choices
Good smoke is thin and bluish or nearly invisible, while thick white smoke often signals a fire that is starved of air or wood that is smoldering. The latter can leave a bitter taste. Aim for a clean-burning fire with enough oxygen. Dry, seasoned wood burns cleaner than green wood, and chips or chunks should be matched to the smoker type and the manual’s guidance.
Different woods bring different flavors. Fruit woods, such as apple and cherry, are mild and slightly sweet, suited to poultry, pork and fish. Oak is a middle-of-the-road choice that works with many meats. Hickory and mesquite are stronger and can overpower delicate foods if overused. Blends offer variety. Start with small amounts and increase according to taste; it is easy to add more smoke but impossible to take it back out.
Use only wood meant for cooking. Avoid treated lumber, painted wood, or softwoods such as pine, which contain resins that make food unpleasant and can be harmful. Do not soak chips unless your manual says so, since wet wood may smolder. Smoke is absorbed mostly early in the cook, when the meat surface is cool and moist, so concentrate smoke at the start and then let the food finish in clean heat. Pellets vary in blend, so check the bag for the wood type and any fillers.
Meat Prep, Temperatures and Food Safety
A successful first cook begins with simple cuts and sensible prep. Pork shoulder, chicken pieces and ribs are common starters because they forgive small errors. Trim excess fat, apply a dry rub or a light seasoning and let the meat sit for a short time so it reaches a more even temperature. Some cooks use a brine or marinade for poultry, but plain salt and spice is often enough.
Use a reliable meat thermometer, because time is only a guide. Food safety guidance sets minimum internal temperatures for different meats, so check an official source for the numbers. Large cuts like brisket and pork shoulder are often cooked beyond the minimum safe temperature to become tender, but that is for texture, not safety. A temperature stall during the cook is normal as moisture evaporates; stay patient and avoid raising the heat dramatically.
Handle raw meat carefully. Keep it refrigerated until it goes on the smoker, use clean utensils and plates for cooked food, and wash hands and surfaces. Do not leave cooked food out for long periods; refrigerate leftovers within the time that food-safety guidance recommends. Rest large cuts wrapped in foil or paper in a cooler or warm oven for a while, which lets juices redistribute. Slice against the grain for tenderness. Keep notes on each cook, including weather, fuel, temperature and results, so you can improve.
Space, Safety and Keeping the Smoker in Shape
Before the smoker arrives, choose a safe spot. Place it outdoors on a level, non-flammable surface, well away from walls, fences, overhanging branches and anything that can burn. Never use a smoker inside a garage, tent or enclosed porch, because smoke and carbon monoxide are hazards. Check local rules and building policies if you live in an apartment or a managed community. Keep a fire extinguisher or a bucket of sand within reach, and know how to shut down the smoker safely.
Handle fuel carefully. Store charcoal and pellets in a dry spot, since moisture ruins them. Use only the lighting method recommended by the maker, and never add lighter fluid to a lit fire. Wear heat-resistant gloves and use long tools. Let the smoker cool completely before covering it, and dispose of ash only when you are sure it is cold, in a metal container.
Basic maintenance keeps the smoker working. Scrape grates after each cook, empty ash and grease, and clean the drip pan to reduce flare-ups. Wipe the interior lightly rather than stripping the seasoned coating that builds up on the walls. Check gaskets, hinges, vents and electrical connections regularly. Cover the smoker between uses to protect it from the weather, and look for rust, which can be treated if caught early. Following the manual for assembly and care helps the smoker last for many seasons and keeps cooks consistent.
A Beginner Checklist Before Your First Smoke
Smoking food is part cooking and part patience, and the early attempts go better with a little preparation. Whether you pick the Masterbuilt, Weber Smokey Mountain, Pit Boss, Dyna-Glo, Camp Chef or Pit Barrel Cooker, run through this list first.
- Read the manual from cover to cover, including the section on seasoning or the first burn-in.
- Set the smoker on a level, non-flammable surface, away from walls, fences, eaves and anything that can burn.
- Gather fuel: wood chips, chunks, pellets, charcoal or propane, as the model requires.
- Buy a reliable digital thermometer, ideally with a probe for the meat and one for the cooking chamber.
- Prepare the meat and plan your timeline, allowing extra time in case the cook runs long.
- Keep a fire extinguisher or other means of safe fire control nearby, as the maker recommends.
- Check wind and weather, since both change how a smoker holds temperature.
Plan your first cook for a day when you are not in a rush. Learning how the smoker responds to vents, fuel and weather is much easier without a hungry crowd waiting.
Fuel Types Compared for New Smokers
Different fuels suit different temperaments. This table summarises the general tradeoffs, but the maker’s instructions should guide your actual use.
| Fuel | What you manage | Good fit for |
|---|---|---|
| Electric | Almost nothing, set and monitor | Those who want simplicity |
| Pellet | Hopper level and settings | Those who like a controller doing the work |
| Charcoal | Airflow, fuel loading and fire | Those who enjoy tending a fire |
| Propane | Burner and wood box | Those who want steady heat and fewer ashes |
There is no wrong choice, only a matter of how involved you want to be. Some people like tending a fire; others prefer to set a temperature and walk away.
Food Safety and When to Follow Official Guidance
Smoked food often cooks at low temperatures for long periods, so food safety is not a detail to guess at. Follow official guidance from your national or local food safety authority for safe internal temperatures, chilling and storage. Use an accurate thermometer, keep raw and cooked foods apart, and do not leave food in a warm smoker after cooking. If you are unsure about a recipe, especially for poultry or large cuts, check the official guidance before cooking.
Fire safety matters just as much. Never use a charcoal or wood smoker indoors, in a garage or on an enclosed porch. For gas or electric models, follow the maker’s instructions about connections, outlets and extension cords, and consult a licensed professional for any gas or electrical work.
Mistakes New Smokers Often Make
Opening the lid too often lets heat and smoke escape and lengthens the cook. Over-smoking with too much wood can leave a bitter taste, so thin blue smoke is usually the goal, not thick white clouds. Cooking to the clock instead of the thermometer causes dry or underdone meat. Skipping the rest period after cooking means juices run out when you slice. Finally, forgetting to clean the grease tray is a common source of flare-ups. Keep notes on each cook so the next one improves.
A Simple Weekend Plan for the First Cook
Choose a forgiving cut for your debut, such as a pork shoulder or chicken thighs, since they handle low temperatures well and tolerate small mistakes. Plan your schedule backward from mealtime. Allow time to prepare the smoker, bring it up to the temperature the recipe suggests, load the food, and then rest the meat once it is done. Rushing the schedule leads to opening the lid too often and cutting corners.
On the day, check the fuel level before you begin, and have extra on hand. Hold a steady temperature rather than chasing small swings, because most smokers drift a little and recover by themselves. Write down the weather, the fuel, the vent settings and the times. After the cook, let the smoker cool fully, empty ash or grease as the manual directs, and cover it to protect it from rain.
Remember that a first attempt is practice. Even a cook that is not perfect teaches you how your smoker behaves, which is worth more than any recipe. Invite people who will enjoy the food and forgive a few rough edges, and plan the next cook while the lessons are fresh.
Choosing a Entry level smokers Around Your Real Routine
Specifications only tell half the story with entry level smokers. The other half is your routine: what you actually cook, how often you cook it, and who else uses the kitchen. A model that suits a household smoking brisket, ribs, poultry, fish and vegetables low and slow, plus experimenting with different woods and rubs several times a week can be the wrong shape entirely for someone who only reaches for it at weekends. Before you compare the picks above any further, spend ten minutes being honest about your patterns, because the right smoker is the one that removes friction from the cooking you already do, not the cooking you imagine doing once a year.
Start With Your Three Most Common Jobs
Write down the three jobs you will ask of this smoker most often. For most households that list centres on smoking brisket, ribs, poultry, fish and vegetables low and slow, plus experimenting with different woods and rubs. Now judge every candidate against those three jobs first and treat everything else as a bonus. Features that serve your top three jobs earn their place in the budget; features aimed at jobs you do twice a year rarely do. This simple test also explains why two reviewers can disagree about the same product: they are quietly scoring it against different lists. Your list is the only one that matters, and it should drive which of the reviews above you read most closely.
Household Size Is Only Part of the Capacity Question
Capacity advice is usually given per person, but appetite, batch cooking and entertaining habits matter just as much. A couple who batch-cooks on Sundays may need more usable space than a family of four who cook fresh each evening. Think about your biggest realistic load rather than your average one, then check it against the honest discussion of usable space in the reviews above. Remember that headline capacity and usable capacity are different things: shape, layout and the way items are arranged decide how much of the stated volume you can genuinely use on a busy day.
Who Else Will Use It?
If teenagers, older relatives or housemates will also use this smoker, controls and access matter more than the brochure suggests. Clear labelling, predictable behaviour and a layout that does not demand strength or reach will decide whether everyone uses it confidently or one person becomes the only operator. Think about height, grip, visibility of markings and how forgiving the controls are when someone is in a hurry. A slightly simpler model that the whole household uses well will outperform a sophisticated one that only one person understands.
A Pre-Purchase Checklist That Catches Expensive Surprises
Most returns and regrets with entry level smokers come from a short list of avoidable surprises rather than from the product itself. Work through these checks before you order, while changing your mind is still free.
- Measure the space, then measure the route. Check a level outdoor spot away from fences and overhangs, shelter from wind, and safe clearance while the unit is hot, and also the doorways, corners and stairs the unit must pass through to reach its home.
- Confirm the services it needs. Power, water, drainage, fuel or ventilation, whichever apply, should be verified in your kitchen rather than assumed from the listing.
- Read the manual before the box arrives. Most manufacturers publish it online. The installation and care pages reveal clearances, restrictions and upkeep that listings gloss over.
- Plan where the accessories live. Think through fuel, wood chunks or pellets kept dry, plus covers and tools stored where damp cannot reach them before the new arrival creates a storage problem elsewhere.
- Check what is included. Racks, trays, hoses, fittings and starter accessories vary between models, and the extras you must buy separately change the real cost of ownership.
- Keep the paperwork. Photograph the serial plate, save the receipt and register the warranty in the first week, while it is still at the front of your mind.
None of these checks takes long, and together they prevent the classic pattern of a good product installed badly, in the wrong place, missing a part, and blamed for all three. If a check raises a question you cannot answer, the manufacturer’s support line or a local installer will usually answer it in minutes, and that call is far cheaper than a return collection.
Getting the Best From It Day to Day
The first fortnight with a new smoker sets the habits that decide how well it serves you for years. Resist the urge to test it with your most ambitious recipe first. Start with familiar food you already know how to smoke low and slow, so the only new variable is the equipment. Note what you changed, what worked and what you would adjust, because those early notes become your personal settings guide long after the novelty fades. Most owners find their results improve steadily over the first month simply because they learn how their particular unit behaves, and that learning curve is normal rather than a sign of a bad purchase.
Build a small rotation of reliable everyday uses before experimenting. In practice that means leaning on the smoker for smoking brisket, ribs, poultry, fish and vegetables low and slow, plus experimenting with different woods and rubs, and paying attention to timing, arrangement and portion size as you go. Crowding, rushing and guessing are the three habits that spoil results most often, whatever the category. Give items room, let the unit do its work without constant interference, and change one variable at a time when you are troubleshooting, so you actually learn what fixed the problem.
Finally, think in terms of workflow rather than single tasks. Decide where ingredients wait before cooking, where hot or finished items land afterwards, and what gets washed as you go. A smoker that fits your workflow feels effortless; the same unit fighting your workflow feels disappointing, even when it performs exactly as designed.
Cleaning and Care: A Routine That Actually Sticks
Care advice fails when it asks for too much at once. Split it into three rhythms. After each use, deal with the obvious: spills, splashes and crumbs are always easier now than next week. Weekly, wipe down the grates, the water pan, the grease tray and the inside of the lid where residue builds up, and check for the early signs of build-up that a deep clean will later have to fight. Monthly or seasonally, do the slower jobs the manual describes, the ones involving soaking, descaling, deep degreasing or a thorough inspection, as they apply to this type of smoker.
Use gentle tools first. Soft cloths, non-scratch sponges and warm soapy water handle most kitchen soil, and they do not damage the finishes, seals and coatings that keep the unit working properly. Harsh abrasives and improvised chemicals cause a surprising share of the damage owners later blame on build quality. Where the manufacturer names a specific product or method, follow it: warranty support is much easier when you can honestly say the care instructions were followed.
Keep a small care kit together near the unit: a cloth, a soft brush, your chosen cleaner and a note of when the last deep clean happened. That tiny bit of organisation turns maintenance from a project into a five-minute habit, and a well-kept smoker not only lasts longer, it performs more consistently, because seals seal, surfaces heat or cool evenly, and moving parts move as they should.
Comparing the Picks in This Guide Against Each Other
The shortlist above — Masterbuilt Digital Electric Smoker, Weber Smokey Mountain Cooker, Pit Boss Pellet Smoker, Dyna-Glo Vertical Offset Charcoal Smoker, Camp Chef Smoke Vault, Pit Barrel Cooker Classic — was chosen because each model earns its place for a slightly different buyer. Comparing them well means resisting the urge to find a single winner and instead matching each pick to the household it suits. Re-read the individual reviews with your own top three jobs in mind, and notice which strengths keep mattering to you and which you can honestly live without.
Masterbuilt Digital Electric Smoker is the opening pick, which sets the benchmark the rest are judged against. The fairest way to judge it is against the job list you wrote earlier: if its strengths line up with the tasks you do weekly, it deserves to be on your final two; if its appeal rests on capabilities you would rarely use, the reviews above give you permission to pass it by, however impressive it looks in isolation. Pay particular attention in its review to the honest limitation noted there, because limitations matter only when they collide with your routine.
Weber Smokey Mountain Cooker is a strong alternative whose appeal lies in a different balance of strengths. The fairest way to judge it is against the job list you wrote earlier: if its strengths line up with the tasks you do weekly, it deserves to be on your final two; if its appeal rests on capabilities you would rarely use, the reviews above give you permission to pass it by, however impressive it looks in isolation. Pay particular attention in its review to the honest limitation noted there, because limitations matter only when they collide with your routine.
Pit Boss Pellet Smoker is a mid-shortlist option that suits buyers who prioritise everyday ease. The fairest way to judge it is against the job list you wrote earlier: if its strengths line up with the tasks you do weekly, it deserves to be on your final two; if its appeal rests on capabilities you would rarely use, the reviews above give you permission to pass it by, however impressive it looks in isolation. Pay particular attention in its review to the honest limitation noted there, because limitations matter only when they collide with your routine.
Dyna-Glo Vertical Offset Charcoal Smoker is a pick that makes most sense for a specific style of cooking or household. The fairest way to judge it is against the job list you wrote earlier: if its strengths line up with the tasks you do weekly, it deserves to be on your final two; if its appeal rests on capabilities you would rarely use, the reviews above give you permission to pass it by, however impressive it looks in isolation. Pay particular attention in its review to the honest limitation noted there, because limitations matter only when they collide with your routine.
Camp Chef Smoke Vault is an option worth serious attention if the earlier picks do not fit your space or routine. The fairest way to judge it is against the job list you wrote earlier: if its strengths line up with the tasks you do weekly, it deserves to be on your final two; if its appeal rests on capabilities you would rarely use, the reviews above give you permission to pass it by, however impressive it looks in isolation. Pay particular attention in its review to the honest limitation noted there, because limitations matter only when they collide with your routine.
Pit Barrel Cooker Classic is the closing pick, which rounds out the shortlist for buyers with different priorities. The fairest way to judge it is against the job list you wrote earlier: if its strengths line up with the tasks you do weekly, it deserves to be on your final two; if its appeal rests on capabilities you would rarely use, the reviews above give you permission to pass it by, however impressive it looks in isolation. Pay particular attention in its review to the honest limitation noted there, because limitations matter only when they collide with your routine.
A useful final exercise is to reduce the shortlist to two and then ask a single question of each: what would I notice about this smoker on an ordinary Tuesday evening, six months from now? The answer is rarely a headline feature. It is the loading, the cleaning, the controls, the noise, the fit in the room. Those everyday qualities are where satisfaction is won, and the reviews above give you the material to judge them if you read for them deliberately.
More Mistakes Worth Avoiding
Beyond the mistakes covered earlier in this guide, a few patterns catch out even experienced buyers of entry level smokers. The first is buying for the biggest day of the year. Sizing everything for a holiday feast or a once-a-year gathering leaves you with a unit that is awkward, hungry for space and harder to clean for the other fifty weeks. Buy for your heavy-but-normal week, and borrow, batch or improvise for the exceptional day.
The second is ignoring running costs and consumables. Filters, fuel, specialist cleaners, replacement parts and accessories add up across years of ownership, and they differ between models in ways listings rarely highlight. The third is skipping the first-use steps: the initial cleaning, seasoning, calibration or test run the manual describes exists because it affects both performance and flavour or hygiene from day one. The fourth is judging too quickly. Almost every smoker has a learning curve, and verdicts delivered after a single rushed use say more about the cook’s evening than the equipment.
The last pattern is letting the purchase end the thinking. The owners who get the most from equipment like this review their setup after a month: what lives where, what gets used, what annoys them. Small changes to arrangement, accessories or routine at that point pay back for years, and they cost almost nothing compared with replacing a unit that was never quite set up properly.
Safety, Efficiency and Considerate Use
Safe use of a smoker is mostly about respect for the obvious risks: live fire or hot elements outdoors, carbon monoxide if a smoker is used in an enclosed space, and hot grease. Build the small habits that neutralise them. Keep the area around the unit clear while it works, use the right protective equipment for hot or heavy items, supervise children and pets around it, and never defeat a safety feature because it slows you down. If anything about the unit’s behaviour changes suddenly — a new noise, a smell, a seal that no longer sits right — stop, check the manual’s troubleshooting section, and treat the change as information rather than an annoyance to ignore.
Efficiency follows a similar pattern of small habits. Use the smoker at sensible loads rather than nearly empty or hopelessly overfilled, keep seals, filters and surfaces clean so it does not work harder than it should, and match the size of the job to the size of the equipment where you have a choice. None of this requires specialist knowledge; it requires only the decision to treat efficiency as part of everyday use rather than a separate project, and over years of ownership those habits are worth real money and a longer working life.
Long-Term Ownership: Repairs, Parts and Knowing When to Replace
A smoker should be judged across its whole life, not its first month. Keep the manual, the receipt and a note of the model and serial details somewhere findable, because every future conversation about parts, service or warranty starts with them. Consumable and wear parts — seals, filters, racks, trays and similar items depending on the type — are worth replacing promptly: a tired wear part can make a healthy unit perform badly and tempt you towards a replacement you do not need.
When something does go wrong, describe the symptom precisely before you book help: when it happens, what you were doing, and what has changed. That detail saves diagnostic time and money. Weigh repair against replacement honestly, considering the unit’s age, the cost and availability of parts, and how well it still suits your household. Replacement makes sense when repairs repeat, parts disappear, or your needs have genuinely outgrown the unit; repair makes sense when the fault is isolated and the rest of the machine is sound. Either way, the decision is easier when the unit has been maintained, because its history is known rather than guessed.
Living With a Entry level smokers: Practical Notes
One underrated skill with any new kitchen equipment is learning to read results instead of instructions alone. When something comes out better or worse than expected, ask what actually changed: the load, the arrangement, the timing, the temperature of the ingredients at the start, or simply how long the door stayed open while you decided. Keeping those variables in mind turns every ordinary meal into useful information, and within a few weeks you will be adjusting by instinct rather than by guesswork. That instinct, more than any single feature, is what separates owners who love their equipment from owners who tolerate it.
It also helps to give the new arrival a defined home and a defined job in the kitchen’s geography. Equipment that lives in the right place gets used; equipment that must be fetched, assembled or cleared around gets quietly avoided. Walk the route from storage to preparation to cooking to serving and notice where the friction sits. Moving one shelf, clearing one stretch of worktop or relocating one rarely used gadget can change how often the new unit earns its keep, and those changes cost nothing but a few minutes of honest observation.
More Entry level smokers Questions, Answered
How long should a unit like this realistically last?
Longevity depends far more on use and care than on the badge. A unit that is loaded sensibly, cleaned on the simple rhythm described above and given prompt attention when a wear part tires will serve for many years, while a neglected unit can feel old quickly. Keep the paperwork, follow the manual’s care schedule, and treat small changes in behaviour as early warnings; that combination does more for lifespan than any single buying decision.
What should I do in the first week of ownership?
Start with the manual’s first-use steps, then cook familiar food rather than ambitious projects. Note the settings, timings and arrangements that work for your household, check that the installation is level, sealed and ventilated as required, and register the warranty while the receipt is still to hand. By the end of the first week you should know how the unit behaves on your everyday jobs, which is the knowledge everything else builds on.
How do I know whether a problem is mine or the product’s?
Change one variable at a time and retest with a simple, familiar job. If results improve, the issue was technique or setup, which is good news because it is free to fix. If the same fault appears regardless of load, arrangement and settings, consult the troubleshooting section of the manual and then the manufacturer’s support, describing the symptom precisely. Keeping a brief note of what you tried makes that conversation far more productive.
Are extended warranties and service plans worth it?
They are worth judging case by case rather than by habit. Consider the unit’s complexity, the availability of local repair, and whether you would genuinely claim or simply replace. Read what is excluded as carefully as what is covered, especially around consumables and cosmetic damage. A plan that covers the parts most likely to fail, from a provider who actually answers, can be sensible; a vague plan bought under pressure at the checkout rarely is.
What is the single best habit for getting value from this purchase?
Use it for your real routine, consistently, and keep it clean as you go. Equipment earns its cost through hundreds of ordinary uses, not a handful of special occasions. The owners who report the highest satisfaction are rarely those who bought the most features; they are the ones whose unit fits their space, whose household all use it confidently, and whose care routine is light enough to survive busy weeks.
When is it time to stop repairing and replace instead?
Replace when faults start repeating, when parts become hard to source, when running it has become noticeably less efficient or less safe, or when your household’s needs have genuinely changed. Repair when the fault is isolated, the rest of the unit is sound and the cost is modest relative to a replacement you would actually want. Decide with the unit’s full history in front of you, which is another reason the simple ownership notes recommended above are worth keeping.
Smoker FAQ
What is the easiest type of smoker to start with?
Electric and pellet smokers usually need the least attention. Charcoal takes more practice.
Do I need a thermometer?
Yes. A probe thermometer shows when the meat is done, which time alone cannot.
Which wood should I use?
Fruit woods and hickory are common starting points. Follow the maker’s guidance.
Can I use a smoker in cold weather?
Yes, but it will take more fuel or power. Check the maker’s advice.
How long does a beginner smoke take?
Times vary by cut, temperature and smoker. Small items like chicken pieces take a few hours, while large cuts such as brisket can take much longer. Use a thermometer rather than the clock.
Should I soak wood chips?
Many cooks skip it, since wet wood can smolder and create harsh smoke. Check your smoker's manual, as some models give specific guidance.
What does thick white smoke mean?
It often points to a fire that needs more airflow or wood that is smoldering. Open the vents slightly and aim for thin, light smoke for cleaner flavor.
Do I need to season a new smoker?
Many manuals recommend a burn-in or seasoning step before the first cook to remove manufacturing residues. Follow the instructions that come with your model.
Can I smoke vegetables or cheese?
Yes, many foods take smoke well, but cheese needs low temperatures so it does not melt. Use a cold-smoking method only if your smoker supports it and follow food-safety guidance.
Why is my meat dry?
Common causes include cooking at too high a heat, overcooking or skipping a rest. Use a thermometer, keep temperature steady and let large cuts rest before slicing.
How do I clean the grates?
Scrape them with a grill brush or scraper while warm, then wipe them down. Avoid harsh chemicals on surfaces that touch food, and rinse thoroughly if you wash them.
The Short Version
For set-and-forget, the Masterbuilt. For classic charcoal, the Weber Smokey Mountain. For pellets, the Pit Boss. For vertical racks, the Dyna-Glo. For propane, the Camp Chef. For a drum, the Pit Barrel Cooker. Confirm the cooking area, the fuel needs and the included parts on each listing before you decide.
Related Guides
- 6 Best BBQ Smokers for Beginners: Easy Electric, Gas, Charcoal
- 6 Best Charcoal Smokers for Beginners: Bullets and Drums (2026)
- 6 Best Meat Smokers for Beginners: Easy and Forgiving
- 6 Best Offset Smokers for Beginners: Easy Starter Picks (2026)
- 6 Best Pellet Grills for Beginners: Easy First Smokers (2026)


