A countertop ice maker gives you a steady supply of ice without waiting on a freezer tray or buying bags. It plugs into a standard outlet, draws water from a reservoir and drops finished ice into a basket. For everyday home use the useful questions are how much ice it makes, how loud it is and how much counter it takes.
The six models below are common picks that suit families, small kitchens and office break rooms. We have not used these products ourselves, so confirm the output, size and features on the current listing before you buy. Output and speed claims are the makers’ own.
As an Amazon Associate we earn from qualifying purchases. Links below are affiliate links, and they do not change the product information we give.
What to Look For
| Feature | Why it matters |
|---|---|
| Daily output | Match the machine to how much ice your household really uses |
| Reservoir | A larger tank means fewer trips to the tap |
| Controls | Size selection and a full-basket sensor save fuss |
| Build | Metal bodies look better; plastic ones weigh less |
| Cleaning | An easy-open lid and a clean cycle keep ice tasting fresh |
In this guide
Specs at a Glance
| Model | Ice type | Water supply | Notes |
|---|---|---|---|
| Frigidaire EFIC123 | Bullet | Manual reservoir | Well-known appliance brand; stainless-style finish |
| Magic Chef portable ice maker | Bullet | Manual reservoir | Compact body; easy controls |
| Vremi portable ice maker | Bullet | Manual reservoir | Light design; small footprint |
| Aeitto portable ice maker | Bullet | Manual reservoir | Budget-friendly; two size options on many units |
| Cowsar portable ice maker | Bullet | Manual reservoir | Compact; self-cleaning on many versions |
| Antarctic Star portable ice maker | Bullet | Manual reservoir | Simple layout; popular for small kitchens |
The 6 Best Countertop Ice Makers for Home Use
Top pickBest for a family kitchen
1. Frigidaire Countertop Ice Maker (EFIC123)
A bullet-style ice maker from a major appliance brand, usually sold in a stainless-style finish. It has a basket, a scoop and simple push-button controls.
Suits: a family kitchen. Strengths: a trusted appliance name and clean looks. Weaknesses: few features beyond the basics. Skip it if you want nugget ice.
View Frigidaire Countertop Ice Maker (EFIC123) on Amazon
Best for a small kitchen
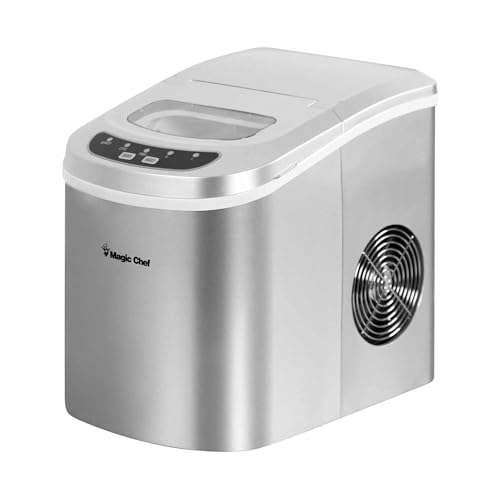
2. Magic Chef Portable Ice Maker
A compact countertop unit from a long-established brand. It makes bullet cubes and is small enough for a corner of the counter.
Suits: a small kitchen. Strengths: a compact shape and plain controls. Weaknesses: limited capacity for large gatherings. Skip it if you throw big parties often.

Best for an apartment or dorm
3. Vremi Portable Ice Maker
A light, small-footprint machine that is easy to carry between rooms. It suits people who need ice for drinks and little else.
Suits: an apartment or dorm. Strengths: a low weight and a small size. Weaknesses: a basic feature list. Skip it if you need a lot of ice per day.
View Vremi Portable Ice Maker on Amazon

Best for a first-time buyer
4. Aeitto Portable Ice Maker
A budget-friendly option with a size selector on many versions, so you can choose smaller or larger cubes. It also has a full-basket indicator.
Suits: a first-time buyer. Strengths: a simple price-to-features balance. Weaknesses: plastic parts and some operating noise. Skip it if you want a premium finish.


Best for a tight counter
5. Cowsar Portable Ice Maker
A compact bullet maker that usually includes a self-cleaning function. It tends to be chosen for small kitchens and camper counters.
Suits: a tight counter. Strengths: self-cleaning and a small body. Weaknesses: varies by version, so check the listing. Skip it if you need a heavy-duty machine.


Best for a home office or break room
6. Antarctic Star Portable Ice Maker
A common pick for small spaces that makes bullet-shaped ice with a basket and scoop. Controls are easy to understand without a manual.
Suits: a home office or break room. Strengths: an easy layout and a small footprint. Weaknesses: some units run louder than others. Skip it if you want near-silent operation.

Care and Setup
- Wipe the basket and lid every few days.
- Drain the reservoir before storing the machine.
- Keep the vents clear so the compressor stays cool.
- Use the maker’s cleaning cycle with approved cleaner only.
- Keep the scoop in a clean, dry spot rather than inside the basket.
- Rinse the basket before the first batch of a new season.
Mistakes to Avoid
- Placing the unit in direct sunlight.
- Assuming it freezes and stores ice for the week.
- Overfilling the reservoir past the marked line.
- Forgetting to descale in hard-water areas.
- Buying a bigger machine than the counter can comfortably hold.
- Ignoring the sound level when the unit sits in an open living area.
How a Countertop Ice Maker Works
A countertop ice maker is a small refrigeration unit. A pump lifts water from the reservoir into a tray or over metal fingers that are chilled by a compressor, and as the water freezes, ice forms on the cold surface. When the cycle ends, the surface warms briefly, the ice drops into a basket, and the process starts again. The result is a stream of small, bullet-shaped cubes, which are hollow on one side and often cloudy.
Because the machine pulls water from a tank, not a plumbed line, it needs refilling. If the basket fills up, a sensor usually stops the cycle. Ice in the basket slowly melts because the unit does not freeze it solid, and the meltwater is typically returned to the reservoir to be reused. That is why the machine is best for making ice you intend to use soon, not for long-term storage.
This design explains many practical points: the compressor needs ventilation, the room temperature affects speed, and the water quality affects taste. A machine in a warm room works harder and produces less ice. If you place it near a window with direct sun, or beside an oven, performance drops. Knowing how it works helps you decide where to put it and how to care for it.
Choosing a Size for Daily Routines
Think in terms of habits, not just numbers. A household that uses ice for a glass of water each evening and a few drinks on weekends needs less than one that fills big tumblers all day. Look at the daily output figure on the listing as the maker’s own claim, and remember that it assumes ideal conditions. The basket capacity is equally important, because it limits how much ice is ready at any moment.
If you only need ice now and then, a compact unit is fine. If your family drinks iced tea or iced coffee every day, you may prefer a model with a larger basket and a bigger reservoir, so you refill less often. Consider the size of your freezer too: if you have ample space, a few ice trays or bins may cover part of your needs, and the machine only supplements them.
Counter space matters. Measure the footprint and the height with the lid open. Leave a gap behind and beside the unit for ventilation, as the manual instructs. Consider a spot near a sink for easy filling and draining, but keep the cord and outlet dry. In an office or a small apartment, a quiet compact unit may be better than the largest one. Remember the noise of the compressor and the sound of ice dropping, which can carry in an open room.
Water Quality, Taste and Cloudiness
The ice is only as good as the water you put in. Tap water that tastes of chlorine or minerals will give ice with the same character. Many people use filtered water or water from a pitcher with a filter, which can improve taste. Distilled water produces very few mineral deposits, but some makers have their own recommendations, so check the manual. Never use anything other than water in the reservoir.
Cloudy ice is normal for these machines. Trapped air and dissolved minerals scatter light, and rapid freezing leaves little time for them to escape. It is not a sign of a fault. If you want clearer ice for cocktails, you might need a different type of machine or a different method.
Hard water causes mineral scale to build up on the cold surfaces and in the pump, which can reduce output and slow the cycle. If you live in a hard water area, plan to descale more often, and consider using filtered water. Change the reservoir water regularly, because water that sits can pick up odors or grow bacteria. If the ice smells or tastes off, drain, clean and refill before using it. Keep the lid closed to keep dust and kitchen odors out of the basket and reservoir.
Noise, Placement and Power
An ice maker makes several sounds: a compressor hum, the sound of water circulating, and the clatter of ice dropping. Some people hardly notice them, and others find them distracting. Placement can help. Put the unit on a stable surface, not on a thin shelf that vibrates, and avoid placing it against a wall that carries sound into a bedroom. A rubber mat can reduce vibration.
Ventilation affects both noise and performance. Machines need space around the vents to release heat. Putting a unit in a tight cabinet or against a wall can make it overheat or run louder. Follow the maker’s clearance guidance. Keep the unit away from direct sun, ovens and dishwashers.
Power matters too. Use a grounded outlet that suits the appliance, and avoid sharing the circuit with other high-draw appliances like microwaves or toasters. After moving the unit, let it sit upright for the time the manual suggests before turning it on, since refrigerant needs to settle. If the unit trips a breaker, stops mid-cycle or the cord feels hot, unplug it and check the manual. A machine that runs quietly in a kitchen with good airflow will likely serve you better than one squeezed into a corner.
Cleaning Schedule, Descaling and Storage
Regular cleaning keeps ice tasting fresh and the machine running. A simple routine is to empty the basket and reservoir, wipe the interior with a soft cloth, and rinse. Do this often if you use the unit daily. Do not use harsh abrasives, which can scratch surfaces and leave places for scale to cling. Check whether the scoop and basket can be washed in the dishwasher.
Periodically do a deeper clean. Many machines have a self-cleaning cycle, which circulates a cleaning solution or water through the system. Use only cleaners approved in the manual, such as a descaling solution or diluted citric acid or vinegar, and rinse thoroughly by running a few cycles of fresh water and discarding the ice. The right frequency depends on water hardness and use.
When storing the unit for a long time, drain all water, dry the interior, leave the lid open to prevent musty smells, and store it upright. Keep the cord loose. Before reusing after storage, clean the machine and discard the first batch of ice. Signs of trouble include slow cycles, small or hollow cubes, a smell that won’t clean out, noise changes, and leaks. If descaling does not fix the problem, check the warranty and consider replacement.
A Checklist for Choosing a Countertop Ice Maker
Countertop ice makers are appealing because they need no plumbing, but a few practical checks save disappointment. Work through these points with the maker’s specification sheet beside you.
- Measure the counter space, including clearance for airflow around the vents, as the manual describes.
- Check the height with the lid open, since you will need to reach into the bin.
- Look at how water gets in. Some models have a reservoir you fill by hand, while others may connect to a line. Choose the one that fits your kitchen.
- Find out where the melted water goes, and whether you must drain it manually.
- Look at the shape of the ice, because it affects how it works in drinks and coolers.
- Check the weight and whether the bin has a carry handle if you plan to move it.
- Read about noise levels in the description, and imagine how the sound will feel in your space.
Ice Shapes and What They Suit
| Ice shape | Good for | Considerations |
|---|---|---|
| Bullet or crescent | Everyday drinks and pitchers | Often the fastest to produce |
| Nugget or pellet | Chewing and soft drinks | Usually needs a more complex machine |
| Clear cubes | Cocktails and slow-melting drinks | Often produced slowly |
| Large cubes | Spirits on the rocks | Usually made in a mold or tray style |
Using the Machine Through a Typical Week
A countertop ice maker does not store ice for long, because the bin is not a freezer. Most of these machines produce ice in a cycle, and ice in the bin gradually melts when the machine is not making more. Plan to move the ice you want to keep into a freezer container, and let the machine begin fresh batches as needed. If you are hosting a gathering, begin well ahead so that a stock can accumulate in your freezer.
Keep the machine on a level surface and away from heat sources. Fill the reservoir with fresh water and avoid topping it up with leftover water from a previous day. Empty the bin and the reservoir if you will not use the machine for a few days, and leave the lid slightly open to air it out, if the manual allows.
A Short Glossary for Ice Maker Listings
- Cycle time: how long it takes to produce a batch, as stated by the maker.
- Output per day: the maximum quantity the maker says the machine can produce in a day under certain conditions.
- Self-cleaning: a program that circulates cleaning solution as directed in the manual.
- Reservoir: the tank where you pour water.
- Bin: the basket that collects finished ice.
- Auto shut-off: a feature that stops production when the bin is full or the water is low.
Keeping It Clean and Knowing When to Call for Help
Water and ice demand cleanliness. Follow the maker’s cleaning instructions and schedule, including any approved cleaner or descaling solution, and rinse thoroughly so no residue remains. Wipe the exterior with a damp cloth, and dry the lid and bin before closing them.
If the machine stops producing, leaks, makes unusual noises or trips the household electricity, unplug it and consult the troubleshooting section of the manual. For electrical repairs or sealed cooling parts, contact the maker or a qualified technician instead of opening the machine yourself.
Reading the Output Figures on a Listing
Ice maker listings advertise how much ice a machine can produce in a day, and the figure is easy to misread. It is usually a maximum under ideal conditions, such as a particular room temperature and water temperature, and a real kitchen may produce less. It also describes continuous operation, not the amount in the bin at any one time. A model that claims a generous daily output may still make only a handful of cubes every few minutes.
Look at the cycle time, which tells you how long the first batch takes, and at the bin capacity, which tells you how much ice can wait. For gatherings, bin capacity matters less than a lead, so begin early and move finished ice into freezer bags or a container. Look for notes about the water temperature and room conditions the maker recommends, since warm rooms slow production.
Water Quality and Taste
Ice reflects the water that goes into it. If your tap water has a strong taste or odor, it may carry over into the ice. Many people use filtered water in their reservoir, though the maker’s manual should say whether that is recommended. Clear ice and cloudy ice are mostly a matter of freezing method and dissolved minerals, so a cloudy cube is not a defect in itself.
Change the water regularly, and do not leave water sitting in the reservoir for long periods. Clean the reservoir and the water path according to the schedule in the manual so that scale and film do not build up. If your area has hard water, the maker may suggest more frequent descaling with an approved product.
- Use fresh water each time you fill the reservoir.
- Check for any slime, odor or discoloration, and clean immediately if you see it.
Choosing Countertop ice makers for home use: What Actually Matters
Ice style is the second decision, and it is a matter of taste and use. Bullet ice is fast and hollow-centered, good for quickly chilling drinks. Nugget ice is soft, chewable, and beloved by people who eat their ice, and it suits sodas and cocktails that benefit from ice that melds with the drink. Clear, dense cubes melt slowly and suit spirits you do not want diluted. Crescent and crushed styles have their own fans and uses, from coolers to blended drinks. There is no best ice in the abstract; there is the ice your household actually enjoys, in the drinks you actually make, and the machine should be chosen for that.
Practical design decides daily satisfaction. A water tank that lifts out or opens wide is easier to fill and clean than a narrow neck you fill with a jug and hope. A bin you can see into, a scoop that stores sensibly, and a self-cleaning cycle you will genuinely run all matter more than small differences in output. Consider noise and heat: the machine makes ice with a small refrigeration system and a fan, and it will live on your counter, so its sound becomes part of the room. Drainage matters too; know where meltwater goes and how you will empty and clean the reservoir.
Ice makers are judged first by two numbers you should translate into your own life: how much ice the machine can produce across a day, and how much it can hold at once. Production tells you whether it recovers between uses; storage tells you whether there is ice ready when you want it. A household that fills two drinks each evening needs steady readiness, while a party host needs a full bin plus fast recovery. Remember that most countertop machines store ice in an insulated bin rather than a freezer, so stored ice slowly melts and is recycled into new cubes; the bin is a buffer, not long-term storage.
How Countertop ice makers for home use Fit Real Routines
Cocktails and considered drinks
Drinks people make ice the second ingredient. Dense, clear ice chills a stirred or spirit-forward drink with slow dilution, while nugget or crushed ice belongs in drinks built to be icy and refreshing. If you entertain with cocktails, plan production ahead: run the machine through the afternoon, bag the harvest into the freezer, and start the evening with both a full bin and a frozen reserve. Rinse the bin and use fresh water for party ice, because ice remembers everything it has sat near. The machine does the volume; your timing does the quality.
Parties, barbecues, and hot days
Party demand always exceeds the estimate, because ice goes into drinks, coolers, and food displays at once. Start the machine early, harvest into freezer bags as the bin fills, and keep the cycle running through the event so fresh ice replaces what melts. Place the machine where guests are not constantly opening it, since every opening warms the bin, and keep the scoop in use rather than hands, for hygiene and speed. For very large gatherings, treat the countertop machine as the fresh-ice station and bagged ice as the bulk supply; the combination covers both quality and quantity.
Everyday drinks and family use
For daily drinks, the winning habit is treating the machine as a small utility: keep the reservoir filled with fresh water, empty and rinse the bin regularly, and move surplus ice to bags in the freezer if you want a reserve. Ice that sits in the bin for days picks up flavors from the air and the machine, so freshness is a routine, not a feature. Families that drink iced water, tea, and coffee all day often find the machine’s quiet constant production more valuable than any burst speed, and a visible bin level helps everyone pace the last cubes fairly.
Setup, Daily Use, and Getting the Best Results
Learn your machine’s rhythm in the first week. Note how long a batch takes once the reservoir and room settle, how the bin’s fullness sensor behaves, and how quickly stored ice melts back on a warm day. These observations let you plan: when to start the machine before guests arrive, how much reserve to bag, and whether the bin will hold enough overnight for morning drinks. Keep the scoop stored cleanly, ideally not loose in the ice, and teach the household the same habit, because the scoop is the one object that touches every serving.
Water management is the ongoing routine. Top up with fresh water rather than letting the reservoir sit low and warm, empty and dry the machine if it will sit unused for more than a few days, and never leave old water standing in it between uses. If your model drains by a plug or hose, learn its location before you need it, ideally over the sink. A machine that is emptied, wiped, and restarted fresh behaves like new each season, while one left wet and idle develops the stale taste that owners wrongly blame on the ice style.
Set the machine on a level, stable counter with clearance for its fan vents, because an ice maker is a small refrigerator that needs to shed heat. Before the first batch, clean the reservoir, bin, and scoop as the manual directs, run a cleaning cycle if it has one, and discard the first batches of ice, which clear the system of new-machine tastes. Use fresh, good-tasting water: ice is mostly water, and the machine cannot improve what you pour in. If your tap water is heavily chlorinated or hard, filtered water improves both flavor and the machine’s internal life.
Care, Cleaning, and Keeping It Working Well
Performance changes are messages. Ice that comes out smaller, hollow, or clumped usually points to warm water, a hot room, blocked vents, or scale on the freezing surfaces, all fixable without a technician. A machine that runs but produces slowly may simply be working against a warm kitchen and a frequently opened bin. Off flavors trace to old water, a bin that needs washing, or ice stored too long near strong-smelling foods in the freezer reserve. Work through water, cleanliness, airflow, and scale in that order, and most complaints resolve at the first or second step.
Cleaning decides whether countertop ice stays something you look forward to. Follow the maker’s self-cleaning cycle if fitted, and periodically wash the bin, scoop, and reservoir with warm water and a mild solution the manual approves, rinsing thoroughly so no cleaning taste reaches the ice. Wipe the exterior and the vents, and check the area under the bin for the slime that any constantly damp appliance can grow if neglected. In hard-water homes, descale on the maker’s schedule; mineral build-up slows production and clouds ice long before it stops the machine.
Common Mistakes and How to Avoid Them
Hygiene mistakes are quieter but matter more. Hands in the bin instead of the scoop, a scoop stored on a worktop and returned unwashed, and a reservoir left wet through a holiday all degrade the one thing the machine makes. Treat ice as food, because it is food: clean hands or a clean scoop, a washed bin, fresh water, and a machine dried before storage. Finally, do not run the machine dry or ignore its low-water signal; the pump and freezing system expect water, and a habit of responding to the indicator promptly is cheap insurance for a long working life.
The most common mistake is expecting freezer performance from an insulated bin. Countertop machines keep ice cold enough for service, not for storage, so ice for next week belongs in bags in the freezer. The second mistake is neglecting the water: topping up old water indefinitely concentrates minerals and flavors, and the ice tells on you. Third is placement, pushed against a wall or beside a hot appliance, where the little refrigeration system labors and production drops. Give the machine air, fresh water, and a harvest routine, and it will meet the output it promises.
How the Picks in This Guide Compare
Comparison only makes sense against your own priorities, so use this section as a decision exercise rather than a ranking. The picks above were chosen to cover different needs within countertop ice makers for home use: different sizes, styles, and strengths for different kitchens. Read across them with your space measurements, your regular recipes, and your cleaning tolerance in hand, and the shortlist usually narrows itself to one or two. What follows revisits each pick in turn and frames the question you should ask of it.
Frigidaire Countertop Ice Maker (EFIC123) is the pick to study closely if its purpose in this guide matches the job you most need done. Read its section alongside the picks either side of it, and notice the trade-offs the guide describes: every design in this category gives something to get something. If the compromise it makes is one you would happily make too, that is a strong signal. If its strengths answer a problem you do not have, a simpler pick further down the list will probably serve you better.
With Magic Chef Portable Ice Maker, the decision is about fit for your household rather than rank. Its review above explains the cooking it is built for; your task is to be honest about how often that cooking happens in your kitchen. A pick used three times a week at the centre of your routine is worth more than a technically broader one used monthly. Check also the practicalities the review raises, size, handling, and care, because those are the details still shaping your satisfaction a year from now.
Vremi Portable Ice Maker represents one answer to the question this guide is asking, and the other picks represent others. Compare them by the criteria that opened this article: how they fit your space, how they behave in the cooking you repeat, and how they clean and store afterwards. If you find yourself torn between this pick and another, choose by the tie-breaker of daily friction: the one that will be easier to reach for, easier to wash, and easier to live with usually wins the year, whatever wins the afternoon.
Aeitto Portable Ice Maker earns its place in this line-up for the role set out in its review above. When you weigh it against the neighbouring picks, compare what the reviews themselves say about what it does well, where its limits are, and the kind of cooking it suits. The right choice is rarely the most elaborate option; it is the one whose strengths match your weekly routine rather than your most ambitious day, and whose handling and care you will be happy with long after the novelty fades.
Cowsar Portable Ice Maker is the pick to study closely if its purpose in this guide matches the job you most need done. Read its section alongside the picks either side of it, and notice the trade-offs the guide describes: every design in this category gives something to get something. If the compromise it makes is one you would happily make too, that is a strong signal. If its strengths answer a problem you do not have, a simpler pick further down the list will probably serve you better.
With Antarctic Star Portable Ice Maker, the decision is about fit for your household rather than rank. Its review above explains the cooking it is built for; your task is to be honest about how often that cooking happens in your kitchen. A pick used three times a week at the centre of your routine is worth more than a technically broader one used monthly. Check also the practicalities the review raises, size, handling, and care, because those are the details still shaping your satisfaction a year from now.
More Practical Notes on Countertop ice makers for home use
Placement shapes both performance and pleasure. An ice maker near the drinks station, glasses, and sink makes service effortless, but it also needs its vents clear and its reservoir reachable for filling without spills. On a bar cart or a side counter it can serve a room without crowding the cooking zone. Wherever it lands, give it a tray or mat if your counter fears water, because filling and harvesting involve drips by nature. A well-placed machine gets used daily; a badly placed one becomes a summer appliance, and its value halves.
Finally, match the ice to your drinks with the same care you give the drinks themselves. If your household lives on iced tea, water, and sodas, speed and soft, chewable ice may matter most. If evenings mean carefully made cocktails, dense ice that melts slowly protects the drink you built. The models in this guide differ in ice style, output, and storage, and those differences are the decision. Choose the ice you love, keep the water fresh and the machine clean, and a countertop ice maker becomes one of those rare appliances nobody in the house would give back.
Do the honest arithmetic of your household’s ice before choosing a size. Count a normal day’s drinks, then your biggest regular event, and notice they are different problems: daily life needs readiness, events need reserves. Most households are happiest with a machine sized for the daily pattern plus a freezer-bag habit for events, rather than a large machine that dominates the counter for the sake of two parties a year. Ice is one of the few things a kitchen makes that can be banked ahead cheaply, so let the freezer do the storing and the countertop machine do the making.
Read the manual once, properly, before the appliance’s first week is out. Manuals are unfashionable and irreplaceable: they hold the clearances, the cleaning products to avoid, the error signals, and the small capabilities the marketing never mentioned. Keep it, or its digital copy, where the household can find it, and note the model and serial details in the same place. When something behaves oddly in year three, the answer is usually in those pages, and the household that can find its manuals solves problems in minutes instead of weekends.
Energy and water habits around countertop ice makers for home use are unglamorous and cumulative. Run appliances at their efficient loads rather than in dribs and drabs where the design allows, keep seals, filters, and vents clean so the machine does not labor against its own neglect, and switch off at the socket where the design expects it rather than leaving everything in standby forever. None of this asks for sacrifice; it asks for rhythm. The households that get the lowest bills and the longest appliance lives are rarely the most frugal, just the most consistent.
Teach the whole household the appliance’s few rules and its ordinary routine. Shared appliances fail at the boundaries between users: one person’s shortcut becomes another’s mystery fault. A short conversation, or a note on the fridge door covering what goes in, what never does, and what to do when a cycle ends, aligns everyone. Children old enough to use countertop ice makers for home use are old enough to learn their care, and guests are happier with a sentence of guidance than with anxious hovering. An appliance the whole house understands is an appliance that lasts.
Keep a small log for the first season: what you cooked or processed, the settings that worked, and the one thing you would change. Appliances have personalities, and published guidance is written for an average kitchen that is not yours. Your own notes, rack positions, timings, doses, and quantities for your regular tasks, become the real manual within a dozen uses. This is the least technological advice in this guide and the most valuable: the difference between owners who love their appliances and owners who tolerate them is usually a page of notes.
Accessories should be bought in the order your frustration dictates. Live with countertop ice makers for home use for a month first, and let real friction, the missing rack, the awkward jug, the pan that does not fit, tell you what to buy. Each accessory should remove a named annoyance from a task you perform weekly; anything bought for an imagined task will join the drawer of good intentions. And when you do buy, measure first and buy once, because the accessory that fits properly and is used daily is cheaper at any price than the almost-right one replaced twice.
Plan for the appliance’s whole life in your home, including its end. Keep the packaging only if storage is free and returns are plausible; register the warranty; note where spare parts and consumables for your model are sold. When performance drifts, work through the simple causes in order, cleanliness, loading, settings, placement, before assuming failure, because most appliance misery is maintenance wearing a disguise. A well-kept machine, honestly assessed, will tell you clearly when it is done; until then, steady care beats anxious replacement.
Consider how countertop ice makers for home use interact with the rest of your kitchen’s cast. The best kitchens are ensembles: each appliance covers the others’ weaknesses, and tasks flow to the tool that does them best rather than the newest one. Let the appliance in this guide take the jobs it is genuinely best at, and resist forcing it to be universal. That division of labor is what makes a kitchen feel calm at the busiest hour, and it is the real destination of every comparison and criterion in this guide: the right tool, in the right place, doing its best work.
Home Ice Maker FAQ
How long does the first batch take?
Usually several minutes after you power on. Cubes appear in the basket as each cycle finishes. Check the listing for the stated cycle time.
Is the water in the reservoir safe to reuse?
Fresh water is better. Stale reservoir water can pick up a taste, so drain and refill it before a new session.
Do these need a drain?
Most portable models have a drain plug or hose outlet for emptying leftover water. Confirm on the listing.
Do they fit under a cabinet?
Check the height with the lid open, because the top lifts for scooping.
Why is my ice cloudy?
Air and minerals trapped during fast freezing make the ice look cloudy. It is normal for bullet-style ice and does not indicate a fault.
Can I use filtered or distilled water?
Filtered water can improve taste. Distilled water produces fewer deposits, but check your manual for guidance.
Why does my ice maker produce less ice in summer?
Warm rooms make the compressor work harder, which slows production. Move the unit to a cooler spot with good airflow.
Do I need to leave space around the unit?
Yes. The compressor needs ventilation, so follow the clearance in the manual rather than pushing it into a tight spot.
How often should I clean it?
Wipe the basket and reservoir often, and do a deeper clean or descale on a schedule that fits your water hardness and use.
Can I store ice in the machine for days?
Not well. Ice melts in the basket, so move it to a freezer container if you want to keep it.
Is it normal for the machine to be loud?
Some hum and the sound of dropping ice are normal. Place it on a stable surface and keep it ventilated to reduce noise.
What should I do before first use?
Read the manual, clean the interior and basket, let the unit rest upright if it was shipped on its side, and discard the first batch of ice.
How long does a batch of ice take?
Timing varies with the model, the ice size selected, the water temperature, and the room temperature. The first batches in a warm machine take longest; production speeds up as the system settles. Starting with cool water and giving the machine airflow helps, and for events it is wise to start well ahead and bank ice in the freezer.
Why does my ice taste strange?
Ice takes its flavor from its water and its storage. Old reservoir water, a bin that needs washing, or reserve ice stored near strong-smelling freezer foods are the usual causes. Empty and clean the machine, restart with fresh or filtered water, discard the first batch, and store bagged ice away from pungent foods. Persistent tastes after cleaning point to a deeper descale or service need.
Do I need a water line or drain for a countertop ice maker?
Most countertop models are self-contained: you fill a reservoir by hand and drain it manually when cleaning, so no plumbing is needed. That is their main convenience. The trade-off is your labor: filling, harvesting, and periodic emptying are part of ownership, which is why an easy-fill tank and a simple drain are worth prioritizing when you compare models.
Why are my cubes small, hollow, or stuck together?
Warm starting water, a hot room, blocked vents, or mineral scale on the freezing surface all produce smaller or imperfect ice. Clumping happens when ice sits and partially melts, then refreezes into a slab; break it up gently and use or bag ice sooner. Clean and descale the machine, improve its airflow, and start with cool water, and cube quality usually recovers.
How often should I clean an ice maker?
Follow the maker’s schedule, and let your water decide the rest: hard water and heavy use call for more frequent descaling and washing. As a rhythm, wash the bin and scoop regularly, run the cleaning cycle or a manual clean every few weeks in daily use, and always clean and dry the machine before storing it. Ice is food, and the machine deserves food-level hygiene.
Why does the ice in the bin melt?
Most countertop ice makers store ice in an insulated, not refrigerated, bin. The ice slowly melts, and the meltwater returns to the reservoir to be frozen again. This is normal and keeps ice fresh for hours of service, but it means the bin is not a freezer: bag surplus ice into your freezer if you want to keep it for days.
The Short Version
For a trusted name, the Frigidaire. For a compact build, the Magic Chef. For light weight, the Vremi. For a size selector, the Aeitto. For self-cleaning, the Cowsar. For small spaces, the Antarctic Star.

