Curtain length is decided by two things: where the fabric hangs from and where you want it to end. The height of the window glass is only a small part of that. Measuring from the actual hanging point to the finished lower edge avoids panels that are too short or that drag on the floor.
What to do
Choose the heading style and the mounting hardware first, since they decide where the fabric hangs. Then measure from the actual attachment reference, such as the bottom of the rings or the track, down to the intended lower edge. Check the product’s own sizing instructions and allow for any variation in the floor.
In this guide
Choose the finished length
Common choices each have a practical effect:
- Just above the sill: easy to keep clean and clear of radiators or furniture beneath the window.
- Just below the sill: covers the sill and gives a slightly fuller look, but check what sits beneath.
- Just above the floor: a small gap avoids dust and wear on the hem and lets the curtain hang freely.
- Touching or pooling on the floor: a deliberate style, but it collects dust and is harder to keep tidy.
Decide which one suits the room before you measure, because the same window gives different numbers for each.
A mistake to avoid
Do not use a single measurement for both sides of a wide window without checking the floor. Floors and walls are rarely perfectly level, and a difference of a centimetre or two can make matching panels look uneven. Measure the drop at several points across the width.
A detail worth checking
Include the curtain header in your reference. Different rings, hooks or tabs place the fabric at a different height relative to the rod, so a nominal panel length needs its real mounting reference. A panel that sounds long enough can finish short once the rings and heading are taken into account.
Try this practical check
Record left, centre and right measurements from the intended hanging reference to the intended lower edge. Use the largest figure as a starting point and see whether the product length covers all three. Compare those numbers with the finished curtain length given in the listing, not an approximate window size. If the curtains are adjustable, check how much hem or heading allowance is available.
Four Finished Lengths Compared
Before you pick up the tape, decide where the bottom edge of the curtain should land. The choice affects how much fabric you buy and how the room feels. This table sets out the four lengths people choose most often.
| Length style | Where the hem ends | Best for | Keep in mind |
|---|---|---|---|
| Sill length | Just above the window ledge | Kitchens, bathrooms, desks under the window | Leave a small gap so fabric does not catch on the ledge |
| Apron length | A few centimetres below the ledge or trim | Casual rooms with a radiator below | Check heat sources in the manual before covering them |
| Floor grazing | A fingertip above the floor | Living rooms and bedrooms | Needs an exact measurement from the hanging point |
| Puddled | Extra fabric resting on the floor | Formal, dramatic looks | Collects dust and is harder to clean around |
If you are unsure, floor grazing is a flexible option because it looks tidy and works with most heading styles.
A Worked Example With Simple Numbers
Following one set of numbers from beginning to end makes the method easier to remember. Imagine a rod fixed at 240 centimetres above the floor, and curtains that hang from rings with a drop of 4 centimetres between the rod and the top of the fabric.
- Measure from the underside of the rod to the floor. Suppose it reads 236 centimetres.
- Subtract the drop from the rod to the first hook or ring position. If the ring hangs 4 centimetres below the rod and the hook sits 2 centimetres below that, subtract a total of 6, leaving 230 centimetres.
- Subtract your clearance. If you want a 1.5 centimetre gap above the floor, the finished fabric length becomes 228.5 centimetres.
- Round to the nearest practical size and check whether the product listing gives drop with or without the heading.
- Add hem and heading allowances only if you are having fabric made or cutting it yourself.
Your own numbers will differ, but the sequence holds: begin at the point where the fabric actually hangs, subtract the hardware, then subtract the clearance.
Mistakes That Lead to Curtains That Do Not Fit
- Measuring from the window glass. The glass height does not tell you where the curtain hangs from.
- Using a sagging tape. Pull it tight and keep it vertical. Lean it against a wall and check it against a spirit level when accuracy matters.
- Forgetting rugs and thresholds. A thick pile rug under the curtain edge raises the floor level, so measure to the highest point it will touch.
- Taking one measurement only. Floors and ceilings often slope. Measure at the left, middle and right and use the shortest figure for floor length.
- Mixing up pair and panel. Check whether the listing and its sizes describe one panel or two.
- Ignoring the heading depth. Pencil pleats, eyelets and tabs all sit at different heights.
A second pair of eyes helps. Ask someone to read the tape while you hold it level at the rod.
Installing Safely and When to Call a Professional
Hanging a rod or a track is a basic task for many homes, yet it involves drilling into walls or ceilings. Before you drill, check for hidden pipes and cables using the methods in your drill and detector manuals, and read the instructions that come with the brackets. Use anchors suited to your wall type, such as plaster, brick or hollow board, and follow the maker’s weight limits.
For heavy, lined curtains, long spans or ceiling-mounted tracks, ask a qualified installer or a trusted handyperson. Work near windows above ground level calls for a stable step ladder used according to its label, and never lean out. If you suspect structural issues such as a cracked lintel or damp plaster, have a professional look at it first.
Key Words You Will See in Listings
- Drop: the length from the top of the heading to the hem.
- Width: the total flat fabric width of one panel, not the finished covered span.
- Fullness: the ratio of fabric width to the rod length it covers.
- Heading: the top treatment, such as eyelet, pleat or tab.
- Return: the part of the rod that turns back to the wall.
A Final Check Before You Order or Cut
Once you have your number, take a few minutes to confirm it before spending money. Hold a tape or a piece of string at the intended hem height and step back to the middle of the room. Look at how the line meets the skirting board, the furniture and any heating outlets. Sometimes a slightly shorter drop looks better because it clears a sofa arm or a radiator cover.
Think about how the curtains will be used each day. If you open and close them often, a small gap above the floor protects the hem from scuffs. If the room has pets or children, consider a length that stays away from muddy paws and sticky fingers.
Finally, compare your finished length to the sizes on offer. If your figure falls between two options, the shorter one usually looks cleaner than a hem that bunches on the floor.
Write all your measurements on one sheet and keep it where you store household paperwork, so you can reorder a matching pair later.
Quick Answers
Should I measure before or after fitting the rod?
Ideally measure after the rod or track is in place, or mark its planned position very precisely. Moving the hardware by even a few centimetres changes the length.
How high should the rod be?
That is a style choice. Fitting it higher than the window frame can make the window feel taller, but check that your wall and ceiling allow it.
Do curtains shrink after washing?
Some fabrics can. Check the care label and the seller’s guidance on shrinkage before ordering close to a length you cannot adjust.
Rod, Track and Heading Styles Compared
The hardware you pick changes how a curtain hangs and therefore how long it needs to be. A rod with rings places the fabric a short distance below the pole, since the ring sits between the rod and the heading. A rod pocket slides the rod through the fabric itself, which means the top of the panel sits at or just above the rod, and the heading creates a ruffle. Tab tops and tie tops hang from loops, which hold the fabric lower than the rod by the length of the loop. Grommet panels slide on the rod through metal-ringed holes, and the fabric starts a little below the rod. Pleated headings used with hooks sit at a height set by the hook position, which is often adjustable.
Tracks work differently again. Fabric hangs from gliders or hooks beneath a track fixed to the ceiling or wall, and the drop depends on the hook and the glider. Some tracks let fabric hang close to the ceiling, giving a clean look. Check the product listing or the track instructions for the exact drop.
Decide on the heading and hardware first, then measure. Look at the sizing guidance for your chosen curtain to see which part of the product is measured, whether it is the total length including the heading, or the length below the rings. Differences of several centimeters are common. If you use a decorative pole with finials, check that the rings or the loops clear the brackets so that the curtain can move freely.
- Rings add a gap between rod and fabric.
- Rod pockets usually reduce the usable length slightly.
- Tracks can be set higher, giving more drop for the same fabric.
Positioning the Rod or Track Before You Measure
Where you fix the hardware decides the starting line for every measurement, so it pays to get it right first. Many people mount the rod or track higher than the window frame to make the window look taller and to let more light in when the curtains are open. Others place it just above the frame for a simple look. The right height depends on the ceiling, the wall space, the style of the heading and the room. Check what is behind the wall, such as pipes, cables or hidden studs, before drilling, and use fixings suitable for the wall type and the weight of the curtains.
Width matters too. Extending the rod beyond the window frame on each side lets the curtains stack off the glass when open. How far depends on the volume of fabric and the space available. Mark the bracket positions with a pencil and a level, then double-check with a tape measure on both sides. A rod that is slightly crooked is a common reason for uneven curtain hems. Use a spirit level or a laser level and fix the brackets securely.
If you are not ready to drill, use masking tape or a removable marker on the wall to show where the rod will go. Hold up a tape from that line to the floor or sill, and read the measurement. If you later move the hardware, remeasure. Photograph the setup for reference when comparing products.
Special Situations: Radiators, Window Seats and Doors
Standard advice assumes a clear wall, but many windows have obstacles. A radiator or heater beneath the window is a common one. Fabric that falls over a heat source can trap warmth, block airflow and in some cases be a safety concern, so many people choose curtains that finish above the sill or stop just above the heater. Check the product’s care guidance and heater instructions. Another option is to hang full-length curtains that fall well clear, though that can stop the heat reaching the room.
A window seat or a built-in desk also affects length. Curtains that reach the floor behind a seat can be awkward, so many choose a length just below the sill or the seat cushion. Measure to the planned lower edge with the cushion in place if one will be fitted.
For patio or balcony doors, curtains should clear the door handle and the threshold so that the door can open freely. Consider a track or a rod that extends wide enough so that the curtain can be pulled fully clear of the door. If the door opens inward, make sure the fabric does not catch. A slightly shorter length can prevent dragging.
- Bay windows may need separate measurements for each section or a flexible track.
- Sloping ceilings and attic windows need careful measurements at each edge.
- Check for skirting boards, trims and carpet thickness at the floor line.
Write down the obstacles before you begin.
Reading Product Listings and Sizing Charts
Once you have your target numbers, compare them with what the product offers. Listings use different conventions, and a number such as 84 can refer to a total length, a finished drop or a nominal size. Look for the phrases finished length, drop and heading allowance. Some listings measure from the top of the fabric, others from below the rings or the grommets. If a listing is unclear, check the product images, the size chart and any customer questions, or contact the seller before you order.
Pay attention to the tolerance. Fabric products may vary slightly from the stated size, and washing can change dimensions. If you are close to a decision point, such as just above the floor, allow a margin so a small variation does not leave the curtain touching or too short. Compare the width as well, because fullness affects how the curtain looks when closed. Check how many panels come in a pack and whether the width is per panel or for the pair.
Look at the options for adjusting. Some curtains have a deep hem that can be let down, while others have fixed hems. Some offer made-to-measure services, which may need precise measurements, with returns often limited. Read the return policy before you order a custom size.
- Check the number of panels, the width of each and the heading type.
- Look for the fabric content and care instructions.
- Note any lining and whether it adds length or weight.
Altering and Troubleshooting Curtains That Do Not Fit
If your curtains turn out slightly wrong, there are options. For curtains that are too long, hems can be shortened. Fold the fabric up evenly, pin it, check the hang with the curtain on the rod, and then sew by hand or machine, or use hemming tape if the fabric and care label allow it. Test the tape on a scrap first, and follow its instructions. Measure each panel from the top so the hems match, and press the fold before fixing it. If the curtain has a lining or weights, adjust them as well.
For curtains that are too short, you can lower the rod if the wall permits, use longer rings or hooks, or add a band of contrasting fabric along the bottom. These changes need planning to look intentional. If the gap is small, moving the hardware down a little may be the simplest fix. If the rod is already low, a decorative trim or border can lengthen the panel.
When the hem is uneven because the floor slopes, adjust each panel individually to follow the floor, or accept a small difference if it is not noticeable. Hang the curtains for a few days before hemming, as fabric can settle and lengthen slightly, especially in heavy materials.
If you are uncertain about altering expensive curtains, consult a tailor or a curtain maker. They can advise on hems, linings and weights, and they can alter fabrics without damaging them. Keep the receipt and care label in case of questions.
Common Questions
Should I measure with the curtains hanging or without them?
Measure to the planned hardware position, ideally after the rod or track is fitted. If the curtains are already hanging, measure from the bottom of the rings or hooks to the lower edge.
How much clearance should I leave above the floor?
Many people leave a small gap so the hem does not drag. The exact amount is a style and cleaning choice. Measure at several points, because floors are often uneven.
Do I need to allow extra for lined or heavy curtains?
Heavy fabric can stretch slightly under its own weight. Allow for this by hanging the curtains for a few days before hemming, and check the product guidance on linings.
How do I measure for a bay window?
Measure each section separately from the hanging point, or use a flexible track that follows the shape. Check the angles and obstacles, and ask the seller about options for bays.
What if my ceiling is lower than the window needs?
Mount the hardware as high as the wall allows and choose a heading style that hangs close to the track. A shorter length that finishes above the floor can also work.
Can I hem curtains without sewing?
Hemming tape is a no-sew option for some fabrics. Check the tape and fabric care instructions, and test on a scrap. For heavy or lined curtains, stitching is usually more secure.
How do I measure curtains for a sliding door?
Measure from the hanging point to just above the floor, and plan the width so the curtain can fully clear the door opening. Check that the hem will not catch the track or threshold.
Related reading
6 Best Thermal Insulated Curtains: Panels and Door (2026)
Reference and further practice
IKEA window measurement and curtain planning

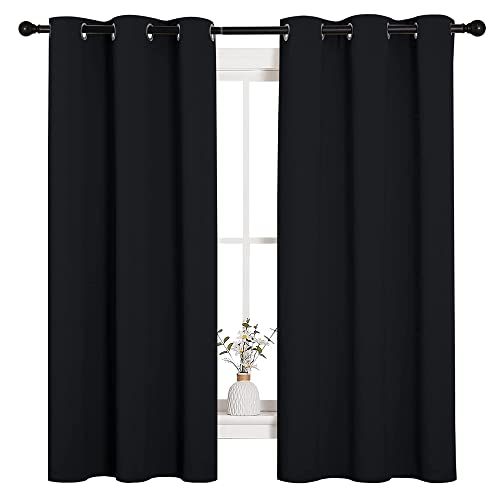
Ready to Buy? Start Here
If this guide helped you decide what to look for, these products are a place to start.

As an Amazon Associate we earn from qualifying purchases. Prices and availability are shown on Amazon.
Going Deeper: What The drop from the real hanging point to the finished hem Really Tells You
Most guides stop at the headline measurement, but the drop from the real hanging point to the finished hem is really a bundle of smaller judgements working together. There is the figure itself, the reference points you took it between, the condition of the space on the day you measured, and the way the item will actually be used once it is in place. Treating those as separate things, and checking each one deliberately, is what separates a purchase that settles in quietly from one that needs adjusting, returning or working around for years.
Start by asking what the measurement is protecting you from. In the case of curtain length, the honest answer is rarely the object itself; it is the routine around the object. Doors still need to swing, people still need to pass, light and air still need to move, and cleaning still needs to happen underneath, behind and between things. When you measure with those routines in mind, the number you write down represents the space as it is lived in, not the space as it appears in an empty room on the day you happen to measure it.
It also helps to separate the figures you cannot change from the ones you can. Walls, doorways, fixed fittings and the footprint of furniture you are keeping are facts. The position of the new item, the direction it faces, and how much clearance you leave around it are choices. A good plan for curtains respects the facts completely and spends the choices wisely, instead of hoping a tight fact will somehow become flexible once the delivery arrives.
Finally, remember that measurements age. Rooms get repainted, floors get covered, furniture moves and households change. The figures you record today are a snapshot, and the most useful habit you can build is to re-check the critical one, the drop from the real hanging point to the finished hem, whenever the room changes in a way that touches it. That single re-check, which takes minutes, protects every decision that was based on the original set of numbers.
A Careful Second Pass: Checking Curtain length Step by Step
The first pass through this guide gives you a working set of figures. This second pass is about turning those figures into ones you would trust with an order you cannot easily undo. Work through it in order, with the item or the space in front of you, and do not skip a step because an earlier one went well; each step below catches a different kind of error, and the errors that cause returns are usually the ones nobody thought to look for.
Fix the hardware first, then measure
Fit or firmly hold the rod, track, rings or tabs in their final position before you measure anything. The hanging point is where the fabric actually attaches, which may be below the rod itself once rings are added, and measuring from the rod alone is the most common cause of panels that finish short. Write the figure down as soon as you take it rather than trusting your memory, and note which point it came from, because the later steps build on these early numbers and a swapped figure is hard to spot once you are comparing listings.
Measure the drop in three places
Take the drop at the left, centre and right of the window, from the same hanging reference down to where you want the hem to end. Floors and ceilings are rarely level, and the three figures together show whether one side needs a longer panel or a small adjustment to the rod height. If the number surprises you, take it once more before moving on. A second reading that agrees gives you confidence, while a different reading tells you the tape slipped, the surface was not square, or something in the way distorted the first attempt.
Decide the hem ending before choosing a size
Settle whether the hem should end above the sill, below the sill, just above the floor or touching it, because each ending changes the figure you need. Write the chosen ending next to the measurement so a listing’s finished length is compared against the right target. Keep the tape or ruler in the same orientation for every reading in this step. Changing how you hold it halfway through a set of measurements introduces small differences that add up and can make two matching items look as though they do not match.
Allow for the heading and hem
Check how much of the panel’s stated length is taken up by its heading style, such as tabs, eyelets or a gathered tape, and how much hem allowance exists if you plan to adjust it. The usable hanging length is what remains after those parts are accounted for. Note any obstruction, slope or soft surface that affected this reading next to the number itself. When you come back to your notes days later, that short comment explains why one figure differs from the others and stops you discarding the wrong one.
Check what sits below the window
Look at radiators, window seats, desks and the tops of furniture under the window, and confirm the falling fabric will clear them or rest on them as intended. A length that is perfect against an empty wall can snag, billow with heat or pool awkwardly once real objects are underneath. Compare this figure with the one from the previous step before you continue. The two should tell a consistent story about the space; if they contradict each other, it is far easier to re-check now, while everything is still in place, than after an order arrives.
Rehearse with a sheet or old curtain
Hang a sheet, blanket or old curtain cut or folded to the planned finished length and live with it for a day. This shows how the hem behaves when the curtains are opened and closed, and whether the ending you chose still looks and works right in morning and evening light. Take a quick photograph of the tape in position if you can. A picture settles arguments with your own notes later, shows a partner or housemate exactly what you measured, and gives you a reference if you need to ask a seller a question.
When you finish, read the full set of figures aloud once, in order. Hearing them as a list makes inconsistencies obvious in a way that scanning a page does not, and it gives you a natural moment to ask whether the numbers describe the space you are standing in. If anything sounds wrong, it probably is, and now is the cheapest possible time to find out.
How Curtain length Plays Out in Everyday Situations
Measurements become real when they meet a routine. The situations below are the ones readers describe most often when a choice about curtains either proves itself or starts to annoy, and each one tests the drop from the real hanging point to the finished hem in a slightly different way. Read them against your own household and note which of them resembles your busiest, least tidy day, because that is the version of life your decision has to survive.
A radiator under the window
In many homes the obvious window for new curtains has a radiator beneath it. A panel that hangs in front of a working radiator traps heat behind the fabric and can look restless as warm air rises, while one that ends just above it keeps the heat in the room and the hem calm. Your drop measurement decides which of those you get, so take it with the radiator’s position, not just the floor, in mind. The lesson from situations like this is that the drop from the real hanging point to the finished hem only makes sense in context. A figure that looks generous on paper can feel tight once real life fills the space around it, and a figure that looks modest can work well when the layout supports it. Work through your own version of this scenario with your actual numbers before you commit, and pay attention to the moments of the day when the space is busiest, because that is when a poor fit stops being a minor irritation and starts changing how you use the room.
A desk or sofa pushed against the wall
Furniture under a window changes the useful length completely. Fabric that falls behind a desk or sofa back gets crushed, fades unevenly and is hard to draw, so in this situation the practical ending is often just above the furniture rather than at the floor your first measurement pointed to. What helps most here is rehearsing the routine rather than imagining the object on its own. Walk through the movements involved, in the order you would really make them, and notice where you turn, pause, set things down or reach past something else. If a rehearsal feels awkward with nothing in place, it will feel worse once the real item arrives, so treat that awkwardness as useful information and adjust the plan, the position or the size while changing your mind is still free.
A sliding door used all day
Curtains over a sliding door are opened and closed far more often than curtains over a window, and the hem drags across the threshold zone every time. A fraction above the floor keeps the fabric cleaner and moving freely, while a pooling style in this position becomes a daily nuisance within a week. Households differ, and this is where a choice that suits one home quietly fails in another. Think about who else uses the space, how often, and what they bring with them, from bags and coats to toys, laptops and laundry. A decision about curtain length that accounts for the busiest realistic day, rather than the tidiest possible day, tends to keep working long after the novelty has worn off and the space has settled into everyday use.
Care, Cleaning and Storage That Protect the Fit
A good fit is not permanent by default. Dust, moisture, heat, sunlight and ordinary wear all change how curtains sit, hang, slide or stand over time, and many problems that look like buying mistakes are actually care problems that developed slowly. The habits below protect the result you measured for, and they are deliberately simple, because a routine you keep beats an elaborate one you abandon by the second month.
Wash with shrinkage in mind
Some fabrics relax or shrink slightly with washing, which changes the finished drop after you have hung the curtains happily for months. Follow the care label for the exact fabric, and if the hem sits very close to the floor or sill, check the length again after the first wash rather than assuming it is unchanged. Build this into a routine tied to something you already do, such as a seasonal clean or the start of a new term, rather than relying on noticing a problem. Small, regular attention of this kind protects the fit you worked to achieve and catches wear while it is still cheap and simple to deal with.
Keep hems off damp floors
A hem that touches a floor which gets mopped, or a sill that collects condensation, will pick up moisture and marks long before the rest of the panel shows wear. Lifting the ending slightly, or wiping the surface beneath regularly, protects the part of the curtain that is hardest to clean. Always check the care label or the maker’s instructions for the specific item before using any product or method on it, because materials that look similar can react very differently. Test anything new on a hidden area first, and stop if the surface changes colour, texture or smell.
Store flat or rolled, not crushed
When curtains come down for decorating or seasonal changes, store them flat or rolled rather than folded tightly in a box. Hard creases at the fold lines can set into some fabrics and change how the panel hangs when it goes back up, which shows first at the hem you measured so carefully. When you store or move the item, protect the edges, corners and surfaces that decide how it sits and fits. Damage usually happens in cupboards, lofts and hallways rather than in daily use, and a few minutes of padding or careful stacking prevents the slow distortion that later shows up as a poor fit.
Once or twice a year, do a short fit audit: stand back, look at how the item sits compared with the day it arrived, and re-check the drop from the real hanging point to the finished hem if anything has shifted, sagged, swollen or shrunk. Catching a small change early usually means a small correction; leaving it means the same correction later, plus whatever the poor fit has been doing to the floor, the wall or the item itself in the meantime.
Comparing the Options in This Guide Against Each Other
Once your shortlist is down to the options discussed in this guide, the temptation is to choose by appearance and be done. Resist it for ten more minutes and compare those options on the points that decide daily satisfaction with curtains. The criteria below are the ones that most often separate the pick that keeps pleasing from the pick that merely looked right on the screen, and each one can be checked from the details already given in this guide and in the listings themselves.
Finished length, not nominal length
Compare every option by its finished hanging length from your reference point, not by the headline size on the packet. Two panels sold under the same size label can hang differently once their headings are fitted, and your drop figure is the only fair common measure. Put the figures for this point side by side for every option on your shortlist, using the same units and the same reference points. Listings describe things in different ways, so the honest comparison is the one you build yourself from your own worksheet rather than the one assembled from marketing headings.
Hem and heading construction
Look at how the hem is finished and how the heading attaches, because these decide both the look at the bottom edge and how much adjustment is possible later. A generous hem gives you options if the room or the rod changes; a skimpy one locks you into the first measurement. Treat this as a pass-or-fail check rather than a matter of taste. An option that fails here will not be rescued by a colour you love or a finish that matches the room, because you will meet this limitation every single day, long after you have stopped noticing how the item looks.
Fabric weight and how it falls
Heavier fabrics hang straighter and hold a line at the hem, while lighter ones move with draughts and can look shorter as they lift and sway. Judge the length you need partly by how the fabric behaves, not only by the number on the tape. If two options look equal on this point, let it go and move to the next criterion instead of forcing a difference that is not really there. Shortlists are decided by the two or three points where options genuinely differ, and those are the points worth your time and questions.
Write your comparison down as a simple grid, one row per option and one column per criterion, and mark only clear wins rather than inventing scores. The right choice usually identifies itself in that grid: it is the option with no failures on the points you cannot compromise, even if another option beats it on a point you care about less.
Mistakes That Only Show Up After a Few Weeks
The mistakes that matter most with curtain length rarely appear on the first day. On the first day everything is new, the room is tidy, and you are paying attention. The problems arrive later, disguised as small daily frictions: the thing that has to be moved before something else can be used, the corner that never gets cleaned because access is awkward, the item that is always slightly in the way of a door, a drawer or a person. Each friction is trivial alone; together they are how a reasonable purchase turns into a quiet regret.
One common pattern is measuring for the object but not for its life. Curtains get opened, pulled out, sat on, walked around, cleaned under and bumped into, and each of those actions needs room that a footprint measurement does not show. When you review your figures, add a mental rehearsal of the object’s busiest hour and ask where everyone and everything stands during it. If the rehearsal needs someone to hold something, move something or wait for something, the plan, not the household, should change.
Another pattern is trusting a single measurement taken once, in a hurry, in an empty room. Floors slope, walls wander, cushions compress and fabrics relax, and a figure that was accurate for the object alone can still be wrong for the object in use. The defence is boring but effective: measure twice, at the points of greatest stress, and keep the least forgiving figure as the one you plan around. Planning around the tightest honest number feels cautious; living with the result feels easy, which is the point.
The last pattern is forgetting that other people use the space differently. The person who measured imagines their own routine and, without meaning to, plans for a household of one. Children, partners, guests, pets and future occupants all bring their own heights, habits and belongings. A decision about curtain length that has been tested against at least one other person’s routine, ideally the person least like you, survives contact with real life far better than one tested only against your own.
More Questions Readers Ask
The common questions earlier in this guide cover the essentials. The questions below come up once people have measured, ordered or lived with the result for a while, and they are answered here in the same spirit: from your own figures first, and from general product claims last.
Should I measure from the top of the rod or from the rings?
Measure from where the fabric will actually hang, which for ring fittings is usually the bottom of the ring where the hook or clip attaches. The rod’s position matters for fitting the hardware, but the panel hangs from the ring, and the difference between the two points is exactly the amount by which curtains most often finish shorter than expected. If you are still unsure, return to the measurements in this guide and test the idea against your own figures rather than general advice, because your space, not an average room, decides whether it works.
What if the left and right drops are different?
Trust the difference rather than averaging it away. A sloping floor or ceiling is normal in many homes, and the practical answers are to level the rod if you can, choose the longer figure and adjust one hem, or accept a small, deliberate difference that follows the room rather than fighting it. When the answer depends on a product detail, check the listing or the maker’s instructions for that exact item, since construction and fittings vary between ranges that otherwise look alike.
Can I use the same length in every room?
Only if the windows, hardware and floor levels genuinely match, which is rarer than it looks. Each window deserves its own drop measurement from its own hanging point, because a few centimetres of difference in ceiling height or fitting position is enough to change where the hem lands. A quick rehearsal with tape, boxes or a paper template usually settles questions like this in minutes and is far more reliable than picturing the result and hoping for the best.
How do I allow for curtains that might be let down later?
Check the depth of the existing hem and whether the fabric and stitching would allow it to be lowered without leaving a visible line. If future adjustment matters, perhaps in a child’s room or a rented home, favour panels with a deeper hem and keep a note of how much spare fabric is folded inside. Keep your written measurements with the order confirmation or guarantee paperwork, so that if the question comes up again you can answer it from your notes instead of starting the whole process again.
Is it better to order longer and shorten, or exact and risk short?
Ordering longer and shortening is usually the safer direction, because fabric can be taken up far more easily than it can be added. Keep the adjustment simple, though: a straightforward hem is a small job, while reworking a heading or a patterned border is not, so check where the extra length sits before relying on altering it. If two people in the household disagree, let the measurements arbitrate: test both ideas against the figures you recorded, and choose the one that works on the busiest day, not the quietest.