The easiest way to clean a microwave is to loosen the mess with steam from a bowl of water, then wipe it away with a soft cloth. This uses things you already have at home and needs no strong sprays. Read the maker’s manual first for anything specific to your model. The sections below add a worked example, common situations and a troubleshooting table.
Steam to Loosen the Grime
- Fill a microwave-safe bowl with about a cup of water.
- Add a few slices of lemon or a splash of white vinegar if you like.
- Place a wooden spoon or similar item in the bowl if the manual recommends it, to reduce sudden boiling.
- Run the microwave for a few minutes until the window fogs.
- Leave the door closed for five minutes so the steam can work.
- Carefully remove the bowl with oven mitts, since it will be hot.
In this guide
Wiping Down
Take out the turntable and wash it in warm soapy water. Wipe the ceiling first, then the walls and the floor, with a damp cloth. Rinse the cloth often. For dried spots, rub with a paste of baking soda and water, then wipe it off completely. Dry the interior with a clean towel.
Door, Seals and Outside
- Wipe the door seal and edges where food collects
- Use a barely damp cloth on the control panel
- Clean the outside and handle with mild soap
- Do not spray liquid into vents
Frequency at a Glance
| Task | How often | Tip |
|---|---|---|
| Wipe splatters | After messy use | Easier when fresh |
| Steam clean | Every few weeks | Do not overheat the water |
| Wash turntable | Weekly | Dry before replacing |
For heavy buildup, repeat the steaming step a second time rather than scrubbing hard. Spills that have been there for weeks may need a few rounds, but patience protects the interior finish. Cover foods with a vented lid in future to reduce splatters, and wipe any drips as soon as they happen. A small habit like this means the deep clean takes minutes rather than a whole afternoon, and the smell of old food stays away.
Do not forget the outside. Wipe the top and sides with a cloth dampened in mild soapy water, and keep the vents on the back or top clear of dust and clutter. Clean vents help the unit shed heat, so a quick pass with a dry brush every few months is worthwhile.
A Worked Example: Dried Sauce and a Lingering Smell
Imagine a pasta dish has spattered the ceiling and walls, the splatters have dried on, and the inside smells of old food. This sequence takes around twenty minutes, most of it waiting.
- Unplug the microwave or make sure it is not running, then lift out the turntable and its support ring. Put them in the sink to soak in warm soapy water.
- Fill a large microwave-safe bowl with about a cup of water and a few lemon slices or a splash of white vinegar. Set the bowl in the center.
- Run the microwave for a few minutes until the window is fogged, as the manual allows, then keep the door shut for five minutes.
- Take the bowl out with oven mitts, because both the bowl and the water are hot. Place it somewhere safe to cool.
- Wipe the ceiling first so drips fall onto surfaces you have not cleaned yet. Move to the walls, then the floor, rinsing the cloth between sections.
- For a dried patch that will not lift, apply a little baking soda paste with a cloth, wait a few minutes, and wipe it off completely.
- Wipe the door, the seal and the edges of the door frame, where food hides. Dry the interior with a towel and refit the dry turntable.
- Leave the door open for a while to air out.
If a smell remains, repeat the steam step with fresh lemon or vinegar and wipe again. Do not use strong sprays inside, as they can leave residue on surfaces that touch food.
Common Scenarios
A microwave used mostly for reheating
Splatters build up slowly. A cover on dishes and a quick wipe every few days is usually enough.
A shared office or flat kitchen
Wipe up after each use, since small spills left by many people turn into hard crusts quickly. A short note asking people to cover food helps.
Popcorn or fish smells
Steam with lemon, wipe the interior and the seal, then leave the door open to air out. Repeat if needed.
A turntable that rattles
Debris under the ring or on the roller track is a common cause. Remove both, wash and dry them, and clean the floor of the cavity before putting them back.
Mistakes to Avoid
- Running it empty. With nothing to absorb the energy the unit can be damaged, so always have the bowl of water inside.
- Using abrasive scourers. They can scratch the interior and make it harder to clean next time.
- Spraying cleaner into vents or onto controls. Liquid can reach electrical parts.
- Leaving a bowl of superheated water undisturbed. Water can boil suddenly when moved, so wait a moment and use mitts, and the spoon trick only if your manual advises it.
- Forgetting the door seal. Food trapped there can stop the door closing properly.
Quick Troubleshooting
| Symptom | Likely cause | What to try |
|---|---|---|
| Smell remains after wiping | Residue on the seal or ceiling | Steam again, then wipe the seal and ceiling |
| White streaks inside | Baking soda left behind | Wipe again with a damp cloth |
| Turntable noisy | Food or dirt under the ring | Remove, wash and dry the ring and track |
| Window stays fogged | Moisture trapped in the cavity | Leave the door open to dry |
| Door does not close fully | Food on the latch or seal | Wipe the latch, seal and frame; contact the maker if it persists |
Care and Upkeep Over Time
Check the interior every few months for chipped coating, rust spots or warped parts, because damage can affect how the unit works. Keep the power cord away from hot surfaces and give the microwave room around the vents. Replace a cracked turntable instead of using it, and ask the maker for a part that fits your model. Light, frequent wiping is gentler on every surface than an occasional hard scrub.
Glossary
- Turntable: the round glass plate that rotates food.
- Roller ring: the support under the turntable.
- Cavity: the inside cooking space.
- Door seal: the edge that keeps the door tight when closed.
- Microwave-safe: a container the maker says can be used in the microwave.
Choosing the Right Bowl and Water Amount
The steam method only works well and safely if the container suits the job. Pick a bowl or large jug that is marked as microwave-safe by its maker. Glass and ceramic are common choices, but check for metal trim, cracks or chips, because damaged dishes can fail when heated. A wide, deep bowl is more stable than a narrow cup and gives steam room to rise without splashing over the rim.
Use enough water to produce steam but not so much that it bubbles over. Fill the bowl partway and leave space at the top. The amount in a guide is a starting point, and your manual may suggest a different quantity or time for your power level. Microwaves differ, so begin with a shorter run and add time if the window has not fogged, instead of boiling the water hard at the start.
Water heated in a smooth container can become hotter than boiling without bubbling, and then erupt when moved or disturbed. To reduce the risk, let the bowl sit for a minute after the cycle ends, open the door carefully and use oven mitts to lift it out. Avoid leaning over the bowl. If your manual recommends a particular method, such as placing a microwave-safe item in the water, follow it. Never use a sealed container, since trapped steam can burst it.
Dealing With Stubborn and Baked-On Residue
Steam softens most spatters, but older deposits sometimes need a second approach. The key is to loosen first and wipe second, instead of scraping dry food off the surface. After steaming, let the cavity cool for a few minutes so you can touch it safely, then start with the softest tool.
- Wipe with a damp microfiber cloth or a soft sponge, working from the top down.
- For a patch that holds on, press a cloth wet with warm soapy water against it for a minute, then wipe again.
- If needed, use a baking soda paste on a cloth, leave it briefly, and wipe off every trace.
- Use a plastic scraper or an old card for thick crusts, holding it flat and pushing gently.
Avoid metal scrapers, steel wool and rough pads, which can scratch the interior coating and make future cleaning harder. If a deposit sits on the wave guide cover, the small panel on the wall or ceiling, handle it carefully. Check the manual to see whether it can be removed or should be left in place, as damage here can affect how the unit works. Where a stain will not shift after a couple of rounds, accept a light mark rather than risk the surface. A mark that does not affect food or function is only cosmetic.
Smells, Stains and Discoloration
Odors and stains tend to come from different causes. Smells linger when oils and food particles settle on the ceiling, the seal and the turntable, and when the cavity stays closed and damp. Wiping every surface after steaming does more than any fragrance. Leave the door open afterward so air can dry the inside, and let the turntable dry before you replace it.
For strong smells such as fish, curry or burnt popcorn, repeat the steam with lemon or vinegar and add a second wipe of the seal and door frame. A bowl of baking soda left inside with the door ajar can help absorb leftover odors overnight, but remove it before use. Avoid scented sprays inside the cavity, since they can leave residue where food is heated.
Yellow or orange tinting often comes from tomato sauce or oils. Warm soapy water and patience work better than strong products, and sunlight on a clean, open cavity may fade light stains over time. If the plastic parts, such as a shelf or a guide, have turned cloudy or rough, they may be worn rather than dirty. Ask the maker for a replacement that fits your model. If you see peeling paint, bare metal or rust, stop using the microwave and contact the maker, as those changes can affect safe operation.
Cooking Habits That Keep the Inside Cleaner
Prevention reduces how often you need to deep clean. Splatters happen when liquids and sauces boil or pop, so the simplest fix is to cover food. A vented lid made for microwave use, or an inverted microwave-safe plate, catches most spray and still lets steam escape. Check that any cover is labeled for microwave use and leave a gap for venting, because a tight seal can build pressure.
Choose deep containers for soups and sauces, and do not fill them to the brim. Stir midway through longer cooking times to avoid hot spots and sudden bubbling. Pierce or vent foods with skins, such as potatoes or sausages, as the maker or the food packaging advises. Use only containers, wraps and bags that are marked microwave-safe, and keep metal, foil and dishes with metallic paint out of the cavity unless your manual says otherwise.
- Wipe condensation and drips with a dry cloth after each use.
- Leave the door open briefly when you finish heating strong-smelling food.
- Keep a cloth nearby so spills are wiped while fresh.
- Remove packaging and trays that could burn or leak before you start.
These habits cost seconds and save a long cleaning session later.
When Cleaning Is Not Enough
A clean microwave still needs to work correctly, and some signs point to a fault that no wipe will cure. Sparks or crackling during use, a burning smell that continues after the cavity is clean, a door that will not latch, or a unit that runs but does not heat properly are all reasons to stop. Unplug the microwave, avoid further use and contact the maker or a qualified repairer. Microwaves hold components that can stay dangerous even when switched off, so do not open the casing.
Check the door, hinges and seal during cleaning. A bent door, a warped seal or a latch that sticks should be looked at by a professional. Look at the area behind the door window as well, because a cracked screen or a damaged mesh can affect how the unit contains energy. If a part such as a turntable, a roller ring or a shelf is broken, ask the maker for a fitting replacement instead of improvising.
It may also be time to replace the whole appliance when the interior coating is damaged in several places, when repairs are frequent, or when the unit no longer meets your needs. Keep the manual and model details to hand when you call, as they help the maker identify the right part or advice.
Cleaning Parts You Might Overlook
Most people wipe the inside walls and stop there, yet several other parts hold grease and odors. A few extra minutes on these areas makes the whole appliance smell fresher and run more reliably. Always unplug the microwave first, and check the manual for which parts are removable.
- Turntable and roller ring: lift them out and wash in warm soapy water, or as the manual allows. Dry fully before replacing.
- Door seal and edges: wipe with a damp cloth to remove splatter that can keep the door from closing neatly.
- Waveguide cover: this small panel inside the cavity is delicate. Wipe it gently and do not soak or scrape it, or ask the maker how to care for it.
- Vents and filters: over-the-range models have grease filters that can be washed according to the manual.
- Exterior and control panel: wipe with a barely damp cloth and avoid spraying liquid directly onto buttons.
A Steam Method Plus a Wipe-Down
Steam softens dried splatters so they wipe away without scrubbing. Use a microwave-safe bowl, and take care with hot containers and steam.
- Fill a microwave-safe bowl with water and add a slice of lemon or a spoonful of white vinegar, if you like.
- Heat for a few minutes, following the oven manual, until the window fogs.
- Leave the door closed for a few minutes so steam can loosen the residue.
- Carefully remove the bowl with oven gloves, since it will be hot.
- Wipe the walls, ceiling and door with a damp cloth, then dry with a clean one.
Preventing Splatter and Odors
Cover food with a vented microwave-safe lid or cover so liquids do not spray the walls. Wipe spills straight away, because baked-on food is harder to remove. For lingering smells, leave the door open to air out the cavity, or place a bowl of baking soda inside for a while. Avoid heating strongly scented foods uncovered.
Do not use abrasive pads or harsh chemical cleaners inside, and never run the microwave empty. If the paint inside is chipped, the door does not latch correctly or you notice sparks, stop using the appliance and contact the maker or a qualified technician.
Monthly Checklist
- Wash the turntable and ring.
- Wipe the door seal and hinges.
- Clean the exterior and handle.
- Check vents for dust.
- Look at the cord and plug for any damage.
Making this a recurring monthly job keeps grease from building into a stubborn layer. A clean cavity also helps food heat more evenly, because splatters do not absorb energy meant for the dish.
Products Worth a Look
As an Amazon Associate, Air Fryer Kitchen Supply earns from qualifying purchases. These picks come from our guide: 6 Best Countertop Microwaves: Sizes and Watts Compared (2026).
-
Chefman 0.7 Cu Ft Microwave
 Chefman Compact Countertop Microwave
-
BLACK+DECKER 0.9 Cu Ft Microwave
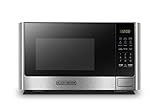 BLACK+DECKER Countertop Microwave Oven
-
COMFEE' Retro Microwave
 COMFEE' Retro Countertop Microwave Oven
Putting It Into Practice in Your Own Kitchen
Planning ahead is the unglamorous step that makes everything else about cleaning a microwave easier. A few minutes spent looking at your calendar, your shopping list and the state of the kitchen before you begin will tell you whether this is a quick tidy or a bigger job, and it stops you starting something you cannot finish. Half-finished kitchen projects are worse than untouched ones, because they block surfaces and drawers that everyone needs. Choose a time when the kitchen is naturally quiet, gather everything you are likely to need in one place, and work in one direction so you are not retracing your steps or moving the same items twice.
Going Deeper: Judging Cleaning a Microwave in Real Life
Guides and labels only tell part of the story with cleaning a microwave. The rest comes from your kitchen itself: its size, its layout, the way your household cooks and shops, and the habits that decide whether a good plan survives a busy week. Before you settle on an approach, work through the points below and be honest about which ones matter most in your home. A choice that looks ideal on paper can disappoint if it fights your routine, while a modest option that fits your routine tends to keep working quietly for years.
- The soil you are dealing with. Splattered sauces, dried milk, fish smells and greasy films each respond to different treatment, and steam loosening works on most of them if given time. Treat this as a deciding factor rather than an afterthought, because it shapes how well the result works day after day, long after the first setup or the first use has been forgotten.
- Interior material and finish. Stainless, painted and plastic interiors tolerate different products and pads, and the door mesh and seal need gentler handling than the cavity walls. Treat this as a deciding factor rather than an afterthought, because it shapes how well the result works day after day, long after the first setup or the first use has been forgotten.
- Turntable and support design. Whether the plate and roller ring remove easily decides if the most-soiled parts can be washed properly at the sink. Treat this as a deciding factor rather than an afterthought, because it shapes how well the result works day after day, long after the first setup or the first use has been forgotten.
- How often the microwave is used. A machine used ten times a day soils at a rate no weekly routine can ignore, while a drinks-only machine needs far less attention. Treat this as a deciding factor rather than an afterthought, because it shapes how well the result works day after day, long after the first setup or the first use has been forgotten.
- Smell problems versus visible dirt. Odours live in films and in the door seal and vents, so a microwave can look clean and still smell, needing a different emphasis in cleaning. Treat this as a deciding factor rather than an afterthought, because it shapes how well the result works day after day, long after the first setup or the first use has been forgotten.
- Products safe around food surfaces. Everything used inside will meet food vapour later, so gentle, food-area-appropriate products and thorough wiping matter more than power. Treat this as a deciding factor rather than an afterthought, because it shapes how well the result works day after day, long after the first setup or the first use has been forgotten.
Once you have weighed those points, rank them. Most households find that two or three of them dominate everything else, and naming them clearly makes the rest of the decisions in this guide much easier. If two people share the kitchen, compare your rankings, because the person who cooks most and the person who cleans most often notice different problems. Agreeing the priorities first avoids the common trap of solving a minor irritation while the main frustration stays exactly as it was.
A Practical Walk-Through, From Start to Finish
Reading about cleaning a microwave is one thing; doing it in a real kitchen, with limited time and other jobs competing for attention, is another. The sequence below turns the advice in this guide into an order you can actually follow. It assumes no special tools beyond what the earlier sections mention, and it builds in pauses to check your work, because most problems with cleaning a microwave come from rushing a step rather than from lacking skill or equipment.
- Remove the turntable and roller ring and wash them at the sink with hot soapy water, setting them aside to dry while you work inside. Work slowly at this stage and check the result before moving on, since correcting a small slip now is far easier than undoing finished work later.
- Place a microwave-safe bowl of water, with lemon slices if you like, inside and heat until it steams well, then leave the door closed for several minutes to loosen soil. Work slowly at this stage and check the result before moving on, since correcting a small slip now is far easier than undoing finished work later.
- Wipe the ceiling first, then the walls, back and floor of the cavity with a soft cloth, rinsing the cloth often so you are not spreading grease around. Work slowly at this stage and check the result before moving on, since correcting a small slip now is far easier than undoing finished work later.
- Clean the inside of the door, its mesh screen and the seal with a damp cloth, taking care not to soak the seal or use anything abrasive on the mesh. Work slowly at this stage and check the result before moving on, since correcting a small slip now is far easier than undoing finished work later.
- Wipe the exterior, handle and control panel with a barely damp cloth, keeping moisture out of vents and seams. Work slowly at this stage and check the result before moving on, since correcting a small slip now is far easier than undoing finished work later.
- Replace the dry turntable and ring, run the empty machine for a few seconds to check it sounds normal, and leave the door ajar to air. Work slowly at this stage and check the result before moving on, since correcting a small slip now is far easier than undoing finished work later.
When you finish, step back and look at the result as a whole rather than hunting for tiny flaws. Live with it through a few normal days of cooking before you judge it. Small adjustments after real use are normal and expected; they are how a general plan becomes one that genuinely suits your household. Note what you changed and why, so that next time you repeat the job you start from your improved version instead of from scratch.
How This Plays Out in Different Households
No two kitchens ask the same thing of cleaning a microwave. The situations below show how the same principles bend to fit different homes, and they may help you recognise your own situation in the advice above.
A family machine with daily explosions
Soup and porridge splashes bake in layers; the steam-bowl step becomes a weekly ritual, and covers on dishes are the real long-term fix. In a case like this, the guidance earlier in this guide still applies, but the priorities shift: start with the step that removes the biggest obstacle, keep whatever already works, and review the result after a week or so of normal use before changing anything else.
An office microwave nobody owns
A rota and a visible note work better than heroic monthly cleans: a weekly steam and wipe by whoever is on kitchen duty keeps it civilised. In a case like this, the guidance earlier in this guide still applies, but the priorities shift: start with the step that removes the biggest obstacle, keep whatever already works, and review the result after a week or so of normal use before changing anything else.
A microwave that smells of fish and curry
Odour is the target, so after the physical clean, the steam step with lemon and a period of airing with the door open does the work that scrubbing cannot. In a case like this, the guidance earlier in this guide still applies, but the priorities shift: start with the step that removes the biggest obstacle, keep whatever already works, and review the result after a week or so of normal use before changing anything else.
A rarely used machine in a spare room
Dust, stale air and a dry seal are the issues; a gentle clean, a check that the turntable turns, and leaving the door ajar between uses keeps it ready. In a case like this, the guidance earlier in this guide still applies, but the priorities shift: start with the step that removes the biggest obstacle, keep whatever already works, and review the result after a week or so of normal use before changing anything else.
Trade-Offs Worth Weighing Carefully
Almost every decision about cleaning a microwave involves giving something up to gain something else. Naming the trade-offs plainly helps you choose on purpose instead of discovering them afterwards.
Steam loosening first versus Scrubbing straight away. Steam from a bowl of water softens most soils so they wipe off with almost no effort and no risk to the finish. On the other hand, Scrubbing dry, baked splashes takes force that finishes cannot tolerate, and it usually smears grease wider before it removes it. Neither side wins in every kitchen, so weigh which drawback you would notice more often in daily use, and which advantage matches the way your household actually cooks, cleans and shops.
Vinegar in the steam bowl versus Lemon in the steam bowl. Vinegar steam is effective on grease and mineral spots and leaves no residue once wiped, though the smell during cleaning is sharp. On the other hand, Lemon steam is gentler in scent and popular for odour problems, though heavy grease may still need a soapy wipe afterwards. Neither side wins in every kitchen, so weigh which drawback you would notice more often in daily use, and which advantage matches the way your household actually cooks, cleans and shops.
Bicarbonate paste for spots versus Hob-style cleaners. A mild bicarbonate paste lifts stubborn spots and deodorises, and it rinses away cleanly from food surfaces. On the other hand, Stronger chemical cleaners are unnecessary inside a microwave and risk residues where food is heated, so they belong elsewhere in the kitchen. Neither side wins in every kitchen, so weigh which drawback you would notice more often in daily use, and which advantage matches the way your household actually cooks, cleans and shops.
A useful test is to imagine the choice on your busiest evening, not your calmest one. Options that depend on extra time, extra space or perfect habits tend to fail exactly when you need them most, while options that forgive a rushed day keep their value. If you are torn between two approaches, pick the one that is easier to reverse or adjust later; flexibility is worth a great deal in a room that has to serve breakfast, homework, storage and celebration meals in the same week.
More Mistakes That Quietly Undo Good Work
Most disappointing results with cleaning a microwave trace back to a handful of repeatable slips rather than to bad luck or bad products. Watch for these as you work.
- Using abrasive pads or powders inside. Scratches in the cavity finish harbour soil and can damage the coating, making every future clean less effective. The fix is usually simple once you spot it: pause, go back to the basic checks in this guide, and correct that one thing rather than starting over or buying something new.
- Spraying cleaner directly into the cavity. Spray can enter vents and the waveguide cover where it cannot be wiped away; apply product to the cloth, not the machine. The fix is usually simple once you spot it: pause, go back to the basic checks in this guide, and correct that one thing rather than starting over or buying something new.
- Soaking or scrubbing the door seal hard. A damaged seal compromises the door’s fit, and aggressive cleaning is a common way seals get torn or stretched out of shape. The fix is usually simple once you spot it: pause, go back to the basic checks in this guide, and correct that one thing rather than starting over or buying something new.
- Running the steam bowl uncovered and unattended for too long. Superheated water can erupt when disturbed; heat in intervals, let the bowl stand, and handle it as the hazard it is. The fix is usually simple once you spot it: pause, go back to the basic checks in this guide, and correct that one thing rather than starting over or buying something new.
- Forgetting the exterior vents and top. Dust and grease on vents and the top surface get drawn in and smell when the machine warms, undoing the interior clean. The fix is usually simple once you spot it: pause, go back to the basic checks in this guide, and correct that one thing rather than starting over or buying something new.
Care, Safety and Keeping Things Working Well
Whatever you decide about cleaning a microwave, the result only lasts if it is looked after. Good care here is rarely complicated; it is mostly about small, regular attention instead of occasional heroic effort, and about respecting the safety basics that apply to any major kitchen appliance. Always follow the manufacturer’s manual for your specific model where it differs from general guidance, and leave work involving gas, mains electricity or plumbing connections to qualified professionals.
- Cover food as a habit, with a lid, plate or microwave cover, because preventing splashes is worth more than any cleaning method. Building this into your normal routine takes only a moment, and it prevents the slow build-up of small problems that eventually turn into repairs, replacements or a job you keep putting off.
- Wipe fresh splashes immediately after use while they are still soft, which takes seconds compared with the steam treatment they will need later. Building this into your normal routine takes only a moment, and it prevents the slow build-up of small problems that eventually turn into repairs, replacements or a job you keep putting off.
- Leave the door ajar for a short while after cooking steamy food so the cavity dries instead of staying damp and musty. Building this into your normal routine takes only a moment, and it prevents the slow build-up of small problems that eventually turn into repairs, replacements or a job you keep putting off.
- Wash the turntable and ring weekly in a busy household, since the ring’s wheels collect grit that makes the plate noisy and uneven. Building this into your normal routine takes only a moment, and it prevents the slow build-up of small problems that eventually turn into repairs, replacements or a job you keep putting off.
- Never use the microwave if the door is damaged or does not close properly, and arrange repair rather than cleaning around a fault. Building this into your normal routine takes only a moment, and it prevents the slow build-up of small problems that eventually turn into repairs, replacements or a job you keep putting off.
Keep a simple note of what you did and when, even if it is only a line on a calendar or in a phone. Dates help you spot patterns, such as a task that needs doing more often in summer, and they are genuinely useful if you ever need warranty help or advice from a repairer, because you can describe the history of the problem instead of guessing at it.
FAQ
Why shouldn’t I run it empty?
Running without anything inside can harm it. Always have a bowl of water in there, as the manual describes.
How do I remove an odor?
Steam with lemon, wipe and leave the door open for a while to air out.
Can I put the turntable in the dishwasher?
Many can go in, but check the manual. Let the glass cool first so it does not crack from sudden temperature changes.
What if the inside coating is chipped or scratched?
Stop using the microwave and contact the maker, because damaged interiors can cause problems. Do not try to repair it yourself.
How often should I do a deep clean?
Every few weeks suits most homes, with a quick wipe after messy use. Heavy users may want to steam more often.
Can I use dish soap in the steam bowl?
It is better to keep the bowl to water with lemon or vinegar. Soap can foam and boil over. Use soapy water on the cloth for wiping instead, and rinse the surfaces afterward.
How long should I leave the door closed after steaming?
Around five minutes is typical, which gives the steam time to soften residue. Check your manual in case it gives a different suggestion for your model.
Is lemon better than vinegar for steam cleaning?
Neither is necessarily better. Lemon leaves a fresher smell while vinegar can be sharper, so choose whichever you prefer. Plain water also helps loosen light spatters.
Can I clean the glass door with window spray?
Avoid spraying cleaner into the door or onto the controls. Apply a small amount of a mild cleaner to a cloth, wipe the glass, and dry it. Check the manual for products to avoid.
Why is there water collecting on the walls after cleaning?
Steam condenses on cool surfaces. Wipe the inside with a dry cloth and leave the door open for a while so the cavity can dry fully.
Should I remove the turntable every time I clean?
Take it out whenever you wash it or clean the floor of the cavity. It is also worth lifting it out when you hear rattling, as debris can build up beneath it.
Can a dirty microwave affect how food heats?
Heavy buildup may smoke or smell when heated, and food residue can burn. Keeping the interior clean also lets you see any damage to the coating.
It also helps to think about cleaning a microwave in terms of seasons rather than single events. Kitchens work harder at some times of year than others: holiday cooking, summer preserving, the return to school lunches, or a house full of guests all change what you ask of the space. A system that is reviewed briefly at those turning points stays useful, while one set up once and never revisited slowly drifts out of step with how you live. You do not need a formal schedule; simply use those natural moments as a prompt to check what is working, what has become a nuisance, and what small change would help most before the next busy stretch arrives.
How do I remove a burnt smell from the microwave?
Clean the cavity fully, then steam a bowl of water with lemon and leave the door closed for a while before wiping and airing. Repeat if needed; persistent burnt smells often live in residue on the ceiling and around the door seal. If your situation differs from the usual case, check the manufacturer’s manual or your local guidance before acting, because models, materials and local rules vary, and that specific advice should always take priority over a general rule of thumb.
Can I use bleach or oven cleaner inside a microwave?
No. Both are far too harsh for the cavity and risky around food, and oven cleaner can damage the interior finish and the waveguide cover. Steam, washing-up liquid and bicarbonate handle everything a microwave should contain. If your situation differs from the usual case, check the manufacturer’s manual or your local guidance before acting, because models, materials and local rules vary, and that specific advice should always take priority over a general rule of thumb.
Why does the turntable area get so dirty?
Boil-overs run down and collect under the plate, and the roller ring traps them. Removing and washing both parts at the sink, rather than wiping around them, is what actually clears this reservoir of soil. If your situation differs from the usual case, check the manufacturer’s manual or your local guidance before acting, because models, materials and local rules vary, and that specific advice should always take priority over a general rule of thumb.
How often should a microwave be cleaned?
A quick wipe after messy uses, a turntable wash weekly in busy homes, and a full steam clean every few weeks is a workable rhythm. Smell and visible film are better guides than a fixed date. If your situation differs from the usual case, check the manufacturer’s manual or your local guidance before acting, because models, materials and local rules vary, and that specific advice should always take priority over a general rule of thumb.
What is the waveguide cover and should I clean it?
It is the small panel, often mica or plastic, on the cavity wall that covers the opening the microwaves enter through. Wipe it gently with a damp cloth only; if it is burnt, cracked or arcing, the machine needs professional attention. If your situation differs from the usual case, check the manufacturer’s manual or your local guidance before acting, because models, materials and local rules vary, and that specific advice should always take priority over a general rule of thumb.
Is it safe to steam vinegar in the microwave?
A bowl of water with a little vinegar, heated to steaming and then wiped out thoroughly, is a common gentle method. Keep quantities small, ventilate the room, and never mix vinegar with bleach or other cleaners. If your situation differs from the usual case, check the manufacturer’s manual or your local guidance before acting, because models, materials and local rules vary, and that specific advice should always take priority over a general rule of thumb.
The Short Version
Steam a bowl of water, wipe the walls, wash the plate and clean the door seal. Keep liquids out of vents, never run it empty, and follow the manual.

