A light coat of oil helps many foods brown in an air fryer, and there are three common ways to apply it: a refillable mister, a brush, or an aerosol can. Each has its own strengths, and the best choice depends on your food, your basket coating and how much tidying you want afterwards. This guide compares the three, shows how to use each well, and lists the usual problems and fixes.
What Each Tool Is For
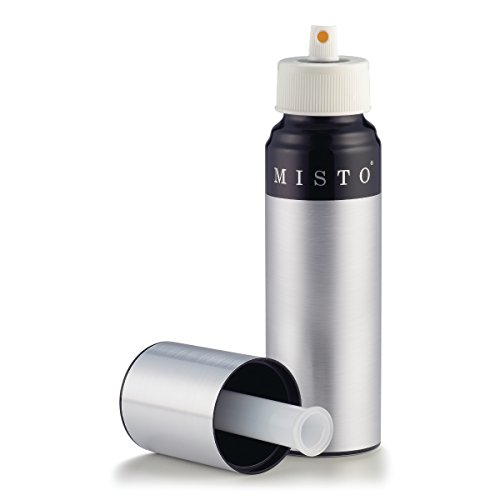
- Refillable mister: a pump bottle that turns oil into a fine mist, suited to even coverage on larger areas.
- Brush: a basting brush for precise placement on single pieces, such as fillets or bread.
- Aerosol spray: a pressurised can that is quick and convenient, though it contains propellants and additives.
In this guide
Key Differences
| Feature | Mister | Brush | Aerosol |
|---|---|---|---|
| Coverage | Wide and light | Targeted, can be heavy | Wide, quick |
| Control of amount | Good with practice | Very good | Harder to judge |
| Cleanup | Rinse nozzle now and then | Wash brush after use | None, but residue may build on surfaces |
| Choice of oil | Any oil you fill it with | Any oil | Limited to what is sold |
A Word on Coatings and Residue
Many makers warn that some aerosol sprays can leave a sticky film on non-stick baskets over time. Others suggest keeping any spray away from the heating area altogether. Because advice varies, read the care section of your manual before using one. A mister or a brush gives you the option to use oil you already trust, with less to worry about on the surfaces.
Who Should Choose Which
- Choose a mister if you cook many varied foods and want light, even coverage.
- Choose a brush if you handle individual pieces, such as chops, bread or vegetables in slices.
- Choose an aerosol only if the maker permits it and you value speed over everything else.
Simple Tips for Any Method
Pat food dry first so oil clings. Apply thinly, since a little goes a long way in moving air. Do not spray into a hot, running appliance, and keep oil away from the element. Take care that no excess pools in the drawer. Store any oil bottle away from heat, wipe the nozzle or brush after use, and replace a brush that sheds bristles or holds a stale smell. Washing tools promptly keeps old oil from turning sticky, which would spoil the next batch.
Using Each Tool, Step by Step
Mister
- Fill the bottle with a mild oil that suits your heat level, leaving the recommended space for air.
- Pump to build pressure as the bottle maker directs.
- Hold it at a short distance from the food, away from the heating element, with the appliance switched off and cool.
- Apply a few light bursts, turn the food, and mist the other side.
Brush
- Pour a little oil into a small dish rather than dipping the brush into the bottle.
- Dip the brush lightly, wipe off the excess on the rim of the dish, and spread the thin film onto the food.
- Work over a plate or board so drips do not reach the basket.
Aerosol
- Read the care notes from both the can maker and the appliance maker.
- Spray the food in a bowl or on a plate, never into the basket while it is hot or near the heating element.
- Keep the can away from heat and flame, and store it as the label directs.
Common Scenarios
Tossing a large batch of vegetables
A mister gives wide, even coverage. A bowl and a spoonful of oil also works, if you toss well.
Oiling a few chicken thighs or fish fillets
A brush gives control, especially on skin or on thin fish where a spray can leave uneven spots.
Coating bread, buns or tortillas for crisp edges
A brush or a gentle mist keeps the oil on the surface. Heavy coating makes bread greasy rather than crisp.
Cooking breaded items
A fine mist over the crumbs helps them brown without washing the coating off. Press the crumbs on first, then mist from a short distance.
Mistakes to Avoid
- Spraying a lot of oil. Excess drips into the drawer, where it smokes and smells.
- Spraying into a hot unit. Oil mist can reach the element and flare or smoke, which is a safety concern.
- Leaving the mister nozzle uncleaned. Old oil can clog the spray and turn rancid.
- Using the same brush for raw meat and finished food. Cross-contamination is a food-safety risk, so keep separate brushes or wash between uses.
- Storing any spray near the unit while it is hot. Heat can harm the container and its contents.
Quick Troubleshooting
| Symptom | Likely cause | What to try |
|---|---|---|
| Mister spits or clogs | Thick oil or dried residue | Wash the nozzle, use a thinner oil and refill |
| Food greasy, not crisp | Too much oil | Apply less, and pat dry first |
| Sticky film on the basket | Aerosol additives or built-up oil | Wash gently and check the manual |
| Brush leaves streaks | Too much oil on the brush | Wipe the brush on a dish rim first |
Safety and Storage Notes
Oil is flammable at high temperatures, and aerosol cans are pressurised, so take a few precautions. Apply oil to food away from the appliance, and never aim a spray toward the heating element or into a running unit. Keep cans and bottles away from the stove, the unit’s exhaust and sunlight. Wipe up spilled oil promptly to prevent slips, and wash tools in warm soapy water. If the appliance maker or the can maker gives specific warnings, follow them over any general advice. If oil flares or smokes heavily, turn the unit off, keep the drawer closed, unplug it once safe, and let it cool before looking inside. Never use water on a grease fire.
Glossary
- Mister: a refillable pump bottle that sprays a fine mist of oil.
- Aerosol: a can that releases a spray using a propellant.
- Propellant: the gas that forces the contents out of an aerosol can.
- Basting brush: a brush used to spread oil or sauce on food.
- Cross-contamination: the transfer of germs from raw food to other food or tools.
Choosing an Oil for Each Applicator
The tool you pick limits which oils work well, so it helps to think about the oil and the applicator together. A mister needs a thin, free-flowing oil. Thick or cloudy oils can struggle to atomise, and they tend to sputter or clog the nozzle. A brush has no such limit, which makes it the easier choice for richer oils, melted butter-style fats or oil that has been mixed with seasoning. An aerosol removes the choice entirely, because you get whatever the can maker put inside it.
Heat tolerance matters more than flavour for most air fryer cooking. Oils differ in how well they cope with high heat before they start to smoke, and the maker of your appliance or the oil producer may give guidance. Check the label on the bottle and the manual for your unit rather than guessing. If you cook at high temperatures often, choose an oil the label describes as suitable for high-heat cooking and keep stronger-tasting oils for finishing foods after they come out.
- For a mister: use a light, plain oil with nothing floating in it, and strain it if you see sediment.
- For a brush: use any oil you like, but keep the layer thin so it does not drip into the drawer.
- For an aerosol: read the ingredients and the maker’s warnings, and confirm the appliance maker allows that type of spray.
It also pays to keep oil fresh. Oil that has sat open for a long time, or been stored near the stove, can smell off and taste stale on food. Buy sizes you will use in a reasonable time and keep the bottle sealed.
Matching the Method to the Food
Different foods hold oil in different ways, and the best applicator follows from that. Foods with a lot of surface area, such as chopped vegetables or potato wedges, are easiest to coat when they are tossed in a bowl, with a mister as a handy alternative for a quick top-up. Flat, single pieces such as fish fillets, chops or slices of bread take a brush well, because you can reach every edge and skip the places that do not need oil.
Foods that already contain fat, such as sausages, bacon or skin-on chicken, often need little or no extra oil. Adding more can simply drip into the drawer and smoke. Frozen products that are sold as oven or air fryer ready may be pre-treated, so follow the pack directions and add oil only if you want deeper colour.
Coated foods need a gentler hand. Breadcrumbs and batter can be washed off or turn pasty if you apply oil roughly. A fine mist from a short distance works better than a brush on crumbs, because the brush can drag the coating away. For doughy foods, such as rolls or pastry, a light brushing keeps the oil where you want it and avoids pooling in folds.
- Large, mixed batches: toss in a bowl or use a mister.
- Single flat pieces: use a brush.
- Crumb or batter coatings: use a gentle mist.
- Already fatty foods: try cooking with no added oil first.
Getting a Thin, Even Coat
A good coat is thin enough that the food looks lightly glossy rather than wet. Excess oil is the most common reason for smoke, greasy results and a drawer that is hard to clean. Because air fryers move hot air quickly, even a small amount is enough to help browning.
Start by drying the food. Moisture on the surface repels oil and steams the food instead of crisping it, so pat it with a towel first. Then apply oil in stages. With a mister, give a short burst, turn the food, and repeat only if a dry patch remains. With a brush, wipe the bristles on the rim of a dish so only a film is left, then use long, light strokes. If you toss food in a bowl, start with a small amount, mix well, and add more only when needed.
Seasoning sticks better when oil is present, so add salt, spices or herbs after oiling. Be cautious with sugary marinades and sauces, because they can darken faster than the food cooks. Applying them near the end of the cook is a common way to avoid burning, and your recipe or manual may offer more guidance.
If you are not sure how much you used, check the drawer after the first cook. Pooled oil means you used too much, and a dry, pale surface suggests you used too little. Adjust a little at a time until the results look right for that food.
Cleaning and Upkeep Routines for Oil Tools
Oil tools collect residue quickly, and old oil turns sticky and then rancid. A small routine prevents most problems. After each use, wipe the outside of the bottle, and wipe the nozzle or the brush head so nothing gums up. Once in a while, empty a mister, rinse it with warm water and a drop of dish soap, and let every part dry before refilling. Follow the bottle maker’s own cleaning directions, since some designs should not be soaked.
Brushes need extra attention because bristles trap oil and food. Wash them in warm soapy water, rinse well and let them dry with the bristles up or hanging. Brushes with silicone heads are generally simple to wash, while natural bristles may hold smells longer. Check the product details for what the head is made from and whether it can go in a dishwasher.
Look at the appliance itself too. A thin, sticky film on the basket or drawer is a sign that oil has been baking on. Wash it gently once cool, using the cleaning method the manual allows, and avoid harsh scrubbing on non-stick surfaces. Keeping the tools and the basket clean helps the food taste right and reduces smoke.
- Wipe the nozzle or brush after each use.
- Rinse a mister now and then, and dry it fully.
- Wash brushes promptly so oil does not turn sticky.
- Keep bottles away from heat and direct sunlight.
What to Check Before You Buy a Mister or Brush
When choosing a mister, look at how it is built and how easy it is to clean. A wide opening makes filling and washing simpler. A material that does not react with oil is a plus, and glass, metal or sturdy plastic are all common, so read what the listing says. Think about whether you prefer a pump-up design or a squeeze style, and whether the spray pattern is described as a fine mist or a stream. Many people find that a finer pattern spreads less oil over more area.
For a brush, the key questions are about the head and handle. Check whether it can handle heat if you also plan to use it for sauces, whether the handle is comfortable and whether the bristles are firmly attached. A brush that sheds is a food-safety nuisance. Consider owning two, one for raw foods and one for finished foods, to prevent cross-contamination.
Budget choices are fine for this kind of tool, because the job is simple. Basic models often do the same work as more costly ones, though sturdier materials and better seals tend to appear higher up the range. Rather than relying on price, read how people describe the nozzle clogging, leaking or wearing out, and check how many people rated the product before trusting any single comment.
Signs It Is Time to Replace
Replace a mister if it leaks, only produces a stream, or smells stale even after cleaning. Replace a brush when the bristles shed, the head is stained or sticky, or a lingering smell will not wash out.

Ready to Buy? Start Here
If this guide helped you decide what to look for, these products are a place to start.

As an Amazon Associate we earn from qualifying purchases. Prices and availability are shown on Amazon.
How Much Oil Is Enough: A Visual Cue Guide
New cooks often worry about using too much or too little oil. A better approach is to learn what a good coating looks like, and adjust until the food tells you it is right. Whichever applicator you use, the aim is a thin, even sheen rather than a pool at the bottom of the basket.
Use these cues as you practise:
- Dry, floury or dusty surfaces after cooking usually mean the coat was too thin or uneven.
- Smoke early in the cook, along with a greasy pan, suggests too much oil or fat dripping down.
- A light shine before cooking, with no drips when you lift the piece, is a good first target.
- Breaded foods often need just a quick pass of oil on the dry patches.
- Potatoes and vegetables tossed in a bowl pick up an even film without much effort.
Keep a note of the amount that gave you the result you liked, using a spoon measure if you pour, or a count of presses if you use a mister.
Which Tool for Which Job
Each applicator shines in different tasks. The table helps you decide quickly, and you can keep more than one in the kitchen if your cooking varies.
| Task | Good fit | Why |
|---|---|---|
| Coating a bowl of chopped vegetables | Spoon and toss | Even coverage with little waste |
| Light misting over breaded pieces | Pump mister | Fine, even cover over a wide area |
| Spreading oil on bread edges | Silicone brush | Control over exactly where it goes |
| Quick touch-ups between batches | Mister or brush | Fast and tidy |
Aerosol cooking sprays are a topic where you should read the can and the appliance manual. Some makers advise against certain sprays on coated baskets because residue can build up, so follow their instructions.
Whatever you choose, keep the applicator clean. A clogged nozzle or sticky brush spreads old oil that can turn rancid and smell unpleasant. Wash it with warm soapy water, dry it fully, and store it upright away from heat sources.
Finally, store oil in a cool, dark cupboard with the lid closed, and replace it if it smells off. Fresh oil, an easy applicator and a light hand are the three habits that make crisp results feel simple.
Safety around oil matters too. Never spray near a heat source or a hot element, and keep aerosol cans away from warm surfaces and direct sunlight. If a bottle comes with storage instructions, follow them. Wipe up any spills on the counter straight away, because oily patches are a slip hazard and attract dust.
Oil Before, During or After: Timing Changes the Result
Most cooks apply oil once, before cooking, and never think about timing again. Yet when the oil goes on changes what it can do. Oil applied before cooking helps seasonings cling, protects delicate coatings from drying, and gives browning a head start across the whole surface. It is the right default for vegetables, breaded foods and anything that benefits from an even, seasoned crust.
A small amount added partway through suits a narrower set of jobs. Foods that dry at the edges during a long cook, or items that are turned halfway and present a pale, dry side to the air, can take a light second application on that turned side. The tool matters here: a brush reaches a specific patch without coating the whole basket, while a mister covers a turned batch quickly. Whichever you choose, work fast so the drawer is open for as short a time as possible, and never reach across a hot unit carelessly to chase a missed spot.
Oil after cooking is a different tool altogether. A brush can add a glossy finish and carry flavours, such as garlic or herb oil, that would burn if they spent the whole cook in hot air. This is finishing, not frying, and it suits foods eaten immediately. It will not crisp anything, so do not use it to rescue an undercooked batch; cook the food properly first, then decide whether a finishing touch earns its place.
Oiling the Food, the Basket, or Both
The basket is tempting to oil because sticking is visible there, but food is usually the better target. Oil on food travels with it, seasons it and browns where browning is wanted. Oil on the basket mostly sits where food is not, gathers heat, and slowly bakes into a film that becomes harder to clean each time. Unless your manual or a specific recipe directs otherwise, dress the food in a bowl and leave the basket alone.
Working in a bowl has a second advantage: control. Tossing vegetables or wings in a bowl with a measured amount of oil coats every surface evenly, including the undersides a mister misses and the corners a brush skips. Any excess stays in the bowl rather than pooling in the basket. For breaded foods, where a bowl would damage the coating, the mister comes back into its own, applied gently to the arranged pieces in the basket just before cooking.
There is one honest exception. Very lean foods with a reputation for welding themselves to a surface, cooked in a basket whose coating has aged, sometimes benefit from the lightest brush of oil on the contact points. Treat that as a targeted remedy for a known problem, not a daily habit, and wash the basket promptly afterwards so the remedy does not become next month’s baked-on film.
How Each Method Handles Tricky Foods
Breaded and battered foods are the mister’s home ground. Their dry, fragile surfaces need oil without touch, because a brush drags crumbs away and leaves bald patches that cook pale. Mist from a short distance, let it settle, and avoid soaking, since a wet crumb layer steams instead of crisping. If the coating still looks dusty-dry in places after the first minutes of cooking, a second light misting on those patches is better than a heavy first coat.
Vegetables reward the brush and the bowl in different ways. Firm pieces such as potato wedges and root chunks take a thorough bowl toss beautifully, emerging evenly glossed with seasoning distributed through the whole batch. Delicate vegetables, and anything already arranged in a single layer, are better brushed in place, where you can reach the dry tops without tumbling the pieces into a heap and losing the arrangement you just made.
Fish and other fragile, lean proteins sit between the two. Their surfaces dry quickly and stick readily, yet they break under rough handling. A brush, used with a light hand on the food itself before it goes into the basket, gives protection without moving the piece around. Aerosol spray, used carelessly and often, is the method most likely to leave residue on the basket around delicate food, which is one more reason the gentler tools earn their counter space in fish-cooking households.
Overspray, Counters and the Tidiness Ledger
Every method has a tidiness cost, and honest comparison has to count it. A mister sends a fine cloud that mostly lands on the food but partly lands wherever the air takes it: the counter edge, the basket rim, the wall of the unit. Working over the open basket, close to the food, and in short bursts keeps that drift small. Spraying from a height for effect is how kitchens acquire an invisible greasy film that only reveals itself when dust sticks to it days later.
The brush is the tidiest applicator at the moment of use and the least tidy afterwards. It drips if overloaded, it needs washing every time, and a brush left unwashed by the sink quietly flavours the next job with the last one. The discipline is simple: load lightly, tap off the excess against the bowl, and wash the brush while the food cooks, when you are standing in the kitchen anyway. A brush washed immediately is a thirty-second job; a brush found tomorrow is a small penance.
Aerosol cans feel tidy because there is nothing to wash, but the residue ledger appears on the basket instead. Fine propelled oil coats everything the jet touches, including basket surfaces beyond the food, and repeated use can build a sticky layer that ordinary washing struggles to shift. If you use aerosol, use it on food arranged in the basket, in brief passes, and wash the basket promptly. Counted over months, the methods are closer in effort than they first appear; they simply send the work to different places.
Storing Oils and Tools So They Stay Pleasant to Use
Oil quality fades with heat, light and air, and the applicator you fill from a tired bottle will deliver tired oil no matter how good the tool is. Keep the main bottle in a cool, dark cupboard rather than beside the warm appliance, fill misters with modest amounts you will use reasonably soon, and smell the oil when you fill. If it smells stale in the bottle, no application method will make it taste fresh on food.
Misters benefit from a rinse cycle between different oils, since flavours carry and residues mix. Brushes should dry fully, bristles up or hanging, rather than sealed damp in a drawer, where they stay musty. Aerosol cans belong away from heat like any pressurised container, following the directions printed on them. None of this is elaborate, but together it is the difference between tools you reach for happily and tools you avoid while wondering why the food is less good than it used to be.
Label a mister if your household uses more than one oil. Two identical bottles, one neutral and one strongly flavoured, guarantee a mix-up at the worst moment. A small piece of tape with the oil and the filling date takes seconds and turns guesswork into information, especially in shared kitchens where the person cooking may not be the person who filled the bottle.
Waste, Refills and Choosing for the Long Term
Looked at over a year of cooking, the three methods differ in what they throw away. A refillable mister and a washable brush produce almost no packaging and can serve for a long time if cleaned as their makers direct. Aerosol cans are single containers that must be replaced and disposed of, and their convenience is paid for repeatedly. None of this decides the question on its own, because a tool you dislike will not be used however frugal it is, but it belongs in an honest comparison.
Durability follows care. A mister whose nozzle is rinsed before residue hardens will spray evenly for a long time; one left clogged and forced will sputter and spit oil in blobs that ruin the even coat it exists to create. A brush washed and dried promptly keeps its shape and does not shed. When a tool finally wears out, replace the tool rather than fighting it: a failing applicator costs more in disappointing meals than a sound one costs to buy.
The practical conclusion for most kitchens is a small partnership rather than a single winner. Keep one refillable mister for breaded foods and quick, touch-free coating, and one brush for finishing, patching and delicate work. Add aerosol only if your cooking genuinely calls for it and you accept its residue habits. Two good tools, each used where it is strongest, beat three tools used interchangeably without thought.
More Questions About Applying Oil
Why does my misting come out in a stream instead of a mist?
The nozzle is usually partly clogged with old oil, or the bottle needs the pumping action its maker describes to build pressure. Rinse the nozzle in warm water, refill with fresh oil, and test the spray onto a plate before aiming at food. If the spray stays uneven after cleaning, the mister itself may be worn, and forcing it will only lay oil down in streaks.
Can I brush oil onto food that is already cooking?
You can, carefully and quickly, when you turn food partway through cooking. Use a heat-safe brush, keep hands and sleeves clear of the hot basket, and work on the newly exposed side only. Do not lean over the open unit longer than the job needs. If a food regularly needs mid-cook oiling, note it in your recipe so the brush is ready before the drawer opens.
Is one method better for seasoning sticking to food?
Yes. Seasoning clings best to a surface that is lightly oiled first, which is why the bowl toss works so well for vegetables: oil, then seasoning, then toss again. With a mister, mist lightly, season, and mist again very briefly to set the seasoning in place. A brush can press seasoning off as easily as it spreads oil, so brush first and season afterwards.
How do I stop oil pooling in the bottom of the basket?
Use less, apply it to the food rather than the basket, and let heavily dressed food stand for a moment in its bowl so excess drains before loading. Pooling usually means the food was carrying more oil than its surface could hold. The fix is almost never a different tool; it is a lighter hand with whichever tool you already own.
Should I oil frozen foods before cooking them?
Many frozen items already carry oil from their manufacture, so look at the surface first. If pieces look dry and pale and the packet guidance allows, a light misting helps browning. If they already glisten, adding more usually produces greasiness rather than crispness. When in doubt, cook a small test portion and judge the result before treating the whole batch.
Oil and Seasoning: Building Flavour in the Right Order
Oil does more than prevent sticking; it is the delivery system for almost everything else on the food. Dry seasonings need a lightly oiled surface to cling to, spices bloom in oil’s presence, and salt distributes more evenly across a glossed surface than across a dry one. This is why order matters. Oil first, then seasoning, gives each spice a surface to hold. Seasoning first, then oil, washes part of the seasoning off and pools it in the oil that runs to the bottom of the bowl.
The applicator shapes that order in practice. A bowl toss lets you oil, season and toss again in one vessel, which is why vegetables treated this way taste evenly seasoned to the last piece. A mister lets you set seasoning with a second brief pass, almost like fixing a coat in place. A brush, used after seasoning, tends to move seasoning around, so brush cooks should oil first, season second, and then leave the surface alone, however tempting it is to tidy it.
Marinades complicate the picture helpfully. A food that arrives already coated in an oily marinade usually needs no additional application at all, and adding more produces greasiness rather than flavour. A watery marinade, by contrast, may leave the surface wet but unprotected, and a light brushing of plain oil after the food is arranged can give it the browning help the marinade cannot. Read the surface in front of you, not the recipe’s category, and let its appearance make the decision.
When Less Oil Is the Better Cooking Decision
There is a point in every cook’s learning where the instinct to add oil for safety meets the evidence that less is producing better food. Excess oil does not crisp; it fries unevenly, pools, smokes sooner and leaves food tasting of the oil rather than of itself. Foods with their own fat need little or none. Foods in good coatings often need only the lightest mist to set them. The skill is not generosity but calibration, and calibration comes from reducing gradually across several cooks rather than swinging between extremes.
Watch the basket as your measuring instrument. If oil is pooling beneath the food or the drawer needs degreasing after ordinary meals, the amount is too high for those foods, whatever the recipe said. If food emerges dry, pale and reluctant to brown despite correct temperature and spacing, a little more, applied by the right tool, is the honest fix. Between those two signals lies the narrow band where oil is doing its real work, and each household finds its own band by paying attention for a few weeks.
Record your calibrations where you keep recipes. A note that a favourite dish wants a misting and no more, while another wants a full bowl toss, is worth more than any general quantity a guide could print, because it was measured on your food, in your unit, with your tools. That small written memory is what turns oil application from a recurring guess into one of the most reliable parts of your cooking.
Sharing oil tools in a household with different tastes
Shared kitchens add one more variable: the flavoured oil one cook loves is the contamination another cook tastes in everything. Agree a neutral default for shared tools, keep strongly flavoured oils in a clearly labelled separate applicator, and wash shared brushes with particular care after rich or spiced work. A two-minute conversation about which mister is neutral prevents a month of mysterious flavours, and it costs nothing but the willingness to label a bottle.
Practising the Light Coat: Exercises for a Steadier Hand
Application is a physical skill, and like every physical skill it improves faster with deliberate practice than with hope. Use a plate of raw vegetable pieces as your training ground. Mist them, then turn each piece and look at what the spray actually reached: the tops will gloss while the sides stay patchy, teaching you more about distance and angle in ten seconds than a page of description can. Brush the next batch and compare. The exercise costs one vegetable and repays it across months of better-coated food.
Notice, as you practise, how little oil a surface actually needs to change state. A piece that looks matte but feels faintly slick under a fingertip is usually coated enough; visible beads and pooling mean you have passed the point some time ago. Training your eye to recognise “just coated” is the single most valuable oil skill, because every method, mister, brush or can, becomes accurate the moment the cook can see the target clearly.
Teach the skill onward if your household shares cooking. One demonstration, with the plate exercise, transfers better than any rule about seconds of spraying or dips of a brush, because quantities mean little across different tools and foods while the appearance of a correct coat is universal. A household where everyone can recognise the right look is a household where the food is consistent whoever cooks it.
A Week of Cooking, Three Tools: How the Choice Settles
Watch the pattern across an ordinary week and the comparison stops being theoretical. The mister comes out for the breaded cutlets and the frozen snacks, where touch would ruin the surface. The brush handles the vegetables already arranged, the finishing gloss on cooked food, and the small rescue of a dry patch discovered at the turn. The bowl, which is not a tool in the usual list at all, quietly does the heaviest work of the week on vegetables and wings. Aerosol, if the household keeps it, waits for the rare job where nothing else is at hand.
That settled pattern is the real answer to the question in this guide’s title. No single method wins a week of real cooking, because a week contains too many kinds of surfaces. The cooks who get the best results are not loyalists; they are matchmakers, pairing each food with the application its surface actually needs, and keeping their few tools clean enough that the pairing is always available. Choose your small set, learn its members properly, and the debate dissolves into routine.
Keep the whole subject in proportion, finally. Oil application is a small craft inside a larger one, and its purpose is a better plate of food, not a perfect performance of technique. A cook who understands what each tool does, keeps those tools clean, and applies a light, even coat with whichever is at hand has already captured nearly everything this comparison has to teach. The remaining differences are the pleasant kind, the ones a lifetime of cooking resolves into personal style.
FAQ
Can I skip oil altogether?
For many foods, yes. Some frozen items already contain oil, and others brown acceptably without any. Add a little when you want deeper colour or a crisper surface.
Which oil should I use?
Follow the maker’s advice. Oils vary in how they handle heat, and the manual may recommend types to avoid.
Is a homemade mister as good as a store-bought one?
A refillable pump bottle works the same way whatever its source. Choose one that makes a fine mist, rinse it, and fill it with plain oil, avoiding thick or flavored mixtures that clog the nozzle.
How do I clean a mister or brush?
Wash the brush with warm soapy water and let it dry fully. For a mister, empty it, rinse the nozzle with warm water, and follow the bottle maker’s instructions for cleaning. Old oil left inside turns rancid and clogs the spray.
Can I use a mister with flavored oil?
Thin, flavored oils may work, but pieces of herbs or garlic can clog the nozzle and burn on hot food. Strain the oil first, or use flavorings after cooking instead.
Can I put an oil mister through the dishwasher?
It depends on the design and materials. Some parts may tolerate it while seals or pumps may not, so check the maker's instructions. When in doubt, wash the parts by hand in warm soapy water and let them dry fully.
How often should I clean the nozzle?
Wipe it after each use and rinse the whole mister every so often, depending on how much you use it. If the spray starts to sputter, clean it right away because old oil is the usual cause.
Is it safe to leave a filled mister on the counter?
Keep it away from the stove, the appliance exhaust and direct sun. Heat can degrade the oil and affect the bottle. A cool cupboard is a better spot.
Why does my food taste of old oil?
Stale oil in the bottle, a dirty nozzle or a brush that has held onto residue can all cause it. Clean the tool, check the oil for an off smell and replace it if needed.
Do I need oil for frozen foods?
Often not, since many are pre-treated. Follow the pack directions and add a very light coat only if you want more colour or crispness.
Can a brush damage a non-stick basket?
Apply oil to the food rather than the basket, and use a soft head. Avoid scraping metal tools against the coating, and follow your manual's care advice.
What is the best way to keep oil from smoking?
Use a thin coat, choose an oil suited to the cooking heat, and keep the drawer clean of old drips. Grease pooled in the drawer is a common source of smoke.
Can I use one tool for different oils?
Yes, but clean it between oils if flavours differ strongly. Mixing old and new oil in a mister can also lead to clogs, so empty and rinse before changing.
The Short Version
A mister suits even coverage, a brush suits precision, and an aerosol is quick but needs care with coatings. Choose by the food you cook, and always check the manual first.