A microwave and air fryer combo is a single appliance that can heat with microwaves and also circulate hot air. It saves space compared with owning two, but it needs careful reading of the manual because cookware rules differ between modes. Here is how to weigh one up, from the first measurement to the way it fits into a normal week of cooking.
What You Are Really Buying
These units usually pack a microwave, a fan and a heating element into one cavity. Some also offer a grill or convection mode. Because the cavity has to serve every function, the interior is often smaller than a dedicated microwave of the same outer size.
That trade-off is worth thinking about. If you need a large turntable for wide plates, check the interior carefully. The outer dimensions on a product page tell you what the appliance needs on the counter, but only the interior figures tell you what actually fits inside.
In this guide
Working Through the Choice
- List what you cook. Reheating, defrosting, baking and air frying each use different modes.
- Check the interior. Measure your largest plate and dish, then compare with the turntable size.
- Look at the controls. Combination cooking can be confusing. Clear presets or a simple dial help.
- Read the cookware section. Metal is not allowed in microwave mode, and some dishes are only for convection use.
- Confirm the accessories. A crisping tray or rack is often part of the kit.
Comparison Table
| Factor | Why it matters | What to check |
|---|---|---|
| Interior space | Shared by all modes | Turntable diameter and cavity height |
| Outer size | Counter and vent clearance | Dimensions plus manual spacing |
| Modes | More modes, more settings to learn | Which ones you will use |
| Cookware rules | Wrong dishes can damage the unit | Lists of permitted materials |
| Cleaning | Heating element and walls get splatter | Smooth interior, removable tray |
Handling and Placement
Never run the microwave mode with metal items unless the maker states they are intended for it. Keep vents clear and follow the spacing in the manual. If you plan a built-in installation, hire a licensed professional and follow the installation instructions closely.
Plug the unit into a wall outlet that suits its electrical label, and ask a licensed electrician if you are unsure about the circuit. Combination units draw power for both microwave and heating functions, so the label matters more than it might on a small single-purpose appliance.
A Worked Walkthrough Before You Commit
Use this short routine with a tape measure and a notepad. It takes about ten minutes and prevents the most common disappointments.
- Write down the three dishes you reheat most. Measure the widest one across, and note its height with any lid on.
- Compare that width with the turntable diameter in the product details. If the dish is wider, it will not rotate freely.
- Measure the counter spot, then add the clearance the manual asks for at the back, sides and top.
- Read the section on accessories. Note which trays are for air frying and which are for microwave use.
- Read the cookware section and check that the dishes you already own are allowed in the modes you plan to use.
- Decide which mode you will use daily. If it is plain reheating, make sure that mode is easy to reach without scrolling through menus.
Common Scenarios
People in flats, dorm-style kitchens or small households often welcome a single appliance that covers reheating and light cooking. Larger households that cook daily may prefer separate units, so one can run while the other is free. Think about whether two people ever need to cook at the same moment, because a combo can only do one job at a time.
- A shared student kitchen: counter space is tight, so a combo replaces two items. The interior size matters less than the footprint, but check that a standard dinner plate turns freely.
- A couple who mostly reheat: an air-fry mode is an occasional bonus. Prioritize clear microwave controls and a cavity that fits their usual dishes.
- A family with teenagers: the microwave gets constant use, which can block air frying at busy times. Think about whether a second appliance would help.
- An older relative: simple dials and large labels beat many presets. Check that the door handle and controls are easy to reach.
Mistakes to Avoid
- Ignoring the cookware list. A dish that is fine in one mode can be wrong in another, and metal in microwave mode can damage the appliance.
- Judging by outer size only. Insulation and the heating parts reduce the usable cavity, so the inside may be smaller than expected.
- Blocking the vents. The fan and heating element need airflow. Pushing the unit tight against a wall or under a low shelf ignores the manual.
- Using a tray from another appliance. It may not suit the shape of the cavity or may sit too close to the element.
- Skipping the manual. Combination cooking has its own rules for timing, trays and preheating, which differ by model.
Care and Upkeep Over Time
Wipe the interior after messy use, once it has cooled. Splatter that bakes on during later air-fry sessions is harder to remove. Remove the turntable and any tray, wash them as the maker allows and dry them before putting them back. Keep the door seal and edges clean so the door closes fully. Do not use abrasive pads on coated surfaces unless the care guide permits it, and never spray cleaner into vents or controls.
Quick Troubleshooting
| Symptom | Likely cause | What to try |
|---|---|---|
| Turntable catches or rattles | Dish too wide, or roller ring out of place | Use a smaller dish and reseat the ring as shown in the manual |
| Food browns unevenly in air-fry mode | Crowded tray or uneven layout | Spread food in one layer and turn it as the guide suggests |
| Smoke or odor during first uses | Residue on the heating parts | Read the first-use section of the manual and ventilate the room |
| Unit stops mid-cycle | Door not fully closed or vents blocked | Check the latch and clear the vents, then consult the manual |
| Display or controls unresponsive | Power interruption or child lock on | Check the outlet and the lock setting in the guide |
Glossary
- Turntable: the rotating plate that moves food through the microwave field.
- Cavity: the interior cooking space.
- Convection: heat spread by a fan moving hot air.
- Combination mode: microwaves and hot air working together, as the manual describes.
- Crisping tray: an accessory with holes that lets air reach the underside of food.
- Clearance: the open space the maker requires around the unit.
Capacity and Cavity Shape
A combo appliance squeezes two cooking systems into one box, which means usable interior space is often smaller than the outside suggests. A turntable, a heating element and a fan housing all take room. Look at the interior dimensions in the product listing rather than the stated capacity alone, and compare them with the plates and containers you use every day.
Think about what you want to cook. Wide, shallow dishes suit a microwave. Tall food, such as a whole chicken or a loaf, needs vertical space and clearance from the heating element. If you cook for a family, check that a single batch will feed everyone, or accept that you will cook in rounds.
Turntable or Flatbed
Some designs spin the food and others keep it still. Spinning helps microwave heating spread evenly but limits the size of the dish. A flat floor allows larger rectangular dishes, though you may need to stir or turn the food more often. Decide which trade-off suits your meals.
Reading the Control Panel Before You Buy
An appliance that does two jobs often has a busier panel. Look at product photos and videos to judge whether the controls are clear. A dial and a few labeled buttons are quick to learn. A touchscreen with many presets can be convenient or confusing depending on your habits.
- Check that switching between microwave, air-fry and combined modes takes few steps.
- Look for a clear display that you can read from a distance.
- See whether a child lock or other lock feature is offered, if you need one.
- Confirm that there is a simple stop or cancel control.
- Find out whether the manual and presets use the same units you do.
It also pays to see whether the appliance remembers your last setting, which can save time on repeated tasks.
Cookware Rules Across Modes
This is the part of ownership that most surprises new users. Microwaves and air fryers have opposite relationships with metal. In microwave mode, metal can be a problem unless the manual specifically allows certain items. In air-fry mode, a metal tray is often required. A combo appliance usually has instructions that separate these cases, and you must follow them closely.
| Mode | Usually involves | Check the manual for |
|---|---|---|
| Microwave only | Microwave-safe glass, ceramic or plastic | Which materials are allowed and any rack use |
| Air fry only | The supplied tray or rack, heat-resistant dishes | Which accessories and in what position |
| Combined | Special cookware named by the maker | Whether any extra items are permitted |
Keep the accessories in a place you can find them, since losing the tray defeats the point of the air-fry mode. If a tray gets damaged, check whether the maker sells replacements.
Everyday Cooking Examples
Thinking through real meals shows whether a combo fits your life. Reheating a bowl of soup is a microwave job. Crisping leftover pizza or reviving fries is an air-fry job. Baking a small potato quickly might use both: a short microwave burst to soften it and an air-fry stage to crisp the skin, if your manual describes such a method.
- Write down the five dishes you cook most often.
- Mark which of them would use microwave, air-fry or both.
- Check whether each fits the cavity size.
- Decide which tasks you would still do on the hob or in a full oven.
If the list leans heavily toward one mode, a simpler appliance may do the job. If it is evenly split, a combo begins to make sense.
Space Planning for the Counter and Cupboard
Combo appliances are often as deep and tall as a regular microwave, sometimes larger because of the vents. Measure your worktop and the shelf above it. Check that the door can open fully without hitting a wall or cupboard, and that the cable reaches an outlet without stretching. Follow the maker’s guidance on clearance around the sides, back and top so the appliance can breathe.
Weight is another factor. A combo is usually heavier than a plain microwave, so check that your counter or shelf can hold it. If you plan to move it for cleaning, make sure you can lift it safely, perhaps with another person.
Learning Curve in the First Month
Expect a short period of adjustment. Presets are a first guess, not a promise, and your own timing will drift from the label. Treat the first few weeks as a time to collect notes. Cook one familiar food in each mode, write down how long it took, and compare the result with your expectation.
- Begin with simple items such as frozen snacks or leftovers.
- Use short time increments and check often.
- Keep a card nearby with the settings that worked.
- Follow the manual’s guidance on preheating, if it advises it.
By the end of the month you will probably know which two or three modes do most of your work, and you can stop worrying about the rest.
Noise, Heat and Kitchen Comfort
Fans make noise, and a fan combined with a microwave’s hum may be louder than either alone. If your kitchen is open to a living area, look for comments about noise in the product listing. Heat output is also worth considering. Air-fry mode can warm the surrounding area, so allow some room for ventilation and avoid placing the unit directly beneath cabinets unless the manual says it is fine.
Smells may travel. Frying-style cooking, even with little oil, can produce aromas that a plain microwave does not. A window or an extractor fan helps. If you share a flat with others, this may be worth discussing before the first fish dinner.
Warranty, Support and Spare Parts
Because the appliance has more parts than a basic microwave, it is worth reading about support options. Look for a clear warranty statement, a way to contact the maker, and a list of replaceable parts. Keep your receipt and the model number somewhere safe.
For any repair involving electrical components, use a qualified technician or the maker’s service route rather than opening the casing yourself. Check how long the maker says spare trays, turntables and filters will be available.
Pre-Purchase Checklist
- I have measured my counter, the shelf above and the door swing.
- I know which dishes I will cook and whether they fit.
- I have read the cookware rules for each mode.
- I have checked what accessories are included and whether replacements are available.
- I understand the warranty and how to reach support.
- I have a plan for the old microwave or toaster oven I might replace.
If you can tick every point, you are ready to choose with confidence, knowing what the appliance will do well and where you will still reach for another tool.
Wattage, Power and Your Home Circuit
A combo appliance with a microwave and a heating element can draw a lot of electricity, more than a basic toaster or a simple air fryer. Look at the power rating in the listing and compare it with the supply in your home. Plug it straight into a wall socket rather than an extension lead unless the maker explicitly allows otherwise, and avoid running it at the same time as other high-power appliances on the same circuit.
If you live in an older property or share a circuit with many devices, consult a licensed electrician when you have doubts. Do not attempt to change fuses, wiring or sockets yourself. The manual states the power requirements, and following them is the safest route.
Running Costs in Everyday Terms
Instead of chasing exact figures, think about the pattern of use. Small portions cooked quickly in a compact chamber often need less energy than heating a full-size oven. Longer jobs for large dishes may favor your main oven. Look at the maker’s information and your own habits to decide.
Using Both Modes in One Recipe
The real appeal of a combo is using each mode where it excels. Microwaves heat water inside food rapidly, which helps with softening and reheating. Hot air dries and browns the surface. A dish that needs both can sometimes be handled in a single appliance without moving it.
- Soften or heat the center with the microwave mode, as your manual describes.
- Switch to air-fry mode to dry and brown the outside.
- Check the surface at short intervals and stop when it looks right.
- Let the food rest briefly before serving.
Some models have a combined mode that runs both together. Read the section carefully, since the rules about cookware and food types can be stricter in that mode.
Cleaning a Two-in-One Cavity
Keeping a combo clean takes a bit more care than a plain microwave. Grease from air-fry cooking can coat the walls and the fan area, while splatter from microwave cooking lands on the ceiling and door. Wipe the interior after each use when it is cool, and clean the removable parts according to the manual.
- Wipe the door seal and edges where crumbs collect.
- Wash trays and racks by hand or in a dishwasher only if the maker says it is fine.
- Use a soft cloth and mild soap, avoiding abrasive pads on coated surfaces.
- Do not spray cleaner into vents or controls.
- Unplug the unit before any deeper cleaning.
A damp cloth heated briefly with a bowl of water in the cavity can loosen stuck-on splashes, but only use methods approved in the manual for your model.
Foods That Suit a Combo, and Foods That Do Not
Understanding the limits saves frustration. Combos handle small to medium portions, reheating, crisping and quick snacks very well. They struggle with very large roasts, tall cakes and foods that need long, slow cooking.
| Good fit | Mixed fit | Poor fit |
|---|---|---|
| Leftover pizza and pastries | Small baked potatoes | Whole large roasts |
| Frozen snacks | Small cakes and muffins | Tall loaves |
| Reheated meals needing crisp tops | Chicken pieces | Very large batches |
If you often cook for six or more, a full oven still earns its place. Think of the combo as a fast, flexible helper rather than a replacement for everything.
Safety Habits to Build Early
Good habits matter more with an appliance that mixes technologies. Never run it empty unless the manual says so. Keep the door seal clean so it closes properly. Do not use sealed containers or closed jars, which can build pressure. Use oven gloves when removing trays, because the cavity and the accessories get hot in air-fry mode.
If you notice sparks, unusual smells, or damage to the door or seal, stop using the appliance, unplug it and contact the maker or a qualified technician. Follow the manual for every mode rather than relying on habits from other appliances.
Comparing Combo Types by Their Heating Layout
Not every combo builds the hot-air side in the same way. Some place a fan and element at the back, others at the top, and some use a convection arrangement shared with a grill. The layout affects which shelf positions work, how food browns and how much headroom you need. The product listing and diagram usually show where the heating parts sit, so study them before choosing.
| Layout | Typical strength | Question to ask |
|---|---|---|
| Top-mounted element | Good surface browning | How much space is there above the tallest dish? |
| Rear fan and element | Even air movement | Is the back clear of racks and trays? |
| Shared grill and convection | Flexible cooking | Does the manual explain each mode clearly? |
If photos are limited, look for the manual online and read the section on racks and positions. Notes about where to place a tray tell you a lot about how the appliance is designed to work.
Finally, think about future needs. If you plan to cook larger meals later or move to a bigger household, consider whether the cavity will still serve you. Buying slightly bigger than your current need can save a second purchase, provided it fits the space and you will use it.


Products Worth a Look
As an Amazon Associate, Air Fryer Kitchen Supply earns from qualifying purchases. These picks come from our guide: 6 Best Countertop Microwaves: Sizes and Watts Compared (2026).
-
Chefman 0.7 Cu Ft Microwave
 Chefman Compact Countertop Microwave
-
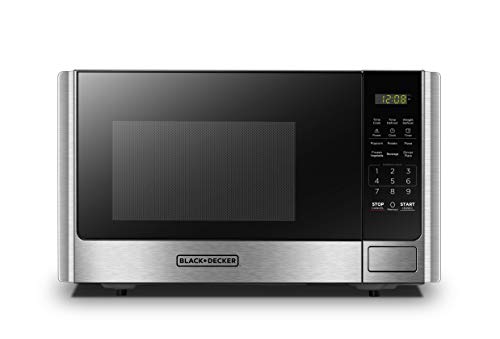
BLACK+DECKER 0.9 Cu Ft Microwave
 BLACK+DECKER Countertop Microwave Oven
-
COMFEE' Retro Microwave
 COMFEE' Retro Countertop Microwave Oven
Putting the Buying Criteria Into Practice
It is easy to nod along with a list of features and still end up with the wrong combo unit. The criteria earlier in this guide become far more useful when you translate them into your own kitchen, your own dishes and your own week. Start with the physical fit, because nothing else matters if the basics are wrong. Work through the counter or shelf footprint of a larger combination appliance, the door swing and the space to load both shallow and tall dishes, the ventilation clearance the maker specifies, and the outlet position so the cord is not trapped behind the unit. Write the numbers down rather than trusting memory, and measure twice in different spots, because floors, counters and cabinet runs are rarely perfectly square or level.
Next, be honest about the work the combo unit will actually do. For most households that means reheating a meal with the microwave and then crisping its top, baking or roasting small dishes in the oven mode, defrosting ingredients before air frying them, and handling everyday microwave jobs like warming drinks and melting butter. Notice which of those jobs happens daily, which happens weekly and which only sounds appealing in theory. A model that handles the daily jobs gracefully will satisfy you far more than one that is optimised for an occasional task while making everyday use awkward. A combination machine replaces two appliances only if both halves genuinely suit your habits, so judge the microwave side and the air fry side as separate purchases that happen to share a box.
Controls and settings deserve the same practical treatment. List the foods and jobs from your real routine, then check that the controls cover them in a way you find obvious at a glance, tired, on a weekday evening. If several people will use the combo unit, favour clarity over cleverness: settings that everyone in the household understands get used correctly, while complicated sequences get guessed at, and guessed settings are where disappointing results usually begin.
Finally, think about what happens around the cooking or the wash itself. Where will hot items rest, where will doors, drawers or lids be while you load and unload, and what else competes for the same counter or floor space at that moment? Walking through one complete task in your head, from preparation to putting everything away, reveals clashes that a specification table never will. Shoppers who do this short exercise rarely return appliances, because the problems show up on paper first.
Matching the Combo unit to Real Life in Your Home
Guides often describe appliances as if they were used in a test kitchen, one careful task at a time. Real homes are messier and more interesting than that. The three situations below cover how most households actually live with an air fryer microwave combo, and checking a candidate model against each of them is a quick way to spot a mismatch before money changes hands.
A busy weekday routine
On a weekday the combo unit has to fit between everything else the household is doing. Think about reheating a meal with the microwave and then crisping its top while someone else is making tea, packing a bag or clearing the counter. In that setting, quick setup, clear controls and an easy clean-up afterwards matter more than maximum capacity or the longest feature list. Judge every candidate by how it behaves on your most ordinary day, not your most ambitious one.
Weekends, guests and bigger jobs
Weekends test a different side of the same appliance: larger quantities, longer sessions and food that matters a little more. Whether it is baking or roasting small dishes in the oven mode, the question is whether the combo unit scales up calmly or forces you into awkward batches, constant checking and a crowded counter. A model that handles the weekend job in a relaxed way, even if it is not the largest available, usually suits a household better than an oversized one that dominates the kitchen all week.
Sharing the space with others
Few kitchens belong to one person. Partners, children, flatmates and visiting family will all use the combo unit in their own way, and they will not read the manual as carefully as you did. Simple, forgiving operation, parts that go back together in an obvious way and controls that cannot easily be set to something extreme all protect your purchase in a shared home. If the appliance only works well in expert hands, it will spend its life being used slightly wrong.
Setup, First Use and Everyday Habits
When the combo unit arrives, resist the urge to judge it in the first ten minutes. Unpack it where there is room to work, keep the packaging until you are sure it is staying, and read the manual sections on placement, clearances and first use before switching anything on. Makers specify ventilation gaps, stable surfaces and connection requirements for a reason, and following them protects both performance and your warranty paperwork. Check that doors, drawers or lids move freely in the final position, not just where the appliance first landed.
Use the first week as a learning period rather than a verdict. Start with familiar, forgiving tasks, note which settings you used and what the result was, and keep those notes somewhere simple like a phone or a card inside a cupboard door. Small adjustments based on your own ingredients, dishes and habits almost always matter more than generic advice. Within a fortnight most households have a personal shortlist of reliable settings for reheating a meal with the microwave and then crisping its top and the other jobs they repeat, and from that point the appliance stops feeling new and starts feeling like part of the kitchen.
Build the small safety and comfort habits early. Hot surfaces, steam and heavy or awkward loads are all easier to manage when the landing spots, oven gloves, tongs or trivets live within reach of the combo unit rather than across the room. Keep cords and hoses arranged so they are not a trip or snag hazard, and make sure everyone who will use the appliance knows the basics: what gets hot, what should never be forced, and when to simply switch off and let things cool or settle before investigating a problem.
Cleaning, Care and Storage Habits That Protect Performance
Most performance complaints trace back to simple build-up rather than faults. For this type of appliance, the parts that deserve regular attention are the interior cavity and its walls, the turntable or tray and any air fry basket or rack supplied, the door seal and window, and the control panel. A brief wipe or rinse after use, while residue is still fresh, takes a fraction of the effort of a monthly rescue job and keeps flavours, odours and drainage or airflow problems from developing. Mild washing-up liquid, warm water and a soft cloth handle the great majority of everyday cleaning without risking damage to finishes.
Set a gentle rhythm rather than an ambitious one: a quick clean as part of clearing up, a slightly deeper clean on a regular day that suits your household, and a periodic check of seals, filters and moving parts as the manual describes. Always let hot components cool fully before cleaning, and check the manual before putting any removable part in a dishwasher or soaking it for a long period, because coatings, seals and electrical parts each have their own limits. Parts replaced in the correct order, fully dry, make the next use smoother as well.
Storage habits matter more than most buyers expect. Accessories that live scattered in different drawers tend to stop being used, while the pieces you reach for daily deserve a home within arm’s reach of the combo unit. Keep the area around the appliance clear enough that air vents, doors and drawers can do their job, and avoid stacking heavy items on or against parts that were not designed to carry weight. A tidy zone around the appliance is not about appearances; it is what makes the quick wipe-down and the correct setup happen by default.
How the Picks in This Guide Compare With Each Other
If you are torn between the options covered earlier in this guide, compare them in a fixed order so the decision stays grounded. Start with fit: which of them sits most comfortably in the space you measured, with doors, drawers or lids used the way you will use them daily? Then compare the layout against your real dishes, pans and routines, because interior arrangement decides how much of the stated capacity you can actually use. Only after those two practical tests should features and settings decide between the remaining candidates.
Expect every shortlist to involve a trade-off. A larger or more capable option usually asks for more space, more cleaning attention or a steeper learning curve, while a simpler one may ask you to cook or wash in an extra batch now and then. Neither direction is automatically right. The honest question is which inconvenience you would rather live with every week: the occasional extra batch, or the daily presence of a bigger, more complicated machine. Your answer to that question is usually the correct choice between two otherwise close picks.
A useful final test is to re-read the honest limitations noted for each pick earlier in this guide and match them against your own habits. A limitation only matters if it touches something you do often. If the drawback concerns a task you perform twice a year, it should carry little weight; if it affects reheating a meal with the microwave and then crisping its top, it should probably rule that model out. Buyers who weigh limitations against their own routine, rather than against an imaginary perfect appliance, are consistently the ones who stay satisfied.
Fine-Tuning the Final Decision
When two models are still level after all the practical checks, sleep on it and then re-test the finalists against one question: which one makes reheating a meal with the microwave and then crisping its top easiest in your kitchen, with your dishes, your counter and your household? That single job, repeated week after week, is the experience you are buying. Everything else, the extra programme, the styling detail, the clever accessory, is decoration around that central answer, and it should only break a tie when the central answer is genuinely equal.
Before ordering, do one last pass over the product listing with fresh eyes. Confirm the dimensions shown match the model variant you intend to buy, check which accessories and fittings are listed as included, and read the maker’s own placement and clearance guidance once more against your measurements. Listings for similar models are easy to confuse, and five careful minutes here prevent the most common delivery-day disappointment of all: the right appliance family in the wrong size or configuration.
Think briefly about the longer view as well. Kitchens change slowly: a household grows or shrinks, cooking habits shift, a worktop gets replaced. A combo unit chosen for honest, flexible everyday performance tends to survive those changes gracefully, while one bought for a single narrow scenario can feel wrong surprisingly quickly. You cannot predict everything, and you do not need to. Choosing the model that serves your most common routines, in the space you actually have, is the closest thing to future-proofing that appliance buying offers.
Mistakes That Lead to Disappointment and Returns
Talk to anyone who has returned a kitchen appliance and the story is rarely about a dramatic fault. It is about a quiet mismatch between the product and the home it landed in. The mistakes below are the ones that come up again and again when people shop for an air fryer microwave combo, and every one of them is avoidable with a few minutes of honest checking.
- Buying by the headline number alone. Capacity, power or size figures are measured in standardised ways that may not match your dishes, pans or portions. Judge the combo unit by how your own items fit and how your own tasks flow, not by the biggest number on the page.
- Skipping the measuring step. Most returns and most frustration come from fit, and fit is decided by the counter or shelf footprint of a larger combination appliance and the other checks described above. Ten minutes with a tape measure is the cheapest insurance in the whole purchase.
- Forgetting the delivery and the doorway. A combo unit that fits its final home perfectly can still be defeated by a narrow hallway, a tight turn or a door that will not open once the appliance is in place. Walk the route and think through the final positioning before ordering.
- Paying for features your routine never touches. Extra programmes and functions are only valuable if they map onto reheating a meal with the microwave and then crisping its top, baking or roasting small dishes in the oven mode, defrosting ingredients before air frying them, and handling everyday microwave jobs like warming drinks and melting butter. If a feature does not serve one of your regular jobs, it adds cost, complexity and cleaning rather than value.
- Ignoring cleaning until it becomes a project. The parts listed earlier, including the interior cavity and its walls, are quick to maintain little and often and miserable to rescue later. If a model’s cleaning routine looks like more than you will honestly do, believe that instinct and choose differently.
- Assuming everything you need is in the box. Before ordering, check the product listing carefully for which accessories, fittings and connection parts are included and which are sold separately, so the first day is not spent waiting for a small essential part.
Notice what your current setup already does well. The habits, layouts and workarounds that work in your kitchen today are worth preserving where possible, and a new appliance that supports them will feel like an upgrade immediately. Change is only an improvement when it improves the routines you actually repeat, so let your proven habits carry real weight in the final decision.
Keep a single notes page for the whole purchase. Measurements, delivery details, the settings that worked in your first week and the date of any deeper clean all belong in one place, whether that is a notebook in a kitchen drawer or a note on your phone. Appliances are owned for years, and the household that can find its own notes solves small problems in minutes instead of rediscovering the same answers every few months.
A cardboard template is an old trick that still works. Cut a piece of cardboard to the footprint of the model you are considering and live with it on the counter or floor for a day. Open the cupboards around it, cook a meal beside it and see whether the space still flows. This five-minute rehearsal exposes awkward corners, blocked drawers and cramped walkways that measurements alone can make look acceptable on paper.
Involve the other people who will use the appliance before you buy, not after. Ask what they find annoying about the current setup, which jobs they use most and whether the controls on your shortlist make sense to them at a glance. A purchase that answers the whole household’s complaints settles in quietly, while one chosen for a single person’s preferences tends to attract a running commentary at every meal.
FAQ
Is a combo better than separate appliances?
It depends on space. A combo frees counter area, while separate units can each be larger and simpler. Choose by which constraint matters most to you, and remember that two appliances can run at the same time.
Can I use any tray in air-fry mode?
No. Use only accessories listed for that mode in the manual, since some trays are meant for microwave use only. Using the wrong one may damage the unit or the tray.
Can I put metal cookware inside?
Only where the manual says a specific accessory is allowed in a specific mode. Otherwise keep metal out of microwave mode entirely, including foil and dishes with metal trim.
Does it need extra space around it?
Yes. The manual lists clearance for the back, sides and top. Follow it so heat and steam can escape.
Will it replace my oven?
For small meals it can stand in, but the cavity is limited. Large dishes or several trays at once usually suit a full oven better.
How long should I spend comparing models before I decide?
Long enough to measure your space, list the jobs the appliance must do weekly and read the limitations of your shortlist carefully. For most households that is an evening of focused work rather than weeks of research. Beyond that point, extra comparison tends to circle around minor features while the deciding factors, fit, layout and ease of cleaning, were settled early on.
What should I check on the day the appliance arrives?
Inspect the packaging and the appliance itself for transit damage before signing anything, confirm the model and included parts match your order, and keep the manual, receipt and warranty details together in one place. Test the basic functions promptly, while returning or exchanging is still straightforward, rather than leaving the box unopened in a corner for a month.
Is it worth choosing a bigger model to be safe?
Only if your routine genuinely produces bigger jobs. An oversized appliance takes more space, often uses more energy and water per small load, and can be slower to clean. A model matched to your real portions, run comfortably within its limits, usually gives better everyday results than a large one that spends its life half empty.
How can I tell whether a model suits my routine before buying?
Write down everything you expect it to do in a normal week, then check each job against the layout, controls and limitations described in this guide. Pay special attention to the task you repeat most often, because that experience, repeated hundreds of times, is what you are really buying.
What is the simplest cleaning routine that actually works?
Little and often beats occasional and heroic. Wipe or rinse the parts that meet food, residue or grease as part of clearing up, let everything dry before reassembling, and follow the manual for periodic deeper cleaning of filters, seals and hidden areas. A routine you can finish in a couple of minutes is one you will still be doing next year.
Should I keep the packaging and paperwork after setup?
Keep the box and packaging at least until the appliance has been used several times and you are confident it is staying, because returns and warranty claims are far easier with the original packaging. File the receipt, manual and warranty details together permanently. If storage space is tight, flatten the box once the trial period has passed, but never discard the paperwork while you own the appliance.
What if my needs change a year or two from now?
Choose for the household you have today, weighted slightly towards the direction you are clearly heading, such as cooking more often or hosting more regularly. Appliances bought for an imagined future self often disappoint the present one daily. A well-matched model that serves current routines properly also tends to cope with gradual change, because everyday tasks like reheating, washing up or storing a weekly shop do not change as dramatically as we expect.
When is the simpler model the smarter purchase?
When it covers your regular jobs completely and its limitations only touch things you rarely do. Fewer programmes and parts usually mean easier cleaning, clearer controls for everyone in the household and less to go wrong. Choose complexity only when a specific feature solves a problem you actually have.
The Short Version
A combo suits kitchens where space is tight and cooking is simple. Check interior size, controls and cookware rules before anything else. Follow the maker’s instructions for use and clearances, and use a licensed professional for any built-in installation or electrical question.