A pebble ice maker, often sold as a nugget ice maker, makes soft, chewable ice in small compressed pieces instead of hard cubes. The ice is made by scraping and pressing flakes together, which leaves it airy and easy to bite. It soaks up the flavor of a drink, packs closely in a cup and is a favorite for iced coffee, soda, cocktails and smoothies. Most home models are countertop appliances that need a water source and a little patience while the first batch builds.
The six machines below cover a range of brands and styles, from a well-known smart model to several plain, practical countertop units. We have not used these products ourselves, and we are working from general product knowledge. Sizes, ice output, tank capacity and features change between versions, so please confirm every detail on the current listing before you buy.
As an Amazon Associate we earn from qualifying purchases. Links below are affiliate links, and they do not change the product information we give.
What to Look For
| Feature | Why it matters |
|---|---|
| Footprint | These machines are bulky, so measure the counter and the space above it before ordering |
| Water supply | Most home units use a manual fill reservoir; a few offer a hose connection |
| Ice bin | A larger bin means fewer refills of ice, but the ice slowly melts in any bin |
| Noise | Compressor hum and ice dropping into the bin can be noticeable in a quiet kitchen |
| Cleaning routine | A self-cleaning mode and an easy drain make upkeep far less of a chore |
| Controls | Simple buttons are fine for most; app control is a bonus, not a necessity |
Think about how you drink. A household that goes through a pitcher of iced drinks every afternoon needs a different machine than a single person who wants a cup of ice with dinner. Match the bin size and the speed of production to your habits rather than to the biggest number on the box.
In this guide
Specs at a Glance
| Machine | Ice type | Water fill | Notes |
|---|---|---|---|
| GE Profile Opal 2.0 | Nugget | Manual reservoir | App connectivity; optional side tank accessory |
| Frigidaire Countertop Crunchy Nugget Ice Maker | Nugget | Manual reservoir | Compact stainless-style design |
| Gevi Household Nugget Ice Maker | Nugget | Manual reservoir | Self-cleaning cycle |
| Euhomy Nugget Ice Maker | Nugget | Manual reservoir | Self-cleaning cycle; ice scoop included |
| Newair Countertop Nugget Ice Maker | Nugget | Manual reservoir | Stainless exterior |
| hOmeLabs Nugget Ice Maker | Nugget | Manual reservoir | Countertop size; check the listing for capacity |
The 6 Best Pebble Ice Makers for Home
Top pickBest for households that want a polished, well-known machine
1. GE Profile Opal 2.0 Nugget Ice Maker
The Opal line is probably the best-known name in home nugget ice. The 2.0 version is a countertop machine with app connectivity, so you can schedule ice making or check its status from a phone. The design is tidy and the machine is meant to look at home next to a coffee maker rather than hide in a cabinet.
Check the listing for the current water reservoir details and for the optional side tank, which lets you connect a larger supply of water if you do not want to refill by hand. Also look at the exact footprint, because the machine stands fairly tall.
The trade-off is cost and the fact that it is a larger purchase than a basic unit. Many buyers find the brand recognition and the support network reassuring, though, and replacement parts are easier to find for a model this popular.
Suits: households that want a polished, well-known machine. Strengths: brand reputation and app control. Weaknesses: a larger footprint and a higher spend than basic models. Skip it if you only want the simplest, lowest-cost option.
View GE Profile Opal 2.0 on Amazon
Best for buyers who like a familiar appliance brand
2. Frigidaire Countertop Crunchy Nugget Ice Maker
Frigidaire is a long-established appliance brand, and its countertop nugget machine is aimed at people who want chewable ice without a specialty-brand price tag. The unit is a self-contained countertop appliance with a manual water fill and a front-facing ice bin.
Because Frigidaire has offered several countertop ice makers over the years, make sure the listing you open is the nugget type and not a bullet-style cube maker. Read the description for the stated bin size and for any cleaning cycle, and compare the footprint to your counter.
The trade-off with a mainstream-brand unit is that features are often modest. You may not get an app or a long list of settings, but for many kitchens a plain machine that makes soft ice is exactly enough.
Suits: buyers who like a familiar appliance brand. Strengths: simple operation and a recognizable name. Weaknesses: fewer extras than app-connected models. Skip it if you want smart features.
Best for small kitchens and first-time buyers
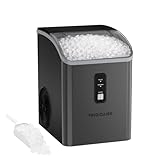
3. Gevi Household Nugget Ice Maker
Gevi sells a number of small kitchen appliances, and its household nugget ice maker is one of its better-known products. It is a countertop machine with a self-cleaning function and a compact body that suits smaller kitchens and apartments.
When you read the listing, look at the stated ice bin size and the water tank size, and note how often the machine will need a refill. Some buyers like to place a drain hose or small bucket under the drain plug, so check that the drain is reachable from the front or back of your counter space.
The trade-off is that a lower-cost machine can feel lighter and louder than a premium one. If the machine will sit in a living area, read buyer comments about operating sound.
Suits: small kitchens and first-time buyers. Strengths: a compact body and a self-cleaning function. Weaknesses: sound and build can feel more basic. Skip it if quiet operation is your top priority.
View Gevi Household Nugget Ice Maker on Amazon
Best for budget-friendly shoppers
4. Euhomy Nugget Ice Maker Countertop
Euhomy offers several countertop ice machines, and its nugget version is a common budget-friendly choice. It generally comes with a scoop and a self-cleaning mode, and it uses a manual water reservoir like most home machines in this class.
Euhomy sells both nugget and bullet-style ice makers, so confirm the ice type on the listing before you order. Look at the capacity details, the dimensions and the cleaning instructions. Also check what the warranty covers, since countertop ice makers contain a compressor and moving parts.
The trade-off is that a value-focused machine usually leaves out the polish of the pricier brands. For plenty of households, that is a fair exchange for chewable ice at a friendlier cost.
Suits: budget-friendly shoppers. Strengths: included scoop and a self-cleaning cycle. Weaknesses: fewer premium touches. Skip it if you want a big-brand service network.

5. Newair Countertop Nugget Ice Maker
Newair is known for ice makers, wine coolers and other small cooling appliances, and its countertop nugget machine brings that experience to chewable ice. The exterior is generally stainless steel, which suits kitchens with other metal appliances.
Newair has sold more than one nugget model, so read the listing carefully and match the stated bin size, water capacity and dimensions to your needs. Look too at whether the machine includes a drain and how the manufacturer describes cleaning.
The trade-off is that a bigger machine takes up more counter. If you are short on space, compare the footprint with the more compact choices here.
Suits: people who like a steel look and a cooling-appliance specialist. Strengths: a durable-looking exterior. Weaknesses: can be large and heavy. Skip it if counter space is very tight.
View Newair Countertop Nugget Ice Maker on Amazon
Best for shoppers who want a straightforward countertop unit
6. hOmeLabs Nugget Ice Maker
hOmeLabs sells compact home appliances, including countertop ice makers, and its nugget machine targets people who want soft ice in a simple unit. As with the others, it works from a manual water reservoir and produces ice in a bin you can scoop from.
Because hOmeLabs has offered several ice makers, read the listing to be sure you are looking at the nugget type. Check the stated dimensions, the capacity details and any notes on cleaning or descaling.
The trade-off is limited information on some listings. Look for clear photos and buyer questions that answer how loud it runs and how often the water needs topping up.
Suits: shoppers who want a straightforward countertop unit. Strengths: a plain design and easy operation. Weaknesses: details can be thin on the listing. Skip it if you want an app or a side tank.
How to Choose a Pebble Ice Maker
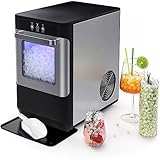
Start with where the machine will live. A nugget ice maker needs a flat, level surface, some clearance around the vents and an outlet within reach of the cord. Leave room above the machine to lift the lid and fill the reservoir, and keep it away from the stove or any heat source, because a warm spot makes the compressor work harder.
Next, think about water. Most home models use a manual fill, so you pour water into a reservoir when the indicator tells you to. If you hate refilling, look for a machine that offers a hose connection or an optional side tank. Even then, it is worth confirming what the plumbing connection requires before you commit.
Finally, weigh the extras. A scoop, a self-cleaning cycle and a clear window to see the ice level are small conveniences that you will use every day. App control and scheduling sound nice, but plenty of owners find that a simple on-off button is all they need.
Nugget Ice Versus Cubed Ice
Pebble ice is made differently from the hard cubes in a freezer tray. Water freezes onto a cold cylinder, a scraper shaves off flakes and an auger presses them into small, soft pieces. The result has tiny air pockets, which is why it is easy to chew and why it cools a drink quickly.
Because the pieces are small and porous, they melt faster than dense cubes in a warm drink. That is fine if you plan to finish the glass, but it can water down a slow sipper. Many people use nugget ice for fast drinks like iced coffee, soda and smoothies, and keep a tray of larger cubes for a drink that sits a while.
Also note that nugget machines are not always built to produce a huge amount quickly. If you host big parties, you may want to treat the machine as a daily convenience and buy bagged ice for large gatherings.
Setup and First Use
When the box arrives, unpack the machine and let it stand upright for the time the manual recommends before plugging it in. This helps the cooling system settle after shipping. Wipe the inside of the bin and the reservoir with a clean damp cloth, and rinse the scoop.
Fill the reservoir with fresh water up to the marked line, then start the machine. The first batch often takes longer than later ones, and the early ice may be thrown away, since it can contain dust from the packaging. Follow the manufacturer’s startup instructions for the exact steps.
Place the machine on a stable surface and, if it has a drain, decide how you will handle the water that comes out. A small towel under the front helps with drips, and a quick wipe after each refill keeps the area tidy.
Care and Maintenance
Ice machines need regular cleaning, because standing water and a cold, damp bin are a good place for film and mineral scale to build up. Many machines include a self-cleaning cycle, and the manufacturer’s manual explains how often to run it and which cleaners are safe. Follow that guidance rather than guessing.
- Empty and wipe the bin when you are not using the machine for several days.
- Use fresh water, and consider filtered water if your tap water is hard.
- Descale as the manual directs when mineral build-up appears.
- Keep the air vents clear of dust and clutter.
- Unplug the machine before any deep cleaning.
Mistakes to Avoid
- Buying without measuring the counter and the cabinet above it.
- Putting the machine next to the stove or in direct sun.
- Skipping cleaning cycles and letting scale build up.
- Assuming every listing from a brand is the nugget type and not a cube maker.
- Expecting a countertop unit to supply enough ice for a large party.
- Ignoring the sound level when the machine will sit in an open living space.
What Pebble Ice Is and Why People Like It
Pebble ice, sometimes called nugget ice, is soft, chewable ice made of small compacted pieces. It absorbs the flavor of drinks, cools quickly and is easy to chew, which is why many people enjoy it in sodas, iced coffee and cocktails. Countertop pebble ice makers produce it at home, usually with a water reservoir you fill and a bin that collects the ice. Because they are appliances with water, a pump and a cooling system, it helps to understand how they work and how much attention they need before you buy.
Think about how you plan to use the ice. A household that fills a few glasses a day has different needs from one that hosts parties or keeps a cooler stocked.
Output, Bin Size and Counter Space
Listings give a daily ice output and a storage bin capacity. Output tells you how much ice the machine can make over a day, while the bin shows how much it holds at once. A machine may produce a lot over time yet hold only a small amount, so you might need to refill the bin during a party. Measure the counter space, the height under cabinets and the clearance around vents. Allow room for the water reservoir to be lifted out and refilled.
| Check | Why it matters |
|---|---|
| Daily output | How much ice per day, under stated conditions |
| Bin capacity | How much ice is ready at once |
| Footprint and height | Fit on the counter and under cabinets |
| Reservoir size | How often you refill |
Water Supply, Draining and Noise
Some machines use a manual fill reservoir, while others connect to a water line. Check the listing for the supply type and any drain needs. Machines melt ice into a drain tray or require a drain hose, so find out how excess water leaves the unit. Noise matters in open kitchens, since the compressor and the pump make sound while the machine runs. Look at the maker’s notes on noise and think about placement. If you need a water line connection, follow the maker’s instructions and use a licensed plumber for plumbing work.
Cleaning Schedule That Keeps Ice Fresh
Ice makers need regular cleaning to prevent buildup and odors. Follow the manual for how often to run a cleaning cycle and which cleaners are suitable. Empty and wipe the bin, rinse the reservoir and change the water if the machine has been idle. Use clean water, and consider a water type that suits your area as the maker advises, because mineral buildup can affect parts. Replace filters as directed.
- Empty and dry the bin if you will not use the machine for days.
- Clean the reservoir regularly.
- Follow the maker’s descaling steps.
Placement and Setup
Place the machine on a level surface with space around the vents. Let it stand before powering it on if the manual says to. Keep it away from heat sources and direct sun, and keep the cord out of walkways.
Pebble Ice Questions Before You Buy a Countertop Machine
Ask how long the first batch takes, whether the machine stops when the bin is full and how it handles a power cut. Look at whether the water reservoir is easy to remove and whether the bin has an insulated lid. Think about where you will keep a spare reservoir of water, and check how the machine signals that it needs more water. Read the care guide in the listing so you know how to deal with scale, and keep spare filters or cleaning supplies at home.
Pebble Ice Maker FAQ
Is pebble ice the same as nugget ice?
Yes, the terms are used interchangeably. Both describe small, soft, chewable pieces of compressed ice. Some people also call it sonic ice or chewable ice.
Do these machines need a water line?
Most home countertop units use a manual reservoir that you fill by hand. A few can connect to a water supply or an optional side tank. Check the listing for the options on your chosen model.
How quickly do they make ice?
The first batch usually takes a while, and later batches arrive more steadily. Exact speed depends on the model, the room temperature and the water temperature. The listing or manual gives the maker’s own estimates.
Are they loud?
Most have a compressor hum and a clatter when ice drops into the bin. Sound levels vary between models, so read buyer feedback if the machine will sit near where you sleep or work.
How often should I clean one?
Follow the manufacturer’s cleaning schedule. A common habit is to wipe the bin regularly and run the cleaning cycle on a set schedule. Cleaning more often is safer if the machine is used daily.
Can I keep the ice for days?
The bin is not a freezer, so the ice slowly melts and the machine drains or recirculates the water. For long storage, move the ice to a freezer container instead.
Does the water type matter?
Fresh, clean water is best. If your water is hard, filtered water can slow scale build-up and may improve the taste of the ice.
Where should I place the machine?
Choose a flat, stable surface with room around the vents, away from the stove and direct sun. Leave space above to open the lid and refill the reservoir.
The Short Version
For a polished, app-connected machine, the GE Profile Opal 2.0. For a familiar appliance brand, the Frigidaire. For a compact first machine with a cleaning cycle, the Gevi. For a budget-friendly choice with a scoop, the Euhomy. For a steel exterior from a cooling specialist, the Newair. For a plain, simple countertop unit, the hOmeLabs.
A Deeper Look at How to Choose Pebble Ice Makers
The headline features of a pebble ice maker are easy to compare and often the least important. What decides satisfaction a year from now is fit with your space, your habits and your household’s real appetite for the job it does. As you read the picks above, keep asking three questions: how often will this genuinely be used each week, who else will use it, and where will it live when it is not working? Honest answers protect you from both underbuying, which leads to frustration, and overbuying, which leads to an expensive ornament.
Pebble ice — small, soft, chewable nuggets — is made by freezing, shaving and compressing ice flakes, which is why these countertop machines are more complex than a simple tray-freezer design. What separates the picks above is how they balance output, reservoir size, footprint and the cleaning burden that any ice machine carries, since ice is food and the machine that makes it needs to be kept like it. Treat every specification as a clue rather than a verdict: a number only matters once you connect it to a task you actually perform, a pan you actually own, a counter you actually have, or a journey you actually take.
Space deserves a tape measure, not a guess. Measure the footprint where the appliance will sit, the clearance it needs around and above it, and the cupboard or shelf it must fit when stored, then compare those numbers with the dimensions on the listing. Allow for doors, lids and handles in their open positions, and for the human being who has to stand in front of it. Many returns and much quiet resentment trace back to a centimetre nobody measured.
Finally, judge the cost of ownership, not just the purchase. Consumables, replacement parts, filters, descalers, spare seals and the electricity or fuel it uses all belong in the real price, as does your own time: an appliance that takes ten fussy minutes to clean will be used less than a slightly humbler one that rinses in two. The reviews above flag where those burdens fall for each pick; weight them as heavily as performance.
Matching a Pebble Ice Maker to Real Life
No pebble ice maker serves every household equally, and the picks in this guide differ because households differ. Home bars, fizzy-drink devotees, families who entertain, and anyone recovering from dental work or simply devoted to chewable ice will each use the machine differently — match the pick to your daily ice appetite, not your biggest party. The scenarios below describe the situations that most often decide between one pick and another.
Small kitchens and tight counters
In a compact kitchen, the best appliance is the one that earns its footprint every week. Favour a pick that stores neatly, sets up in moments, and does not demand a supporting cast of accessories that need homes of their own. If counter space is the scarcest resource you own, consider where the appliance goes during the other twenty-three hours of the day, and be honest about whether a cupboard shuffle will quietly kill your enthusiasm within a month.
Families, sharing and heavier use
Shared households reward capacity, durability and simple controls that a second person can use without a tutorial. If children, flatmates or a partner will all operate it, look for intuitive settings, parts that survive enthusiastic handling, and cleaning routines that do not depend on one careful owner. Agree where it lives and how it gets cleaned before it arrives, because most appliance friction in a shared home is really unresolved housekeeping wearing a disguise.
Enthusiasts and weekend projects
If this purchase feeds a hobby, your priorities invert: control, consistency and room to experiment matter more than speed of setup. Choose the pick whose adjustments let you learn — repeatable settings, honest feedback about what changed, and a community of recipes or guidance to borrow from. Enthusiasts should also plan the second purchase now, whether that is a particular accessory, a storage solution or a supply of consumables, so the hobby grows in an order rather than a muddle.
Getting the Best From It Day to Day
The first week with any new appliance is a learning curve, and treating it as one pays off. Start with the maker’s basic instructions and the simplest version of the task, note what you did and what resulted, and change one variable at a time as you improve. Most disappointing first attempts come from changing everything at once and learning nothing, or from skipping the maker’s guidance entirely and blaming the machine for a technique problem.
Start with clean water and a cleaned machine, expect the first batches to be the learning curve as the system settles, and keep the scoop stored clean and separate rather than buried in the ice, where handles contaminate what hands will later eat. Small rituals help: keep the accessories it needs in one place, wipe or rinse parts while residues are fresh rather than dried on, and leave the appliance clean and ready, because a tool that greets you ready gets used, and a tool that greets you dirty gets postponed.
Keep a short note — on paper or in your phone — of the settings and timings that worked for your favourite tasks. Households repeat a handful of jobs endlessly, and a personal record turns early experiments into reliable routine. It also helps a second user reproduce your results instead of starting from zero, and it makes troubleshooting simple, because you can see exactly what changed when results change.
Care, Cleaning and Storage in More Detail
Care is where good appliances are kept and careless ones are lost, and it begins with the maker’s instructions for your exact model. Ice makers need regular cleaning and descaling exactly as the maker directs, because mineral scale slows production and stale water taints flavour. Empty and dry the reservoir if the machine will sit unused, run cleaning cycles on schedule rather than on symptoms, and always wash hands before handling stored ice, just as you would with any food. As a rule, clean sooner and gentler than feels necessary: fresh residues lift easily, while baked, dried or soured deposits demand the harsh scrubbing that damages finishes and seals.
Build a rhythm rather than relying on rescue cleans. A quick wipe or rinse after each use, a proper clean on a weekly cycle if the appliance works daily, and a deeper session — descaling, deep degreasing or seal inspection, as the maker directs — at the intervals your water, fuel or ingredients demand. Put the deep clean in the calendar if you must; appliances rarely fail from one missed clean, but they decline steadily from a habit of missed cleans.
Storage protects the machine between uses. Dry every part fully before reassembling or putting it away, since trapped moisture corrodes, smells and grows things nobody wants near food. Store cords loosely rather than wound tight, keep sharp or heavy items from resting on delicate parts, and leave lids ajar where the maker allows so seals rest in their natural shape. In humid homes, where the appliance sits matters as much as how it was cleaned.
Watch for the small warnings and act while they are cheap: a seal that no longer sits flat, a filter past its life, a cord with a nick, a part that has started to smell even when clean. Replacing a minor part early is almost always less costly — in money and in ruined meals — than nursing a failing one, and keeping the maker’s part numbers from your manual makes ordering the right piece a two-minute job instead of a research project.
How the Picks in This Guide Compare With Each Other
Several picks in one guide can look interchangeable until you map them to your own priorities. The reviews above describe each model’s character; the way to compare them is to decide which two or three criteria matter most to you — size, control, ease of cleaning, capacity, portability — and let everything else be a tiebreaker rather than a distraction.
Use the GE Profile Opal 2.0 Nugget Ice Maker as your benchmark, since it represents the balance this guide puts first. Read its review and note where it is strong and where the guide itself admits a limitation. Then test each alternative against it: a rival pick earns your money only if it beats the benchmark on a criterion you genuinely care about, not merely on a longer feature list.
The Frigidaire Countertop Crunchy Nugget Ice Maker illustrates the usual trade: a shift in emphasis — perhaps more capacity or control in exchange for size, or simplicity in exchange for fewer adjustments. Neither direction is wrong; the right one is the one that matches your kitchen and your patience. If you find yourself defending a pick against your own habits, that is the wrong pick, however impressive it looks.
Options like the Gevi Household Nugget Ice Maker show how wide the category runs once you look past the headlines. Rank all the picks by your top criterion, discard the bottom half without regret, then rank what remains by ease of cleaning and storage. The survivor of those two rankings is very rarely the wrong purchase, and the exercise takes ten honest minutes.
Before ordering, re-read the listing for your chosen pick with fresh eyes: dimensions, what’s in the box, care requirements and warranty terms. Keep the packaging until the appliance has done its real job in your kitchen at least twice, because performance on your counter, with your ingredients and your water, is the only review that finally counts.
Common Mistakes and How to Avoid Them
The most frequent mistake is buying for an imagined life — the daily fresh juice, the weekly expedition, the elaborate weekend routine — rather than the life visible in last month’s calendar. Appliances punish optimism by taking up space. Choose for the routine you already have, and let a well-used first purchase, not a fantasy, justify any upgrade later.
Second comes skipping the manual. Modern appliances hide their best features and their important warnings in those pages: the correct assembly order, the part that must never be immersed, the setting meant for exactly your task. Twenty minutes with the manual and the maker’s quick-start guidance will save most owners at least one ruined meal, one avoidable mess, or one damaged part in the first month alone.
Third, many owners clean by folklore instead of by instructions — soaking what should only be wiped, scrubbing coatings that should only be soaked, or using a fashionable cleaning hack that voids common sense along with the finish. When advice conflicts, the maker’s word wins, because the maker knows the materials. When in doubt, start with warm water, mild detergent and patience, which solve the large majority of kitchen cleaning problems.
Finally, people often blame the appliance for ingredient problems. Stale, wrong-sized, wrong-temperature or simply unsuitable ingredients defeat good machines daily, and the fix is in the shopping and the prep rather than the settings. Before concluding that a pick underperforms, repeat the task once with fresh, appropriate ingredients and the maker’s recommended method; that single honest test separates machine faults from material ones.
More Questions Buyers Ask
How long should an appliance like this last?
With cleaning and care that follow the maker’s guidance, a well-chosen kitchen appliance should serve for years of regular use. Lifespan is decided mostly by habits: prompt gentle cleaning, correct storage, timely replacement of seals and filters, and never forcing parts or settings beyond what the design intends.
Should I buy the largest or most powerful option?
Only if your household’s real workload demands it. Oversized appliances cost more to buy, house and often to run, and they can perform worse at small jobs than a right-sized model. Match capacity and power to your typical batch and your biggest regular occasion, not to the largest event you can imagine hosting once.
What should I do in the first week of ownership?
Read the manual, run the maker’s recommended first-use steps, and practise on the simplest version of the main task before attempting anything ambitious. Keep notes on settings and results, register the warranty if the maker offers one, and keep all packaging until the appliance has proved itself on your counter.
How do I know whether a problem is the machine or my technique?
Repeat the task exactly as the maker’s basic instructions describe, with fresh, suitable ingredients or materials. If the problem vanishes, it was technique or materials; if it persists under the textbook method, consult the troubleshooting section of the manual and then the maker’s support, describing the steps you followed.
Are accessories worth buying at the same time?
Buy only the accessories you already know a job for. Most owners use one or two attachments constantly and store the rest forever. Live with the appliance for a month, note which tasks genuinely felt limited by a missing accessory, and buy for that list — it will be shorter and far more accurate.
How should I store it between uses?
Clean, fully dry, and assembled loosely or stored exactly as the maker directs, with the cord loose and delicate parts protected. Avoid damp cupboards, heavy items stacked on top, and lids sealed tight on a still-warm or damp machine. A stored appliance should be ready to use the moment it comes out, not a cleaning project before it can start.
What regular maintenance is easiest to forget?
The unglamorous kind: seals, filters, blades, gaskets and descaling schedules, depending on the appliance. These small items decide performance quietly and fail gradually, so the decline feels like the machine ageing rather than a part expiring. Check them on a fixed rhythm — monthly is a good default for daily-use appliances — and replace by the maker’s guidance.
Is it worth repairing an older appliance?
Often, yes, when the fault is a replaceable part and the body and motor remain sound — a fresh seal, filter or blade can restore years of service. Repair stops making sense when parts are unavailable, when several systems are failing together, or when the repair approaches the cost of a modern replacement that would also be cheaper to run. Decide with the part price in hand, not by guesswork.
Can I leave the machine running all the time?
Many owners do leave a countertop ice maker on so ice is always ready, and the bin is designed to hold ice as it slowly melts and is remade. Whether that suits you depends on your electricity habits, how fast you use the ice, and how the maker describes standby operation in the manual. If the machine will sit idle for days, switching it off, draining it and drying the bin is the kinder routine, and it is certainly the cleaner one.
Serving Drinks With Pebble Ice: Small Habits That Help
Pebble ice rewards a little technique at the glass. Fill the glass generously rather than sparingly, because a full bed of nuggets chills faster and melts more slowly than a few pieces rattling in warm liquid, and pour the drink over the ice rather than dropping ice into a filled glass, which splashes and dilutes unevenly. For drinks that will sit — a slow evening cocktail, a bottle shared across a long meal — keep a tray of dense cubes in the freezer as the guide above suggests and save the nuggets for fast, cold, cheerful drinking. When you entertain, start the machine early in the day and bank ice in a freezer container, so the bin is a buffer rather than a bottleneck, and put the scoop where guests can reach it without opening the machine’s lid every time. These are small habits, but they are the difference between a machine that merely makes ice and one that quietly improves every cold drink in the house.
Ownership Notes: The First Season With It
The first season with a pebble ice maker quietly decides whether it becomes a daily pleasure or a summer guest. Keep a mental note of how often the bin is emptied on an ordinary week, whether the cleaning cycle has become a habit or a guilt, and how the noise sits with your household at breakfast. If production feels slow in a heatwave, remember that room temperature is part of the machine’s working conditions, and that starting it earlier in the day is the simplest upgrade there is. A machine whose water, cleaning and placement have been tuned to your kitchen in this way will still be making good ice long after the novelty has worn off.
Troubleshooting: When Ice Making Does Not Go to Plan
Most ice-maker frustrations have ordinary causes, and the manual should always be your first stop. Ice that comes out small, soft or clumped usually points to warm conditions: a machine baking beside the oven, a reservoir filled with warm water, or a bin opened every few minutes by curious children. Move the machine somewhere cooler, start with cold water, and let it work undisturbed through a full cycle before judging the result. Production that slows over weeks rather than days usually tells a different story — mineral scale building on the cold surfaces — and the answer is the maker’s descaling routine, done properly and on schedule, not a harder scrub at the parts you can see.
Taste and smell problems are almost always water problems. Ice faithfully preserves whatever was in the reservoir, so stale water, a bin that has not been wiped, or a scoop stored buried in the ice will all announce themselves in the glass. Empty the machine, clean it by the book, refill with fresh water, and store the scoop clean and outside the bin. If the machine stops mid-cycle, check the obvious before the dramatic: the reservoir level, whether the bin is genuinely full or merely piled under the sensor, and whether a kinked drain or a blocked vent is making the machine protect itself. A countertop ice maker that is cleaned, cooled and given clean water will solve most of its own problems; the ones that remain after that honest routine are the ones worth a call to the maker.
From Shortlist to Checkout: A Practical Walkthrough
Once the reviews have narrowed your choice to two or three machines, decide with a tape measure and a diary rather than a photograph. Measure the counter where the machine will live, including the height to the underside of the wall cabinets and the space needed to lift the lid and slide the reservoir out, then picture your household’s real ice consumption across an ordinary week — school-day breakfasts, evening drinks, the weekend — rather than the biggest party you host twice a year. Check on each listing the same things in the same order: footprint, bin and reservoir size, cleaning method, drain arrangement, and what is included in the box. Working in a fixed order stops a handsome finish from outweighing a cleaning routine you will quietly abandon by the second month.
Finally, plan the first week. Let the machine stand upright after delivery for as long as the manual asks, run the initial cleaning it describes, throw away the first batches as directed, and judge it on your ordinary drinks, not on a stopwatch. Keep the packaging until the machine has survived a full weekend of your household’s habits, note the refill and cleaning rhythm that actually fits your days, and settle it into its permanent spot with its vents clear and its scoop in its proper place. Bought this way, a pebble ice maker becomes a small daily luxury that asks little and gives reliably, instead of a bulky experiment competing for counter space.