A gas grill responds quickly, and a griddle plate on top turns it into a flat top within minutes. The insert spreads heat from the burners across a solid surface, which suits breakfast, stir-fry and smash burgers. The best inserts match your grill’s cooking area closely.
The six products below include made-for-model inserts and universal toppers for gas grills. We have not used these products ourselves, so confirm the dimensions, the burner layout and the material on the current listing before buying a griddle insert for your gas grill.
As an Amazon Associate we earn from qualifying purchases. Links below are affiliate links, and they do not change the product information we give.
What to Look For
| Feature | Why it matters |
|---|---|
| Burner coverage | The plate should sit over the burners without blocking airflow |
| Material | Cast iron retains heat; stainless is lighter |
| Grease control | A raised rim or a trough contains oil and drippings |
| Handles | Strong handles ease lifting a hot plate |
In this guide
Specs at a Glance
| Insert | Material | Style | Notes |
|---|---|---|---|
| Weber Crafted Griddle | Steel | Insert for the Crafted frame | Needs the matching frame |
| Broil King Cast Iron Griddle | Cast iron | Plate | Made for matching grills |
| Nexgrill Stainless Steel Griddle | Stainless steel | Topper | Check the listing for the size |
| Char-Griller Cast Iron Griddle | Cast iron | Plate | Made for matching grills |
| Dyna-Glo Griddle | Steel | Topper | Check which models it fits |
| Royal Gourmet Cast Iron Griddle | Cast iron | Plate | Check the listing for the fit |
The 6 Best Griddle Inserts for Gas Grills

Top pickBest for weber Crafted owners
1. Weber Crafted Griddle
A griddle plate made for the Weber Crafted frame, which lets a gas grill swap between cooking surfaces. It needs the matching frame kit, but the fit is exact once set up. It is the cleanest way to swap between grates and a flat top.
Suits: Weber Crafted owners. Strengths: an exact fit and a flat steel plate. Weaknesses: requires the frame kit. Skip it if you do not own the Crafted system.


Best for a Broil King owner
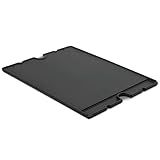
2. Broil King Cast Iron Griddle
A cast iron griddle sold by Broil King for use on its own gas grills. The plate retains heat well, and a made-for-model fit makes setup simple. Give the plate a few extra minutes to warm through before you add food.
Suits: a Broil King owner. Strengths: heat retention and a matching fit. Weaknesses: heavy and needing seasoning. Skip it if your grill is another brand.

Best for a lighter insert for a mid-size grill
3. Nexgrill Stainless Steel Griddle
A stainless steel topper made for Nexgrill grills and similar cooking areas. Stainless is lighter than iron and easier to lift, though it holds less heat. It suits quick breakfasts and vegetables best.
Suits: a lighter insert for a mid-size grill. Strengths: low weight and easy cleaning. Weaknesses: less heat retention. Skip it if you want a cast iron sear.


Best for a Char-Griller owner
4. Char-Griller Cast Iron Griddle
A cast iron griddle made for Char-Griller gas grills. The thick plate suits pancakes, bacon and burgers, though the fit depends on the grill model. It is a good option for pancakes and smash burgers.
Suits: a Char-Griller owner. Strengths: a thick plate and a brand match. Weaknesses: fit is by model. Skip it if you own a different grill.

Best for a Dyna-Glo owner
5. Dyna-Glo Griddle
A griddle plate from Dyna-Glo for its own gas grills. Read the listing to see which models it fits, because the plate is cut to a specific cooking area. Compare the plate’s measurements with your grill before you order.
Suits: a Dyna-Glo owner. Strengths: a made-for-grill plate. Weaknesses: a narrow fit list. Skip it if you want a universal topper.
View Dyna-Glo Griddle on Amazon

Best for a Royal Gourmet owner
6. Royal Gourmet Cast Iron Griddle
A cast iron griddle sold by Royal Gourmet for use on its own gas grills. It brings the heat retention of iron to a budget-minded grill. It is a simple way to add a flat top to an entry-level setup.
Suits: a Royal Gourmet owner. Strengths: iron mass in a budget-friendly build. Weaknesses: sizes vary by grill. Skip it if your grill is another brand.

Care and Setup
- Match the plate to the burners and keep vents clear.
- Preheat on medium heat so the plate expands evenly.
- Season cast iron before the first cook.
- Scrape and oil the plate before storing it.
Mistakes to Avoid
- Covering all the burners and starving the flame.
- Using a plate that does not fit.
- Cooking on high heat from a cold start.
- Leaving a wet plate on the grill.
Checking Fit Before You Order an Insert
A griddle insert lives or dies on fit. Start by measuring the cooking area of your grill: the width and depth of the grate area, the distance between the side supports, and the clearance under the lid. Compare these figures with the plate’s dimensions on the listing. If the plate is too small, heat leaks around the edges and the burners stay uncovered. If it is too large, it may not sit flat or the lid may not close.
Look at how the grill holds its grates. Some grills have grates that rest on ledges, others have flame tamers or sear plates, and some use cooking grid frames that the insert must match. Many inserts are made for specific brands or lines, and universal toppers are more variable. Check the model compatibility list, and confirm your grill’s exact model number.
Think about the lid. An insert adds height, and a thick plate with handles may keep the lid from closing fully. That matters if you plan to melt cheese or finish food under the lid. Check burner placement as well, because a plate that sits on only some burners will heat unevenly. If you are unsure whether it fits, contact the maker of the grill or insert with your model number. Returns on heavy cast iron can be a hassle, so a careful check at the start saves effort.
How Heat Behaves Over Gas Burners
A solid plate over gas burners changes the way heat moves. Instead of flames and hot air touching food directly, the plate absorbs heat and spreads it, so the cooking surface is gentler but also slower to respond. Expect a longer preheat than with grates, and plan for that on cold or windy days. Preheat on medium rather than high so the plate warms evenly and does not warp.
The plate also traps heat from the burners. Without air gaps, the grill may run hotter underneath than the lid thermometer suggests. Keep an eye on the knob settings, and start at a moderate level, then adjust. Cast iron is slow to warm and slow to cool, which is good for holding temperature when you add cold food. Thin steel or stainless heats faster, but loses heat more quickly and can show hot spots right over the flame.
Airflow matters. The burners need oxygen to burn cleanly, so do not block vents or cover every opening. If the flames turn yellow, flicker or pop out, check the airflow and reduce the heat. Some grill makers advise against certain insert styles, so read the grill’s manual for warnings. Use the zones in your favor: if burners are independently controlled, leave one side cooler for resting food, and keep a section of plate for oil-free items like toasting buns.
Seasoning and First Use
Raw cast iron and steel need seasoning before they cook well. Wash the plate as the maker advises, dry it completely, then rub on a very thin layer of cooking oil. Heat the plate on the grill until the oil smokes and darkens, then let it cool and repeat a few times. Thin coats matter, since thick oil leaves a sticky surface. A pre-seasoned plate still benefits from a few extra coats.
Take care on the first cooks. Start with fatty foods like bacon or burgers, which add oil and build the surface. Avoid acidic or delicate foods until the seasoning is established. Scrape and wipe the plate after each use, while it is still warm, and apply a thin film of oil before it cools. Do not use soap on a seasoned plate unless the maker says it is fine.
Stainless plates need less seasoning, but they benefit from oil on the surface to limit sticking. Watch for temperature spikes that can discolor stainless. Keep a spray bottle of water or a squeeze bottle handy to help lift stuck bits while scraping. Use tools suited to the plate: metal scrapers are fine on bare steel and iron, but check the listing for any coating that could be damaged. After the first few sessions, you will see how the plate behaves and can adjust heat and oil to match.
Grease Management and Flare-Up Safety
A solid plate changes where grease goes. On open grates, drippings fall to the bottom of the grill and into a tray, but on a plate, fat collects on the surface and runs toward the edges. A raised rim, a slope or a trough directs it to a spot where it can be collected. Check the design of the insert to see how grease leaves the plate, and make sure it reaches the grill’s drip system instead of dripping onto the burners.
Keep the grease tray under the grill clean. Overflow or old grease build-up can ignite, and extra grease below a hot plate is a fire hazard. Empty and wipe the tray after each cook, and check for leaks that could drip onto the cabinet or deck. Do not let bacon grease or oil pool and spill over the edge.
Use good habits for safety. Keep the lid open when preheating if the manual advises, keep a clear zone around the grill, and never leave it unattended. Keep a grease-rated extinguisher nearby, and do not use water on a grease fire. If grease ignites on the plate, turn off the burners and cover the flames if it is safe to do so. Wear heat gloves when lifting a plate, and let it cool fully before removing. A hot plate is heavy, so use both hands and secure footing.
Storing, Switching Between Grates and Griddle, and Replacement Signs
Swapping between grates and a plate should be easy but safe. Let the grill cool before changing surfaces, and use gloves. Lift the plate straight up with both hands, and rest it on a heat-safe surface. Store plates flat, dry and oiled, away from moisture, ideally indoors or in a covered area. Cast iron should be stored in a dry place with a thin oil film, and not stacked in a way that traps damp.
Clean grates before reinstalling them, and check that the burners and ignition parts are clear. Do not store the plate on the grill outdoors unless the manual says it is fine, since rain and humidity encourage rust. A cover helps, but trapped moisture under a cover can still cause problems, so make sure everything is dry first.
Watch for signs of wear. A warped plate that rocks, deep pitting or rust that will not scrub off, flaking seasoning that persists after re-seasoning, cracks in cast iron, loose or broken handles and a plate that no longer sits flat over the burners are reasons to repair or replace. Uneven heating that does not improve after cleaning can signal burner problems, not just the insert. When replacing, compare the new plate with the old one, note the grill model number, and check the same fit points as before. Keep the manual for care steps and any warranty information.
A Quick Checklist Before You Buy an Insert
Griddle inserts look simple, yet a small mismatch can leave you with a plate that rocks or hangs over the burner box. Run through these points first.
- Find your grill’s model name and check the maker’s list of compatible accessories.
- Measure the cooking grate width and depth, edge to edge.
- Note the number and spacing of burners beneath the plate.
- Decide between cast iron, steel and coated options based on how much upkeep you accept.
- Check the weight so you can lift and store it comfortably.
- Look for a grease channel or drip opening in the design.
Once these answers are in hand, product pages become much easier to judge.
Cast Iron Versus Steel: A Comparison Table
Material is the biggest practical difference between inserts. This table sets out how the two main options usually behave.
| Point | Cast iron | Stainless or coated steel |
|---|---|---|
| Weight | Heavy | Lighter |
| Heat holding | Holds heat steadily | Responds faster to changes |
| Upkeep | Needs seasoning and drying | Easier to wipe clean |
| Rust concern | Higher if left damp | Lower |
| Handling | Needs a firm grip | Easier to carry |
Neither is universally better. If you cook often and enjoy maintaining cookware, cast iron rewards the effort. If you want something you can rinse and put away, lighter metal is friendlier.
Mistakes That Shorten an Insert’s Life
Most problems with griddle plates come from habits rather than defects. Avoid the following and your insert should stay in good shape longer.
First, do not leave the plate wet. Water sitting on bare metal invites rust, so dry it fully after washing and wipe on a light coat of cooking oil if the maker advises it. Second, avoid sudden temperature jumps, such as pouring cold water onto a hot plate, since rapid change can stress the metal.
Third, resist scrubbing with harsh pads on a seasoned surface, as that strips the layer you worked to build. Use a scraper and a soft cloth instead. Fourth, keep the plate level, because a tilt sends grease to one corner and causes uneven cooking. Finally, do not force a plate onto a grill that does not match it. If it will not seat flat, return it and look for a better size.
Reading a Listing for Fit and Coverage
Many inserts are advertised as universal, yet that word can cover a wide range of shapes. Read the stated measurements and picture them against your grates. Check whether the dimensions describe the cooking surface or the outer frame, because a frame with raised edges can be larger than the flat area you can use.
Look at the number of burners the plate is meant to cover. A plate that spans only part of the grate leaves a cooler zone, which can be handy for keeping food warm, or annoying if you wanted full coverage. When photos show a model installed on a grill that looks like yours, that is a useful clue, but the maker’s compatibility list is still the safer source.
Storage and Switching Between Grates and Plate
Changing between grates and a griddle is part of daily use, so plan where each lives. Let the plate cool fully before lifting it, and use heat-resistant gloves as the maker recommends. Wipe it, dry it and store it somewhere dry, such as a cabinet or a covered shelf, rather than leaving it exposed on the grill.
If you have limited space, hang the grates on a hook or slide them into a cabinet next to the plate. Keep a small kit of scraper, cloth and oil near the grill so cleanup happens right after cooking, when the surface is easiest to handle.
Planning a Griddle Menu and Zones
A griddle plate changes what you can cook outdoors, so think about the meals you want. Breakfast is the classic use, with eggs, pancakes and bacon all sharing one surface. Smash burgers, sliced vegetables, fried rice and sandwiches also work well on a flat plate.
If your insert covers only part of the grill, treat the open section as a second zone. Use the plate for foods that need a flat surface and the grates for items that benefit from direct flame. Plan the order of cooking so that strongly flavored foods go last. Keep a squeeze bottle of oil and a sturdy spatula nearby, and clear space on a side table for finished plates so food does not wait on the hot surface.
Gas Grill Griddle Insert FAQ
Will a griddle insert damage my gas grill?
A well-fitting plate should not, but follow the grill maker’s advice about blocking vents.
Is cast iron better for a gas grill?
It holds heat evenly. Stainless is lighter and easier to move.
How do I clean a griddle insert?
Scrape while warm, wipe with a cloth and oil lightly.
Can I use any size insert?
No. The plate should match the cooking area. Read the dimensions on the listing.
Can I cook directly on the grates after using an insert?
Yes, once you remove the plate and clean the grates. Let everything cool first, and clean off any grease that dripped through.
Do I need to oil the plate every time?
A light film before and after cooking helps prevent sticking and rust, especially on cast iron and steel. Follow the care steps for your plate.
What foods work well on a griddle insert?
Breakfast items, smash burgers, vegetables, fajitas, fried rice and quesadillas all suit a flat surface. Delicate fish can work once the plate is well seasoned.
Can an insert cover side burners?
Check the listing and the grill manual. Many inserts are made for the main cooking area only, and side burners have their own cookware requirements.
Will a cast iron plate rust outdoors?
It can if left wet or uncovered. Dry it fully, oil it lightly and store it in a dry place to limit rust.
How do I lift a hot plate safely?
It is best to let it cool first. If you must move it hot, use heat gloves, both hands and a clear path to a heat-safe surface.
Can I use a universal insert on any gas grill?
Only if the dimensions and burner layout match. Confirm the cooking area and clearance before ordering.
Choosing Griddle Inserts for Gas Grills With More Care: The Details That Decide
The picks above give you the shortlist. This section slows the decision down and looks at the details that separate griddle inserts for gas grills you will enjoy for years from the ones that quietly end up at the back of the cupboard. None of these points require specialist knowledge; they ask you to match the product to your grill, your food and your habits, which is where good purchases are actually made. Work through them with your own cooking in mind, especially smash burgers, breakfasts, fajitas and fried rice, and the right pick usually identifies itself.
Coverage: Full Replacement or Half Insert
A full plate replaces the grates entirely for maximum flat-top space; a half insert keeps a grill zone beside the griddle. Breakfast-for-many households love full plates; mixed menus love the split. Decide by your most common cook, not your most ambitious one. To judge it on a listing, look past the headline claim and find the detail that proves it: a stated dimension, a named material, or a clear photo of the part you will actually handle. If the page stays vague on this point, treat that as information in itself and weigh the griddle inserts for gas grills that explain it clearly more heavily.
Thickness and Warping Resistance
Thin plates flex and bow over burners, pooling oil at the edges and cooking unevenly. Substantial thickness, sensible bracing and a maker who talks about warping honestly are what you are paying for. A plate that stays flat stays nonstick and predictable. In daily use this matters most on the third or fourth cook, not the first. The first session with new griddle inserts for gas grills almost always goes well; it is the repeated heating, washing and storing that reveals whether this detail was designed properly or just described well. Buy for the routine you will repeat all season, not for the unboxing.
Grease Drain Design
Every griddle makes grease; designs differ in where it goes. A drain hole with a cup, a channel to a tray, or a raised lip you scrape against each suits different cooking styles. What matters is that grease leaves the cooking surface without crossing the burners or your shoes. A practical way to test the claim before you commit is to compare it against the griddle inserts for gas grills you already own or have used. Note what frustrated you there, then check whether this option genuinely fixes that frustration or simply moves it somewhere else. Improvements you can point to concretely are worth more than long feature lists.
Handles and Swap-Over Effort
You will swap between grates and griddle more than you predict, sometimes mid-week, sometimes with the grill warm. Handles that stay reachable, a weight you can manage, and storage that keeps the plate clean decide whether the insert is a tool or a trophy. There is usually a trade-off hiding inside this point, and honest listings make it visible. More of one quality tends to mean less of another, whether that is weight, space, speed or simplicity. Decide which side of the trade-off suits your cooking before you shop, so the comparison between griddle inserts for gas grills stays anchored to your priorities.
Burner Pattern Compatibility
Gas grills heat in stripes above each burner. A plate whose size and thickness spread that striped heat evenly matters more than raw power. If your grill has an odd burner layout or a sear burner, check the maker’s guidance for your model rather than assuming even results. Match this criterion to the foods you cook most, which here means smash burgers, breakfasts, fajitas and fried rice. A feature that shines with one kind of food can be irrelevant, or even a nuisance, with another. The strongest choice is rarely the one with the longest specification list; it is the one whose strengths line up with your regular menu.
Griddle Inserts for Gas Grills in Real Life: Four Situations Worth Planning For
Product pages describe features; households live in situations. Here is how griddle inserts for gas grills behave in the situations that actually come up around a gas grill on a patio, and what to do in each so the equipment helps rather than hinders.
Full Breakfast Outdoors
Bacon first, then eggs in the bacon’s leavings, pancakes on the cleaned zone, all without a pan. Sequence by temperature tolerance and mess, keep a scraper moving, and the insert replaces three pans and the washing up that comes with them. The routine that makes this work is preparation: have everything cut, seasoned and within reach before the heat is on, because once cooking starts there is rarely a spare moment to go back inside. A small tray or board beside the grill turns a scramble into a sequence you can repeat.
Smash Burger Night
The flat plate is the only home surface that does smash burgers properly: balls of beef pressed thin on fierce heat, edges lacing and crisping. Work in pairs, scrape under each with conviction, and cheese them on the plate while buns toast at the edge. Timing is the skill to practise here. Foods finish at different speeds, so start the slowest items first and add the quicker ones in stages rather than loading everything at once. That single habit does more for the result than any accessory, and it is free.
Fajitas and Stir-Fry Style Cooks
Peppers, onions and sliced meat in strips cook fast and need constant movement, which a plate with a lip handles beautifully. Keep ingredients dry so they sear rather than stew, and cook in batches small enough to stay in a single layer. Keep notes the first few times, even if only mentally: what the heat felt like, how long each item took, and what you would move earlier or later next time. Griddle Inserts for Gas Grills reward cooks who adjust in small steps instead of changing everything at once.
Fried Rice and Leftovers Night
Day-old rice, leftover vegetables and a beaten egg become a proper meal on the plate, with room to keep components separate until the final mix. This is the insert’s weeknight superpower: turning fridge contents into dinner with one surface to wash. For serving, plan the landing zone before you start: a clean platter, resting space and somewhere safe for hot tools. Good results are often lost in the last two minutes, when cooked food waits around getting cold or overcooks in its own residual heat because nothing was ready for it.
Using, Cleaning and Storing Your Griddle Inserts for Gas Grills: A Working Routine
Long life from griddle inserts for gas grills is mostly routine, not luck. The steps below follow the order of a real cook, from before the heat goes on to the moment everything goes away, and they apply whichever pick from the list above you choose. Adapt the details to your model’s manual where the two differ, since the maker’s instructions always win on safety and warranty questions.
Season the Plate Before Its First Cook
Wash off factory coatings, dry the plate on the burners, then build seasoning with several whisper-thin oil coats heated until they stop smoking. The surface will darken unevenly at first; that is normal. Cook fatty foods early and the layer evens out. Make it a habit rather than a project: two minutes of attention straight after cooking replaces an hour of soaking and scrubbing later, and it keeps every part working the way it did on day one.
Manage Heat in Zones
Set burners to create a hot zone and a gentle zone rather than one uniform temperature. Food moves between them as it cooks, which is the entire technique of flat-top cooking. Learn your plate’s cool corners; every plate has them, and they are useful. Always let hot parts cool enough to handle safely before you start, and keep water away from anything electrical or still holding serious heat. A cracked surface or a warped part often traces back to one impatient cleaning session.
Scrape While It Is Still Warm
A bench scraper across a warm plate clears almost everything in a minute. Push residue and grease to the drain as the maker intended, wipe with a cloth, and finish with the thinnest oil film while the plate cools. Tomorrow’s cook starts clean. Dry everything fully before it goes away. Trapped moisture is the quiet cause of rust, odours and sticking, and it does its damage in storage where nobody notices until the next cook.
The Occasional Deep Clean
When carbon builds at the edges, heat the plate, use water carefully to steam-lift residue as the maker allows, scrape, dry and re-oil. Avoid stripping to bare metal unless seasoning has failed; a full re-season is a morning’s work you rarely need. Use the mildest tool that does the job first, and step up only if residue survives. Aggressive scrubbing solves today’s mess by creating tomorrow’s sticking problem, especially on coated or seasoned surfaces.
Store It Seasoned and Dry
Store the plate with its oil film intact, somewhere dry, with a cloth over the surface if pans will rest on it. If it lives on the grill, keep the grill covered and remember the plate is seasoning-protected, not rust-proof, in a damp winter. Store the piece where air can move around it and where it will not be knocked, stacked under heavy pans or left at the damp end of a cupboard or garage. Storage conditions decide lifespan as much as build quality does.
How the Picks Above Compare When You Cook Side by Side
Read as a group, the six picks in this guide are not six attempts at the same product; they are six answers to six slightly different questions. The comparison that matters is therefore not which one is best in the abstract, but which one’s strengths land on the cooking you do most. The guide’s own summary positions them as follows, and it is worth translating those positions into everyday terms before you decide.
The Weber is the pick put forward for a Weber Crafted frame. In practice that makes it the natural shortlist-topper if that description sounds like your household, and the one to pass over if it clearly does not, however strong its other qualities are.
The Broil King is recommended for a Broil King. Treat that as a statement about fit rather than rank: it will feel like the best product on this page to the cook it was chosen for, and like an odd compromise to anyone else.
The Nexgrill covers the case for a lighter plate. If that case is your default weeknight rather than an occasional event, weight this pick heavily; if it happens twice a year, let one of the more general picks win instead.
The Char-Griller is the answer for a Char-Griller. Notice that this is a different promise from the picks around it, which is exactly why the guide keeps all six: most households recognise one of these descriptions immediately as their own situation.
The Dyna-Glo is positioned for a Dyna-Glo. The honest way to use that is as a filter: say yes to it if the description matches your grill, your space and your menu, and do not let a feature you will never use argue you out of the match.
The Royal Gourmet rounds out the list for a budget-minded cast iron plate. For the right buyer it is not a consolation choice at all but the most sensible one here, because buying capacity, size or toughness you never use is its own kind of waste.
When two picks still tie, decide with three questions. Which one fits the equipment you already own without adapters, workarounds or wishful thinking? Which one will you clean without resentment on an ordinary evening? And which one’s main strength addresses the frustration that sent you shopping in the first place? The pick that answers all three is the right one, and it is rarely decided by a single headline feature.
More Mistakes That Trip Up Owners of Griddle Inserts for Gas Grills
The mistakes section earlier in this guide covers the classics. These four are the quieter ones, the habits that do not ruin a single meal but steadily shorten the life of griddle inserts for gas grills or make them less pleasant to use.
Skipping Seasoning and Blaming the Plate
Eggs on an unseasoned plate stick, and the plate gets the blame. Seasoning is not an optional ritual; it is the nonstick system itself. Invest the first hour and every cook after it is easier. The fix costs nothing: slow down at this one step and check before the heat, the guests or the hunger make the decision for you. Most equipment problems that get blamed on build quality turn out to be this exact moment, repeated.
Flooding the Plate With Oil
Pools of oil fry food unevenly, smoke heavily and run to the drain carrying your seasoning’s early layers. A thin, shimmering film is the target. Add small amounts as you cook rather than one heroic pour at the start. If you recognise your own habit here, change the routine rather than the product. A written or mental checklist at the grill sounds excessive until the first time it saves a meal; after that it just becomes how you cook.
Cooking Everything at Maximum Heat
A ripping-hot plate is for searing, not for eggs, onions or anything delicate. Use the zones, lower the burners, and let the plate’s stored heat do gentle work. Burnt edges with raw centres mean heat management, not the plate, failed. This mistake also compounds. One rushed session leaves residue, damage or bad seasoning behind, and the next session starts from a worse position, which makes the same shortcut tempting again. Breaking the cycle once, with a proper reset, is usually enough.
Letting Grease Reach the Burners
Ignoring a full grease cup or scraping grease across drain-less edges invites flare-ups and a filthy grill interior. Empty the cup, mind the drain path, and keep a scraper between the fat and the flames at all times. It is worth saying out loud to anyone you share the equipment with, too. Shared griddle inserts for gas grills suffer most from inconsistent habits, where one careful owner undoes another person’s shortcut, or the other way round.
More Griddle Inserts for Gas Grills Questions, Answered
Buyers ask a second round of questions once the first cook is done and the equipment has to earn its place week after week. Here are the ones that come up most often for griddle inserts for gas grills, answered in the same spirit as the rest of this guide: practical, and honest about what depends on your model.
Will a griddle insert damage my gas grill?
Used as intended, no. Problems come from blocking ventilation, trapping grease against burners, or plates so oversized they distort airflow and lid closure. Buy the size made for your grill’s cooking box and keep grease management as the maker designed it.
Can I close the lid with the insert in place?
Usually yes for warming and melting, but the insert is designed for open-lid cooking, and lid-down time over a fiercely hot plate should be brief and monitored. Check clearances with handles and thermometers, and never leave a hot, closed grill unattended.
How do I stop food sliding off when I scrape?
Work with the plate’s lip and drain layout, scrape toward a corner or edge that catches food, and use a second tool as a backstop for piles of onions or rice. Technique settles within a couple of cooks; the first session is the clumsy one.
Does an insert work over only some burners?
Half inserts are designed exactly for that, leaving grates over the other burners. Full plates should sit over the burner array they were sized for. Running a large plate with half its burners lit creates a hot side and a cold side, which some cooks use deliberately as zones.
What oil is best for seasoning and cooking?
A neutral oil with a high smoke point, applied extremely thinly, is the standard choice for both. Save flavoured oils and butter for the food itself, added during cooking, rather than for building the seasoning layer.
How do I know the seasoning is ready?
The surface looks satin-dark rather than shiny-grey, water flicked on it skitters, and eggs release with only a nudge after a minute. If food still grabs in patches, cook a few more fatty meals and add one more thin seasoning coat; it builds quickly with use.
Ownership Notes: Getting More From Your Griddle Inserts for Gas Grills
One underrated step before buying any of the griddle inserts for gas grills above is to measure the space it has to live in, not just the space it cooks on. Check the working area, the storage spot and the path between them, because equipment that is awkward to reach for gets used less, whatever its merits on paper. A tape measure and five honest minutes prevent the most common return reason of all: it simply did not fit the way the household actually works.
Read the manual that comes with your pick, even if you have owned similar griddle inserts for gas grills before. Makers differ on seasoning, maximum heat, dishwasher safety and which parts can be immersed, and the warranty usually assumes you followed their version. Ten minutes with the booklet protects both the equipment and your claim if something fails early, and it often reveals a small feature or warning that the product page never mentioned.
Plan a low-stakes first cook with your new purchase. Choose forgiving foods, keep the group small and treat the session as calibration: learning how this piece behaves with heat, timing and cleanup in your own a gas grill on a patio. A relaxed trial run teaches more than any guide, and it means the first important meal, the one with guests and expectations, is cooked with knowledge instead of hope.
Think about the season as a whole when you judge value. Griddle Inserts for Gas Grills that get used weekly for months should be chosen for durability and easy cleaning above almost everything else, while a piece bought for one annual event can reasonably trade some toughness for price or compact storage. Matching the purchase to the real frequency of use is the simplest way to spend the right amount in the right place.
Keep a simple ownership routine on the calendar: a quick inspection at the start of the season, a proper clean before storage, and a mid-season check of the parts that wear, loosen or corrode. Small checks catch small problems while they are still cheap and easy, and they mean the equipment is ready on the first warm weekend instead of needing rescue work.
Safety deserves a line of its own. Work on a stable, level surface, keep handles and cords where nobody brushes past them, and give hot equipment a clear landing zone away from children, pets and paper or cloth clutter. None of this is complicated, but it has to be arranged before the cooking starts, because mid-cook is the worst moment to improvise it.
If you are choosing between two finalists among the griddle inserts for gas grills above and going in circles, decide by cleanup. When cooking performance is close, the piece you will happily wash on a tired weeknight is the one that gets used, and used equipment is always better value than excellent equipment that lives in a cupboard. Honest self-knowledge about your own habits is a legitimate buying criterion.
Before you buy, check that replacement parts and accessories for the model are easy to find: the wear items specific to griddle inserts for gas grills, such as the parts that heat, move, seal or take the scrubbing. A product whose consumables are unavailable becomes disposable the first time a small part fails, however solid the rest of it is. Five minutes checking parts availability has saved more good equipment than any warranty.
Read the warranty terms with the same care as the feature list, because the two describe different products: the features describe the best day, the warranty describes the worst one. Note what is covered, for how long, and what care the maker requires from you to keep the cover valid. File the details with the manual so a problem in year two starts with information, not archaeology.
The Short Version
For a Weber Crafted frame, the Weber. For a Broil King, the Broil King. For a lighter plate, the Nexgrill. For a Char-Griller, the Char-Griller. For a Dyna-Glo, the Dyna-Glo. For a budget-minded cast iron plate, the Royal Gourmet.