If you want smoked ribs, chicken or salmon without learning to manage a fire, an electric smoker is the easiest way to start. You set the heat, add wood and let the cabinet do the work. The best electric smokers for beginners are forgiving, simple to operate and easy to clean.
The six models below range from analog dial cabinets to digital controls and one compact vertical. We have not used these products ourselves, so confirm the rack count, dimensions and control style on the current listing before buying. You will need an outdoor outlet and a thermometer.
As an Amazon Associate we earn from qualifying purchases. Links below are affiliate links, and they do not change the product information we give.
What to Look For
| Feature | Why it matters |
|---|---|
| Controls | A digital panel is easiest to set; an analog dial is simpler and cheaper |
| Size | Start with a size that suits your usual meals, not a giant cabinet |
| Wood loading | A side loader lets you add chips without opening the door |
| Window | A glass window helps you check food without losing heat |
| Cleanup | Removable trays and racks make cleaning less of a chore |
| Warranty | Check what the listing says about parts coverage and support |
In this guide
Specs at a Glance
| Smoker | Control | Size note | Notes |
|---|---|---|---|
| Masterbuilt 30-Inch Analog | Vertical cabinet | Analog dial | Chip tray |
| Masterbuilt 40-Inch Digital | Vertical cabinet | Digital panel | Side loader |
| Bradley Digital 6-Rack | Rack cabinet | Digital | Bisquette feed |
| Smoke Hollow 30162E | Vertical cabinet | Digital panel | Glass window |
| Cuisinart COS-118 | Compact vertical | Dial control | Two racks |
| Char-Broil Analog | Vertical cabinet | Analog dial | Water pan |
The 6 Best Electric Smokers for Beginners
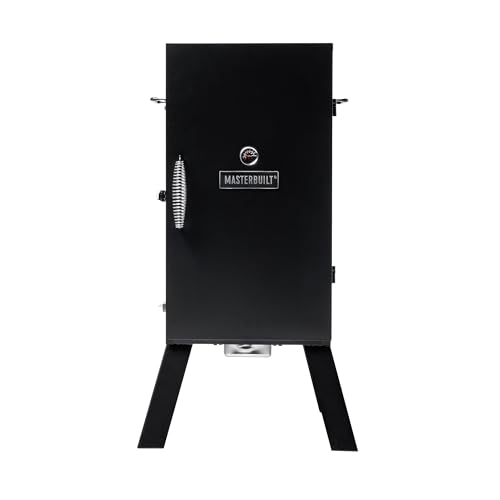
Top pickBest for first-time smokers who like simplicity
1. Masterbuilt 30-Inch Analog Electric Smoker
A simple vertical electric smoker from Masterbuilt with a dial-based thermostat, a chip tray and several racks. It is a classic starter smoker.
Suits: first-time smokers who like simplicity. Strengths: an easy dial and a familiar brand. Weaknesses: a less precise temperature readout. Skip it if you want a digital display.

Best for families that smoke for a crowd
2. Masterbuilt 40-Inch Digital Electric Smoker
A larger vertical electric smoker with a digital panel and a side wood chip loader. It holds a good amount of meat for gatherings.
Suits: families that smoke for a crowd. Strengths: a bigger cabinet and digital control. Weaknesses: a taller body. Skip it if you cook for just one or two.

Best for cold smoking and curing
3. Bradley Digital 6-Rack Smoker
A digital smoker from Bradley that uses wood bisquettes, fed automatically, for steady smoke. It is a go-to for fish, bacon and jerky.
Suits: cold smoking and curing. Strengths: automatic smoke feed. Weaknesses: bisquettes are an ongoing cost. Skip it if you want to use plain chips.
Best for those who want a window
4. Smoke Hollow 30162E Digital Electric Smoker
A 30-inch electric smoker with a digital control panel, a window and several racks. It is a straightforward home smoker for new users.
Suits: those who want a window. Strengths: a digital panel at a modest size. Weaknesses: a plainer brand reputation. Skip it if you want app control.
View Smoke Hollow 30162E Digital Electric Smoker on Amazon
Best for small patios
5. Cuisinart COS-118 Vertical Electric Smoker
A compact 18-inch vertical electric smoker from Cuisinart with a thermostat control and two racks. It is a small step into smoking.
Suits: small patios. Strengths: a compact body. Weaknesses: limited capacity. Skip it if you want to smoke a big brisket.
View Cuisinart COS-118 Vertical Electric Smoker on Amazon
Best for casual smoking
6. Char-Broil Analog Electric Smoker
A simple vertical smoker from Char-Broil with a dial thermostat, a wood chip tray and a water pan. It is built for low-fuss smoking.
Suits: casual smoking. Strengths: simple dials. Weaknesses: a basic feature set. Skip it if you want digital timers.
View Char-Broil Analog Electric Smoker on Amazon
Care and Setup
- Season the smoker first by running it empty as the manual suggests.
- Keep a probe thermometer handy and rely on it, not the lid.
- Empty the water and drip pans after cooking.
- Cover the unit between uses to keep out rain.
- Keep a notebook of times and temperatures to learn what works.
Mistakes to Avoid
- Opening the door repeatedly and losing heat.
- Using too much wood and making food bitter.
- Overcrowding the racks so smoke cannot flow.
- Skipping a thermometer and guessing doneness.
How an Electric Smoker Makes Heat and Smoke
An electric smoker separates heat from smoke. A heating element, controlled by a thermostat, keeps the cabinet at a set temperature, while a small tray, box or feeder holds wood that smolders to create smoke. This is why these units are forgiving: the temperature does not depend on how well you manage a fire. The trade-off is that the smoke tends to be milder than that of a charcoal or wood-burning cooker.
Wood is the flavor source. Chips, chunks and pellets or bisquettes are used depending on the model, and the manual says which to use. Chips ignite and burn out faster, so they need reloading during a long cook on models with a side loader, while bisquette feeders add wood automatically. Because the element is doing the work, smoke production depends on the wood’s contact with the heating surface and on airflow through the vent.
A thin, clean blue-ish smoke is the goal, while thick white billowing smoke can leave a bitter taste. Poor airflow, damp wood or an overloaded tray can cause it. The vent controls airflow and humidity: partially open is a common starting point, but follow the manual. Knowing this helps you diagnose problems, such as bitter food or weak smoke flavor, without guessing. Learn the behavior of your own smoker by making notes on every cook.
Power, Placement and Weather Planning
An electric smoker needs a power outlet near where it will sit. Look at the wattage on the listing and use an outdoor-rated, appropriately sized extension cord only if the manual allows it. A long or thin cord can cause voltage drop and may trip a circuit. Ideally, use a grounded outlet protected by a ground fault circuit interrupter, and check local rules.
Place the smoker on a stable, level, non-combustible surface, away from walls, railings, siding and overhangs. Smoke and heat vent from the top and sides, so allow clearance as the manual directs. Never use an electric smoker inside a garage, shed or enclosed porch, because smoke and carbon monoxide from smoldering wood are hazards. Keep it clear of children and pets while hot.
Weather affects performance. Cold and wind pull heat out of the cabinet, so the smoker takes longer to reach temperature and uses more power. A sheltered spot helps, and some owners use an insulating blanket made for the model. Rain can damage electrical parts, so protect the unit and the plug connection. Choose a spot where you can stand comfortably while checking the food, and where smoke will not drift into windows or neighbors’ yards. Plan the cord path so nobody trips over it.
Temperature, Time and Food Safety
Smoking is slow cooking, and safe doneness depends on the internal temperature of the food, not on the time on the clock. Use a reliable probe thermometer, and place the probe in the thickest part without touching bone. Built-in lid gauges are often inaccurate, so treat them as rough indicators and check against a separate thermometer.
Minimum safe internal temperatures differ for poultry, pork, beef and fish, and food safety agencies in your country publish them. Look these up rather than relying on memory. Cuts such as ribs, pork shoulder and brisket are often cooked beyond the minimum safe temperature, because their connective tissue needs to break down to become tender. That is a matter of texture, not safety, and recipes give guidance.
Plan for the stall, a period during which the temperature of large cuts stops rising for a while. It is normal. Do not raise the heat in a panic or open the door repeatedly. Allow time, since a large cut can take longer than expected. Start early, and rest the meat after cooking, wrapped loosely, before slicing. Do not leave food in the smoker after cooking, and do not leave cooked food at room temperature for long. Refrigerate leftovers promptly. Use clean utensils and plates for cooked food, separate from those used for raw meat.
Wood Types and Flavor Choices
Choosing wood is an easy way to change flavor without changing technique. Fruit woods such as apple and cherry are generally mild and slightly sweet, and they suit poultry, pork and fish. Hickory and oak give a stronger, more traditional barbecue flavor and suit beef and pork. Mesquite is intense and best used sparingly or for short cooks. Many people blend woods once they know their preferences.
Use wood made for smoking, not treated lumber, painted scrap or wood from unknown sources. Choose clean, dry chips, chunks or the specific pellets or bisquettes the maker lists. Whether to soak chips is debated. Soaking delays ignition and creates steam, and many cooks prefer dry chips for cleaner smoke, but follow the manual for your model.
Start with a small amount. A little wood goes a long way in a sealed cabinet, and too much creates acrid flavor. Most of the smoke is absorbed in the early hours of a cook, so extra wood later adds little. For short cooks like sausage or fish, a single small load may be enough. Keep notes on wood type and quantity for each cook to find what you like. Store wood in a dry place, because damp or moldy wood burns poorly and tastes off. Adjust to your taste rather than to rigid rules.
Cleaning, Seasoning and Upkeep
A smoker needs regular care to run well and stay safe. After each use, let it cool, then empty the wood tray and any ash. Remove and clean the drip pan and water pan, as grease and food residue can cause smoke, odors or flare-ups. Wash racks with warm soapy water and a brush. Wipe the interior walls, but avoid scrubbing off the dark seasoned layer, which protects the metal and is part of the smoker’s character in many models.
Keep the heating element and electrical connections dry and clean. Do not spray water at the control panel or element. Check the power cord for cracks or damage before each season. Inspect door seals for gaps, because poor seals leak heat and smoke. If grease builds up on the walls and drips, clean it, since heavy buildup can ignite or taste rancid.
Cover the smoker when not in use, and store it in a dry place if you can. Signs that it is time to repair or replace the smoker include a heating element that no longer heats, a thermostat that holds the wrong temperature even when checked with a reliable thermometer, a damaged or exposed cord, rust that has eaten through the cabinet, and doors that no longer close. Contact the maker about replacement parts, and do not use a unit with damaged wiring.
Electric Smoker Terms for First-Timers
Electric smokers are among the gentlest ways to learn smoking, but the vocabulary can be unfamiliar. The glossary below explains the words, so you can read listings and recipes with more confidence.
- Heating element: an electric coil that produces the heat, replacing a fire. It keeps the temperature steady.
- Wood chip tray: a small tray that holds wood chips. The element heats the chips so they smolder and release smoke.
- Digital controller: a panel for setting temperature and time. Some models offer an app connection.
- Water pan: a pan inside the chamber that holds liquid, often used to moderate temperature and add moisture.
- Racks: the shelves where food sits. More racks allow more food, but check that your cuts fit.
- Chamber: the cooking space inside the smoker.
- Vents and dampers: openings that control airflow and smoke.
Choosing a Smoker for Your First Season
You want a simple machine that holds a temperature
Electric smokers excel at steady heat. Look for a clear controller and a door that seals well.
You live in an apartment or a place with limited outdoor space
Check your building rules, since many buildings restrict open flames, and some also restrict smokers. Always use outdoors in a safe, open area with the clearances the maker specifies.
You cook for a small household
A compact smoker will suit you. Look at the rack space and think about the size of the cuts you plan to cook.
You cook for large gatherings
A larger chamber with several racks helps. Check that it is easy to load and unload.
Electric and Other Smokers Compared
| Question | Electric | Charcoal or wood |
|---|---|---|
| Temperature control | Steady, set and monitor | Needs constant adjustment |
| Learning curve | Gentle | Steeper |
| Smoke flavor | Lighter, from chips | Often stronger |
| Power needs | Requires an outlet | No power |
Safety, Power and Placement
Use the smoker outdoors only, on a stable, level, non-flammable surface, with the clearances from walls, railings and overhangs that the manual describes. Plug it into a grounded, outdoor-approved outlet, and avoid thin extension cords. Keep the cord away from the hot surface and from standing water, and never use the unit in rain unless the maker explicitly permits it. If you are unsure about outdoor electrical safety, ask a licensed electrician.
Keep children and pets away, and let the smoker cool before cleaning. Follow current food safety guidance from official sources about safe internal temperatures, and use a reliable thermometer to check doneness. Handle wood chips as the maker advises.
A Simple First Cook
Begin with something forgiving, such as chicken pieces or sausages. Season the smoker according to the manual, then preheat. Add wood chips as directed, set the temperature, and place the food on the rack. Resist the urge to open the door often, since each peek lets heat and smoke escape. Use a probe thermometer to track doneness, and let meat rest after cooking.
Keep notes on the chips you used, the time and the results. Wood types give different flavors, so try mild options first and adjust to your taste.
Reading an Electric Smoker Listing
Check the cooking area, the number of racks and the controller type. Look at the wattage, the cord length and any app features. Read about insulation and door seals, which affect temperature stability. See what accessories come with the smoker, such as a thermometer or a cover. Read the warranty summary and the return terms. Choose a model that fits your space and your confidence, and enjoy learning the craft one cook at a time.
Mistakes First-Time Smokers Often Make
New smokers tend to peek too often, which drops the temperature and stretches the cooking time. Trust the thermometer, and open the door only when you must. Piling on wood chips is another habit, since too much smoke can leave a bitter taste, so use the amount the maker suggests. Skipping the preheat can leave the first stretch of the cook cool and uneven.
Many beginners also cook by the clock instead of the thermometer. Meat is done when it reaches a safe internal temperature, according to official food safety guidance, not when a recipe says a certain number of hours have passed. Finally, avoid crowding the racks, because smoke and heat need space to move. A modest first batch teaches far more than an overloaded one.
Keep a notebook of every cook. Over a few weekends, you will learn how your smoker behaves and how to repeat your best results.
Choosing a Electric smoker Around How You Really Cook
Choosing a electric smoker starts with the style of smoking you want to do for beginners who are smoking food for the first time. Cabinet-style electric smokers hold temperature with a heating element and burn wood chips or similar fuel in small amounts for flavour. Pellet models burn compressed wood pellets and feed them automatically, which makes them behave more like an outdoor oven that also grills. Kamado-style egg smokers use charcoal in an insulated ceramic body. All three produce genuinely smoked food, but they ask different things of you: chips need topping up on long cooks, pellets need a dry supply and a hopper kept reasonably full, and charcoal needs fire management skill. Match the style to how involved you want to be.
Capacity is the second decision, and it should be based on the biggest cook you do regularly, not the biggest you can imagine. A whole brisket, several racks of ribs, or a pair of chickens all need shelf space and airflow around them. The picks above describe rack layouts and cooking areas in their own terms, so compare those descriptions against the cuts you actually buy. Remember that a smoker packed edge to edge cooks unevenly, because smoke and heat need room to circulate. A slightly larger unit used comfortably beats a smaller one crammed full every weekend.
Temperature control is where electric models earn their keep. Digital controls generally hold a set temperature with less attention than analogue dials, and some models add probes or app connections as described in their listings. Treat extra connectivity as a convenience rather than a necessity: what matters is that the smoker recovers temperature sensibly after the door opens and holds steady through wind and cold. If you plan overnight or winter cooks, insulation and build quality matter more than another digital feature.
Finally, think about where the smoker will live and how you will feed it. Electric models need a suitable outdoor outlet within cord reach, and extension lead use should follow the manufacturer’s guidance. Pellet models need dry pellet storage, because damp pellets swell and jam feed systems. Chip and chunk smokers need a modest stock of wood in flavours you enjoy. None of this is difficult, but planning it before the first cook turns a new electric smoker from a novelty into a routine.
Where a Electric smoker Earns Its Keep
Weekend brisket and large cuts
Long cooks are the classic test of any smoker. For brisket, plan the whole day around the meat rather than the clock: start earlier than you think, keep the door closed, and judge doneness by tenderness rather than time alone. A electric smoker with steady temperature control makes these cooks far less stressful, because you are managing the food instead of constantly managing the fire.
Ribs, chicken, and weeknight-friendly cooks
Not every session needs to run all day. Ribs, chicken pieces, sausages, and fish take smoke in shorter sessions that fit an afternoon. This is where a smaller or simpler model shines, since it heats up without ceremony and cleans down quickly. Many owners find these shorter cooks are what they do most often, so weigh them honestly against the occasional holiday brisket when you compare capacities.
Beginners learning the craft
If you are new to smoking, an electric model removes fire management from the learning curve so you can concentrate on seasoning, timing, and resting. Start with forgiving foods such as chicken thighs or a small pork shoulder, keep notes on wood type and cooking time, and change one thing at a time. The notes matter: after a few cooks you will know exactly what your electric smoker does with your favourite cuts.
Gatherings and batch cooking
When friends or family are coming, smokers reward planning. Cook larger cuts ahead, rest them properly, and use the smoker’s holding warmth or a low oven to keep food safe until serving. Smoke also suits batch cooking for the week: a shoulder becomes sandwiches, salads, and tacos. Just be realistic about refrigerator space for the results before you load the racks to capacity.
Setup, Placement and Safety Basics
Set up your electric smoker outdoors on a level, stable surface away from walls, fences, and anything flammable, following the clearances in the manual. Electric smokers need weather awareness: the unit may be built for outdoor use, but the connection to the power supply should stay dry, and cooking in heavy rain or standing water is a bad idea with any mains-powered appliance. Give yourself working room on at least one side for trays, tongs, and a resting board, because brisket day improvisation around a hot smoker is how accidents happen.
Before the first real cook, run the seasoning or burn-in process the manufacturer describes. New smokers carry manufacturing residues on interior surfaces, and a seasoning run burns those off and coats the interior lightly. This is also your chance to learn the controls without food at stake: watch how the temperature settles, how much smoke the unit produces with a normal load of wood, and how the door or lid seals. Note any hot spots by observing where the smoke and heat move, not by cooking an expensive cut as an experiment.
Assemble your supporting kit at the same time. You will want heat-resistant gloves, long tongs, a reliable food thermometer, foil or butcher paper for wrapping, a spray bottle if you like to spritz, and a tray big enough for your largest cut. None of these need to be fancy, but having them ready before the smoker is loaded turns a long cook into a calm routine instead of a series of trips back to the kitchen.
Getting the Best From It Day to Day
Good smoked food is mostly patience and restraint. Keep the door or lid closed as much as possible, because every look lets heat and smoke escape and adds time to the cook. Load the wood as the design intends: chips, chunks, bisquettes, or pellets each behave differently, and overloading the smoke source produces bitter, acrid flavours rather than more of the gentle smoke you want. Thin, clean-smelling smoke is the goal; thick white billows usually mean the wood is smouldering badly or the load is too large.
Manage the meat, not just the machine. Season in good time, let very cold meat lose its deep chill before it goes in if your routine calls for it, and place cuts so air can move around them. Use a water pan if your model provides one and your style of cooking benefits from the humidity. When you wrap a cut partway through, wrap it tightly and return it promptly so the smoker recovers temperature quickly.
Resting is part of the technique, not dead time. Large cuts continue to relax and redistribute juices after they leave the heat, and slicing too early loses that moisture onto the board. Rest on a tray in a warm, draft-free spot, loosely tented or wrapped as your method dictates, and keep food safety in mind: cooked food should not sit out indefinitely. A calm, planned rest is the difference between good brisket and great brisket more often than any secret rub.
Cleaning, Care and Storage
Cleaning a electric smoker is about managing grease and ash before they manage you. After each cook, once everything has cooled, remove and wash the racks and drip components as the manual directs, empty the grease management parts, and wipe down interior surfaces that collect residue. Ash from pellet or charcoal models should be completely cold before it is removed and disposed of safely in a metal container, never in household rubbish while there is any doubt about embers.
Between cooks, protect the unit from the weather. A cover helps, but only over a clean, dry smoker; trapping moisture against a dirty interior invites mould and rust. Check the door seal or gasket for wear and food buildup, since a poor seal leaks heat and smoke and makes temperature control harder than it should be. Pellet owners should vacuum the fire pot area periodically as the manual advises and keep pellets dry in a sealed container.
Electrical parts deserve a gentle hand. Keep water away from control panels and elements when you clean, and never pressure-wash the inside of an electric smoker. Inspect the power cord for damage before each season, store the unit where the cord will not be crushed, and if the smoker has been unused for months, run it empty briefly to drive off moisture and confirm the controls behave before committing a brisket to it.
How the Picks in This Guide Compare
The six picks above are not six versions of the same idea, and comparing them well means comparing them against your own routine rather than against each other in the abstract. Work through them in the order presented, and for each one ask the same three questions: does its style and size fit my space, does the way it works fit the food I cook most, and would its cleaning and storage routine fit my patience? A electric smoker that scores well on all three for your household is a better buy than one that wins on a single headline feature.
Consider the Masterbuilt 30-Inch Analog Electric Smoker. Its description above sets out who it suits and where its limits lie, so measure it against your biggest regular cooking occasion and your smallest everyday one. If it handles the big occasion comfortably but feels oversized for the everyday, decide which of those two days matters more to you, because that judgement, not the feature list, is what owners end up living with.
Consider the Masterbuilt 40-Inch Digital Electric Smoker. Its description above sets out who it suits and where its limits lie, so measure it against your biggest regular cooking occasion and your smallest everyday one. If it handles the big occasion comfortably but feels oversized for the everyday, decide which of those two days matters more to you, because that judgement, not the feature list, is what owners end up living with.
Consider the Bradley Digital 6-Rack Smoker. Its description above sets out who it suits and where its limits lie, so measure it against your biggest regular cooking occasion and your smallest everyday one. If it handles the big occasion comfortably but feels oversized for the everyday, decide which of those two days matters more to you, because that judgement, not the feature list, is what owners end up living with.
Consider the Smoke Hollow 30162E Digital Electric Smoker. Its description above sets out who it suits and where its limits lie, so measure it against your biggest regular cooking occasion and your smallest everyday one. If it handles the big occasion comfortably but feels oversized for the everyday, decide which of those two days matters more to you, because that judgement, not the feature list, is what owners end up living with.
Consider the Cuisinart COS-118 Vertical Electric Smoker. Its description above sets out who it suits and where its limits lie, so measure it against your biggest regular cooking occasion and your smallest everyday one. If it handles the big occasion comfortably but feels oversized for the everyday, decide which of those two days matters more to you, because that judgement, not the feature list, is what owners end up living with.
Consider the Char-Broil Analog Electric Smoker. Its description above sets out who it suits and where its limits lie, so measure it against your biggest regular cooking occasion and your smallest everyday one. If it handles the big occasion comfortably but feels oversized for the everyday, decide which of those two days matters more to you, because that judgement, not the feature list, is what owners end up living with.
If you are torn between two of the picks, choose by the routine you will repeat most often: the setup you will do weekly, the parts you will wash, and the space the electric smoker will occupy when it is not in use. Features impress on the first day; routines decide satisfaction in the sixth month.
Problems Worth Knowing About
Temperature swings up and down
Some swing is normal as elements cycle, but wild swings suggest a cause: a door opened too often, a poor seal, strong wind, or a very cold day overwhelming an uninsulated cabinet. Check the seal and placement first, shelter the unit from wind, and confirm the temperature with a separate thermometer before blaming the controller.
Food tastes bitter or acrid
Bitter smoke flavour usually means too much wood, dirty smoke from smouldering fuel, or heavy residue inside the cooking chamber. Use less wood, let the smoke settle to a clean, thin stream before loading food, and clean the interior surfaces that drip old grease onto new cooks.
Pellets stop feeding or the fire goes out
On pellet models, damp or low-quality pellets, an empty hopper, or ash buildup in the fire pot are the usual suspects. Keep pellets dry, keep the hopper reasonably full on long cooks, and follow the manual’s cleaning routine for the burn area. Never reach into a hot feed system; switch off, cool down, then investigate.
Meat finishes much later than expected
Large cuts are individuals: two briskets of the same weight can finish hours apart because of fat distribution and the well-known stall as moisture evaporates. Start earlier than the recipe suggests, judge by tenderness and internal temperature together, and build resting and holding time into your plan so a slow cook is an inconvenience rather than a disaster.
Two Habits That Make the Biggest Difference
Keep a simple cook log for your first season: the cut, its weight, the wood you used, the weather, and how long everything took. Smoking has enough variables that memory alone blurs them together, and two lines of notes per cook will teach you more than any single tip. Within a few months the log becomes your personal manual for your own smoker, your own cuts, and your own tastes, which is something no product listing can give you.
When comparing the picks above, weigh the cost and effort of the fuel system as well as the machine itself. A smoker that uses fuel you can buy locally and store easily will be used more often than one that depends on supplies you have to plan around. Convenience is not a compromise in smoking; it is what turns an occasional project into a habit your household actually enjoys.
A Slower, More Careful Way to Decide
There is a slower way to choose a electric smoker that works better than comparing feature lists, and it starts with a week of honest observation. Notice what you cook, how many people you cook for, and where the friction appears: the pan that never fits, the breakfast that takes three batches, the cleanup that puts you off starting. Write those moments down, because they are the specification that matters. A electric smoker chosen against your real friction points will satisfy you in a way that one chosen against an idealised version of your cooking never will, and the picks above can then be read as answers to specific problems rather than as a league table.
Next, walk the physical reality of your space with a tape measure and your phone camera. Record the dimensions, the position of sockets, the clearance above and around the patio, and anything that would complicate delivery or installation. Photograph the area where the racks, drip tray and fuel supply will need attention, because that is where ownership is won or lost: the part you must clean, fill, empty, or store decides whether the appliance stays pleasant. Compare those photographs and measurements against the descriptions in this guide before you order, and most of the classic disappointments in this category simply never happen.
Then think about the second year, not the first week. In the second year the novelty has gone, and what remains is the routine: how long setup takes when you are tired, whether spare parts and replacement pieces for the racks, drip tray and fuel supply are easy to obtain, and whether the appliance still suits a household that may have changed around it. Designs that age well share a pattern: few parts, obvious controls, cleaning that does not need special products, and a manual that answers questions plainly. When two picks above look equal, the one with the calmer second year is usually the right choice.
Making the First Sessions Count
For your first sessions, keep the stakes deliberately low and cook a pork shoulder or a tray of ribs rather than the most ambitious dish you know. The first outings teach you the appliance’s temperament: how it heats, how it responds when you adjust it, and what its normal sounds and smells are. Treat anything unexpected as information, check it against the manual, and adjust one thing at a time on the next attempt. Cooks who rush to a celebration meal on day one often blame the appliance for what is really unfamiliarity, while a couple of low-pressure practice runs turn the same appliance into a trusted tool.
Finally, build the small routine that keeps the appliance ready: a fixed home for it and its accessories, a two-minute tidy after each use rather than a monthly excavation, and a note of the settings and timings that worked for your regular dishes. Readiness is the hidden feature in this whole category. A electric smoker that is clean, complete, and where you expect it to be gets used on ordinary Tuesdays, and ordinary Tuesdays are where good kitchen equipment quietly earns back its cost many times over.
Beginner Electric Smoker FAQ
What should a beginner smoke first?
Chicken thighs, pork ribs and sausages are forgiving. Brisket and large roasts take longer and need more attention.
Do I need to soak wood chips?
Makers differ, so read the manual. Many cooks use dry chips for cleaner smoke.
Is an electric smoker worth it?
If you want steady heat and little tending, yes. It will not match a stick burner’s depth of smoke but is far easier to run.
How do I keep meat moist?
Use a water pan if the smoker has one, avoid overcooking and rest the meat before slicing.
How long do I run the smoker the first time?
Follow the break-in steps in the manual, which usually means an empty burn to cook off factory residue before real food goes in.
Can I use an electric smoker in the rain?
Rain can damage electrical parts, so use it in a sheltered spot or under cover with safe clearance. Check the manual for guidance.
Why does my food taste bitter?
Common causes are too much wood, damp wood, thick white smoke or poor airflow. Use less wood and make sure the vent is open as the manual suggests.
How do I know when meat is done?
Use a probe thermometer to check the internal temperature, and compare it with safe-temperature guidance for that meat. Do not rely on time alone.
What is the stall?
It is a period when the internal temperature of a large cut stops rising for a while. It is normal. Stay patient and avoid raising the heat or opening the door often.
How often should I clean the smoker?
Empty ash and drip pans after each use, and clean racks regularly. Do a deeper clean when grease builds up.
Should I use an extension cord?
Only if the manual allows it and the cord is outdoor-rated and heavy enough for the load. A short, direct connection is better.
Can I smoke in cold weather?
Yes, though it takes longer to heat and uses more power. A sheltered spot and an insulating blanket made for the model can help.
Do I need to preheat an electric smoker?
Yes. Bringing the smoker up to temperature and letting the smoke settle before the food goes in gives you a stable environment and cleaner smoke flavour. Loading food into a cold, smoky start-up usually produces harsher results.
How much wood should I use?
Less than most beginners expect. Smoke flavour builds over the whole cook, and the meat takes on smoke most readily early on. Follow the loading guidance for your model, start modestly, and add more next time if you want a stronger flavour rather than overwhelming the first cook.
Can I use my smoker in cold or windy weather?
You can, but expect longer preheats and more fuel or energy use, and position the unit out of the worst of the wind. Insulated models cope better with winter cooking. Keep the power connection dry and follow the manufacturer’s outdoor-use guidance in all weather.
Should I use a water pan?
Many smokers include one, and it can help stabilise temperature and add humidity that keeps surfaces from drying during long cooks. It is a tool rather than a rule: try your regular cooks both ways, keep notes, and settle on the approach your household prefers.
How do I know when smoked meat is done?
Use both internal temperature and texture. Large cuts are done when a probe slides in with little resistance, not simply when a number is reached, and poultry and other meats should always reach the safe temperatures described in reliable food safety guidance. A good instant-read thermometer is the most valuable accessory you can own.
Can I leave a smoker running overnight?
Treat it as you would any heat-producing appliance: follow the manufacturer’s guidance, keep the area around it clear, ensure the fuel or pellet supply is adequate, and check in periodically. Many owners prefer to start very early instead, or to hold finished food safely, rather than sleep through an entire cook.
How long should a electric smoker last?
That depends far more on use and care than on the badge. Appliances in this category that are cleaned as the manual directs, used within their intended job, and stored dry and complete generally serve for years, while neglected ones fail early regardless of quality. Treat the care routine in this guide as part of the purchase, and judge any pick above by whether you will actually keep that routine.
What should I do on the first day I use my new electric smoker?
Read the manual’s setup and safety pages, wash the parts it identifies, and run the simplest version of the job the appliance exists for. Keep the session short, note what surprised you, and resist judging the purchase on a single first attempt. Familiarity over the next few sessions is a fairer test, and most early frustrations turn out to be technique that a little practice fixes.
The Short Version
For a classic analog starter, the Masterbuilt 30-Inch Analog. For a larger digital cabinet, the Masterbuilt 40-Inch Digital. For cold smoking, the Bradley. For a window, the Smoke Hollow. For a tiny footprint, the Cuisinart COS-118. For simple dials, the Char-Broil Analog.