Replacement grates can bring an old grill back to life. Cast iron holds heat and gives a strong sear, while stainless steel resists rust and is lighter. Porcelain coating makes cast iron easier to clean, though a chipped coating can rust. Fit matters most, so check your grill model first.
The six sets below include grates made by grill brands and aftermarket sets for popular models. We have not used these products ourselves, so confirm the exact size, the fit for your grill and the material on the current listing before buying replacement grates.
As an Amazon Associate we earn from qualifying purchases. Links below are affiliate links, and they do not change the product information we give.
What to Look For
| Feature | Why it matters |
|---|---|
| Material | Cast iron sears well; stainless is lighter and rust resistant |
| Fit | Measure your grill, since grates are cut to specific models |
| Coating | Porcelain eases cleanup but can chip if misused |
| Bar shape | Wider or rounder bars shape the sear marks |
In this guide
Specs at a Glance
| Grate | Material | Fit | Notes |
|---|---|---|---|
| Weber Stainless Steel Cooking Grates | Stainless steel | Sized to Weber models | Brand-made replacement |
| Weber Cast Iron Cooking Grates | Cast iron | Sized to Weber models | Heavier, strong sear |
| Hongso Porcelain Cast Iron Grates | Porcelain cast iron | Sized to popular grills | Aftermarket set |
| Uniflasy Cast Iron Grill Grates | Cast iron | Sized to popular grills | Aftermarket set |
| Char-Broil Cast Iron Cooking Grates | Cast iron | Sized to Char-Broil models | Made-for-model |
| Hisencn Stainless Steel Cooking Grates | Stainless steel | Sized to popular grills | Aftermarket set |
The 6 Best Grill Grates
Top pickBest for owners of an older Weber
1. Weber Stainless Steel Cooking Grates
A set of stainless steel replacement grates sold by the grill maker, in sizes for specific lines. Stainless resists rust and is light to lift, though it holds less heat than cast iron. It also shrugs off damp weather better.
Suits: owners of an older Weber. Strengths: a made-for-model fit and rust resistance. Weaknesses: less searing power than cast iron. Skip it if you want the best sear.
View Weber Stainless Steel Cooking Grates on Amazon

Best for a cook who sears often
2. Weber Cast Iron Cooking Grates
Cast iron replacement grates sold by the grill maker for its own models. They hold heat for strong sear marks, though they are heavy and need care to prevent rust. Preheat them well so the bars are hot before food goes on.
Suits: a cook who sears often. Strengths: heat retention and a strong sear. Weaknesses: heavy and needing upkeep. Skip it if you want low maintenance.


Best for a cook replacing worn grates on a budget
3. Hongso Porcelain-Coated Cast Iron Grates
An aftermarket set in porcelain-coated cast iron, sold in sizes for many popular grills. The coating makes them easier to clean, though dropping them can chip it. Handle them gently when you lift them out.
Suits: a cook replacing worn grates on a budget. Strengths: a coated surface that cleans well. Weaknesses: fit needs careful checking. Skip it if you want a factory part.

Best for a grill with a common size
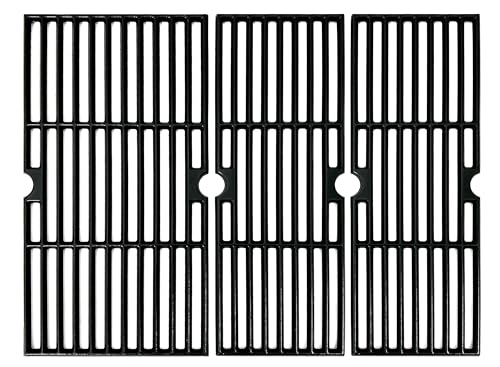
4. Uniflasy Cast Iron Grill Grates
A replacement cast iron set made for many popular grill models. Read the listing to confirm the size for your grill, because the fit list is long and exact. Keep your old grate as a template.
Suits: a grill with a common size. Strengths: a cast iron sear at a budget-friendly build. Weaknesses: fit must be confirmed. Skip it if you cannot measure your grill.
View Uniflasy Cast Iron Grill Grates on Amazon
Best for a Char-Broil owner
5. Char-Broil Cast Iron Cooking Grates
Cast iron grates made by Char-Broil for its own models. They carry the heat well, and a made-for-model fit saves guesswork when you order. Wipe on a thin film of oil before the first cook.
Suits: a Char-Broil owner. Strengths: a made-for-model fit. Weaknesses: only fits matching models. Skip it if you own another brand.

Best for a lighter alternative to iron
6. Hisencn Stainless Steel Cooking Grates
An aftermarket stainless steel set for common grill models. Stainless is light and easy to clean, and the set suits those who dislike heavy iron. It dries quickly after a wash.
Suits: a lighter alternative to iron. Strengths: rust resistance and low weight. Weaknesses: less heat retention. Skip it if you need strong sear marks.
View Hisencn Stainless Steel Cooking Grates on Amazon
Care and Setup
- Burn off residue and brush the grates after each cook.
- Oil cast iron lightly to prevent rust.
- Store spare grates indoors in a dry place.
- Check porcelain for chips and replace if it flakes.
Mistakes to Avoid
- Ordering grates without measuring your grill.
- Scrubbing porcelain with metal tools.
- Leaving cast iron wet.
- Assuming one size fits all models.
Cast Iron, Stainless and Porcelain: The Trade-Offs in Depth
Choosing between grate materials is really a choice about which chore you prefer. Bare cast iron stores heat well and gives a strong sear, but it needs oiling and must be kept dry. Porcelain-coated cast iron adds a smoother, easier-to-clean surface over the same heavy core, though the coating can chip if the grate is dropped, banged with tools or scrubbed hard. Once chipped, the exposed iron beneath can rust.
Stainless steel grates are lighter and handle damp weather and coastal air better, which suits grills that live outdoors all year. They heat up faster and cool faster, so they hold less energy for searing, and thin rods can leave less impressive marks. Grades of stainless differ, and some hold up to heat and cleaning better than others, so look for the material detail on the listing rather than relying on the word stainless alone.
Weight is a practical factor that is easy to overlook. A full set of cast iron grates can be heavy to lift in and out for cleaning, which matters if you clean often or have limited strength or storage space. If you cook mainly burgers, sausages and vegetables, a lighter stainless set may serve you perfectly well. If you sear thick steaks regularly, heavier grates are worth the effort. Match the material to what you cook most, and to how willing you are to maintain it.
How to Measure Your Grill for Replacement Grates
Grates are cut to specific dimensions, and a set that is a little off will rock, leave gaps or refuse to drop in. The most reliable method begins with your old grates. Take them out, lay them flat and measure the length and width of each piece, then count how many pieces make up the full cooking surface. Write the numbers down and note whether the grates have a lip, a hook or a rounded corner that must match the firebox or the frame.
Measure the opening itself as well, since old grates can warp, rust or shrink with age and may not reflect the original size. Check the width from the left rail to the right rail and the depth from front to back. Note the bar spacing too, because wide gaps change how small foods behave and narrow ones can affect airflow and cleaning.
Next, compare your figures with the dimensions and compatibility list on the listing, allowing a small tolerance. If you own a grill with a model name, search that exact name against the fit list instead of relying on the brand alone, because one brand can sell many similar-looking grills. When a listing offers several sizes, confirm which size you are actually adding to the cart. Keep your old set until the new one has been tested, so you have a template if something does not match.
Seasoning and First Use of New Grates
New grates often arrive with a light protective coating from the factory, and the maker usually tells you how to deal with it. Read the instructions before the first cook, since steps differ between bare cast iron, porcelain-coated iron and stainless steel. Common advice includes washing away any shipping residue, drying thoroughly and then heating the grates on the grill to burn off what remains.
For bare cast iron, many makers recommend applying a very thin coat of cooking oil and heating the grill to build a protective layer. Several thin coats do better than one thick coat, which can turn tacky. Porcelain-coated grates generally need less seasoning, but a light wipe of oil before cooking can help food release. Stainless grates usually need little more than a clean surface and a light wipe of oil.
For the first cook, choose something forgiving, such as sausages or vegetables, rather than a delicate fish fillet. Watch how heat distributes across the new surface, since a different material may run hotter or cooler than the old grates did. You may need to adjust burner settings or cooking times. Take a moment to confirm that the grates sit flat and stable before you load them with food, and recheck after the first heat cycle because metal can shift slightly as it expands.
Cleaning Routines That Protect Grates
A good routine takes minutes and extends the life of the grates considerably. After cooking, let the grill run for a short time with the lid closed so leftover food burns to ash, then brush the grates while they are still warm. Choose a brush that suits the surface: stiff bristles are fine for bare iron and stainless, while porcelain coatings call for gentler tools so the finish is not scratched or chipped.
Check the condition of the brush too. Worn or shedding bristles can leave fragments behind, so replace a brush that looks tired and inspect the grates before cooking if you suspect a problem. For deeper cleaning, soak removable grates in warm water with mild dish soap according to the maker’s guidance, scrub gently and rinse well.
Dry matters as much as washing. Bare cast iron should be dried immediately and wiped with a thin coat of oil, while stainless and porcelain should be dried to prevent water spots and corrosion. Avoid harsh chemical cleaners unless the manual approves them, because residue can end up on food. If the grill sits unused for long periods, cover it and consider storing removable grates indoors. A little attention after each cook is far easier than restoring a heavily rusted or caked-on set later.
When to Replace Grates and When to Restore Them
Not every worn grate needs replacing. Surface rust on cast iron can often be removed with a brush, a wash and a fresh coat of oil, and heavily caked grease can usually be burned or scrubbed off. If a grate is basically sound, restoring it costs little and keeps a good fit.
Some signs point firmly to replacement. Look for cracks, especially in the bars or at the joints, because a cracked grate can break under load or when you lift it. Deep pitting that leaves a rough surface, bars burned thin enough to bend, and warping that stops the grate sitting flat are all warnings. On porcelain-coated grates, flaking or large chips expose iron that rusts and may shed bits onto food, so replace the set rather than patching it.
Consider how food behaves, too. If everything sticks no matter how well you preheat and oil, the surface may have worn past the point of recovery. Uneven cooking, with some zones scorching while others stay cool, can also hint at damaged grates or burner trouble, so check the burners before blaming the grates. When you do buy new ones, confirm the fit against your measurements, and think about whether a different material would fix the problem that wore out the last set.
A Replacement Grate Checklist
Before you order new grates, gather a few facts about your grill. A wrong guess means returns, so take five minutes to check each of these points.
- Write down the grill make, model name and any model number on the data label or in the manual.
- Measure each existing grate on its own, in width, depth and rod thickness.
- Count how many grates your grill uses and whether they are the same size.
- Check the ends and edges, since some grates have tabs or notches that hold them in position.
- Look at the firebox shape, which may be rectangular, round or curved.
- Note whether your grill has a warming rack above that limits grate height.
Keep these notes on your phone. They help when you compare listings and confirm fit with the seller or the grill maker.
Direct and Indirect Cooking: How Grates Come Into It
The grate does more than hold food. It is the surface that carries heat to your meal, and its thickness and spacing influence how much sear you get. Heavy cast iron holds heat well and leaves bold marks. Thinner stainless rods respond faster to temperature changes and tend to be lighter to handle.
When you cook directly over a flame, the grate takes the full heat, so a solid construction helps. For indirect cooking, where food sits away from the burner, the grate matters less, and spacing and cleanliness become the priority.
Think about the foods you cook most often. Delicate fish and vegetables benefit from a smooth, well seasoned or coated surface. Steaks and burgers often do well on dense, heavy rods. Wide spacing lets smoke and flare through, while narrow spacing supports small items and gives more contact.
Comparing Two Common Choices
| Question | Cast iron | Stainless steel |
|---|---|---|
| Weight | Heavy | Lighter |
| Heat holding | Strong | Moderate |
| Upkeep | Needs oil and dry storage | Simple wash and brush |
| Rust concern | Higher if neglected | Lower |
| Handling | Can be awkward to lift | Easy to remove for cleaning |
Neither is a universal winner. The better choice depends on how much care you will give the grates and how you like to cook.
Mistakes That Shorten Grate Life
A few habits cause most early wear. Scraping the surface with the wrong tool can scratch a coating, so follow the maker’s guidance on brushes and scrapers. Leaving wet grates in a closed grill invites rust, so dry them after washing and keep the lid open until the unit is cool.
Another trap is overheating an empty grill for long periods, which can stress coatings and burn off seasoning. Using harsh cleaners can also strip a protective layer. Check the care instructions that came with your grates, and when in doubt, choose a gentle method.
Finally, store spare grates indoors in a dry place, wrapped loosely, so they are ready when you need them.
Measuring Checklist for Replacement Grates
Grates must fit the grill, so measure carefully. Always compare your numbers with the grill maker model information.
- Measure the interior width and depth of the cooking area at its widest.
- Note the rod diameter if you want to match thickness.
- Check the number of grates your grill uses and whether they are one piece or several.
- Look at how the grates sit on the supports and whether tabs are needed.
- Check the model number on the grill body.
- Take a photo of the old grates for comparison.
If you are unsure, contact the grill maker for a matching part.
Break-In and Care Table
| Step | What to do |
|---|---|
| Wash new grates | Remove factory residue as directed |
| Apply oil | Wipe a thin coat on bare iron |
| Heat in place | Follow the maker method |
| Brush after cooking | Use a brush suited to the material |
| Store dry | Keep moisture away to limit rust |
Check grates regularly and replace those that are cracked or flaking badly.
Signs That It Is Time to Replace Grates
Grates do not last forever. Look for these signs during your regular cleaning.
- Cracks, deep pits or broken rods.
- Coating that flakes or peels off in pieces.
- Warping that stops the grate from sitting level.
- Rust that returns quickly after cleaning.
- Food that sticks badly even after seasoning or cleaning.
When a grate is past its best, order a replacement based on the measurements you took earlier, and check the maker guidance for the right fit.
Keep the receipt and the listing details for the grates you buy, including the material and the model fit. If the grates do not sit right, contact the seller promptly rather than forcing them into place.
Grill Grate FAQ
Which material is best for grill grates?
Cast iron sears best. Stainless is lighter and easier to maintain.
How do I know which size to buy?
Measure the old grates and compare them with the listing’s dimensions. Keep the old set as a template.
Does porcelain coating chip?
It can if it is hit or scrubbed with hard tools. Treat it gently.
Can I mix grate types?
Mixing is possible if sizes match, but heat will differ between them, so cook with care.
Are porcelain-coated grates safe to use once chipped?
Small chips are common, but flaking can expose iron that rusts and may release bits onto food. Many makers advise replacing grates when the coating flakes, so check your instructions.
How often should I replace grill grates?
There is no fixed schedule. Replace them when you see cracks, deep pitting, warping or a coating that is flaking, and restore them when the damage is only surface rust or grease.
Can I use the same brush on every grate type?
Not always. Stiff bristles suit bare iron and stainless, but porcelain coatings need gentler tools, so follow the maker's cleaning advice.
Do I need to season stainless steel grates?
Usually not much. A clean surface and a light wipe of oil before cooking are normally enough, but check the manual for your set.
Why are my new grates cooking differently from the old ones?
A different material or thickness can run hotter or cooler across the surface. Adjust burner settings and watch the first few cooks closely.
Can I store spare grates outdoors?
It is better to keep them dry and indoors, since damp air speeds up rust on cast iron. A covered, dry spot is the next best option.
What should I do if the new grates do not sit flat?
Recheck your measurements against the listing and make sure the pieces are placed in the correct positions. If they still rock, contact the seller about the fit rather than forcing them into place.
Choosing Grill Grates With More Care: The Details That Decide
The picks above give you the shortlist. This section slows the decision down and looks at the details that separate grill grates you will enjoy for years from the ones that quietly end up at the back of the cupboard. None of these points require specialist knowledge; they ask you to match the product to your grill, your food and your habits, which is where good purchases are actually made. Work through them with your own cooking in mind, especially everything the grill cooks, from vegetables to roasts, and the right pick usually identifies itself.
Exact Fit, Measured Properly
Replacement grates live or die on measurement: length, width, shape and how the grate is supported, tabs, ledges or frames. Measure the old grate and the cooking box, and note curved or hinged sections. A few millimetres of error becomes a grate that rocks, drops or jams the lid. To judge it on a listing, look past the headline claim and find the detail that proves it: a stated dimension, a named material, or a clear photo of the part you will actually handle. If the page stays vague on this point, treat that as information in itself and weigh the grill grates that explain it clearly more heavily.
Material Matched to Your Habits
Cast iron rewards cooks who oil and dry it; stainless rewards cooks who scrub and forget; porcelain-enamel splits the difference until it chips. The best material is the one whose care routine matches your real behaviour on a tired Sunday evening, not your intentions in spring. In daily use this matters most on the third or fourth cook, not the first. The first session with new grill grates almost always goes well; it is the repeated heating, washing and storing that reveals whether this detail was designed properly or just described well. Buy for the routine you will repeat all season, not for the unboxing.
Bar Thickness and Spacing
Thick bars hold heat and mark food boldly; thin bars heat fast and suit delicate items. Wide spacing drops small food; tight spacing is harder to clean. If you grill one style of food mostly, let its needs set the spacing and stop apologising for specialising. A practical way to test the claim before you commit is to compare it against the grill grates you already own or have used. Note what frustrated you there, then check whether this option genuinely fixes that frustration or simply moves it somewhere else. Improvements you can point to concretely are worth more than long feature lists.
Weight and Handling
Heavy grates sear better and lift worse. You will remove them for cleaning and for reaching burners or coals, sometimes one-handed, sometimes hot. Handles, split designs and hinged sections turn a wrestling match into a routine, especially on big grills. There is usually a trade-off hiding inside this point, and honest listings make it visible. More of one quality tends to mean less of another, whether that is weight, space, speed or simplicity. Decide which side of the trade-off suits your cooking before you shop, so the comparison between grill grates stays anchored to your priorities.
Coating Quality and Honest Care Notes
On enamelled grates, coating quality decides whether you get years or one season before chips expose steel to rust. Look for smooth, complete coverage, especially at edges and welds, and care instructions that admit limits. A maker who warns you about metal tools is telling the truth. Match this criterion to the foods you cook most, which here means everything the grill cooks, from vegetables to roasts. A feature that shines with one kind of food can be irrelevant, or even a nuisance, with another. The strongest choice is rarely the one with the longest specification list; it is the one whose strengths line up with your regular menu.
Grill Grates in Real Life: Four Situations Worth Planning For
Product pages describe features; households live in situations. Here is how grill grates behave in the situations that actually come up around any home grill, and what to do in each so the equipment helps rather than hinders.
Replacing Worn Grates on an Older Grill
A grill with tired grates but sound burners and body deserves new grates; it is the cheapest route back to food that releases and browns properly. Confirm the rest of the grill is worth the investment first: ignition, gas lines or coal bed, and lid fit. The routine that makes this work is preparation: have everything cut, seasoned and within reach before the heat is on, because once cooking starts there is rarely a spare moment to go back inside. A small tray or board beside the grill turns a scramble into a sequence you can repeat.
Upgrading for Better Searing
If your complaint is pale, steamed results, a heavier grate with more contact can transform the same grill. Expect a longer preheat as the price. Many cooks keep the old light grate for delicate work and swap, which is a perfectly good system. Timing is the skill to practise here. Foods finish at different speeds, so start the slowest items first and add the quicker ones in stages rather than loading everything at once. That single habit does more for the result than any accessory, and it is free.
A Second Set for Messy or Delicate Work
Two sets, one for saucy, sugary cooks and one kept clean for fish and vegetables, solve the flavour-transfer problem. Store the spare dry and oiled. This is common in serious home setups and cheaper than a second grill. Keep notes the first few times, even if only mentally: what the heat felt like, how long each item took, and what you would move earlier or later next time. Grill Grates reward cooks who adjust in small steps instead of changing everything at once.
New Grates After a Move or a Neglected Season
Grates left in a damp, uncovered grill through winter may be restorable or may be pitted and flaking. Brush, wash, heat and oil a test area, then cook something forgiving. If food still sticks everywhere and rust returns overnight, replacement is the honest call. For serving, plan the landing zone before you start: a clean platter, resting space and somewhere safe for hot tools. Good results are often lost in the last two minutes, when cooked food waits around getting cold or overcooks in its own residual heat because nothing was ready for it.
Using, Cleaning and Storing Your Grill Grates: A Working Routine
Long life from grill grates is mostly routine, not luck. The steps below follow the order of a real cook, from before the heat goes on to the moment everything goes away, and they apply whichever pick from the list above you choose. Adapt the details to your model’s manual where the two differ, since the maker’s instructions always win on safety and warranty questions.
Season New Cast Iron Before Food
Wash, dry completely, then apply the thinnest possible coat of high-heat oil and heat until it sets, repeating if the maker advises. The first cooks should be fatty and forgiving, burgers and sausages, which build the layer while feeding people. Make it a habit rather than a project: two minutes of attention straight after cooking replaces an hour of soaking and scrubbing later, and it keeps every part working the way it did on day one.
The Warm Brush and Wipe Routine
After cooking, brush warm grates to clear residue, then wipe with a lightly oiled cloth held in tongs. This two-step habit, done while the grill cools, prevents nearly all deep-cleaning emergencies and keeps seasoning topped up automatically. Always let hot parts cool enough to handle safely before you start, and keep water away from anything electrical or still holding serious heat. A cracked surface or a warped part often traces back to one impatient cleaning session.
Deep Cleaning Without Destroying
For heavy build-up, heat and brush first, then wash removable grates in hot soapy water, dry immediately and oil lightly. Avoid long soaks for cast iron and harsh chemicals on enamel. Most grates need this once or twice a season, not monthly. Dry everything fully before it goes away. Trapped moisture is the quiet cause of rust, odours and sticking, and it does its damage in storage where nobody notices until the next cook.
Rust Triage
Surface rust brushes off, then needs oil and heat. Rust that flakes in sheets, pits deeply or thins the bars is structural, and those grates are done. Learn to tell the two apart and you will neither waste good iron nor cook on failing metal. Use the mildest tool that does the job first, and step up only if residue survives. Aggressive scrubbing solves today’s mess by creating tomorrow’s sticking problem, especially on coated or seasoned surfaces.
Storage Between Seasons
Clean, dry and lightly oil grates before any long idle period, and store them somewhere dry, ideally not in a grill that will collect condensation. A sheet of cardboard between stacked grates stops them chipping each other in storage. Store the piece where air can move around it and where it will not be knocked, stacked under heavy pans or left at the damp end of a cupboard or garage. Storage conditions decide lifespan as much as build quality does.
How the Picks Above Compare When You Cook Side by Side
Read as a group, the six picks in this guide are not six attempts at the same product; they are six answers to six slightly different questions. The comparison that matters is therefore not which one is best in the abstract, but which one’s strengths land on the cooking you do most. The guide’s own summary positions them as follows, and it is worth translating those positions into everyday terms before you decide.
The Weber Stainless is the pick put forward for a stainless factory part. In practice that makes it the natural shortlist-topper if that description sounds like your household, and the one to pass over if it clearly does not, however strong its other qualities are.
The Weber Cast Iron is recommended for a cast iron factory part. Treat that as a statement about fit rather than rank: it will feel like the best product on this page to the cook it was chosen for, and like an odd compromise to anyone else.
The Hongso covers the case for a coated aftermarket set. If that case is your default weeknight rather than an occasional event, weight this pick heavily; if it happens twice a year, let one of the more general picks win instead.
The Uniflasy is the answer for a cast iron alternative. Notice that this is a different promise from the picks around it, which is exactly why the guide keeps all six: most households recognise one of these descriptions immediately as their own situation.
The Char-Broil is positioned for a Char-Broil. The honest way to use that is as a filter: say yes to it if the description matches your grill, your space and your menu, and do not let a feature you will never use argue you out of the match.
The Hisencn rounds out the list for a lighter aftermarket set. For the right buyer it is not a consolation choice at all but the most sensible one here, because buying capacity, size or toughness you never use is its own kind of waste.
When two picks still tie, decide with three questions. Which one fits the equipment you already own without adapters, workarounds or wishful thinking? Which one will you clean without resentment on an ordinary evening? And which one’s main strength addresses the frustration that sent you shopping in the first place? The pick that answers all three is the right one, and it is rarely decided by a single headline feature.
More Mistakes That Trip Up Owners of Grill Grates
The mistakes section earlier in this guide covers the classics. These four are the quieter ones, the habits that do not ruin a single meal but steadily shorten the life of grill grates or make them less pleasant to use.
Ordering by Grill Model Name Alone
Manufacturers change grate dimensions between model years with the same name on the lid. Measure the part, not the badge. Returns of heavy, greasy grates are nobody’s idea of a good weekend. The fix costs nothing: slow down at this one step and check before the heat, the guests or the hunger make the decision for you. Most equipment problems that get blamed on build quality turn out to be this exact moment, repeated.
Pressure-Washing or Burning Off Enamel
Extreme cleaning shortcuts strip coatings and drive water into every pore of cast iron. Heat, a brush and patience clean any grate that deserves to survive. If a method sounds like punishment, it probably is. If you recognise your own habit here, change the routine rather than the product. A written or mental checklist at the grill sounds excessive until the first time it saves a meal; after that it just becomes how you cook.
Cooking Delicate Food on Dirty Grates
Fish on last night’s burger residue sticks and tastes of it. A two-minute brush and oil wipe before delicate food is the cheapest insurance in grilling. Clean grates are a cooking ingredient, not a cosmetic preference. This mistake also compounds. One rushed session leaves residue, damage or bad seasoning behind, and the next session starts from a worse position, which makes the same shortcut tempting again. Breaking the cycle once, with a proper reset, is usually enough.
Ignoring a Rocking Grate
A grate that rocks spills food, cooks unevenly and wears its supports. Check seating, clear debris from ledges, and if the grate itself is warped, replace it. Cooking around a known fault for a season teaches only frustration. It is worth saying out loud to anyone you share the equipment with, too. Shared grill grates suffer most from inconsistent habits, where one careful owner undoes another person’s shortcut, or the other way round.
More Grill Grates Questions, Answered
Buyers ask a second round of questions once the first cook is done and the equipment has to earn its place week after week. Here are the ones that come up most often for grill grates, answered in the same spirit as the rest of this guide: practical, and honest about what depends on your model.
How do I measure my grill for replacement grates?
Measure the old grate itself, length and width at its widest points, and note its shape and any hinges, handles or cut-outs. Then measure the cooking box ledges it rests on. Both sets of numbers should agree with the replacement’s stated dimensions before you order.
Can I mix materials, like cast iron on one side?
Many grills accept a cast iron section beside a stainless one, giving you a sear zone and a gentle zone. Confirm the heights sit level so pans and food do not tilt, and remember each side wants its own care routine.
Why does food stick to stainless grates?
Usually the grate was not fully hot, the food was wet, or it was moved too early. Stainless releases food that has had a minute to sear. Preheat thoroughly, dry the food, oil lightly, and let the release happen instead of forcing it.
How often should grates be replaced?
When they are warped, cracked, flaking or rusted through in a way cleaning cannot reverse. With decent care, good grates last for years of regular use. Heavy users in coastal climates should inspect more often, since salt air shortens every timeline.
Is it worth seasoning stainless grates?
A light oil wipe before cooking helps release and cleaning on any material, though stainless does not build a permanent seasoning layer like cast iron. Think of it as a per-cook aid rather than a coating you are creating.
Can I put grill grates in the dishwasher?
Small stainless grates sometimes fit and survive it, but cast iron and enamel should stay out: detergents strip seasoning and thermal shock plus detergents age coatings. Hot soapy water in a sink or tub, immediate drying and light oil is the safer routine for all types.
Ownership Notes: Getting More From Your Grill Grates
One underrated step before buying any of the grill grates above is to measure the space it has to live in, not just the space it cooks on. Check the working area, the storage spot and the path between them, because equipment that is awkward to reach for gets used less, whatever its merits on paper. A tape measure and five honest minutes prevent the most common return reason of all: it simply did not fit the way the household actually works.
Read the manual that comes with your pick, even if you have owned similar grill grates before. Makers differ on seasoning, maximum heat, dishwasher safety and which parts can be immersed, and the warranty usually assumes you followed their version. Ten minutes with the booklet protects both the equipment and your claim if something fails early, and it often reveals a small feature or warning that the product page never mentioned.
Plan a low-stakes first cook with your new purchase. Choose forgiving foods, keep the group small and treat the session as calibration: learning how this piece behaves with heat, timing and cleanup in your own any home grill. A relaxed trial run teaches more than any guide, and it means the first important meal, the one with guests and expectations, is cooked with knowledge instead of hope.
Think about the season as a whole when you judge value. Grill Grates that get used weekly for months should be chosen for durability and easy cleaning above almost everything else, while a piece bought for one annual event can reasonably trade some toughness for price or compact storage. Matching the purchase to the real frequency of use is the simplest way to spend the right amount in the right place.
Keep a simple ownership routine on the calendar: a quick inspection at the start of the season, a proper clean before storage, and a mid-season check of the parts that wear, loosen or corrode. Small checks catch small problems while they are still cheap and easy, and they mean the equipment is ready on the first warm weekend instead of needing rescue work.
Safety deserves a line of its own. Work on a stable, level surface, keep handles and cords where nobody brushes past them, and give hot equipment a clear landing zone away from children, pets and paper or cloth clutter. None of this is complicated, but it has to be arranged before the cooking starts, because mid-cook is the worst moment to improvise it.
If you are choosing between two finalists among the grill grates above and going in circles, decide by cleanup. When cooking performance is close, the piece you will happily wash on a tired weeknight is the one that gets used, and used equipment is always better value than excellent equipment that lives in a cupboard. Honest self-knowledge about your own habits is a legitimate buying criterion.
Before you buy, check that replacement parts and accessories for the model are easy to find: the wear items specific to grill grates, such as the parts that heat, move, seal or take the scrubbing. A product whose consumables are unavailable becomes disposable the first time a small part fails, however solid the rest of it is. Five minutes checking parts availability has saved more good equipment than any warranty.
Read the warranty terms with the same care as the feature list, because the two describe different products: the features describe the best day, the warranty describes the worst one. Note what is covered, for how long, and what care the maker requires from you to keep the cover valid. File the details with the manual so a problem in year two starts with information, not archaeology.
The Short Version
For a stainless factory part, the Weber Stainless. For a cast iron factory part, the Weber Cast Iron. For a coated aftermarket set, the Hongso. For a cast iron alternative, the Uniflasy. For a Char-Broil, the Char-Broil. For a lighter aftermarket set, the Hisencn.